
You can avoid blossom end rot by recognizing it as a physiological disorder, not a disease, caused by insufficient calcium transport to developing fruits. Look for dark, sunken spots that grow at the blossom end of tomatoes, peppers, or squash.
There's nothing worse than finding rotten patches on your tomatoes. It means that you'll lose the precious fruit that you've waited for and tended for months, and that all of your hard work in your gardens is for what? What to do if half of your tomatoes turn into mush? This is a hard lesson I've learned after weeks and weeks of watering and feeding.
This publication guides you on effective methods to eliminate blossom end rot. I will provide methods to amend the soil, irrigation techniques, and container options that have proven effective for me. You will understand how to manage calcium and balance pH to mitigate this problem. If you have experienced blossom end rot, consider my timely solutions for more productive harvests.
Water Management Essentials
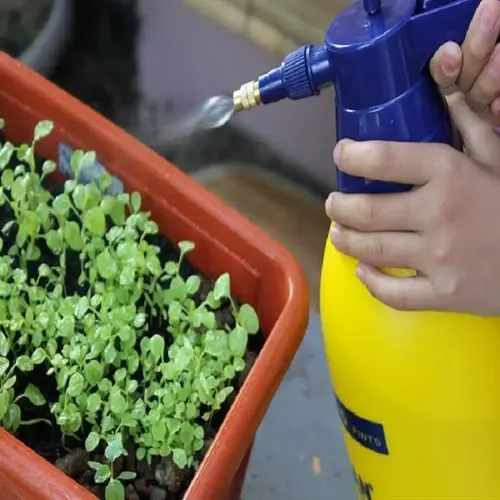
Proper watering is your best first line of defense against blossom end rot. Calcium is carried through plant tissues in water. Without a consistent supply of moisture, your plants cannot transport this important element to their developing fruits. Droughts can interrupt this transfer. A steady supply of water keeps calcium in transit.
Water plants thoroughly every day, especially if they are kept in the hot house, as they are prone to dry out. In hot weather, it is essential to water them both in the morning and evening. Ground plants require two or three waterings per week, with each watering being about two inches deep. A good average is one to one and a half inches, which can be measured using a rain gauge.
Mulch will absorb moisture like a sponge and keep it in your soil. I use straw or wood chips around my plants. I spread three inches around my tomatoes every spring. That layer serves to prevent moisture from drying out of the soil too quickly and keeps the roots cool during heatwaves.
Install drip irrigation or soaker hoses to achieve the best results; they deliver water directly to the soil around the roots, resulting in minimal waste. Hand watering can miss the target completely! I learned this the hard way when I lost half of a crop my first summer with everything so dry. Plants really appreciate a consistent watering system!
Consistent Watering
- Maintain uniform soil moisture using drip irrigation or soaker hoses. Water 2-3 times weekly for in-ground plants, providing 1-1.5 inches (2.5-3.8 cm) total. Avoid fluctuations between dry and waterlogged conditions.
Mulching Practices
- Apply 2-4 inches (5-10 cm) of organic mulch around plants. Use straw or wood chips to reduce evaporation and maintain stable soil temperatures throughout the growing season.
Container Watering
- Water potted plants twice daily during temperatures above 85°F (29°C). Ensure containers have drainage holes and use potting mix with perlite for optimal moisture retention without waterlogging.
Monitoring Methods
- Check soil moisture 2-3 inches (5-7.5 cm) deep before watering. Use finger test or moisture meters to prevent both underwatering and overwatering during heat waves.
Timing Strategies
- Water early morning to reduce evaporation losses. Avoid evening watering to prevent fungal diseases. Adjust frequency during rainy periods to maintain consistent soil moisture levels.
Soil and Fertilization Fixes
The pH of your soil regulates the availability of calcium to plants. Aim for 6.5 to 7.0 to release calcium in your soil. Below this, acids bind the calcium, rendering it useless to plants. Above this, you encounter "alkaline soils," which bind the calcium too tightly. Test your soil every spring.
Use lime to raise the pH of soils with a pH lower than 6.5 if they are acidic. In less than a hundred square feet, five to ten pounds should suffice. Use gypsum instead if your soil is neutral. Still, your plants are exhibiting signs of calcium deficiency (meaning they appear pale and spindly). Gypsum will add calcium, but has little to no bearing on the pH of your soil. I wish I had known that before I shot my wad on the wrong amendment.
Pick fertilizers that are low in nitrogen, like the 5-10-10 NPK formulas. Otherwise, the plants grow too quickly and restrict their ability to absorb calcium. Avoid ammonium-based fertilizers at all costs. They are busy trying to snatch its lunch and won't let calcium in. Most of my first garden died because I used the wrong plant food.
Before planting, mix compost into the soil to a depth of at least a foot; this will help build structure and increase nutrient availability. For calcium, mix in some crushed eggshells or bone meal. I toss the eggshells from breakfast into my garden beds. They take a while to break down and nourish throughout the entire season!
Soil pH Adjustment
- Test soil pH annually using kits or meters. Apply agricultural lime if pH < 6.5 (5-10 lb/100 sq ft or 2.5-5 kg/9 m²). Use gypsum if pH is neutral but calcium deficient (no pH change).
Organic Amendments
- Incorporate compost 12 inches (30 cm) deep before planting. Add crushed eggshells or bonemeal (1 cup/plant or 240 ml) to boost calcium. Reapply mid-season for heavy-feeding crops.
Fertilizer Selection
- Choose low-nitrogen formulas (5-10-10 NPK ratio). Avoid urea/ammonium-based options. Apply balanced slow-release fertilizers at planting (follow label rates). Side-dress with calcium nitrate during fruiting.
Application Timing
- Fertilize only moist soil to prevent root burn. Split applications: 50% at planting, 25% at flowering, 25% at fruit set. Never fertilize drought-stressed plants.
Container-Specific Mixes
- Use potting soils with perlite/vermiculite. Add 1 tablespoon (15 ml) gypsum per gallon (3.8 L) of soil. Monitor pH monthly; adjust with dolomitic lime if acidic.
Root and Environmental Care
Protect roots from soil disturbance to prevent blossom end rot. Don't cultivate within a foot of your plants. Digging deeply, even in places they don't grow, is killing the tender roots that absorb calcium. I learned the hard way when my rototiller obliterated a crop.
Every four weeks, aerate the surface of cultivated ground with a garden fork, thrusting the prongs to a depth of eight to ten inches. However, do not force them down too deeply, as this can injure the plant roots. This will open up the surface; the air will gain entrance, and where there is free circulation, water and nutritive matter will reach the absorbents more readily.
Use shade cloth for temps over ninety degrees. Hang thirty percent shade cloth over sensitive crops. It helps reduce heat stress that contributes to calcium transport problems. Row covers work when temps drop down to the 50's.
Don't plant until the soil has warmed to sixty degrees. Cold soil inhibits root function and calcium uptake. To be sure, measure the soil temperature four inches down with a meat thermometer. (I lost early tomatoes by planting too soon.)
Set insulating burlap screens three feet high at angles facing the prevailing winds. With the young plants protected from the drying winds that stress their roots, the lucky owners of staked plants will learn that the terrific gusts do chastise unshackled ones.
Root Zone Protection
- Maintain 12-inch (30 cm) no-till radius around plants. Use hand tools within 6 inches (15 cm) of stems. Apply 3-inch (7.5 cm) mulch layer to prevent soil compaction from rain.
Soil Aeration
- Aerate compacted areas with garden fork every 4-6 weeks. Insert fork 8-10 inches (20-25 cm) deep, rocking gently. Follow with compost top-dressing to improve structure.
Temperature Management
- Install 30% shade cloth when temperatures exceed 90°F (32°C). Use row covers for cold nights below 50°F (10°C). Maintain greenhouse humidity at 60-70% with ventilation fans.
Wind Protection
- Erect windbreaks using burlap screens 3 feet (90 cm) tall. Space at 45° angles to prevailing winds. Stake young plants securely in exposed areas.
Crop Rotation
- Rotate nightshades (tomatoes/peppers) with legumes annually. Allow 3-year gap before replanting in same bed. Plant cover crops like clover during off-seasons.
Container-Specific Solutions
Select larger containers for tomatoes and peppers. Five-gallon pots are the smallest I would recommend. Anything smaller constrains roots and can lead to moisture stress. I lost an entire crop to blossom end rot, using three-gallon buckets, before I learned this lesson.
Perlite or vermiculite should be mixed into soils to improve drainage. A ratio of 60% potting soil, 20% perlite, and 20% compost will help eliminate water pooling around plant roots and prevent suffocation. In contrast, the compactness of garden soil will not allow for adequate drainage when grown inside a container.
Water container plants twice daily with water from weather-waves. Test soil dryness in the morning and afternoon is in temperatures with waves above eighty degrees. Water till it runs through the drainage holes in the base of the containers. Place saucers beneath containers, and water till the saucers are full, but do not permit plants to stand in water during dry weather.
When you prepare your potting mix, you will want to add gypsum at the rate of 1 Tablespoon per gallon of soil. Gypsum provides Calcium without affecting pH. I typically add it to the mix before planting to prevent blossom end rot from developing on my plant from the start.
By wrapping pots in burlap, you will provide temperature protection while providing some airflow. Keep all plants elevated at least one inch to allow proper air circulation. Rotate the pot clockwise 90 degrees every week to ensure even sunlight exposure. Implementing these steps will help keep the roots healthy and maintain a balanced calcium content.
Container Selection
- Choose 5-gallon (19 L) minimum size for tomatoes/peppers. Use 3-gallon (11 L) for eggplants. Ensure drainage holes (minimum 1/2 inch or 1.3 cm diameter) to prevent waterlogging.
Soil Mix Formula
- Combine 60% potting soil, 20% perlite, 20% compost. Add 1 tablespoon (15 ml) gypsum per gallon (3.8 L) of mix. Avoid garden soil to prevent compaction.
Watering Protocol
- Water until drainage occurs (20% runoff volume). Check twice daily at temperatures above 85°F (29°C). Use saucers to retain moisture in dry climates.
Fertilizer Management
- Apply liquid calcium nitrate every 2 weeks (1 tsp/gallon or 5 ml/3.8 L). Use slow-release pellets (5-10-10 NPK) mixed into top 2 inches (5 cm) of soil monthly.
Root Protection
- Wrap containers in burlap during heat waves. Elevate pots 1 inch (2.5 cm) for airflow. Rotate 90° weekly for even sun exposure on all sides.
Prevention Step-by-Step Plan
Consider starting your prevention plan four to six weeks before planting. Test the pH of your soil, aiming for a range of 6.5 to 7.0. Increase the pH by adding lime or gypsum if your soil is acidic or neutral. Apply five pounds per hundred square feet. Mix compost into that first foot of soil.
On the day you plant, install drip lines for ground plants and and mulch with three inches of straw. Add slow-release fertilizer, such as 5-10-10 NPK. If you're using pots, use five-gallon pots and a perlite mix. I skipped this step once and thoroughly regretted it.
Water ground plants once a week to one and a half inches, and container plants daily. Foliar calcium spray every week during flowering. Use one tablespoon per gallon. Check soil moisture three inches deep. Regularity will not interfere with calcium.
Side-dress plants with calcium nitrate as the fruit develops. Use two tablespoons per plant. Remove any affected fruit at once. Weekly checks for soil compaction are also advisable, and container plants should be rotated in their pots weekly as well. These precautionary measures around the developing product are both essential and protective.
Monitor throughout the entire growing season. Replace mulch when it is gone. Once a month, aerate the soil around your plants. Test the soil pH every four weeks to ensure optimal conditions. Replenish container plants with topsoil. Document your results for next year's planting success! Consistency in monitoring means no more rotting harvests.
Pre-Planting Prep (4-6 Weeks Before)
- Test soil pH: Target 6.5-7.0. Apply lime if acidic (5 lb/100 sq ft or 2.3 kg/9 m²) or gypsum if neutral. Incorporate compost 12 inches (30 cm) deep.
Planting Day Setup
- Install drip irrigation lines. Mulch with 3 inches (7.5 cm) straw. Add slow-release fertilizer (5-10-10 NPK) at label rates. For containers: Use 5-gallon (19 L) pots with perlite mix.
Early Growth Phase (First Flowers)
- Water 1-1.5 inches (2.5-3.8 cm) weekly; containers daily. Apply foliar calcium spray (1 tbsp/gal or 15 ml/3.8 L). Monitor soil moisture 3 inches (7.5 cm) deep.
Fruit Development Stage
- Side-dress with calcium nitrate (2 tbsp/plant or 30 ml). Maintain strict watering schedule. Remove affected fruits immediately. Check for soil compaction.
Ongoing Maintenance
- Reapply mulch as needed. Aerate soil monthly around plants. Test pH every 4 weeks. Container plants: Rotate pots weekly and refresh topsoil.
5 Common Myths
Blossom end rot is caused by fungi or bacteria requiring fungicides
This physiological disorder stems entirely from calcium transport issues in developing fruits, not pathogens. Unlike infectious diseases, it cannot spread between plants and requires no chemical treatments. The dark lesions result solely from cell collapse due to calcium deficiency during rapid fruit expansion phases.
Adding more Calcium to the ground will not solve problem plants instantaneously
All Calcium uptake occurs when water moves through the Xylem vessels evenly, not because of the amount of Calcium present in the soil. An abundance of Calcium in the soil still results in plant death if the soil is not watered regularly, the roots are damaged and/or the pH of the soil restricts Nutrients. The focus should be on properly managing water and using Nitrogen-rich fertilizers that interfere with Calcium absorption.
Fruits showing blossom end rot must be discarded entirely as unsafe
Only the affected portion becomes inedible; the rest remains perfectly safe. Cut away the leathery, sunken area while leaving firm tissue intact. This disorder doesn't produce toxins or affect flavor elsewhere in the fruit. Prompt removal redirects energy to healthy development of unaffected fruits.
Tomatoes are the only garden plants affected by blossom end rot
While tomatoes show high susceptibility, peppers exhibit nearly identical vulnerability. Squash, cucumbers, melons, and eggplants also develop identical symptoms under calcium transport stress. All fruiting vegetables sharing rapid enlargement phases face comparable risks without preventive care.
Applying insecticides prevents this disorder by killing pathogens
Chemical pesticides worsen root health and disrupt soil ecology without addressing the actual cause. They kill beneficial microbes aiding nutrient availability while potentially harming pollinators. Focus instead on balanced fertilization, consistent watering, and physical root protection for sustainable long-term prevention strategies.
Conclusion
Focus on three essential components to eliminate blossom end rot for good. Maintain consistent soil moisture, manage calcium levels, and cultivate healthy soil. These aspects are interdependent like a tripod. One leg removed, and your plants begin to fail. I've seen this balance save whole gardens.
Start prevention methods as far back as possible - well before the fruit forms. It's relatively pointless reacting after you've spotted something on fruit. Test the soil and set up irrigation before planting. Container fruits will require meticulous attention from day one, as their soil space is always limited.
Jot down in your garden journal what works for you every season, when you watered each flowerbed, how much fertiliser, and what your soil test said. Also, note the weather and how your plants respond. I keep it simple with a notebook. It helps me every year.
The actions and activities that you perform today will determine the health of your plant as it grows. Follow these steps consistently, and then you can share your results with fellow gardeners! Before long, you'll be harvesting beautiful tomatoes - without black spots! All your hard work will yield great rewards.
External Sources
Frequently Asked Questions
What causes blossom end rot in tomatoes?
Blossom end rot results from disrupted calcium transport during fruit development, not soil deficiency. Key factors include inconsistent watering, root damage, high nitrogen fertilizers, and incorrect soil pH blocking calcium absorption. Physiological stress prevents calcium from reaching developing fruits properly.
How can I naturally prevent blossom end rot?
Implement these organic strategies:
- Maintain even soil moisture with drip irrigation or soaker hoses
- Apply mulch to regulate soil temperature and moisture
- Adjust soil pH to 6.5-7.0 using lime or gypsum
- Use balanced organic fertilizers low in nitrogen
- Add crushed eggshells or bone meal to planting holes
Can baking soda cure blossom end rot?
No, baking soda doesn't address the root cause. While it temporarily raises surface pH, it doesn't improve calcium transport. Baking soda sprays may damage leaves and disrupt soil microbiology. Focus instead on consistent watering and soil amendments for lasting prevention.
When should I apply calcium to prevent blossom end rot?
Begin calcium management before planting by testing and adjusting soil pH. Incorporate calcium sources during bed preparation, then maintain consistent soil moisture throughout growth. For existing plants, use foliar calcium sprays at early flowering stage when fruits first form.
Are tomatoes with blossom end rot safe to eat?
Yes, unaffected portions remain edible. Cut away the leathery, sunken area while the firm tissue is perfectly safe. This disorder doesn't produce toxins or affect flavor in healthy sections. Prompt removal helps redirect plant energy to developing fruits.
What fertilizer prevents blossom end rot?
Use low-nitrogen formulas like 5-10-10 NPK to avoid calcium uptake competition. Avoid ammonium-based fertilizers. Incorporate calcium-rich amendments during planting and supplement with liquid calcium nitrate during fruiting. Slow-release options maintain steady nutrient availability.
How often should I water to prevent blossom end rot?
Water deeply 2-3 times weekly for in-ground plants, maintaining consistent moisture. Container plants need daily watering, sometimes twice in extreme heat. Always water at soil level and check moisture 3 inches deep before watering to prevent fluctuations.
Do container plants need special care to prevent blossom end rot?
Yes, containers require:
- Minimum 5-gallon pots with drainage holes
- Soil mixes containing perlite/vermiculite
- Daily moisture checks and twice-daily watering in heat
- Gypsum amendment in potting mix
- Monthly pH monitoring and root protection
Can eggshells provide enough calcium for tomatoes?
Crushed eggshells offer limited benefits as they decompose slowly. They work best when finely ground and incorporated into soil months before planting. For immediate needs, use faster-acting calcium sources like gypsum or calcium nitrate during active growth phases.
Which plants besides tomatoes get blossom end rot?
Commonly affected plants include:
- Peppers (all varieties)
- Eggplants and zucchini
- Summer and winter squash
- Cucumbers and melons
- All experience similar symptoms under calcium transport stress