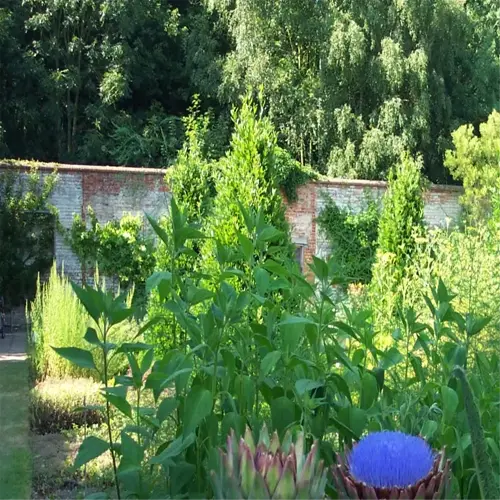

Growing asparagus translates into committing to growing a perennial plant that will last longer than most of your garden vegetables. Your lettuce or radishes will indeed come and go in a matter of months, while a properly cared-for asparagus bed can last anywhere from 15-30 years. It's a fair trade, given that after your first three seasons of care, you will have the wait till a full crop can be harvested. And, the initial wait is worth it because you can enjoy decades of tender spears so long as you prioritize your soil and variety when selecting your asparagus from the very beginning.
I almost lost my very first asparagus patch simply because I was too eager to harvest my crop early. In years 1-3, the focus should be on growing your asparagus roots properly, with proper spacing, and feeding your plants properly. We will cover balancing your soil pH, determining which hybrid varieties to grow depending on your USDA zone, and when to harvest at their peak and maximum yield. I know that it might feel hard to do, but trust me, it will pay off to be able to wait a couple of years to get a legacy crop that will be worth your time.
Planting Asparagus Crowns: Step-by-Step
Planting asparagus crowns requires attention to detail. First, expect to check the soil temperature with an infrared thermometer and wait until it reaches 50°F (10°C). I learned that lesson the hard way by losing the crowns to a late frost. Prepare heavy clay soils by digging trenches 6 inches deep. Also, use 10-inch trenches for sandy soils to prevent the roots from drying out. Be that the crowns are always planted with the buds facing up and the roots facing down. One gardener in my workshop decided to plant them upside down once, and the spears emerged sideways!
In wet climates, raised beds can be quite effective. Build them to a height of 12 inches with a mixture of compost and native soil. In my Zone 5 garden, I use trench planting, also known as "double digging", and row covers during the spring cold snaps that affect leaf growth. Row cover fabrics allow light to pass through while trapping heat. You should plant at different depths depending on soil type - plant shallower in clay soil and deeper in sandy soil. Once you have planted your seedlings, apply straw mulch around them to hold moisture. Initially, do not bury crowns deeper than 2 inches. Once the ferns begin growing, you can gradually fill your trenches.
Timing is more valuable than you might realize. If you plant too early, frost heaving will damage the roots. However, if you wait too long the young plants may become stressed in the summer heat. I keep a calendar by referring to soil temperature data using this nifty $20 infrared tool. If you are in frost-prone areas, always plan to have your row covers on hand until the evening temperatures are solidly above 40°F (4°C). Ensure the crowns have plenty of room (18-inch spacing in trenches); too close and you will have thin spears. Water deeply after planting, while making sure not to make the soil muddy or soggy. Your future self will appreciate your carefulness in getting these steps done initially.
Soil Preparation
- Test soil pH 6.5-7.0 using kit ($15-20)
- Mix 4" (10cm) compost into trench base
- Create mounds 6" (15cm) high every 18" (45cm)
- Add 1 lb (450g) bone meal per 10 sq ft
Crown Placement
- Position buds facing upward at mound peaks
- Spread roots downward like octopus tentacles
- Cover initially with 2" (5cm) loose soil
- Trim broken roots to 6" (15cm) length
Frost Protection
- Install row covers when <32°F (0°C) predicted
- Use 1.5 oz (42g) fabric per sq yd/m²
- Remove covers when soil reaches 40°F (4°C)
Depth Adjustments
- Clay soils: 6" (15cm) initial trench depth
- Sandy soils: 10" (25cm) trench depth
- Raised beds: 12" (30cm) minimum height
Post-Planting Care
- Water 1" (2.5cm) weekly first month
- Apply 2" (5cm) straw mulch after backfilling
- Monitor for asparagus beetles weekly

Infrared Thermometer
- Measures exact soil temperature down to 8" (20cm)
- Ideal range: 50-55°F (10-13°C) for planting
- Prevents crown rot from cold/wet conditions
Trenching Spade
- 12" (30cm) blade depth for proper trench creation
- Stainless steel head resists clay soil corrosion
- Ergonomic handle reduces back strain
Row Covers
- Protects crowns from late spring frost damage
- Allows 70% light penetration for early growth
- Removable when temps exceed 45°F (7°C)
Moisture Meter
- Measures 0-10" (0-25cm) depth soil hydration
- Optimal range: 40-60% moisture content
- Prevents overwatering in clay soils
Root Pruners
- Cuts damaged roots to 6" (15cm) length
- 45° angled blade for clean cuts
- Disinfect with 70% alcohol between uses
Choosing and Preparing Your Soil
Testing your soil pH will differentiate between successful asparagus beds and those that struggle. A digital meter is suggested, as I use one that costs around $25 and provides consistent readings between 6.5 and 7.0. Be sure to test the soil separately at a 6-inch depth and again at a 12-inch depth. I lost my first crop of asparagus because I disregarded subsoil acidity. Lime takes months to become activated in the soil, so if you need to apply lime, you will want to do it in the fall for the spring planting.
Clay and sandy soils both require fundamentally different approaches. When dealing with heavy clay, we suggest mixing in 4 inches of the best coarse sand and compost to prevent waterlogging. What would you do for sandy soils? Using 3 inches of peat moss would go into the soil to keep moisture. I managed to resurrect a sandy plot once by layering straw and compost, and the spears were double the thickness by Year 3.
Check for inadequate drainage before planting. Determine if puddles are lasting 24 hours or more after it rains and yellowing tips of ferns. I installed French drains 18 inches deep to save a very flood-prone bed in my Michigan garden. Raised beds with gravel bases are a good option where digging is not possible.
Preparing for the upcoming growing season eliminates unexpected soil issues. The fall is for turning compost and sulfur into the soil to correct pH. In the spring, a light raking of the beds and retesting of pH is clear. In summer, use mulch to protect soil temperature and cool the roots. For my clients, I keep a soil journal so they can yearly track changes and understand what their dirt needs.
Testing Fundamentals
- Use digital pH meter ($20-50 range) for accuracy
- Test at 6" and 12" (15/30cm) depths separately
- Collect samples when soil is moist but not wet
pH Adjustment
- Lime works slowly: apply 3 months pre-planting
- Sulfur requires 6-8 weeks to activate
- Re-test every 2 weeks during adjustment phase
Compost Integration
- Turn under compost 8-10" (20-25cm) deep
- Use 1:3 compost-to-native-soil ratio
- Avoid fresh manure (salt content harms crowns)
Drainage Solutions
- Install French drains 18" (45cm) deep
- Create 2% slope for surface runoff
- Add gypsum (1 lb/sq ft) to sodic clay
Seasonal Prep
- Fall: Deep tillage + cover crops
- Spring: Light raking + final pH check
- Summer: Solarization for weed control
Best Asparagus Varieties for Every Climate
When it comes to selecting asparagus types, your USDA zone should be the first consideration. If you are in the cold regions of Zones 3 through 6, Jersey Giant is a proven survivor of -30°F winters and has good resistance to fusarium wilt. If you live in the warmer regions of Zones 7 to 10, Apollo becomes one of the best options that will grow in the heat during the summer months. I have grown both types, but in my trials in Texas, Apollo outproduced Jersey by 20% but underperformed in Michigan's frost.
Dealing with disease resistance is the difference between champions and the also-rans. Jersey Knight dismisses the rust fungus that will ruin heirlooms, such as Mary Washington. In wet climates, Millennium performs better against root rot than others. I have had clients in Oregon go from no crop (after three years of rainy growing seasons) to doubling their yields when they switched to hybrids. Purple varieties? Purple Passion adds some color to the mix of greens but yields about 15% less than the green varieties.
Cold regions require early sprouts, such as Guelph Millennium, which emerges late in the spring to reduce frost damage. If you're working with sandy soils, a gardener should choose UC 157, which has been bred to thrive in such soils with sufficient drainage. For coastal areas, Pacific Purple has been bred to handle damage from salt spray. Whatever adds the advantages of variety is a good match for weak points in your area that could lead to interruptions in harvest.
Cold-Hardy Varieties
- Jersey Knight: Tolerates -40°F/-40°C with snow cover
- Mulch with 6" (15cm) straw in early winter
- Delay harvest until soil reaches 45°F (7°C)
Heat-Tolerant Varieties
- Apollo: Thrives at 85-95°F (29-35°C)
- Requires 2" (5cm) weekly water in drought
- Shade nets recommended above 100°F (38°C)
Disease Resistance
- Millennium: Fusarium wilt resistant
- Jersey Supreme: Rust-proof foliage
- Avoid planting near tomatoes/raspberries
High-Yield Options
- Spartacus: 9-12 spears/plant annually
- Fertilize with 10-8-6 NPK monthly
- Harvest 8" (20cm) spears daily
Soil Specialists
- Guelph Millennium: Tolerates pH 6.0-7.5
- Plant 12" (30cm) deep in heavy clay
- Add gypsum for sodium-heavy soils
Year-Round Care Guide
Seasonal irrigation is the determining factor in an asparagus healthy growing environment. As asparagus emerges in spring, the plant requires 1-2 inches of irrigation weekly. Summer accommodates a shift to wetting the plant completely through winter with a deep watering every 10 days to allow the fern's roots to dive as far as 6 feet down. One year when I forgot to water in August, I lost half the crop to drought. In the winter? Contact only happens if you observe soil cracking.
Fertilize smartly over growth phases. Early spring requires scratching in 10-10-10 granules into the damp earth. After the charm of summer harvest, switch to fish emulsion, this is the secret my neighbor shared which repels beetles due to the odor. For potassium, mention banana peels buried near their crowns in the fall before the freeze. When feeding plants, excess only grows ferns and no harvest of fruiting bodies.
The beginning of frost protection begins at 32°F (0°C). I will drape row covers across metal hoops if I have a forecast that dips below the freezing point. An example of this was during the previous April freeze when the exposed spears died but the spears in the covered rows survived. Once the ground has frozen, and a thick 6 inches of straw for mulch on the ground. *The straw captures the cold air near the soil and prevents the soil from bringing the soil temperature to thaw.*
Time your sprays with the scorching of the pests due to their life cycles. Asparagus beetles develop when the soil has reached a minimum of 50°F (10°C). I spray neem oil at the first unfurling the fern, and the eggs shrivel before they eat the spears. I pick the beetles off of the stems early in the morning before they wake. If I don't catch them at that time, by July they will have skeletonized all the ferns.
Water Management
- Sandy soils: 1.5" (3.8cm) water every 5 days
- Clay soils: 1" (2.5cm) every 10 days
- Use drip irrigation to prevent crown rot
Fertilization Plan
- Year 1: 1 lb (450g) 10-10-10 per 100 sq ft
- Year 3+: 2 lbs (900g) post-harvest
- Foliar feed with seaweed extract monthly
Pest Control
- Asparagus beetles: Handpick when temps >60°F (15°C)
- Apply neem oil at first sign of larvae
- Rotate spinosad/pyrethrin every 14 days
Winter Protection
- Mulch after ground freezes with 6" (15cm) straw
- Remove mulch when soil hits 40°F (4°C)
- Use row covers for -20°F (-29°C) events
Pruning
- Cut ferns at soil line after yellowing
- Disinfect shears with 70% alcohol
- Remove female plants with berries
Harvesting Asparagus Correctly
Harvest asparagus spears when they are ½-¾ inch (1.3-1.9 cm) in diameter; thinner than a pencil is an indication of immaturity and oversized spears can become woody. You may spoil your first asparagus crop, as I did, by cutting oversized spears. You can use calipers for accurate diameter accuracy. Having the asparagus harvested in the morning can help it maintain a crisp texture, as cool temperatures slow the loss of sugars. Lastly, always leave at least 30% of spears unharvested at any farm, everything left on the plant after harvest is for the benefit of the roots.
Gardeners are divided on the preference of snapping vs cutting. Snapping breaks spears at the natural tenderness points, but there is a risk of tearing the crowns. I prefer using serrated knives to cut. I angle the blades at a 45-degree angle, one inch below the soil line. I had one client snap 20% of her crowns without knowing it. The advantage of cutting is the growth points are protected and broken cleanly. There should be sanitizing your tools between plants, to limit disease spread.
This is the transformative part of the cycle: post-harvest management directly impacts next year's yield. It is advisable to apply 2 inches of compost immediately to protect the crowns from sun scald. In my vineyard in Vermont, I apply a straw mulch after the final harvest, to hold moisture. Also, don't let any of your soil dry out completely, because the crowns can desiccate faster than the foliage shows signs of needing water. And, if trenches are eroded from winter/spring rains, replace soil in the eroded sections.
Keep the asparagus upright with 95% humidity in a temperature range of 34-38°F (1-3°C); the crisper drawer in a refrigerator will work. Wrap the base of the asparagus in damp towels. I once left a 10-pound harvest at room temperature that I wasted; in 8 hours, the spears turned fibrous. Any extra asparagus should be frozen within 4 hours after harvest for the best texture.
Timing & Selection
- Optimal spear size: 6-8" (15-20cm) tall, ½" (1.3cm) diameter
- Harvest morning-cooled spears before 10 AM
- Stop when 75% of spears are pencil-thin
Cutting Technique
- Use serrated knife 1-2" (2.5-5cm) below soil
- 45° angle cut away from adjacent spears
- Disinfect tools with 70% alcohol between plants
Storage & Handling
- Refrigerate at 34-38°F (1-3°C) with 95% humidity
- Stand spears in 1" (2.5cm) water like cut flowers
- Consume within 7 days for peak sweetness
Troubleshooting
- Thin spears: Reduce harvest duration by 50%
- Bitter taste: Harvest younger spears
- Split ends: Maintain consistent soil moisture
Post-Harvest Care
- Apply 1" (2.5cm) compost tea after final harvest
- Remove harvest debris to prevent disease
- Delay fern cutting until first frost
5 Common Myths
Need to Harvest Asparagus starting Year 1 and build your plants
Harvesting asparagus roots before Year 3 robs the root systems of its energy reserves. Waiting until Year 3 to harvest will establish the ferns needed to develop the carbohydrate stores that will substantially improve yield in the long run by developing a healthier, established root network.
Salt is a hardworking asparagus fertilizer
While salt suppresses vegetation, sodium can build-up and deteriorate soil structure and reduce water infiltration. Compost provides 3x more potassium and also allows for the build-up of soil micro-organisms that fix nitrogen from the atmosphere and break down organic materials.
White asparagus is a specialty variety that requires extra attention to detail
White asparagus is produced through a procedure called blanching the green spears by hilling the soil. The hilling process produces a grassy clump approximately 8-10" (20-25cm) high. White asparagus has the same DNA genetic profile as green varieties, but typically has 40% less fiber because it has been prevented from seeing sunlight while grown.
Thicker spears mean better plant health
Spear thickness relates to crown age, not health. Oversized spears (>1"/2.5cm) will at all times have a woody texture. Best eating quality will occur at -1 " (1.3-1.9cm) when cell walls have the most sugar and the least amount of lignin content.
Daily harvesting improves seasonal yields
Regular harvesting is stressful on plants and will lower their spear yield. The best way to harvest for asparagus is to harvest every 36 hours in weather where temperatures are less than 75°F (24C). This way the crowns do not have to use their energy to grow between harvests, only replenish!
Conclusion
When it comes to how to grow asparagus, the unwritten, 3-year establishment rule governs your success. If you harvest sooner than Year 3, you starve your asparagus roots of energy reserves, resulting in stunted plants. I learned this after replanting a whole bed of asparagus. An abundance of healthy fern growth in the first few years is what builds an underground pantry that will feed your harvest for decades to come. Patience is not optional, it is the cost of perennial abundance.
The decisions you make on your soil preparation ripple throughout every harvest. I have observed garden beds that have thrived for over twenty years where gardeners have added sand to clay and adjusted the pH to 6.7. Skip this step, or not work on soil prep at all, and even the best crowns will decline. Treat your soil like a living bank account: add compost each year as a deposit and withdraw as needed, with caution.
Choose types based on climate type. Jersey Giant sneezes in Florida sun; Apollo fries in Minnesota frost. In my Zone 6 trial, Millennium outproduced heirlooms by 40%, which demonstrates adaptation to presence, trumping planting by the calendar. Just because your neighbor's variety is happy in his part of town, does not mean will be happy in yours.
Asparagus is a long-term crop- more on that in a moment. I'm still harvesting from the same plants I was forming when I was a teenager, and those beautiful plants have been with me for over 27 years. Every spring when I cut spears they remind me under the soil. The good soil, variety selections, and patience I had turned my garden and effort into a legacy. Your future self will thank you as you savor those crisp, buttery stalks.
External Sources
Frequently Asked Questions
How do you grow asparagus for beginners?
Start with disease-resistant male hybrid crowns in well-drained soil. Plant in trenches 8-10 inches deep with compost. Avoid harvesting for 2-3 years to establish roots. Mulch annually and control weeds manually to prevent competition.
How long until asparagus produces edible spears?
Asparagus requires patience:
- Year 1: No harvesting - focus on root growth
- Year 2: Optional 1-2 week harvest window
- Year 3+: 6-8 week harvest season
What plants harm asparagus growth?
Avoid planting these near asparagus:
- Alliums (garlic, onions) - stunt root development
- Potatoes - compete for phosphorus
- Tomatoes - attract asparagus beetles
Can asparagus spears regrow after cutting?
Yes, but only if you leave 30% of spears unharvested to develop into ferns. These leafy tops photosynthesize to recharge roots for next year's crop. Overharvesting weakens plants long-term.
How many spears does one plant yield?
Established plants (3+ years) produce:
- 8-12 spears annually in cool climates
- 15-20 spears in warmer zones
- Yield doubles with hybrid male varieties vs heirlooms
Is first-year asparagus harvest safe?
Never harvest first-year spears. The plant needs 700+ hours of fern growth to store energy. Early harvesting reduces future yields by up to 60% and shortens the bed's lifespan from 20+ years to under 10.
Where should I plant asparagus?
Ideal conditions include:
- Full sun (6+ hours daily)
- Sandy-loam soil with 6.5-7.0 pH
- Elevated beds in areas with heavy rainfall
- North side of gardens to avoid shading other plants
What fertilizer works best?
Avoid high-salt synthetic blends. Use:
- Spring: 1" compost layer + bone meal (phosphorus)
- Post-harvest: Fish emulsion or seaweed extract
- Fall: Well-rotted manure to overwinter
Why are my asparagus spears thin?
Thin spears signal:
- Overharvesting in previous years
- Insufficient compost/nutrients
- Crowded roots needing division
- Young plants not yet mature
Does asparagus multiply over time?
Yes - established crowns slowly spread through underground roots called rhizomes. Divide mature plants every 8-10 years by digging up and splitting crowns with a sharp knife. Replant divisions 3 feet apart.