
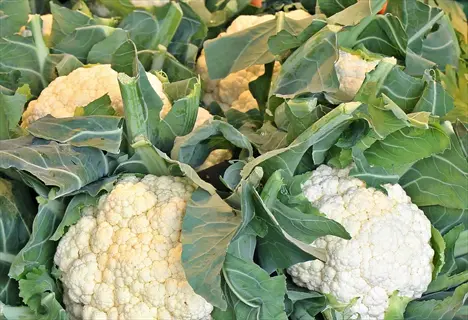
Knowing when to plant cauliflower is what separates a successful harvest from a flop. This vegetable is being used in rice, pizza crusts, creamy soups, and more. Mess up the timing, though, and you face either tiny heads or burnt crowns.
Cauliflower grows best in cool weather, ranging from 50°F to 70°F. Moisture is essential to keep the heads in condition and prevent them from rotting. I have seen plants run to seed from a sudden excess of warmth; you must give them protection from hot summer weather.
This guide provides planting dates tailored to your specific zone. You will learn care techniques to avoid problems like buttoning, as well as savvy tips to dispel any garden myth that refuses to die. Here are the steps to a head of healthy, tasty cabbage.
Container Growing
If you're intending to try growing cauliflower in containers, stick to one of the mini varieties, such as 'Graffiti' purple. They remain small enough to flourish in pots without compromising the quality of the head. Aim for at least a 16in pot with plenty of holes in the base so that water drains properly. Shallow pots lead to poorly developed roots and plants.
Daily watering becomes a necessity as the summer heat approaches. The soil in the container drains faster than in a garden bed. Insert your finger two inches into the soil; if it feels dry at that depth, water thoroughly until it runs through the bottom of the pot. Shallow watering, which only moistens the surface, should be avoided.
Apply liquid fertilizer every two weeks for consistent nourishment. I mix the fish emulsion at half-strength for my cabbages, which seems to prevent root-burn. Container plants will exhaust nutrients from the soil more quickly than those in the ground. Regular feeding will keep the leaves green and promote the development of a firm head. Feed only after watering, so the roots are not shocked.
Place containers where they receive sun in the morning and shade in the afternoon. Rotate pots each week so that all sides get an even amount of light. Move pots to higher ground if temperatures exceed 80°F and stay above this level for longer than a few hours. I place my pots on wheeled saucers so that I can move them to areas with cooler air. Stressed plants make loose heads.
Pot Size
- Depth Requirement: Containers must be minimum 16 inches deep (40 cm) to accommodate root systems, preventing stunted growth and premature heading issues
- Capacity: Each mini cauliflower plant requires 5 gallons (19 liters) of soil volume for optimal development, with overcrowding reducing head size significantly
- Material: Breathable terracotta or fabric pots regulate soil temperature effectively, unlike plastic containers that may overheat roots in direct sunlight conditions
- Drainage: Mandatory drainage holes prevent waterlogging; elevate pots 1 inch (2.5 cm) above surfaces using specialized pot feet for airflow
- Mobility: Lightweight containers enable relocation during extreme weather events like heatwaves or unexpected frost warnings in transitional seasons
- Spacing: Maintain 15 inches (38 cm) between containers to ensure adequate air circulation and minimize fungal disease risks
Soil Mix
- Composition: Use peat-free vegetable-specific mix blended with perlite and compost to avoid disease transmission from garden soil contaminants
- pH Level: Maintain 6.0-7.0 pH range; test monthly and amend with lime if acidity drops below optimal levels for nutrient absorption
- Nutrients: Incorporate slow-release organic fertilizer before planting and replenish every 60 days during active growing season phases
- Moisture Retention: Add water-holding crystals to maintain consistent dampness; ideal soil texture resembles a wrung-out kitchen sponge
- Aeration: Ensure 30% perlite content for proper oxygen flow to roots, preventing compaction that severely stunts cauliflower development
- Contamination Prevention: Sterilize reused containers with vinegar solution to eliminate lingering pathogens between planting cycles

Sun Exposure
- Duration: Position containers for minimum 6 hours direct sunlight daily; use sun-tracking apps to monitor exposure patterns accurately
- Heat Management: Rotate pots 90 degrees daily for even growth; light-colored containers reflect excess heat during summer afternoons
- Shading: Install 40% shade cloth suspended over PVC frames when temperatures exceed 77°F (25°C) to protect developing heads
- Reflective Surfaces: Place aluminum foil around containers to boost light absorption in persistently shady balcony corners
- Seasonal Adjustment: Move containers south-facing in spring/fall but shift to east-facing positions during summer heat peaks
- Wind Protection: Shield plants with burlap screens when placed on exposed balconies or rooftops prone to gusty conditions

Maintenance
- Watering Frequency: Daily watering required during summer; check moisture 2 inches (5 cm) deep and water if soil feels dry
- Fertilizing Schedule: Apply balanced liquid fertilizer every 14 days; increase potassium levels during critical head formation stage
- Pest Control: Inspect leaf undersides weekly; apply neem oil immediately at first sign of aphids or caterpillars
- Support Systems: Install tomato cages for taller varieties; secure stems with soft plant ties to prevent wind damage
- Leaf Management: Remove yellowing outer leaves promptly to improve air circulation around developing heads and prevent rot
- Winter Care: Insulate pots with bubble wrap when temperatures drop below 50°F (10°C) to protect root systems

Variety Selection
- Compact Types: Choose 'Snow Crown' or 'Graffiti' purple for containers; these mature under 60 days with 6-inch heads
- Heat Tolerance: Select 'Amazing' or 'Candid Charm' for warm climates; withstand temperatures up to 85°F (29°C)
- Color Varieties: Purple types like 'Graffiti' contain anthocyanins; orange varieties offer extra vitamin A benefits
- Hybrid Advantages: Modern hybrids like 'Skywalker' resist bolting and maintain compact form in limited spaces
- Succession Planting: Stagger 'Minuteman' or 'White Corona' plantings every 3 weeks for continuous harvests
- Disease Resistance: Opt for 'Clapton' if clubroot is prevalent; shows strong immunity to soil-borne pathogens
Planting Technique
- Seed Depth: Sow seeds ¼-½ inch (0.6-1.3 cm) deep in sterile mix; maintain 70°F (21°C) for germination
- Transplant Timing: Move seedlings outdoors at 4-6 weeks old after gradual hardening off process
- Root Handling: Minimize root disturbance; plant seedlings slightly deeper than nursery pots for stability
- Companion Placement: Surround with dwarf marigolds to repel pests; avoid tall plants causing shade competition
- Succession Sowing: Plant new seeds every 14 days in separate containers for staggered harvest windows
- Depth Adjustment: Bury stems up to first true leaves to encourage stronger root development
Watering System
- Automated Solutions: Install timer-based drip systems with 1 gallon (3.8 L) per hour emitters for consistency
- Moisture Monitoring: Use soil probes to check dampness at root level; avoid surface-only watering
- Morning Routine: Water before 10 AM to reduce evaporation losses during peak daylight hours
- Mulch Application: Top with 2 inches (5 cm) straw mulch to decrease watering frequency by 30%
- Drainage Check: Ensure excess water flows freely from drainage holes within 5 minutes of watering
- Rainwater Use: Collect in barrels for pH-neutral irrigation; avoids chlorine damage from tap water
Fertilization Strategy
- Starter Boost: Apply high-phosphorus solution at transplanting to encourage root establishment
- Growth Phase: Switch to balanced 10-10-10 formula every 14 days during leaf development stage
- Head Formation: Increase potassium with 5-10-15 blend when curds begin forming visibly
- Foliar Feeding: Spray seaweed extract weekly during stress periods like heatwaves for micronutrients
- Organic Options: Use fish emulsion or compost tea for chemical-free nutrient supplementation
- Deficiency Signs: Yellow leaves indicate nitrogen shortage; purple tints signal phosphorus deficiency
Pest Management
- Physical Barriers: Cover with 0.6mm mesh netting immediately after planting to exclude cabbage moths
- Companion Plants: Interplant with thyme or mint to repel flea beetles through natural aromatics
- Organic Sprays: Apply Bacillus thuringiensis (Bt) weekly for caterpillar control without chemicals
- Slug Prevention: Surround containers with copper tape to deter slugs and snails effectively
- Aphid Response: Blast colonies with water spray or apply insecticidal soap at first infestation signs
- Disease Prevention: Avoid overhead watering to minimize fungal issues like mildew on leaves
Harvesting
- Timing Indicator: Cut heads when 6-8 inches (15-20 cm) wide and still tightly packed before separation
- Cutting Technique: Use sharp knife angled downward; leave 2-3 leaves attached to protect curd
- Secondary Heads: After main harvest, leave plants; smaller heads may form from side shoots
- Morning Harvest: Pick during cool morning hours to preserve crisp texture and sweetness
- Storage Prep: Refrigerate immediately with damp cloth over cut surface to maintain freshness
- Yield Expectation: Average 1-2 pounds (0.5-1 kg) per container-grown mini cauliflower plant
Companion Planting
Celery planted near cauliflower plants tends to keep the cabbage worm away. The limonene in the celery leaves has this natural repelling quality, so plant them 12 to 18 inches apart for mutual benefit. I grow them alternately in my garden beds. It reduces caterpillar predation without the use of harmful pesticides.
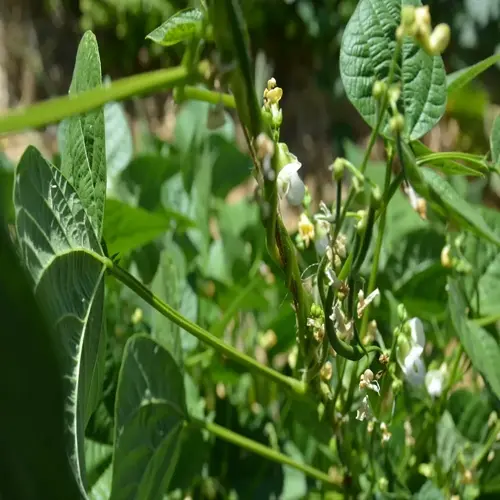
Legumes. Beans, for instance, also fix nitrogen. Though they have been found to be hostile companions, they are very strong growers in containers. They can rapidly choke the roots of cauliflowers. Planting in the ground is much better for pot-growing plants, except for the dwarfed herbs that can grow together for companionship.
Aromatic herbs should interplant with cauliflower at distances of no more than 12 inches, with thyme 8 to 10 inches from the stems. Everything has to have space to breathe, including cauliflower. The herbs trick pests with their confusing smells. Make sure to prune herbs to keep them from spreading. I keep mine pruned, clipping them about every two weeks when they are growing vigorously.
Avoid tall companions, such as corn, that block vital sunlight. By 3 feet, weeds reduce light to 30% less, which is detrimental to crops such as cauliflower that require full sun for at least 6 hours daily to produce both leaves and heads. Plant sun-blocking crops on the north side, and use a simple meter to measure the light, ensuring accurate readings.
Celery
- Pest Deterrence: Releases natural limonene compounds forming protective barrier against cabbage worms within 3 feet (0.9 meters) radius
- Spacing: Maintain 12-18 inches (30-45 cm) between plants to balance airflow and chemical protection effectiveness
- Soil Synergy: Matches cauliflower's moisture needs precisely, eliminating irrigation conflicts in shared garden beds
- Flavor Enhancement: Reduces environmental stress on cauliflower, increasing natural sugar content in developing heads
- Harvest Timing: Synchronizes maturity with mid-season cauliflower varieties for efficient garden management
- Container Growth: Requires minimum 8-inch (20 cm) root separation when grown together in mixed planters
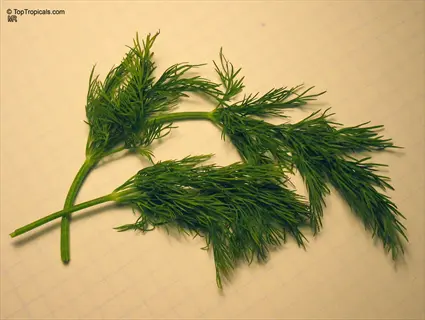
Dill
- Beneficial Insects: Attracts ladybugs consuming 20-25 aphids daily per insect for natural pest control
- Scent Masking: Emits terpenoid volatiles that confuse cabbage moths seeking cauliflower egg-laying sites
- Height Control: Regular trimming maintains 18-inch (45 cm) height to prevent morning light obstruction
- Root Management: Position 10-14 inches (25-35 cm) away to avoid phosphorus competition with cauliflower
- Continuous Planting: Sow new dill every 21 days to sustain predator insect populations season-long
- Airflow Improvement: Thins dense cauliflower foliage to reduce fungal disease transmission risks
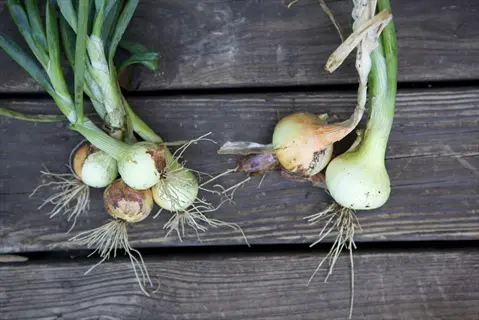
Onions
- Pest Confusion: Sulfur compounds disrupt insect navigation, reducing aphid infestations by 40-50% effectively
- Diagonal Planting: Space in offset grid 8 inches (20 cm) from cauliflower stems for efficient bed usage
- Soil Compatibility: Shallow roots avoid competing with cauliflower's deep 24-inch (60 cm) root system
- Harvest Coordination: Spring onions cleared before cauliflower head formation maximizes space utilization
- Antifungal Properties: Allicin secretions suppress clubroot spores during rotational planting cycles
- Container Consideration: Requires dedicated pots when paired with mini cauliflower due to bulb expansion
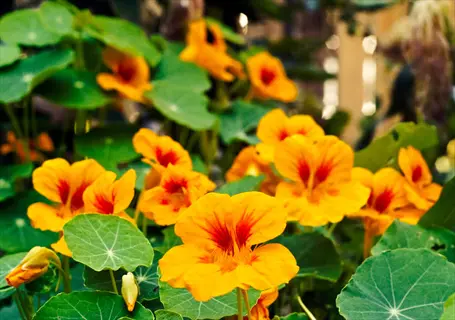
Nasturtiums
- Trap Cropping: Sacrificial plants attract 50-75 aphids each, diverting pests from cauliflower foliage
- Vertical Training: Guide vines away using trellises positioned 24 inches (60 cm) from cauliflower stems
- Nutritional Boost: Flowers provide lutein enhancing cauliflower's health benefits when consumed together
- Pollinator Support: Increases hoverfly activity by 30% compared to non-companion planting setups
- Weed Suppression: Living mulch effect at 6-inch (15 cm) spacing controls weed growth efficiently
- Frost Mitigation: Offers 1°F (0.5°C) microclimate warmth during early autumn frost occurrences
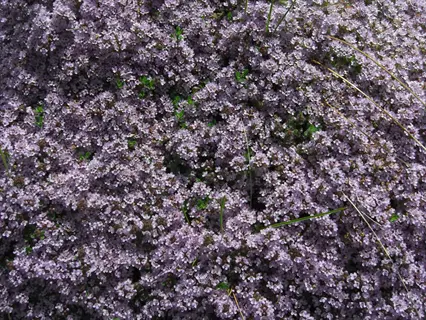
Thyme
- Pest Repellent: Thymol oils deter imported cabbageworm with 90% effectiveness when properly maintained
- Ground Cover: Low profile suppresses weeds while permitting 85% light penetration to cauliflower
- Water Efficiency: Shared drought tolerance reduces irrigation frequency in well-drained garden soils
- Pruning Needs: Trim monthly to prevent woody stem encroachment near cauliflower plant bases
- Planting Density: Optimal protection requires 3-5 thyme plants per cauliflower specimen minimum
- pH Adaptability: Thrives in identical 6.0-7.0 pH range without additional soil amendments
Beans
- Nitrogen Competition: Depletes soil nitrogen by 25% during pod formation, starving cauliflower heads
- Shading Risk: Tall varieties block 4+ hours of daily sun when planted within 3 feet (90 cm)
- Trellis Solutions: Grow only on north-facing trellises 5 feet (1.5 meters) from cauliflower beds
- Root Conflict: Aggressive roots extend 4 feet (120 cm), competing for phosphorus in topsoil layers
- Disease Sharing: Susceptible to same fungal pathogens like alternaria that attack cauliflower leaves
- Alternative Partners: Replace with low-growing clover for nitrogen fixation without light competition
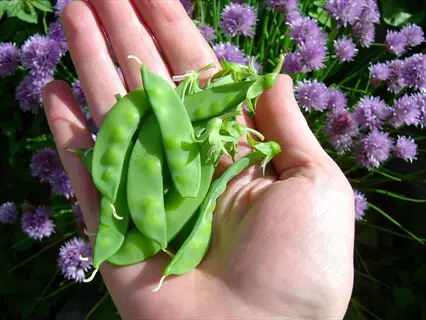
Peas
- Vertical Invasion: Tendrils bind cauliflower leaves, restricting head development and causing deformities
- Moisture Theft: Consumes 50% more water than cauliflower during pod production in summer months
- Buffer Zones: Requires 4-foot (1.2-meter) separation when grown in same garden section as cauliflower
- Trellis Management: Use removable trellises to harvest peas before cauliflower head formation begins
- Nutrient Imbalance: High nitrogen fixation creates excess that promotes leafy over curd growth
- Succession Option: Plant only after fall cauliflower harvest to utilize residual soil nutrients
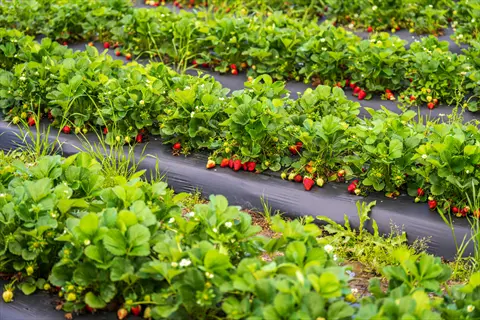
Strawberries
- Pest Attraction: May draw slugs requiring additional control measures near cauliflower plantings
- Root Management: Confine to containers when grown near cauliflower to prevent nutrient competition
- Disease Risk: Potential verticillium wilt transmission necessitates 8-foot (2.4-meter) separation
- Bird Deterrence: Use netting to prevent birds attracted to berries from damaging cauliflower heads
- Humidity Control: Prune runners regularly to reduce excess moisture around cauliflower plants
- Alternative Pairing: Better suited for separate garden zones than direct cauliflower companionship

Tomatoes
- Growth Inhibition: Root allelopathy affects cauliflower within 1-2 foot (30-60 cm) radius
- Light Competition: Canopy reduces cauliflower sunlight by 50% during critical development phases
- Disease Management: Requires 10-foot (3-meter) separation to prevent shared blight transmission
- Water Competition: Deep roots may monopolize moisture during tomato fruiting periods
- Calcium Conflict: Both plants compete for calcium needed for cellular structure development
- Spatial Solution: Grow in opposite garden sections divided by physical pathway barriers
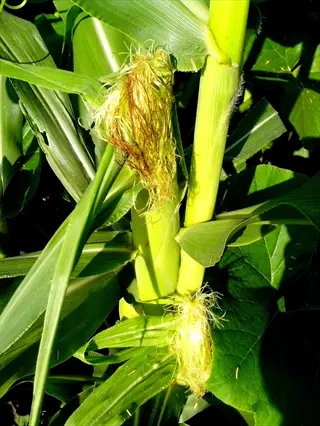
Corn
- Light Reduction: Tall stalks create 4-6 hour daily shade, decreasing cauliflower head size
- Wind Damage: Creates turbulent airflow damaging cauliflower leaves at 10-15 mph (16-24 km/h)
- Root Competition: Absorbs phosphorus from top 18 inches (45 cm) of soil needed by cauliflower
- Buffer Requirement: Minimum 10-foot (3-meter) southern separation prevents light deprivation
- Pest Correlation: Attracts insects that later develop into cauliflower-damaging cabbage loopers
- Timing Conflict: Late-season harvest compacts soil around developing fall cauliflower plants
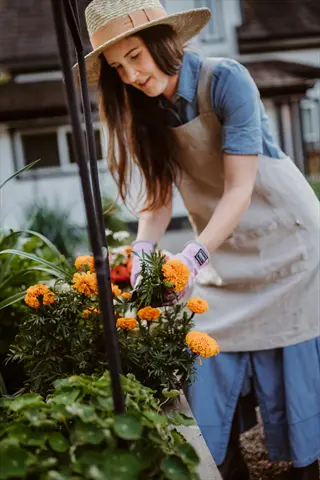
Marigolds
- Nematode Control: Root secretions suppress harmful soil nematodes affecting cauliflower root health
- Aphid Deterrence: Strong scent repels aphids while attracting hoverflies that consume pest larvae
- Border Planting: Effective when planted as perimeter 12 inches (30 cm) from cauliflower beds
- Continuous Bloom: Maintain flowers all season to sustain protective chemical compound release
- Container Use: Suitable for mixed pots if given 10-inch (25 cm) root space separation minimum
- Disease Reduction: Lowers fungal spore transmission through improved air circulation around plants
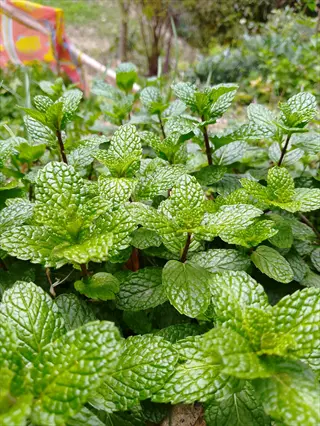
Mint
- Ant Repellent: Strong aroma masks cauliflower scent, deterring aphid-tending ants effectively
- Containment Need: Requires pots or barriers to control invasive roots in cauliflower beds
- Harvest Timing: Frequent trimming prevents flowering and maintains pest-repelling potency
- Companion Distance: Plant 18-24 inches (45-60 cm) away to balance benefits and competition
- Microclimate Moderation: Dense foliage provides 1-2°F (0.5-1°C) cooling during heatwaves
- Fungal Prevention: Essential oils reduce powdery mildew risks when properly spaced for airflow
Harvesting and Storage
Check for visual indicators before harvesting your cauliflower. The heads themselves will average 6-8 inches wide with curds that are tight and firm. A slight yellowing of the curd can make you aware of the fact that your cauliflower is becoming too mature. Likewise, if the outer leaves of the plant start pulling up and away from the head, it is a sign that the cauliflower is ready for harvest.
Use a sharp knife to cut the stems at a 45-degree angle so that the cut surface is sloping rather than straight across, leaving 3 or 4 wrapper leaves on to protect the head. Leave at least 2 inches of stem in the cutting. This technique allows water to run off rather than collect and cause the head to rot, and it also forms the smaller secondary head later on.
For refrigeration, your crisper drawer will maintain a humidity level of 95% for 2 to 3 weeks. Wrap a head in a perforated plastic bag for best results; standard shelves, with their lower humidity, will suffice for 5 days or less. Never pack near apples or bananas, as they give off ethylene gas that can destroy green crops.
Blanch before freezing to preserve texture. Blanch small florets (florets from a "male" broccoli) for 2 minutes in boiling water. Medium ones require 3 minutes and large ones take 4 minutes. Cool in iced water for 5 minutes, then thoroughly dry before sealing in a vacuum bag for storage.
Timing Indicators
- Head Size: Harvest when heads reach 6-8 inches (15-20 cm) diameter for standard varieties, 4-6 inches (10-15 cm) for mini types
- Compactness: Curds should feel firm and tightly packed with no visible separation or flowering
- Color Change: White varieties yellowing or purple types fading indicate over-maturity; harvest immediately
- Leaf Position: Outer leaves begin lifting away from head when ready for harvest in most varieties
- Temperature Timing: Harvest in early morning when temperatures are below 60°F (15°C) for best quality
- Seasonal Limits: Spring crops last 3-5 days after maturity; fall crops hold 2-3 weeks in cool weather
Cutting Technique
- Tool Selection: Use sharp serrated knife sterilized with rubbing alcohol to prevent disease transmission
- Cutting Angle: Slice main stem at 45-degree angle 2 inches (5 cm) below head to allow water runoff
- Leaf Retention: Leave 3-4 wrapper leaves attached to protect curd from bruising and moisture loss
- Stem Length: Preserve 1-2 inches (2.5-5 cm) of stem below head for easier handling and storage
- Plant Care: Avoid damaging surrounding leaves to support potential secondary head development
- Field Sanitation: Wipe blades with disinfectant between plants to prevent bacterial spread
Secondary Heads
- Regrowth Potential: After main harvest, leave plant intact; smaller 2-3 inch (5-7.5 cm) heads may form in 2-3 weeks
- Care Requirements: Apply balanced fertilizer and maintain consistent moisture to support secondary growth
- Yield Expectation: Produces 1-3 additional heads at 30-50% size of primary harvest
- Temperature Sensitivity: Secondary heads develop best in 50-65°F (10-18°C) temperature ranges
- Harvest Timing: Cut secondary heads when 2-4 inches (5-10 cm) wide before they loosen
- Plant Removal: Discard plants after second harvest as quality declines rapidly
Handling Precautions
- Bruise Prevention: Handle heads like eggs; impacts cause brown discoloration within hours
- Sun Protection: Move harvested heads to shade immediately; direct sun softens curds in 20 minutes
- Dirt Avoidance: Rinse only before use; pre-washing increases spoilage risk during storage
- Stacking Limit: Never stack more than two heads high to prevent crushing damage
- Field Cleaning: Brush off dirt with soft brush; avoid water contact until ready to use
- Temperature Control: Keep harvested heads below 50°F (10°C) at all times before storage
Field Holding
- Fall Crops: Can remain in garden 2-3 weeks after maturity in 45-60°F (7-15°C) temperatures
- Protection Method: Fold and tie outer leaves over heads; secure with rubber bands for frost/freezing protection
- Quality Check: Heads exposed to temperatures below 28°F (-2°C) develop translucent spots and bitterness
- Rain Protection: Cover plants with breathable row cover during heavy rains to prevent waterlogging
- Pest Monitoring: Check weekly for slug damage or caterpillar infestation under leaves
- Harvest Window: Monitor daily after maturity; heads can deteriorate rapidly in fluctuating weather
When to Plant Cauliflower
Get those cauliflower seeds started as soon as the soil temperatures hit the 50-70°F (10-21°C) mark. This will ensure quick germination and the production of healthy young transplants. Test the temperature at a depth of 4 inches using a soil thermometer. I test my earth temperature at dawn, and I never make a mistake. Cold soils under 45°F get those California Blues.
Spring planting runs the risk of bolting if the weather gets too cold. Likewise, a fall planting runs the danger of frost damage. Plan the timing of your spring crops so that they are sown after the last frost and before the heat arrives. Schedule your fall crops for 6-8 weeks before the first frost. That balances both risks.
Follow your zone-specific dates. Zones 3-4 start planting in May. Zones 5-6 start in April. Southern zones 7-10 can plant from February to March. Northern gardeners will want to begin growing once the soil is warm enough without worrying about a hard frost. There are zones for hardiness.
Head formation ceases and the plants bolt above a temperature of about 77°F (25°C). Heat causes the plants to form loose, rice-like curds in place of tight heads. Schedule your planting so that the head development occurs in the cooler part of the season. Use shade cloth if the weather unexpectedly warms. It is a regular part of my dealings with this crop to study the forecast on a day-by-day basis.
Soil Temperature
- Germination Range: Seeds sprout best at 50-70°F (10-21°C); below 45°F (7°C) causes delayed or failed germination
- Transplant Threshold: Seedlings require minimum 50°F (10°C) soil before moving outdoors to prevent shock
- Measurement Method: Use soil thermometer 4 inches (10 cm) deep; test at 9 AM for accurate readings
- Warming Techniques: Use black plastic mulch to raise soil temperature 5-8°F (3-4°C) in early spring
- Cooling Methods: Apply straw mulch to lower soil temperature 7°F (4°C) during late summer heatwaves
- Seasonal Tracking: Monitor with wireless sensors; optimal root development occurs between 55-65°F (13-18°C)
Daylight Duration
- Vegetative Growth: Requires 12-14 hours daylight for leaf development; less than 10 hours stunts growth
- Head Initiation: Curd formation triggered when daylight decreases below 11 hours in fall varieties
- Photoperiod Management: Use blackout cloth for spring crops if natural days exceed 14 hours
- Latitude Adjustment: Northern growers (45°+) may need row covers to extend daylight in spring
- Supplemental Lighting: Add LED grow lights if starting seeds indoors during low-light winter months
- Seasonal Planning: Align planting with local sunrise/sunset charts for optimal light exposure duration
Frost Tolerance
- Seedling Hardiness: Mature plants withstand 28°F (-2°C) but young transplants damaged at 32°F (0°C)
- Acclimatization Process: Harden off seedlings 7-10 days before transplanting; expose gradually to outdoor conditions
- Protection Methods: Use cloches or row covers when temperatures drop below 40°F (4°C) unexpectedly
- Spring Risk: Exposure to temperatures below 50°F (10°C) for 1+ weeks may cause premature bolting
- Fall Advantage: Light frosts (30-32°F/-1-0°C) enhance sweetness in late-season varieties
- Microclimate Use: Plant near south-facing walls for 3-5°F (2-3°C) temperature buffer in marginal zones
Heat Management
- Head Formation Limit: Temperatures above 77°F (25°C) cause loose, ricelike curds instead of tight heads
- Shading Techniques: Install 30% shade cloth when forecast exceeds 75°F (24°C) during curd development
- Water Cooling: Mist plants early morning to reduce leaf temperature by 8°F (4°C) on hot days
- Variety Selection: Choose heat-tolerant types like 'Snow Crown' for zones 7-10 summer planting
- Mulch Benefits: 3-inch (7.5 cm) straw layer lowers soil temperature 6°F (3°C) during heat waves
- Planting Timing: Schedule so head formation occurs before average temperatures reach 70°F (21°C)
Rainfall Patterns
- Moisture Consistency: Requires 1 inch (2.5 cm) weekly rainfall; irregular watering causes hollow stems
- Drought Response: Plants stop growing after 4 days without water; heads become bitter if stressed
- Container Irrigation: Potted cauliflower needs daily watering in temperatures above 80°F (27°C)
- Drainage Requirement: Heavy clay soils must be amended with compost to prevent waterlogging roots
- Monsoon Preparation: Build raised beds in areas receiving 4+ inch (10+ cm) weekly summer rains
- Rainwater Harvesting: Use barrels to collect soft water with ideal 6.0-7.0 pH for cauliflower's growth
Soil and Planting Guide
Cauliflower grows best in loamy soil (40% sand, 40% silt, 20% clay). A respective balance provides drainage, whilst retaining moisture. You can discover the texture of your soil by the jar method. Put a quart jarful of your soil into the jar, fill with water, and shake well. Leave overnight to settle, retaining the measurements of the sand, silt, and clay divisions.
Adjust pH to 6.0-7.0: If your soil tests acidic below 6.0, you can raise pH by half a point with 5 pounds of dolomitic lime per 100 square feet. If alkaline above 7.0, mix in 2 pounds of elemental sulfur per 100 square feet. Always retest after 4 weeks.
Planting depths: seedlings vs seed(s). Sow seeds at ¼ inch deep in fine soil, and cover lightly with vermiculite. Transplant seedlings 1 inch deeper than their nursery pots, burying the stem up to the first true leaves. This helps prevent leggy plants.
Firm up the soil around plants to prevent "loose heads." As you plant, press down the soil with your palms. Form a little hollow around the stems to catch the water. I walk along the rows and press down the earth. In short, the soil is so dense that pressure with the fingers is necessary to leave any trace whatsoever.
Soil Composition
- Ideal Texture: Loamy soil with 40% sand, 40% silt, 20% clay provides optimal drainage and moisture retention
- Drainage Test: Dig 12-inch (30 cm) hole, fill with water; drains in 2-4 hours indicates proper structure
- Clay Improvement: Add 3 inches (7.5 cm) coarse sand and 2 inches (5 cm) compost per square foot to heavy soils
- Sandy Solution: Mix 4 inches (10 cm) peat moss or coconut coir to increase water-holding capacity
- Organic Matter: Incorporate 25% compost by volume for ideal nutrient availability and microbial activity
- Container Blend: Use equal parts compost, perlite, and topsoil for potted cauliflower drainage
pH Adjustment
- Target Range: Maintain 6.0-7.0 pH; test every spring using digital meter or test strips
- Acidic Soils: Apply 5 lbs (2.3 kg) dolomitic lime per 100 sq ft (9 m²) to raise pH by 0.5 units
- Alkaline Soils: Mix 2 lbs (0.9 kg) elemental sulfur per 100 sq ft (9 m²) to lower pH by 0.5 units
- Timing: Amend soil 3-4 months before planting to allow complete chemical reaction
- Retesting: Check pH again 30 days after application; adjust if still outside optimal range
- Container pH: Use pH-adjusted potting mixes and monitor monthly with probe meter
Nutrient Management
- Pre-Plant Testing: Conduct soil test for N-P-K levels; ideal ratio 1-2-2 for cauliflower establishment
- Nitrogen Sources: Apply blood meal (12-0-0) at 3 lbs (1.4 kg) per 100 sq ft (9 m²) for leafy growth
- Phosphorus Boost: Use bone meal (3-15-0) at 5 lbs (2.3 kg) per 100 sq ft (9 m²) for root development
- Potassium Supplement: Add greensand (0-0-3) at 10 lbs (4.5 kg) per 100 sq ft (9 m²) for disease resistance
- Micronutrients: Incorporate kelp meal for boron and molybdenum to prevent hollow stem disorder
- Side-Dressing: Apply balanced fertilizer 4 weeks after transplanting when plants are 6 inches (15 cm) tall
Planting Techniques
- Seed Depth: Sow seeds ¼-½ inch (0.6-1.3 cm) deep; cover lightly with fine vermiculite
- Transplant Depth: Set seedlings 1 inch (2.5 cm) deeper than nursery pots; bury to first true leaves
- Spacing Standards: 18-24 inches (45-60 cm) between plants; 24-30 inches (60-75 cm) between rows
- Mini Varieties: Plant 12 inches (30 cm) apart in containers or raised beds for compact growth
- Firming Method: Tamp soil gently with hands after planting; final density should resist finger pressure
- Watering In: Apply 1 quart (1 liter) per plant of fish emulsion solution to reduce transplant shock
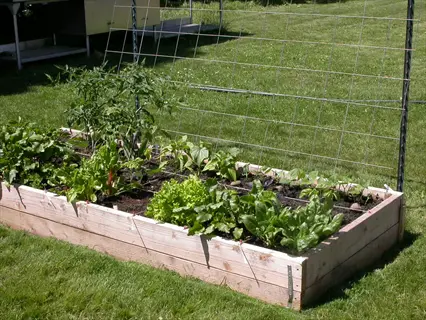
Bed Preparation
- Tilling Depth: Turn soil 12 inches (30 cm) deep; break clumps larger than 2 inches (5 cm)
- Raised Beds: Construct 8-12 inch (20-30 cm) high beds for improved drainage in wet climates
- No-Dig Method: Layer 6 inches (15 cm) compost over cardboard; plant directly after 4 weeks
- Slope Consideration: Create 1-2% gradient for water runoff; avoid low spots where water pools
- Pre-Plant Watering: Moisten soil to 6-inch (15 cm) depth 48 hours before planting
- Final Raking: Level surface with garden rake; create fine tilth for seed-to-soil contact
Crop Rotation
- Disease Prevention: Rotate cauliflower out of brassica beds for 4 years to disrupt clubroot cycle
- Ideal Predecessors: Follow legumes (beans/peas) or alliums (onions/garlic) to replenish soil nitrogen
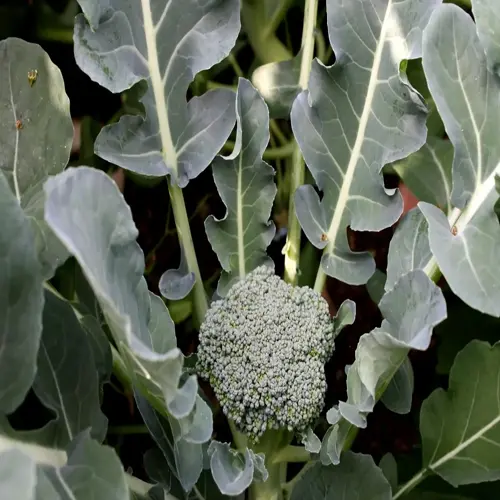
- Poor Predecessors: Avoid planting after other brassicas like cabbage or broccoli due to shared pests
- Cover Cropping: Sow buckwheat or clover in offseason to suppress weeds and improve soil structure
- Container Rotation: Replace 50% of potting mix annually when reusing containers for cauliflower
- Companion Strategy: Alternate rows with nitrogen-fixing plants like clover in same-season plantings
Caring for Cauliflower
Use the finger test to gauge soil moisture. At each growth stage, push your finger 3 inches deep near the seedlings and 6 inches deep as the plants mature. Water when the soil at your fingertip feels dry. Seedlings will require more frequent testing than established crops at that point.
Alter fertilizer ratios during head formation. Start with a balanced 10-10-10 NPK for leaf growth, then switch to a 5-10-15 NPK once the plants start forming. This lowers nitrogen and bumps potassium. Potassium firms the curds and keeps the stems from going hollow! I add a little kelp meal for an extra potassium boost.
Organic treatments, such as a Bt spray, are most effective against caterpillars. They won't harm the beneficial insects you're trying to attract! Synthetic pesticides kill more quickly but may damage soil microbes. I prefer organic for overall plant health! Apply in the early morning when caterpillars are especially active in their feeding.
Start leaf-tying once the heads approach golf-ball size. Review this technique, also called bracing, before proceeding. Gently fold the outside leaves over the head. Gather with a rubber band or soft twine. Only do this when the sustained temperature won't exceed 75 degrees. Greater heat leads to rot and the accumulation of trapped moisture. Check every 3 days.
Watering Management
- Frequency Check: Insert finger 3 inches (7.5 cm) deep; water if dry - requires 1-1.5 inches (2.5-3.8 cm) weekly
- Drought Response: Plants wilt after 48 hours without water; recover slowly with 50% yield loss potential
- Container Needs: Water potted plants twice daily in temperatures above 85°F (29°C) to prevent stress
- Irrigation Methods: Use soaker hoses or drip systems to avoid wetting leaves and reduce disease risk
- Rain Adjustment: Reduce watering by 30% during weeks with 0.5+ inch (1.3+ cm) rainfall
- Mulch Benefits: 3-inch (7.5 cm) straw layer cuts evaporation by 40% in summer heat
Fertilizing Schedule
- Starter Feed: Apply high-phosphorus (5-10-5) solution at transplanting for root establishment
- Vegetative Phase: Use balanced 10-10-10 fertilizer every 3 weeks until heads begin forming
- Head Formation: Switch to low-nitrogen (5-10-15) formula to prioritize curd over leaf growth
- Organic Options: Side-dress with compost tea or fish emulsion every 14 days for gradual nutrition
- Deficiency Signs: Purple leaves indicate phosphorus shortage; yellow edges signal potassium deficiency
- Overfeeding Risk: Excess nitrogen causes loose heads and attracts aphids - follow soil test recommendations
Pest Control
- Cabbage Worms: Hand-pick daily or apply Bacillus thuringiensis (Bt) weekly at first leaf damage signs
- Aphid Management: Spray with strong water jet or insecticidal soap every 4 days until infestation clears
- Flea Beetles: Use yellow sticky traps and diatomaceous earth around plant bases as physical barriers
- Slug Prevention: Set beer traps and copper tape rings; apply iron phosphate bait in damp conditions
- Row Covers: Install immediately after planting with edges buried 6 inches (15 cm) deep for full protection
- Companion Plants: Interplant with mint or thyme to repel pests through aromatic confusion
Disease Prevention
- Clubroot Solution: Rotate crops 4 years; apply lime to raise soil pH above 7.3 to inhibit pathogen
- Black Rot: Remove infected leaves immediately; spray copper fungicide every 10 days during wet spells
- Downy Mildew: Space plants 24+ inches (60+ cm) apart; avoid overhead watering to reduce humidity
- Fusarium Wilt: Plant resistant varieties like 'Clapton'; solarize soil before planting in infected areas
- Botrytis: Improve airflow by pruning lower leaves; apply baking soda spray (1 tbsp/gallon) preventively
- Sanitation: Sterilize tools with 10% bleach solution between plants to prevent bacterial spread
Blanching Technique
- Timing: Begin when heads reach golf ball size (1.5 inches/3.8 cm) for most varieties
- Method Options: Tie outer leaves over head with rubber bands or use clothespins for secure closure
- Self-Blanching Types: Note varieties like 'Snow Crown' require no manual intervention for white curds
- Inspection Frequency: Open every 3 days to check for moisture buildup and pest activity
- Duration: Maintain coverage 7-12 days until heads reach full size but remain compact
- Heat Precautions: Avoid blanching when temperatures exceed 75°F (24°C) to prevent rot
5 Common Myths
By adding additional nitrogen fertilizer, cauliflower will produce larger heads
While excess nitrogen encourages leafy growth rather than promoting the formation of heads and developing density of the head, these plants produce less dense and often poorly formed curds. For optimum head development and to improve density and quality of curd, adequate amounts of phosphorus and potassium need to be supplied at the time of curd formation. Meanwhile, excessive applications of nitrogen increase the likelihood of greater aphid attraction and higher disease susceptibility leading to lower yields and poor quality.
All cauliflower varieties require manual blanching to develop white heads
Self-blanching varieties like 'Snowball' and 'Snow Crown' naturally curl their leaves over developing heads, eliminating the need for manual intervention. Colored varieties (purple, orange, green) actually lose vibrancy when blanched. Only traditional white non-hybrid types benefit from leaf-tying techniques, and even then, modern hybrids often self-protect.
You can still harvest and eat cauliflower that has been affected by frost
The frost causes water-soaked areas on the cauliflower to become clear, and these will turn brown and bitter shortly after being discolored. This process will also destroy the textural qualities of the cauliflower and create undesirable flavours that cannot be remedied through cooking. While you can cut off the outer leaves that have been superficially damaged, the head itself is no longer fit for consumption after the plant has been subjected to temperatures of less than 28°F (-2C) or colder.
Small containers are sufficient for growing mini cauliflower varieties
Even compact varieties require minimum 5-gallon (19-liter) containers with 16-inch (40-cm) depth for proper root development. Restricted root space causes moisture stress and nutrient deficiencies, resulting in undersized heads. Container depth directly correlates with head size - a 12-inch (30-cm) pot can reduce yield by 40% compared to recommended dimensions.
Cauliflower must not be washed before harvest if you want to store them properly
Sooner than washing produces moisture, which can hasten spoilage and encourage bacterial growth. If you leave heads unwashed, it protects the waxy coating long enough to allow heads to remain fresher 50% longer in the refrigeration environment. When it comes to storage, always keep unwashed cauliflower in perforated bags, and rinse before eating. Quickly washing cauliflowers increases the chance of rotting; this is particularly true for the gaps between the curd clusters where water collects.
Conclusion
Cauliflower is an incredibly adaptable vicinior that can be grown as a cool-season crop and for extended harvest. Depending on your region, you can grow several successions from spring through fall for continuous fresh harvests. I plant every 3 weeks for nonstop production.
Realise true satisfaction growing the purple, orange and green varieties instead of the common white sorts, which, while they have their good points, do not compare in richness of character and taste or value to the coloured types of Cabbage, Cauliflower and Broccoli, which they both far exceed in the matter of taking less attention to grow, and present a glorious sight as well as of utility to the table.
Preventive pest control means quality heads every time. Cover rows with floating row covers at planting to keep pests out. Check on the scout every three days for signs of trouble. I release ladybugs weekly for natural aphid control.
Blanching (practicing good horticulture) is vital to ensure perfect appearance and flavour, and you'll want to master the techniques. Tie up the leaves when the heads are golf-ball size, preferably on cool mornings, as that will shelter the curds from the worst of the sun's rays and bring out the sweetness. Blanching makes the difference between marketable and mediocre harvests, and between good and unworthy-of-a-spot-in-your-garden ones.
External Sources
Frequently Asked Questions
What month should I plant cauliflower?
Planting months depend on your climate zone. For spring crops, start seeds indoors 4-6 weeks before the last frost date. Fall crops should be planted 6-8 weeks before the first frost. Coastal zones can plant in early spring or late summer.
What plants should never be near cauliflower?
Avoid these incompatible companions:
- Tomatoes: Compete for nutrients and cause allelopathic inhibition
- Strawberries: Attract slugs that migrate to cauliflower
- Corn: Blocks sunlight and creates root competition
- Pole beans: Deplete soil nitrogen during critical growth stages
Is autumn suitable for cauliflower planting?
Fall is ideal for cauliflower in most regions. Cooler temperatures prevent bolting while enhancing flavor development. Plant in late summer for autumn harvest, ensuring heads form before hard frosts. Use row covers for frost protection below freezing temperatures.
How long until cauliflower is harvest-ready?
Maturation ranges from 55 to 100 days after transplanting. Mini varieties mature fastest, while large-headed types take longer. Growth duration depends on temperature consistency, variety selection, and whether plants experience heat stress during head formation.
Why does cauliflower fail to form heads?
Head formation fails due to:
- Temperature extremes above optimal range during development
- Inconsistent watering causing growth interruptions
- Nutrient imbalances like excessive nitrogen
- Transplant shock or root damage during planting
- Insufficient sunlight below daily minimum requirements
Can cauliflower survive winter conditions?
Cauliflower tolerates light frosts but not hard freezes. In zones with mild winters, use heavy mulching and cloches for protection. For sustained freezing temperatures, grow cold-hardy varieties in containers that can be moved indoors temporarily.
What's crucial for successful cauliflower growth?
Essential success factors include:
- Maintaining consistent soil moisture without waterlogging
- Providing balanced nutrition with extra potassium during heading
- Blanching heads at precise development stages
- Implementing proactive pest management strategies
- Ensuring cool temperatures during curd formation
How much water does cauliflower require?
Cauliflower needs deep, consistent moisture equivalent to natural rainfall weekly. Increase watering during head formation and hot weather. Container plants require daily watering, while garden beds need deep soaking every 3-4 days depending on soil type.
What are key fall planting steps?
Critical fall planting practices:
- Start seeds in late summer during cooler temperatures
- Use shade cloth to protect young seedlings from heat
- Amend soil with phosphorus-rich fertilizers for root development
- Time transplanting for 6-8 weeks before expected frost
- Apply thick mulch to regulate soil temperature
What deters pests from cauliflower?
Effective organic pest deterrents include:
- Floating row covers installed immediately after planting
- Companion planting with aromatic herbs like thyme
- Neem oil or insecticidal soap sprays for soft-bodied insects
- Diatomaceous earth barriers around plant bases
- Bacillus thuringiensis applications for caterpillars