
Knowing exactly when to plant broccoli can be the difference between a large harvest and a miserable failure. As a cool-season crop, broccoli should be planted at the optimal time for maximum yield. Get it wrong, and your plants will bolt before making heads. I learned this lesson the hard way when my first crop bolted early during a freak heatwave.
Broccoli requires a temperature between 50°F and 70°F for optimal growth and development. At either end of this, the plants will suffer. I would advise using a thermometer in the soil, noting it just at dawn. Above 80 degrees, the heads will be very bitter, while frost has the same effect when they are young.
You have two planting windows: spring and fall. Spring planting starts a few weeks before the last frost; for fall, you plant in late summer. When you plant affects the variety you plant as some types (such as Purple Sprouting) can tolerate the cold better, while others mature quicker and are ready to harvest sooner.
Broccoli Types Simplified
Broccoli can be grouped into two major categories, meaning you'll cut it differently depending on whether it's a heading type that creates a large central head versus a sprouting variety that produces smaller florets along many smaller heads: Calabrese, with the dome-type heads you're used to seeing at the store, or Purple Sprouting, with thinner shoots that are sent up on each stem along the way. Because they grow differently, your harvest approach and space requirements differ, too.
When selecting varieties, pay attention to the maturity times. The swift 'Green Magic' is ideal for early crop harvests in the spring, as it matures in just 50-60 days from seed sowing. A more traditional variety is 'Waltham 29', which takes longer to reach maturity, at 70-85 days, but is more frost-tolerant. For growing in frigid climates, try Purple Sprouting broccoli, which can survive temperatures as low as 15°F and continue to produce crops through winter in mild areas.
Chinese varieties such as 'Gai Lan' are superior in heat resistance. They thrive when the thermometer rises to 80 degrees Fahrenheit. The long slender stems are ready in 45 to 55 days. I sow these in late summer for fall use, as they do not bolt as easily in the wayward warm periods as some of the old heading types.
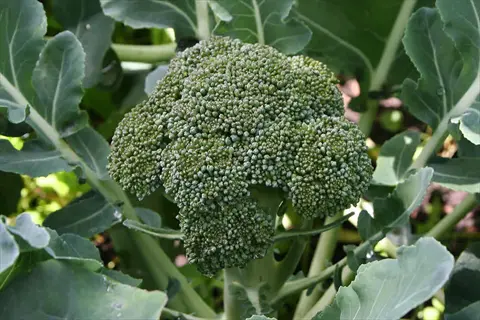
Heading Broccoli
- Description: Single large green heads commonly found in supermarkets with compact florets forming a central dome
- Examples: Calabrese (traditional), Green Magic (bolt-resistant), Packman (early harvest)
- Maturity: 60-85 days to harvest main head depending on variety and growing conditions
- Best For: Spring and fall planting in mild climates with consistent temperatures between 60-70°F (15-21°C)
- Special Notes: Produces one primary head with potential for smaller side shoots after main harvest
- Temperature Range: Performs best at 60-70°F (15-21°C) and bolts above 80°F (27°C)
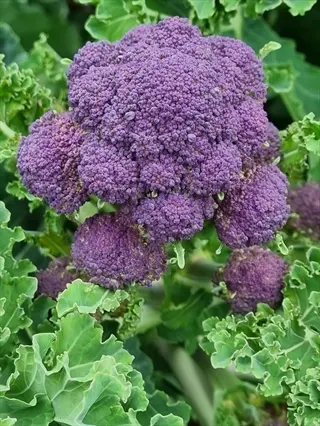
Sprouting Broccoli
- Description: Multiple small purple or white heads on long stems with extended harvest period over several weeks
- Examples: Purple Sprouting (hardy), Early Purple (quick maturing), White Star (mild flavor)
- Maturity: 150-220 days for overwintered crops requiring cold exposure for optimal development
- Best For: Winter harvest in cold climates (Zone 5+) where plants withstand frost down to 20°F (-7°C)
- Special Notes: Flavor significantly sweetens after frost exposure with improved texture and taste
- Cold Tolerance: Established plants withstand temperatures as low as 20°F (-7°C) without damage
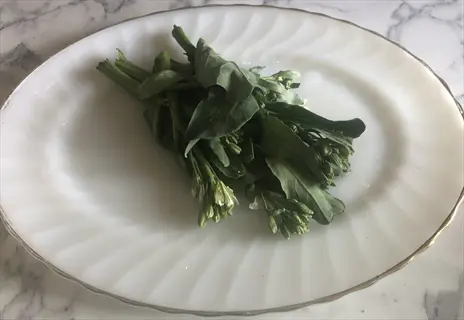
Chinese Broccoli
- Description: Slender blue-green stems with small florets and edible oval leaves used extensively in Asian cuisine
- Examples: Gai Lan (standard), Kailaan (tender stems), Happy Rich (prolific side shoots)
- Maturity: 45-60 days for continuous harvest of leaves and stems throughout growing season
- Best For: Hot climates and summer planting tolerating temperatures up to 85°F (29°C) without bolting
- Special Notes: Entire plant is edible including leaves stems and florets with slightly bitter flavor
- Heat Tolerance: Maintains quality in warmer conditions up to 85°F (29°C) unlike heading varieties
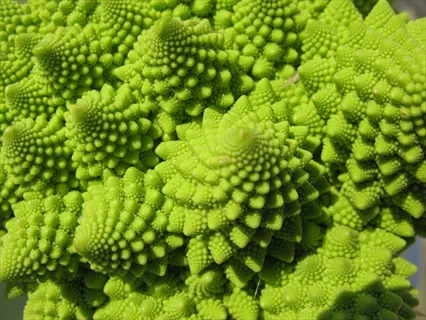
Romanesco Broccoli
- Description: Striking lime-green fractal-patterned heads with spiraled cones forming geometric shapes
- Examples: Veronica (classic), Natalino (compact), Minaret (container-friendly)
- Maturity: 75-100 days requiring consistent cool temperatures between 50-70°F (10-21°C)
- Best For: Fall planting in most zones with harvest after first light frost for best texture
- Special Notes: Nutty flavor profile distinct from traditional broccoli with firmer crunch when raw
- Temperature Sensitivity: Requires strict temperature control between 50-70°F (10-21°C) for proper head formation
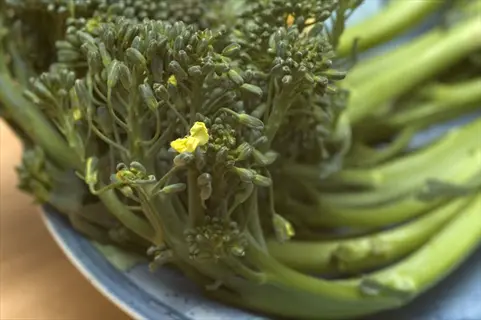
Broccolini
- Description: Hybrid with slender stalks small florets and minimal leaves developed from broccoli and gai lan
- Examples: Aspabroc (standard), Atlantis (disease-resistant), Sweet Baby (early harvest)
- Maturity: 50-60 days with continuous production of side shoots after main stem harvest
- Best For: Succession planting in spring and fall with quick turnaround between plantings
- Special Notes: Entire stalk is tender and edible requiring no peeling with sweet mild flavor
- Versatility: Adapts well to both garden beds and container growing in 12-inch deep pots
Soil and Climate Essentials
Broccoli responds vigorously to temperature changes. Be sure to take the soil temperature at a depth of 4 inches using the thermometer. Between 50-70°F (1019°C) is the most suitable for promoting growth. I record both scales, because a sudden lowering of temperature below 25° (-4°C) roughens the plants. Excessive temperatures over 80° (270 °C) give them a bitter taste and cause bolting.
Test your soil pH every week during the growing season using a digital meter or a chemical kit. Broccoli requires a pH level of around 6.0 to 7.0 for optimal nutrient uptake. If your pH is below 6.0, mix in dolomite lime; if your pH is alkaline and above 7.0, add sulfur. I retest after a month.
Drainage Needs vary from soil type to soil type. Clay soil needs coarse sand and compost added. Sandy soil needs peat moss for moisture retention. The easiest way to test for drainage is to dig a one-foot round hole about five or six inches deep, fill with water, and see if it empties in an hour or less time should be four hours. Remember: soil left in water becomes chemically injured; water lying in that soil causes root rots.
Choose frost-tolerant varieties, such as Purple Sprouting, for overwintering. They'll withstand temperatures as low as 15°F. (-9C.). Once they are below 32F. (0C.) I cover them using row fabric as a protection. They're sweeter because of the frost! I apply a heavy mulch of straw to keep the centres as insulated as possible on cold nights.
Soil pH Balance
- Testing: Use digital meter or chemical test kit weekly during growing season
- Ideal Range: Maintain 6.0-7.0 for optimal nutrient absorption
- Acidic Fix: Apply 5 lbs (2.3 kg) dolomite lime per 100 sq ft (9.3 m²) if below 6.0
- Alkaline Fix: Mix 2 lbs (0.9 kg) sulfur per 100 sq ft (9.3 m²) if above 7.0
- Monitoring: Check monthly after initial correction
- Impact: Affects clubroot resistance and calcium availability
Drainage Solutions
- Clay Soil: Amend with 30% coarse sand and 20% compost
- Sandy Soil: Add 3-4 inches (7.5-10 cm) peat moss to retain moisture
- Raised Beds: Build 12-inch (30 cm) height for problematic areas
- Container Mix: Blend equal parts compost, perlite, and topsoil
- Drain Test: Dig 1 ft (30 cm) hole, fill with water; should drain in 4 hours
- Warning Signs: Standing water causes root rot within 48 hours
Nutrient Amendments
- Compost: Work 2-4 inches (5-10 cm) into top 8 inches (20 cm) of soil
- Nitrogen Source: Apply blood meal (12-0-0) at 3 cups (710 ml) per 10 sq ft (0.9 m²)
- Phosphorus Boost: Bone meal (3-15-0) for root development
- Potassium: Wood ash (0-1-10) for disease resistance
- Timing: Amend 4 weeks before planting and mid-season
- Organic Option: Aged manure at 1 inch (2.5 cm) depth, composted 6 months
Soil Structure Improvement
- Aeration: Loosen compacted soil to 12-inch (30 cm) depth with broadfork
- Organic Matter: Add 3 inches (7.5 cm) leaf mold annually to build humus
- Cover Cropping: Plant winter rye to prevent erosion and add biomass
- No-Till Method: Layer compost directly on soil surface without disturbing structure
- Testing: Perform ribbon test to determine clay/sand ratio
- Benefits: Improves water retention and root penetration dramatically
Moisture Management
- Mulching: Apply 3-inch (7.5 cm) straw layer to reduce evaporation
- Watering Depth: Provide 1 inch (2.5 cm) water weekly to reach 6-inch (15 cm) roots
- Drought Signs: Wilting at midday indicates immediate need for water
- Sensor Use: Install soil moisture meters at 4-inch (10 cm) and 8-inch (20 cm) depths
- Container Care: Water until 10% runoff from drainage holes
- Overwatering Risk: Yellow lower leaves signal excessive moisture
Planting and Care Guide
For spring planting, start seeds indoors 6-8 weeks before your last frost date, transplant seedlings when the soil hits 40°F (4°C). For fall planting, start seeds 10-12 weeks before the first frost. I time my fall crop for late summer sowing so they aren't stressed by heat, yet still reach maturity before hard freezes.
Water using drip irrigation at the soil base. Shun the heads. Provide 1-1.5 inches weekly (measured with a rain gauge). In heatwaves, give them 2 inches. I water at dawn; it cuts the evaporation loss. Take note: the plants in your containers will dry out quicker than established plant beds so check them daily.
Fertilizer: Use balanced 10-10-10 fertilizer at transplanting, and after three weeks or so, switch to high-nitrogen blood meal. Apply bone meal for phosphorus as soon as heads form, and use liquid seaweed as a foliar feed every two weeks for container plants. Stop fertilizing as soon as heads develop so they won't split.
Container broccoli? Use 5-gallon buckets with drainage holes: compost, perlite, and topsoil mix. Rotate pots so that plants receive even sunlight. I elevate containers on bricks for better drainage. Cover pots with shade cloth when the temperature exceeds 80°F (27°C).
Watering Technique
- Frequency: Provide 1-1.5 inches (2.5-3.8 cm) water weekly through drip irrigation
- Timing: Water early morning to reduce evaporation and fungal risk
- Method: Direct water to soil base using soaker hoses, avoiding heads
- Drought Response: Increase to 2 inches (5 cm) during heatwaves above 80°F (27°C)
- Container Check: Water when top 1 inch (2.5 cm) soil feels dry
Fertilization Schedule
- Transplant Stage: Apply balanced 10-10-10 fertilizer at planting
- 3 Weeks Later: Side-dress with high-nitrogen blood meal (12-0-0)
- Head Formation: Switch to low-nitrogen, high-phosphorus bone meal
- Container Feeding: Use liquid seaweed every 2 weeks due to nutrient leaching
- Caution: Avoid fertilizers after heads form to prevent bolting
Temperature Protection
- Frost Guard: Cover plants below 32°F (0°C) with row covers
- Heat Stress: Install 30% shade cloth above 80°F (27°C)
- Mulching: Maintain 3-inch (7.5 cm) straw layer for root insulation
- Container Move: Relocate pots to afternoon shade in summer
- Monitoring: Use soil thermometer at 4-inch (10 cm) depth
Pest Prevention
- Physical Barrier: Install insect netting immediately after transplanting
- Companion Plants: Border with garlic and marigolds to deter pests
- Organic Spray: Apply neem oil weekly for aphid/caterpillar control
- Hand Inspection: Check leaf undersides daily during warm spells
- Fall Advantage: Plant in late summer to avoid peak pest seasons
Pruning Method
- Leaf Removal: Trim yellowing lower leaves weekly for airflow
- Head Harvest: Cut main stem at 45° angle 6 inches (15 cm) below head
- Side Shoots: Prune above leaf node to encourage new growth
- Overcrowding Solution: Remove every other plant if spaced under 18 inches (45 cm)
- Tool Care: Disinfect shears with alcohol between plants
Spring Planting Timeline
Start seeds indoors 6-8 weeks before your last expected frost date. I sow my seeds in mid-March to have them established by May for the plantings. Maintain a soil temperature of 70°F (21°C) for optimal germination; use heat mats as needed.
Take it outside to harden off whenever the nighttime temperatures are 50°F (10 °C) or higher, in general. At first, one to two hours in the shade, then gradually longer and longer in the sun over the next week, till they are in full sun. Don't leave any unprotected plants overnight when temperatures are likely to drop below 40˚F (4˚C). Still, I often bring them inside overnight, just to be safe.
Transplant your seedlings if the soil temperature is at least 40°F (4°C) at a depth of 4 inches. Space them 18 to 24 inches apart in the row, and water them into the soil the moment you plant them. I also throw a row cover over them for the first week to keep them snug and protected from wind shocks.
Pay attention to head development during temperatures of 15-18°C (60-65°F). The optimal temperature for this stage of growth is also an ideal length to produce the densest, tightest heads possible. If the temperature increases to 24°C (75°F) or higher, apply shade cloth to the plant to protect it from excessive heat. If you do not harvest before the flowers open, the resulting plant will likely be bitter-tasting.
Weeks 1-2: Seed Starting
- Timing: 6-8 weeks before last expected frost date
- Method: Sow seeds ¼ inch (0.6 cm) deep in seed trays
- Temperature: Maintain 70°F (21°C) for optimal germination
- Lighting: Provide 14 hours daily under grow lights
- Moisture: Keep soil consistently damp but not waterlogged
Weeks 3-4: Seedling Care
- Thinning: Remove weaker seedlings when first true leaves appear
- Feeding: Apply liquid fertilizer at 50% dilution weekly
- Temperature: Reduce to 65°F (18°C) to strengthen stems
- Light Adjustment: Lower lights to 2 inches (5 cm) above plants
- Disease Prevention: Water at base to avoid damping off
Weeks 5-6: Hardening Off
- Process: Gradually expose to outdoor conditions over 7 days
- Day 1-2: Place in shaded area 2 hours
- Day 3-4: Morning sun 4 hours
- Day 5-7: Full daylight 6+ hours
- Protection: Bring indoors if temperatures drop below 40°F (4°C)
Week 7: Transplanting
- Timing: After last frost when soil reaches 40°F (4°C)
- Spacing: Plant 18-24 inches (45-60 cm) apart in rows
- Depth: Set level with first true leaves
- Protection: Cover with row fabric if nights below 45°F (7°C)
- Watering: Soak roots immediately after transplanting
Weeks 8-10: Head Development
- Temperature Watch: Protect plants when exceeding 75°F (24°C)
- Watering: Provide 1.5 inches (3.8 cm) water weekly
- Feeding: Apply low-nitrogen fertilizer when heads form
- Pest Check: Inspect daily for caterpillars and aphids
- Harvest Window: Begins 60-85 days after transplant
Fall Planting Strategy
When to Start Fall Broccoli: Start plants 10-12 weeks before your first frost in the fall so that they can mature before the deep cold sets in. I start seeds in my garden in late July for harvesting in October (I'm in zone 5). Don't plant too soon or they'll bolt in the summer heat.
Adjust planting according to the USDA hardiness zone. Zones 3-4 start seeding in early June. Zones 5-6 are mid to late July. Warm zones 7-10 start in August or September. I track dates of frost with the local agricultural extension.
Shield tender plants from early frosts with row covers or cloches. Be ready to cover plants if overnight temperatures drop below 32 degrees Fahrenheit (0 degrees Celsius). I use a thick layer of straw mulch around the stems for insulation, and remember to remove the protective coverings on sunny days to prevent the plants from overheating.
Cold stimulates flavor enhancement by converting starch reserves into sugars. Heads are sweeter after harvesting following light frosts. Purple varieties develop richer colors. I pick broccoli early in the morning, following a cold night, when sugar concentration is highest. All types become less bitter from freezing.
Zones 3-4: Early Summer Start
- Timing: Start seeds indoors early to mid-June
- Transplant: Move outdoors mid-July before heat peaks
- Frost Prep: Install row covers by early September
- Harvest: Complete by early October before hard freeze
- Variety Tip: Choose cold-hardy types like 'Waltham 29'
Zones 5-6: Mid-Summer Planting
- Timing: Sow seeds indoors late June to early July
- Transplant: Early to mid-August during cooler evenings
- Frost Prep: Add mulch layer in September
- Harvest: Mid-October through November
- Variety Tip: Purple sprouting types sweeten with frost
Zones 7-8: Late Summer Timing
- Timing: Direct sow or start seeds late July
- Transplant: Early September when temps drop below 80°F (27°C)
- Frost Prep: Minimal needed; use fabric for rare frosts
- Harvest: November through December
- Variety Tip: Chinese broccoli thrives in warmer falls
Zones 9-10: Extended Season
- Timing: Plant September to October
- Transplant: October through November
- Frost Prep: Rarely needed; focus on pest control
- Harvest: December through February
- Variety Tip: 'Green Magic' resists bolting in warm spells
General Care Protocol
- Watering: 1 inch (2.5 cm) weekly until first frost
- Pest Control: Apply Bt every 2 weeks for caterpillars
- Frost Response: Harvest immediately after light frost
- Mulching: 3-inch (7.5 cm) straw layer after transplant
- Succession: Plant every 2 weeks for continuous harvest
5 Common Myths
Many gardeners mistakenly believe broccoli requires hot summer weather to develop large heads successfully.
Broccoli actually bolts and develops bitter flavors when temperatures consistently exceed 80°F (27C). This cool-season crop thrives in 50-70F (10-21C) conditions, with head formation optimal at 60-65F (15-18C). Exposure to heat triggers premature flowering, ruining the edible portion while reducing nutritional value significantly.
A widespread misconception suggests all broccoli varieties mature at exactly the same growth rate regardless of type.
Maturity timelines vary dramatically between broccoli types. While standard heading varieties like Calabrese mature in 60-85 days, purple sprouting varieties require 150-220 days to develop properly. Chinese broccoli reaches harvest in just 45-60 days, and Romanesco needs 75-100 days under specific temperature-controlled conditions for optimal head formation.
Numerous people assume growing broccoli in containers severely limits the plant's yield potential compared to ground planting.
Properly maintained container-grown broccoli can produce full-sized heads when given adequate space and nutrients. Using 5-gallon buckets with nutrient-rich soil, consistent watering, and biweekly liquid seaweed feeding yields comparable results to in-ground planting. Container growth actually offers advantages like better pest control and mobility to optimize sun exposure throughout the season.
It's commonly thought that yellow leaves on broccoli plants always indicate serious disease or pest infestation issues.
Yellowing lower leaves typically signal nitrogen deficiency rather than disease, especially during rapid growth phases. This can be corrected with blood meal application. True disease symptoms include black spots, oozing lesions, or fuzzy mold. Environmental stressors like waterlogged soil or temperature extremes also cause yellowing without pathogenic involvement.
Many gardeners consider fall-planted broccoli to be inherently riskier and less productive than spring planting efforts.
Fall planting offers distinct advantages including reduced pest pressure, enhanced sweetness from frost exposure, and extended harvest periods. Cooler temperatures prevent bolting while improving texture and flavor development. With proper timing (starting 10-12 weeks before frost), fall yields often exceed spring harvests, especially for cold-hardy varieties like purple sprouting types that thrive in chilly conditions.
Conclusion
Broccoli is a "two-season" crop, meaning that you can choose to grow it for a spring or fall harvest. The latter is cooler and extends your harvest. I grow for both seasons so that we always have some available. Choose your varietal based on your climate, selecting heat-tolerant types for late summer plantings and cold-hardy varieties for those that will be exposed to frost.
The selection of varieties is the key to your success. Aim to match the plants with your particular length of season and temperature conditions. Try a few new things every year and keep a record of what does best in your garden. This personal knowledge base is invaluable.
To ensure quality harvests, keep a close eye on the temperatures. Soil thermometer readings should be taken in the morning when the sun isn't shining. Make note of both daily highs and lows, and set up phone reminders when temperatures exceed either of these extremes. When the temperature becomes very hot or very cold, take steps to protect your plants from losing their value as crops.
Try different growing methods each season. Compare container gardening with raised beds. Try different organic fertilizers. Experiment with plant dates. I learn a great deal from my own gardening experiences. Your garden will teach you all you need to know.
External Sources
Frequently Asked Questions
What is the best time to plant broccoli?
Plant broccoli in early spring when soil reaches 40°F (4°C) or in late summer for fall harvest. For spring planting, start seeds indoors 6-8 weeks before last frost. Fall planting requires sowing 10-12 weeks before first frost. Avoid summer heat above 80°F (27°C) which causes bolting.
Does broccoli need full sun or shade?
Broccoli thrives in full sun with at least 6 hours of direct daily light. In hot climates, provide afternoon shade to prevent heat stress. Consistent sunlight ensures proper head formation while partial shade protects plants during temperature spikes above 75°F (24°C).
What should never be planted near broccoli?
Avoid planting these near broccoli:
- Nightshades (tomatoes, peppers) which compete for nutrients
- Strawberries that attract slugs harming broccoli roots
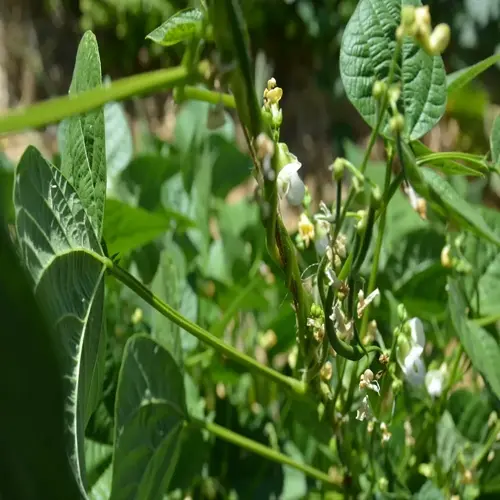
- Beans altering soil chemistry and inhibiting growth
- Mustard greens spreading shared pests and diseases
How often should I water broccoli plants?
Water broccoli with 1-1.5 inches (2.5-3.8 cm) weekly. Increase to 2 inches (5 cm) during heatwaves. Use drip irrigation at soil level in early morning. Check container plants when topsoil dries. Consistent moisture prevents bitterness but avoid waterlogging.
Can broccoli be grown in containers?
Yes, use 5-gallon buckets with drainage holes. Key requirements:
- Soil mix: Equal parts compost, perlite, and topsoil
- Feeding: Liquid seaweed fertilizer every two weeks
- Spacing: One plant per container
- Sun: Minimum 6 hours daily with rotation
What are good companion plants for broccoli?
Ideal companions include:
- Aromatic herbs like dill and rosemary repel pests
- Onion family plants deter aphids and beetles
- Nasturtiums act as trap crops for caterpillars
- Beets and celery with complementary nutrient needs
Why does my broccoli have yellow leaves?
Yellow leaves typically indicate nitrogen deficiency, not disease. Apply blood meal fertilizer if no spots or mold are present. Other causes include overwatering, temperature stress, or compacted soil. Always check soil moisture before watering and ensure proper drainage.
How do you grow broccoli in fall?
Start seeds indoors during summer heat. Transplant seedlings when temperatures drop below 80°F (27°C). Use zone-based timing:
- Zones 3-4: Plant by early July
- Zones 5-6: Mid to late August
- Zones 7-10: September through October
- Mulch heavily and monitor for frost
What makes broccoli heads form properly?
Optimal head formation requires:
- Temperatures consistently between 60-65°F (15-18°C)
- Phosphorus-rich fertilizer during head development
- Consistent moisture without soil drying
- Protection from heat above 75°F (24°C)
- Adequate spacing for air circulation
Can broccoli survive winter frost?
Cold-hardy varieties like Purple Sprouting tolerate frosts down to 20°F (-7°C). Protect plants with row covers below 32°F (0°C). Frost actually enhances flavor but prolonged freezing kills plants. Harvest before temperatures drop below 15°F (-9°C) for survival.