
Knowing exactly when to plant beans determines whether you'll get a lone handful or baskets full of pods. No kidding, beans are the perfect garden starter. They ask for very little indeed and pay handsomely for it!
Success hinges on timing your planting window properly. Get this right and your plants will take off within days. Pay special attention to three non negotiables: your local climate patterns, reliable soil thermometers, and frost date trackers in your area. These control your clock.
Don't worry about being perfect. Beans are forgiving, so much more forgiving than tomatoes or peppers. If you're a complete novice, start with bush beans. They grow quickly, giving you a burst of self-confidence. Believe me, that first bona fide harvest is going to turn you into a gardener.
Container Growing Tips
Transform your balcony and patio into a bean patch! Display a few pots on a balcony or fire escape, where city dwellers can have fresh-picked... beans. I've grown bush beans in 30cm (12-inch) pots on the fire escape. They will thrive if you make pots deep enough for their long roots.
Choose appropriately sized pots. Pole varieties prefer deep pots of at least 45cm (18 inches) so their roots have room. Choose robust trellises. Plastic pots retain moisture better, as my ceramic pots showed last summer during the heatwave, when they dried out almost every day.
Watering becomes of vital importance in containers. During warm spells, examine the soil in the morning and evening, and give plants a thorough soak so that the water drips from the drainage holes. When there is great heat, I water my beans in the morning and evening to prevent their drooping.
Use pot material suitable for your local weather conditions. Plastic works in areas with less rain; heavier ceramic pots are wind-proof yet require regular watering. I add watering crystals to my soil mix because they can help alleviate the stress of a hot spell on my plants.
Soil Mix Formula
- Combine 60% peat-free compost with 30% well-rotted manure and 10% perlite for optimal drainage
- Maintain neutral pH between 6.0-7.0 using garden lime if needed
- Refresh top 8 cm (3 in) of soil monthly during growing season
Watering Protocol
- Water deeply until drainage occurs - typically 1 liter (34 oz) per 30 cm pot daily in summer
- Check moisture 5 cm (2 in) below surface; soil should feel like damp sponge
- Use finger test before watering to prevent root rot from over-saturation
Feeding Schedule
- Apply liquid tomato fertilizer monthly during flowering stage at 15 ml per liter (0.5 oz per quart)
- Mix 30 grams (1 oz) bone meal into topsoil at planting time for phosphorus boost
- Avoid high-nitrogen formulas that reduce bean production
Sunlight Requirements
- Position containers to receive 6-8 hours of direct sunlight daily for optimal growth
- Rotate pots 90 degrees weekly to ensure even sun exposure on all sides
- Use reflective surfaces to maximize light in shaded areas
Pest Management
- Inspect leaves weekly for aphids; spray with diluted soap solution at 10 ml per liter (0.3 oz per quart)
- Place copper tape around container rims to deter slugs and snails
- Introduce ladybugs as natural predators for common bean pests
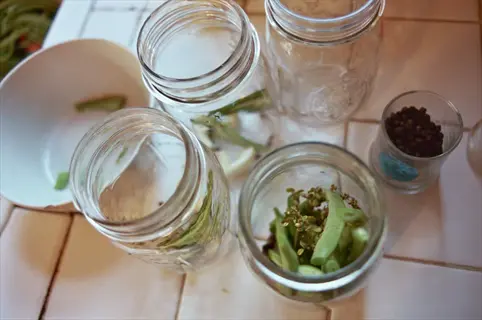
Storing and Preserving Beans
Fresh beans require different treatment from those intended for storage for any extended period. Store unwashed pods in perforated bags at 4 °C (40°F) or 7°C (45°F) for 1 to 2 weeks. For immediate use, try the usual rehydrating procedure for cut flowers - stems are stood in water for an extra "fresher" look.
Blanching. The secret to successful freezing is proper blanching. Boil your beans in 4 litres (1 gallon) of water for 3 minutes, then transfer them to ice water. This effectively stops the enzyme action. Pat them dry and pack them in labelled bags to go in the freezer.
Canning can be dangerous and should only be done with caution. A pressure canner at 10 PSI (69 kPa) must be used. Process pint jars for 20 minutes at 116°C (240°F). Add some citric acid to prevent botulism. Discard any jars immediately that have bulging lids.
Last for years when properly stored. First freeze for 48 hours to kill any remaining insects. Seal in Mylar bags with oxygen absorbers. Store in a cool, dark cupboard at a temperature below 21°C (70°F) and rehydrate for at least 8 hours overnight.
Refrigeration
- Place unwashed beans in perforated plastic bags to maintain humidity between 90-95%
- Store at 4-7°C (40-45°F) for 5-7 days maximum freshness
- Avoid stacking heavy items on top to prevent bruising delicate pods
Root Cellar Storage
- Maintain 10°C (50°F) with 85% humidity using damp burlap sacks
- Arrange beans in single layers in wooden crates for air circulation
- Inspect twice weekly for mold; lasts 2-3 weeks in optimal conditions
Hydration Technique
- Submerge stems in 2 cm (0.8 in) of water like cut flowers
- Cover loosely with plastic wrap; change water daily
- Extends freshness by 3 days compared to dry storage methods
Vacuum Sealing
- Use oxygen absorbers with vacuum-sealed bags for moisture control
- Store at consistent 3°C (37°F) in dark environment
- Prevents dehydration and extends shelf life to 14 days
Ethylene Management
- Store separately from apples/bananas that emit ripening gas
- Use activated charcoal filters in storage containers
- Reduces yellowing and fiber development by 50%
Freezing
- Blanching Process: Boil beans 3 minutes in 4 liters (1 gallon) water then ice-bath shock for equal time
- Drying Method: Pat dry thoroughly before flash-freezing on baking sheets for 2 hours
- Packaging: Use freezer bags with 1 cm (0.4 in) headspace; remove excess air with straw suction
- Temperature: Maintain constant -18°C (0°F); lasts 8-10 months without texture loss
- Thawing: Cook directly from frozen; prevents sogginess from slow thawing
- Yield: 450 grams (1 lb) fresh beans yields 3 cups frozen after preparation
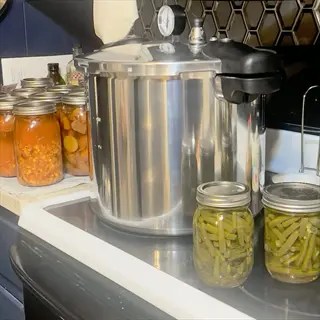
Pressure Canning
- Equipment Requirement: Use dial-gauge pressure canner at 10 PSI (69 kPa) for safety
- Processing Time: Pint jars 20 minutes; quart jars 25 minutes at 116°C (240°F)
- Acidification: Add 1/4 teaspoon citric acid or 15 ml (1 tbsp) lemon juice per jar
- Headspace: Leave 3 cm (1.2 in) space for liquid expansion during processing
- Storage: Keep in dark pantry at 10-21°C (50-70°F); lasts 12-18 months
- Safety Check: Discard any jars with bulging lids or cloudy liquid immediately

Dehydration
- Preparation: Slice beans lengthwise into uniform 0.6 cm (1/4 in) strips
- Blanching: Steam blanch 4 minutes to preserve color before dehydrating
- Temperature: Dry at 57°C (135°F) for 8-12 hours until brittle
- Testing: Properly dried beans snap cleanly without bending
- Storage: Use oxygen-absorber packs in glass jars; lasts 2+ years
- Rehydration: Soak in 82°C (180°F) water for 30 minutes before cooking
Pickling
- Brine Formula: 3:1 vinegar-water ratio with 50 grams (1/4 cup) salt per liter
- Flavorings: Add garlic cloves, dill seeds and mustard seeds per quart jar
- Processing: Water bath can 15 minutes for shelf-stable preservation
- Fermentation: For probiotic version, ferment 3-7 days at 18-22°C (65-72°F)
- Safety pH: Maintain below 4.6 using pH test strips; prevents botulism
- Serving: Ready after 4-week flavor development; lasts 1 year unopened
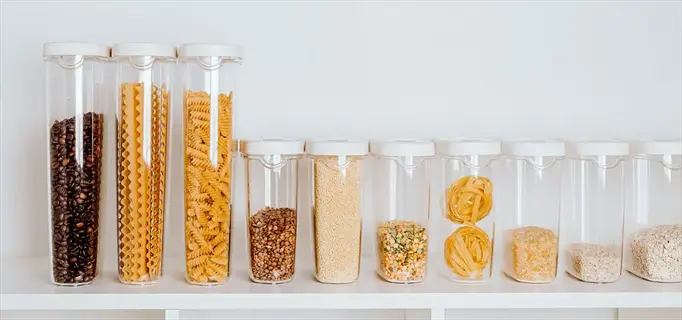
Dry Bean Storage
- Curing: Let bean pods dry on plants until rattling when shaken
- Shelling: Remove beans when pods crack open easily; discard discolored seeds
- Freezer Treatment: Freeze 48 hours to kill potential insect eggs
- Containers: Use Mylar bags with oxygen absorbers or vacuum-sealed glass jars
- Conditions: Store in cool dark place below 21°C (70°F); lasts 2-3 years
- Preparation: Soak overnight in 3:1 water ratio before cooking 1-2 hours
Companion Planting Partners
Beans form wonderful partnerships in the garden, benefiting all. Corn is a natural trellis for pole beans, and in return, beans fix nitrogen for the corn. Plant beans 6-8 in. apart. Bush beans should be interplanted with marigolds as they repel harmful nematodes.
Select companions for your bean varieties. Pole beans climb on cucumbers that share their vertical space; plant them 18 in. apart. Nasturtiums, that repel aphids' worst enemy, the ladybird beetle, should be planted 12 in. apart in a circle about the bush beans. Both will flourish.
Stay away from these plants! Potatoes will put blight on your Beans. Onions will stunt the growth of other plants because of their roots competing for space in the soil below ground. For best results, keep your crops at least 90 centimeters (3 feet 6 inches) apart from each other. Trust me; I lost a harvest by planting potatoes too close to onion plants, and you don't want to make the same mistake!
Herbs such as basil improve the health of beans significantly due to their strong odors, which repel Mexican bean beetles. Plant a 30-centimeter perimeter around the beans to act as a barrier and help attract pollinators, which will in turn produce more pods.
Three Sisters Method
- Implementation: Plant corn first, add pole beans when corn reaches 15 cm (6 in), sow squash 1 week later
- Spacing: 90 cm (3 ft) mounds with 4 corn stalks, 3 bean plants, 2 squash vines per mound
- Benefits: Corn supports beans, beans fix nitrogen, squash shades soil and suppresses weeds
Pest-Repellent Borders
- Plants: Basil (Ocimum basilicum), rosemary (Salvia rosmarinus), and thyme (Thymus vulgaris)
- Placement: Surround bean patch with 30 cm (12 in) wide herb border
- Effect: Strong scents deter Mexican bean beetles and aphids while attracting pollinators
Nitrogen-Fixing Allies
- Plants: Crimson clover (Trifolium incarnatum) and vetch (Vicia sativa)
- Method: Sow between bean rows as living mulch after bean establishment
- Benefit: Boosts soil nitrogen by 25% and reduces fertilizer needs for subsequent crops
Trap Cropping
- Plants: Radishes (Raphanus sativus) and Chinese cabbage (Brassica rapa)
- Placement: Plant sacrificial rows 1.5 m (5 ft) from main bean patch
- Effect: Lures flea beetles and aphids away from beans; remove infested trap plants weekly
Pollinator Attractors
- Plants: Borage (Borago officinalis) and sunflowers (Helianthus annuus)
- Timing: Sow 2 weeks before beans to establish blooms during flowering
- Impact: Increases bean pollination rates by 40% leading to higher pod yields
Soil Preparation Essentials
First, get the soil tested for pH with samples taken at a 15cm (6-inch) depth in five locations. You want a pH reading of 6.0-7.0 for beans to thrive. I had very acidic, heavy soil last year, and adding 500g/m² of lime made a significant difference to my crop.
Prepare differently for bush and pole varieties of beans. Bushy sorts require land with a tilled depth of at least 20 cm (8 inches), while climbing types benefit from a depth of 30 cm (12 inches). For heavy clay and coarse sand, add at least 5 cm of coarse sand, and sandy soils are improved with a 7.5 cm layer of compost.
Amendments are about being right! You will want to create a balanced fertilizer; 100g/m² (3.5oz/yd²) will work before planting. To create new beds, add 10-15L of compost per square meter to incorporate into your soil. I prefer not to use fresh manure because it can burn your roots; it is better to use well-rotted compost instead.
Quick fixes to drainage problems are raised beds (15-20 cm high) for clay soils and mixing 25% perlite into sandy soils. All beds should slope at a rate of 2% to allow for proper drainage. If drainage is not adequate, root rot can destroy crops, as I have experienced.
pH Testing
- Collect samples from 5 locations at 15 cm (6 in) depth
- Use digital meter or test kit; ideal range is 6.0-7.0
- Adjust with lime (raise pH) or sulfur (lower pH) as needed
Tilling Technique
- Till soil when moist but not wet - crumbles in hand
- Depth: 30 cm (12 in) for pole beans, 20 cm (8 in) for bush varieties
- Remove rocks >2.5 cm (1 in); break large clods
Organic Matter Integration
- Mix 10-15 liters (2.6-4 gal) compost per m²
- For new beds: add 5 cm (2 in) layer of aged manure
- Incorporate 2 weeks before planting to allow settling
Drainage Improvement
- Create raised beds 15-20 cm (6-8 in) high in clay areas
- Mix in 30% coarse sand or perlite in waterlogged soils
- Slope beds 2% grade for runoff in heavy rain regions
Pre-Planting Fertilization
- Apply 10-20-10 NPK fertilizer at 150 g/m² (5 oz/yd²)
- Mix blood meal (for nitrogen) 50 g/m² (1.8 oz/yd²)
- Avoid fresh manure - can burn roots and introduce pathogens
Ideal Planting Time by Climate
Your date of planting will be more dependent on soil temperature than the calendar. Pole beans require 12°C (54°F) minimum, and bush beans can take as little as 10°C (50°F). For convenience, I use a digital thermometer inserted into the earth to a depth of 10cm. To plant too early is to secure a bad supply of rotten seeds.
In temperate zones, you will have to watch the frost dates. Until then, plant your bush beans two weeks after the last frost, and pole beans three weeks after the last frost. On the coast, you must delay a fortnight more, on account of the cool spring weather; in the mountains, you will have to wait until the nights become warm (5° C, or 41° F).
Urban gardeners prosper. The city heat islands allow you to plant bush beans 1-2 weeks earlier than rural areas. Use this to your advantage for succession planting, but cover them with shadecloth when the pavement temperature reaches 35°C (95°F), or they'll scorch.
To avoid the hottest time of the day, tropical farmers typically plant their crops during the wet season, utilizing irrigation as a means of cultivation. Morning shade is used to protect the beans from damage caused by temperatures higher than 32°C (90°F). Beans grown in dry areas should be planted in February or March, or in September or October, for optimal growth and yield.
Tropical Regions
- Plant during rainy season for natural irrigation
- Provide afternoon shade in temperatures >32°C (90°F)
- Use mulch to reduce soil temperature by 5°C (9°F)
Temperate Zones
- Start indoors 4 weeks before last frost date
- Use black plastic mulch to warm soil 2 weeks earlier
- Succession plant bush beans every 3 weeks until midsummer
Cold Climates
- Pre-warm soil with cloches or cold frames for 1 week
- Choose fast-maturing bush varieties (<60 days)
- Use row covers until nighttime temps stabilize above 10°C (50°F)
Coastal Microclimates
- Plant 2 weeks later than inland areas due to cooler springs
- Select wind-tolerant varieties like 'Kentucky Wonder'
- Create windbreaks with burlap screens
Urban Heat Islands
- Plant 1-2 weeks earlier than rural areas in spring
- Provide shade cloth when pavement temps exceed 35°C (95°F)
- Water twice daily in container gardens during heat waves
5 Common Myths
Beans must be soaked overnight before planting for better germination.
Soaking beans increases rot risk in cold soil with minimal benefits. Modern seed varieties germinate efficiently without soaking in warm, moist soil. Unsoaked seeds achieve comparable germination rates to soaked ones within 10 days when planted correctly. Always use dry seeds in soil above 12°C (54F) for optimal sprouting.
Planting beans immediately after the last frost date is safe.
Soil temperature matters more than air temperature for bean germination. Planting in cold soil below 10°C (50F) causes seed rot before sprouting. Wait 1-2 weeks until soil reaches at least 12°C (54F) measured at 10 cm (4 in) depth. Use black plastic mulch to warm soil faster if needed.
Beans require heavy nitrogen fertilization for best growth.
Beans naturally fix nitrogen through rhizobium bacteria in their root nodules. Excessive nitrogen fertilizers promote leafy growth instead of pod development. Apply phosphorus-rich fertilizer at planting but avoid high-nitrogen formulas. Supplement nitrogen only if clear deficiency symptoms appear after flowering begins.
Mulch should cover bean stems completely to retain moisture.
Covering stems with mulch encourages stem rot diseases. Maintain 5-8 cm (2-3 in) clearance around plant bases while mulching between rows. Use breathable materials like straw that allow air circulation. Proper mulching reduces weeds significantly without increasing disease pressure on bean stems.
Watering beans daily maximizes pod production and growth.
Overwatering causes root rot, bloom drop, and reduces pod production. Beans thrive with deep, infrequent watering - provide 2.5 cm (1 in) weekly, increasing to 4 cm (1.5 in) during flowering. Check soil moisture 5 cm (2 in) deep and water only when dry. Drip irrigation prevents foliage diseases better than overhead watering.
Conclusion
Timing controls everything. Early planting may result in frost; late planting does not produce beans. Your frost date in the spring, as indicated by your local soil thermometers, is your guide. You succeed only by planting early enough to catch Mother Nature's fancy.
Consider this: with proper timing you can plant to your climate zone, amend your soil with the _correct_ pH and forego the "myths" of soaking overnight. That way everything works together to give you healthy plants brimming with peas!
And now for some action. Measure your soil temperature today with a simple thermometer. Study the companion planting guide before reaching for your shovel. Put these lessons into practice this season, and your future self will be rewarded with basket loads of heartbreakingly sweet crisp beans.
External Sources
Frequently Asked Questions
What is the best month to plant beans?
Planting months vary by climate: February-April in subtropical zones, late May-June in cold regions, and year-round in tropics avoiding summer heat. Soil temperature must reach at least 12°C (54°F) for successful germination.
Can beans be grown during fall?
Yes, fall planting works in subtropical climates (August-October) and arid regions (September-October). Use fast-maturing bush varieties and ensure soil remains above 10°C (50°F). Protect young plants from early frosts with row covers.
Are beans easy for beginners?
Beans are ideal starters due to low maintenance needs. Key tips:
- Plant in warm soil after frost danger passes
- Avoid overwatering to prevent root rot
- Use trellises for pole varieties
- Harvest regularly to boost production
What should never be planted near beans?
Avoid potatoes and onions near beans. Potatoes share disease risks and compete for nutrients, while onions stunt bean growth through root interactions. Maintain minimum 90 cm separation from incompatible plants.
How long until bean harvest?
Growth duration depends on type: Bush beans mature in 50-60 days, pole beans in 60-90 days. Fast-maturing varieties in cold climates reach harvest in under 60 days when planted in pre-warmed soil.
What are essential bean-growing tips?
Critical practices include:
- Test soil pH and maintain 6.0-7.0
- Use nitrogen-sparing fertilizers
- Provide 6-8 hours of daily sunlight
- Mulch with stem clearance to prevent rot
- Water deeply but infrequently
Do beans need frequent watering?
Beans thrive with deep, infrequent watering. Provide 2.5 cm (1 inch) weekly, increasing to 4 cm during flowering. Overwatering causes root rot - always check soil moisture 5 cm deep before watering.
Are coffee grounds good for beans?
Yes, coffee grounds add nitrogen and improve drainage when composted first. Mix sparingly into soil to avoid acidity imbalance. Never use fresh grounds directly as they can inhibit growth.
What makes green beans grow faster?
Accelerate growth by:
- Pre-warming soil with black plastic mulch
- Using inoculants for nitrogen fixation
- Planting in raised beds for drainage
- Applying phosphorus-rich starter fertilizer
- Maintaining consistent soil moisture
Which beans are easiest to grow?
Beginner-friendly varieties include bush beans like 'Contender' and 'Provider', which mature quickly and require no support. Dwarf varieties also thrive in containers with minimal space.