
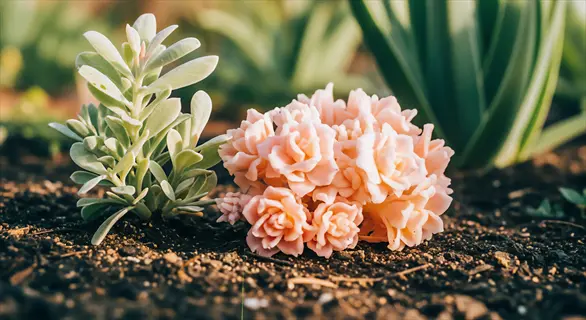
Discovering when to plant asparagus is your ticket to perennial success with this crop, as get it wrong. Your crowns could languish, but get it right, and you'll benefit from harvests for at least 15 years. Those who think long-term will have to learn a little patience, but it'll be worth it!
You'll need to wait 2-3 years before picking your first spears. It's a minimum time, but your plants will need to establish a strong root system to produce future abundant harvests. I've seen impatient gardeners fail miserably after yielding a meager harvest the first season!
Your reward will be decades of delicious asparagus; once you get all the groundwork laid, you'll hardly have to lift a finger. The spears are sweet and tender and always much better than any at the store. Just concentrate on timing, soil preparation, and planting; get them right, and the rest is easy.
Best Time to Plant Asparagus
Plant asparagus crowns in the spring when the soil temperature reaches approximately 50 degrees, and the danger of frost has passed. Anywhere in the country will suffice, particularly in zones 3-7, which are colder. Wait till the ground has dried out after the snow has gone. If the ground is too wet, the roots are liable to rot before they start growing, and that happened to me, for I did not make the effort to learn the correct dates.
Fall planting works well in warmer zones, where the soil does not drop below 40 degrees F. Plant six weeks before the first frost to give roots a chance to grow. For success in the fall, use strong, two-year-old crowns; in my experience, this is the best way to plant in the fall, as young crowns are winter tender. I recommend Jersey Knight to southern gardeners.
Everywhere, the question of drainage regulates the question of filling. Dig a hole and fill it with water; if, at the end of four hours, there is any water in it, the beds must be raised. Heavy rains will prevent planting at any time during the summer. I have a habit, when possible, of adding grit to the clay two months before the plants are planted.
Crown maturity. One year crowns require spring planting to be safe. It is possible to plant two year crowns in the autumn in temperate climates. Always check that the buds are plump and the roots are free from mold before placing them in the trench.
Cool Climate Zones
- Priority: Spring planting only after frost danger passes in late April-May
- Critical: Improve drainage with raised beds to prevent crown rot
- Timing: Delay planting if soil remains below 50°F (10°C)
- Protection: Use row covers for unexpected late frosts in May
Warm Climate Zones
- Option: Fall planting during September-December in southern states
- Advantage: Winter rains reduce irrigation needs significantly
- Caution: Avoid planting during heavy rain periods causing waterlogging
- Variety: Select heat-tolerant types like Jersey Knight for best results
Coastal Zones
- Timing: Spring planting delayed until May-June for warmer soil
- Challenge: Salt spray requires windbreaks and raised bed solutions
- Drainage: Mix sand into soil at 40% ratio for optimal drainage
- Variety: Choose salt-tolerant varieties like Millennium
Mountainous Zones
- Window: Short spring planting period in June-July after snowmelt
- Protection: Use deep mulch (6 inches) for insulation against frost
- Drainage: Create sloped beds to prevent water accumulation
- Variety: Cold-hardy types like Mary Washington recommended
Transitional Zones
- Flexibility: Both spring and fall planting options available
- Monitoring: Track soil temperature with thermometer for ideal timing
- Drainage: Amend clay soils with 30% compost for better drainage
- Strategy: Plant 2-year crowns in fall for earlier harvest
Preparing the Site and Soil
Asparagus requires full sun; for northern zones, southern exposures are preferable, or your bed should receive at least 6 to 8 hours of direct light daily. Don't plant on a north-facing slope or at the foot of a building where the bed would be shaded. Morning sun dries the dew, reducing the chances of fungal diseases.
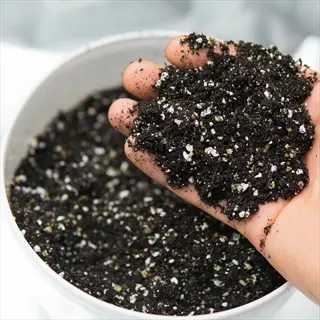
Add amendments according to your soil type. Heavy clay? Add 40% coarse sand and more than 30% compost. Sandy soils? Add 25% of peat moss and top with 3 inches of compost. Loam? Just add the 2 inches of compost!
Dig your trenches 6-8 inches (15-20cm) deep in clay and 10-12 inches (25-30cm) deep in sandy soils, for deeper trenches are necessary in the latter, to prevent the roots from drying out. I always form a pyramid of soil every foot for the support of the crowns, and then spread the roots downwards as I spread the rays of the sun.
Take soil tests at five locations, at a 6-inch depth. Asparagus is happiest at a pH of 6.5 to 7.0, and you can expect reasonable production if the soil pH is 6.0 or higher (some tolerant soils are below this range). Add 5 pounds of dolomitic lime per 100 square feet to acid soils. Reduce strongly alkaline soils by applying 2 kg of sulfur per 100 square feet three months before planting.
Sunlight Requirements
- Minimum: 6-8 hours direct sunlight daily for optimal spear production
- Orientation: South-facing slopes preferred in northern hemisphere locations
- Shade Impact: Reduces yield by 30-40%; avoid tree shadows and buildings
- Measurement: Use sun mapping apps to track seasonal light patterns
- Adjustment: Morning sun critical for drying dew to prevent fungal diseases
- Exception: Partial shade acceptable in extremely hot southern climates
Wind Protection
- Necessity: Prevents fern breakage and crown dehydration in exposed areas
- Solutions: Install windbreaks 15-20 feet upwind using burlap or shrubs
- Height: Barriers should be 50% taller than mature ferns (6+ feet)
- Placement: Avoid creating frost pockets with solid barriers
- Materials: Use permeable materials like willow fencing for airflow
- Maintenance: Inspect windbreaks annually for damage after winter storms
Slope and Drainage
- Ideal Gradient: 2-5% slope for natural water runoff without erosion
- Problem Areas: Avoid low-lying spots where frost or water accumulates
- Solution: Create berms or raised beds in flat areas for drainage
- Testing: Dig 12-inch hole, fill with water; should drain in 4 hours
- Correction: Add French drains if drainage exceeds 12 hours
- Measurement: Use laser level for precise slope assessment
Soil Depth
- Minimum: 18 inches of workable soil for deep root penetration
- Problem: Shallow bedrock requires raised beds at least 12 inches deep
- Testing: Probe with soil auger to check for compaction layers
- Amendment: Double-digging technique to break up hardpan subsoil
- Container Alternative: Half wine barrels for limited-space solutions
- Warning: Avoid areas with utility lines or septic systems below
pH Zones
- Target Range: 6.5-7.0 pH for optimal nutrient availability
- Testing: Collect samples from 5 locations at 6-inch depth
- Acidic Soil: Apply 5 lbs dolomitic lime per 100 sq ft per pH point
- Alkaline Soil: Add 2 lbs sulfur per 100 sq ft per pH point
- Timing: Amend 3-6 months before planting for full reaction
- Monitoring: Retest every 3 years using professional lab analysis
Well-Rotted Manure
- Application: 3-inch layer mixed into top 12 inches of soil
- Timing: Apply 4 weeks before planting to allow integration
- Benefit: Provides slow-release nitrogen for crown development
- Caution: Fresh manure burns roots; must be composted 6 months
- Source: Horse or cow manure preferred over poultry
- Testing: Ensure internal temperature reached 130°F (54°C) during composting
Coarse Sand
- Ratio: 40% by volume for clay soils
- Function: Improves drainage and prevents waterlogging
- Testing: Squeeze test - soil should crumble when moist
- Alternative: Perlite or grit for container growing
- Grain Size: 1-2mm particles ideal for soil structure
- Limitation: Avoid fine sand which causes compaction
Lime
- Purpose: Raises pH from acidic to neutral (target 6.5-7.0)
- Amount: 5 lbs per 100 sq ft for each pH point increase
- Timing: Apply 3 months before planting for full reaction
- Test: Retest soil 2 weeks after application
- Types: Dolomitic lime adds magnesium; calcitic for calcium
- Safety: Wear mask during application to prevent inhalation
Balanced Fertilizer
- Formula: 10-10-10 NPK ratio for initial trench preparation
- Amount: 1.5 lbs per 100 sq ft incorporated into trench base
- Precaution: Avoid high-phosphorus fertilizers unless deficient
- Organic Option: Bone meal for phosphorus, kelp for potassium
- Release: Slow-release granules preferred for steady nutrition
- Application: Water thoroughly after applying to activate
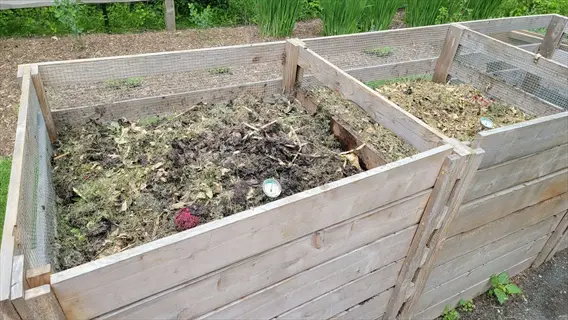
Compost
- Quality: Fully decomposed, earthy-smelling material
- Function: Improves moisture retention in sandy soils
- Application Rate: 3-4 inch layer across entire bed surface
- Testing: Ensure carbon/nitrogen ratio of 30:1 for ideal breakdown
- Materials: Mix greens (vegetable scraps) and browns (leaves)
- Curing: Allow to mature 2 months before use
Gypsum
- Use: Breaks up clay without altering pH levels
- Application: 10-15 lbs per 100 sq ft worked into topsoil
- Benefit: Adds calcium and sulfur for root development
- Effect: Visible soil flocculation within 3-4 weeks
- Frequency: Apply annually in heavy clay regions
- Limitation: Ineffective in sandy or low-sodium soils
Biochar
- Function: Increases soil carbon and nutrient retention
- Ratio: 10% by volume mixed with compost before application
- Activation: Charge with compost tea for 2 weeks before use
- Benefit: Reduces fertilizer requirements by 20-30%
- Source: Hardwood-derived biochar has highest porosity
- Caution: Low-quality biochar may contain contaminants
Worm Castings
- Application: 1-inch topdressing around established crowns
- Benefit: Provides 5% nitrogen and beneficial microbes
- Tea Recipe: Steep 1 cup castings in 5 gal water for 48 hours
- Timing: Apply monthly during growing season
- Storage: Keep in cool, dark place to maintain microbial life
- Yield Impact: Increases spear production by 15-20%
Peat Moss
- Use: Water retention amendment for sandy soils
- Ratio: 25% by volume mixed thoroughly with native soil
- Moistening: Pre-wet before use to improve absorption
- Environmental Note: Consider coconut coir as sustainable alternative
- pH Impact: Slightly acidic (3.5-4.5); requires lime balance
- Application: Incorporate 6 inches deep for maximum benefit
Perlite
- Function: Aeration amendment for heavy soils
- Ratio: 30% by volume in clay; 15% in loam
- Particle Size: Coarse grade (3-6mm) for perennial beds
- Sterility: Pre-baked to eliminate pathogens and weed seeds
- Durability: Maintains structure for 5+ years
- Alternative: Vermiculite for higher water retention needs
Planting Methods: Crowns vs. Seeds
Choose the crowns option, as you can expect a harvest 2-3 years sooner than seeds that require 3-4 years to mature. Crowns have a fully formed root system that matures more quickly than natural teeth. Seeds must be germinated at 68°F to 77°F degrees, then transplanted outside. I recommend crowns for beginners, as they avoid the sometimes tricky phase of seedling.
Plant the crowns of the buds up on the soil mounds, with the roots spread out to reach the bottom of the trench. They should be planted as the tentacles of an octopus might be planted at the bottom of a trench. Cover the roots with about 2 inches of soil, but leave the buds showing. As the ferns grow, more soil should be gradually added until the soil is level.
The best time to start your seeds indoors is 12 weeks before your last frost date. Your seedlings will need to remain warm and moist throughout this period, and a seedling heat mat will ensure that consistent warmth reaches the seed, enabling reliable germination. Seedlings should be hardened off before being transplanted outside. This will help to prevent them from being shocked by their new environment.
Crowns are more expensive, but you have less planting to do. You put the crowns in once for all, in trenches, and then you can safely forget them for a year; whereas your seeds want constant attention to see that they turn up all right, to thin them, and to harden them. Which you can best afford determines the question.
Crown Preparation
- Soaking: Submerge crowns in water for 15 minutes before planting
- Inspection: Select plump, mold-free crowns with intact buds
- Timing: Plant immediately after last spring frost or early fall
- Handling: Avoid damaging brittle roots during placement
- Quality: Choose certified disease-free 1-2 year old crowns
Trench Configuration
- Depth: 6-8 inches for clay, 10-12 inches for sandy soils
- Width: Minimum 12 inches wide for root spreading
- Base: Mix 2 inches compost with native soil in trench bottom
- Mounding: Form 4-inch high soil pyramids every 12 inches
- Spacing: 18 inches between crowns, 3 feet between rows
Placement Technique
- Orientation: Position crowns bud-up on soil mounds
- Root Spread: Fan roots downward without forcing or bending
- Coverage: Initial 2-3 inch soil layer over roots only
- Progressive Fill: Add soil as ferns grow until trench filled
- Watering: Soak immediately after planting to settle soil
Post-Planting Care
- Mulching: Apply 3-inch straw layer to retain moisture
- Weed Control: Hand-weed within 6 inches of new crowns
- Frost Protection: Cover with row cloth during spring cold snaps
- Monitoring: Expect spear emergence in 2-3 weeks
- First Year: No harvest; allow full fern development
Common Errors
- Depth Mistake: Planting too shallow (under 6 inches)
- Water Error: Overwatering causing crown rot in clay soils
- Timing Issue: Planting during summer heat stress
- Spacing Fault: Crowding crowns under 12 inches apart
- Cover Blunder: Burying buds completely during initial planting
Seed Preparation
- Soaking: Submerge seeds 2 hours in 68°F (20°C) water before sowing
- Viability Check: Float test - discard seeds floating in water
- Timing: Start indoors 12-14 weeks before last frost date
- Sterilization: Use pasteurized seed-starting mix to prevent damping-off
- Storage: Keep unused seeds in cool, dark place for 3 years
Germination Process
- Depth: Sow ½ inch deep in seedling trays
- Temperature: Maintain 68-77°F (20-25°C) constant soil temperature
- Moisture: Keep soil damp but not waterlogged with spray bottle
- Light: Provide 14 hours daily under grow lights after sprouting
- Timeline: Expect germination in 14-21 days
Seedling Management
- Thinning: Remove weakest seedlings; keep strongest per cell
- Feeding: Apply half-strength liquid fertilizer after 4 true leaves
- Hardening: Gradually expose to outdoor conditions over 7 days
- Transplant Size: Move when seedlings reach 6 inches tall
- Spacing: Plant 12 inches apart in nursery bed
Field Transplanting
- Timing: Early spring after hardening for 1-year seedlings
- Method: Use same trench technique as crowns with mounds
- Depth: Match original nursery soil level on stem
- Watering: Daily for first week to reduce transplant shock
- Protection: Shield from direct sun for 3 days with shade cloth
Growth Timeline
- Year 1: Develop root system in nursery bed
- Year 2: Transplant to permanent location
- Year 3: Light harvest (2-3 weeks maximum)
- Year 4+: Full 8-week harvest seasons
- Note: No harvest during first two field years
Essential Care Routine
Asparagus should be watered differently according to soils and weather: sandy soils being well watered every three days, in hot weather, and clay soils once a week; but during a period of drought I water fully an inch and a half per week. I use lines of drip tubes to water the root without wetting the foliage, otherwise it is treacle to the diseases which infest it.
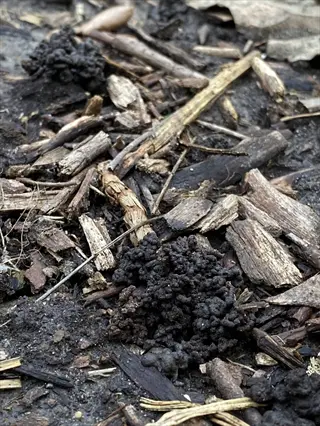
Apply straw mulch 3 inches thick in summer, but reduce it to 1 inch in spring. Renew mulch every autumn before winter, using shredded leaves or composted bark as a replacement. However, avoid using fresh grass clippings, as they can create unfavorable nitrogen conditions in the beds.
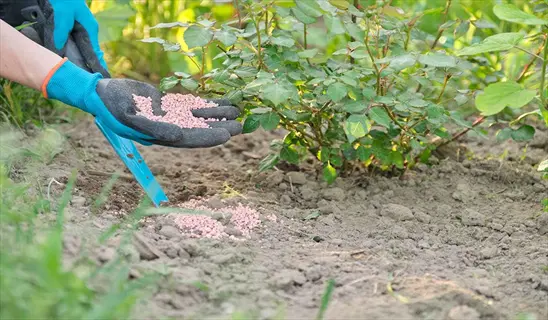
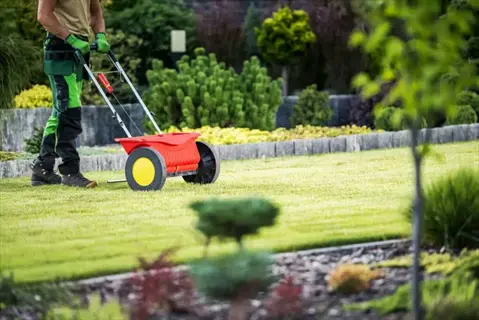
Fertilize with a balanced 10-10-10 fertilizer before the spears emerge in spring, and then switch to a high-nitrogen feed after the harvest ends. I never fertilize closer than 6 weeks to frost. I apply my compost tea monthly while the ferns are showing for an organic feed.
Weed Control: Hand pulling is effective for weeds, particularly within eight inches, or so, of the crowns of plants. Sow some clover between the rows and it will stifle the intruders. Flame-weeding the paths, keeping it at least a foot from the plants, takes care of approaching weeds. The mulched barriers in the aisles will effectively stop any invasion.
Watering Management
- Minimum: 6-8 hours direct sunlight daily for optimal spear production
- Orientation: South-facing slopes preferred in northern hemisphere locations
- Shade Impact: Reduces yield by 30-40%; avoid tree shadows and buildings
- Measurement: Use sun mapping apps to track seasonal light patterns
- Adjustment: Morning sun critical for drying dew to prevent fungal diseases
- Exception: Partial shade acceptable in extremely hot southern climates
Mulching Techniques
- Materials: Straw, shredded leaves, or composted bark
- Application: 3-inch layer maintained year-round
- Seasonal Adjust: Reduce to 1 inch in spring for soil warming
- Renewal: Replenish annually before winter freeze
- Avoid: Fresh grass clippings (causes nitrogen imbalance)
- Benefit: Suppresses weeds and maintains soil temperature
Feeding Schedule
- Early Spring: Balanced 10-10-10 fertilizer (1 lb/100 sq ft) before spears emerge
- Post-Harvest: High-nitrogen fertilizer (e.g., blood meal) in late June
- Organic Options: Compost tea monthly during fern growth phase
- Soil Test Rule: Apply phosphorus only if deficiency confirmed
- Container Plants: Liquid fertilizer every 2 weeks May-August
- Caution: Avoid fertilizing within 6 weeks of first frost
Weed Control
- Hand Removal: Essential within 8 inches of crowns
- Shallow Cultivation: Less than 2 inches deep pre-harvest
- Flame Weeding: For paths; avoid within 1 foot of ferns
- Cover Crops: Clover between rows suppresses weeds naturally
- Mulch Barrier: 6-inch straw layer in aisles
- Herbicide Warning: Never use near spears or ferns
Fern Support
- Structure: Stake-and-twine "fences" on both sides of rows
- Height: Support at 24 and 48 inches for 6-foot ferns
- Installation: Early June before ferns reach 18 inches
- Materials: Bamboo stakes and jute twine (biodegradable)
- Wind Protection: Critical in exposed sites to prevent crown damage
- Removal: Cut down with ferns after first hard frost
Harvesting and Maintenance
Harvest your spears when they are 6 to 8 inches tall, before the tips begin to loosen. Snap them at the soil line or sever them with scissors a couple of inches below the ground. Pick them every 24 to 48 hours, especially during the peak season. Take only half the spears that are coming up per plant. I disinfect my knife between plants to prevent the spread of diseases.
Crowded crowns after 3-5 years, late in the winter, digging carefully, separate to either conserve regions of 3+ buds, or to discard woody leftovers to replant the new sprouts in some new soil. Continue to water daily for at least two weeks after. (If you're dividing to thin out the plants, the same applies; recovery can be long enough that you skip a harvest.) I do this before spring growth, in winter, when the plant is dormant.
Clear all plant debris after the first hard frost. Remove ferns, fallen spears, etc. (This prevents rust and fusarium from overwintering). Apply a new 4-inch layer of mulch before the first freeze. Disinfect tools in a bleach solution. I installed wire mesh to protect against rodents in the winter.
Ideally, store in 1 inch of water and keep them upright in the refrigerator, where they'll last for about 10 days. To freeze, blanch in boiling salted water for 3 minutes, then pack airtight. For preservation, pressure can be at 240°F for 30 minutes. Take them out to dry before you put them in the refrigerator, or they'll mold.
Timing Principles
- First Harvest: Year 3 for crowns (Year 4 for seed-grown plants)
- Duration: 6 weeks initial harvest; extend to 8 weeks in subsequent years
- Daily Window: Harvest in early morning when spears are coolest
- Temperature Check: Stop harvesting when soil exceeds 85°F (29°C)
- End Signal: Spear diameter drops below pencil thickness
- Disease Prevention: Discontinue harvest during wet conditions to avoid rust spread
Proper Harvesting Technique
- Height: Cut at 6-8 inches tall before tips loosen
- Method: Snap spears at soil line or cut 1-2 inches below surface
- Frequency: Harvest every 24-48 hours during peak season
- Tool Care: Disinfect knife with 10% bleach solution between plants
- Yield Limit: Take max 50% of emerging spears per plant daily
- Pest Check: Inspect spears for beetle eggs before storage
Post-Harvest Handling
- Cooling: Submerge in ice water within 30 minutes of picking
- Storage: Refrigerate upright in 1 inch water at 34°F (1°C)
- Fresh Duration: 7-10 days shelf life with proper humidity
- Freezing: Blanch for 3 minutes then freeze in airtight bags
- Canning: Pressure can at 240°F (116°C) for 30 minutes
- Mold Prevention: Pat dry before refrigeration
Disease Prevention
- Sanitation: Remove all harvest debris from beds daily
- Rust Control: Apply copper fungicide at first sign of orange pustules
- Airflow: Maintain 18-inch spacing between plants
- Resistant Varieties: Plant Jersey Knight or Millennium hybrids
- Tool Hygiene: Clean shears with alcohol after infected plants
- Crop Rotation: Avoid replanting asparagus in same soil for 5 years
Pest Management
- Asparagus Beetle: Hand-pick adults; apply neem oil to larvae
- Cutworm Control: Use cardboard collars around young spears
- Prevention: Remove overwintering sites by clearing fern debris
- Beneficials: Introduce ladybugs for aphid control
- Monitoring: Check spear tips daily during harvest season
- Organic Spray: Pyrethrin for severe infestations
Crown Division
- Frequency: Every 3-5 years in late winter
- Method: Dig carefully; separate into sections with 3+ buds
- Replanting: Use fresh soil; discard woody center pieces
- Recovery: Water daily for 2 weeks; no harvest that year
- Timing: Best during dormancy before spring growth
- Disease Check: Inspect for fusarium rot during division
Bed Renovation
- Indicators: 30% yield reduction or disease buildup
- Process: Remove old plants; solarize soil for 6 weeks
- Amendment: Add 6 inches compost before replanting
- Crop Rotation: Plant beans for 1 year to restore nitrogen
- Timeline: Allow 2 years before replanting asparagus
- Pest Reduction: Eliminate cutworm habitats during renovation
Off-Season Cleanup
- Fall Cutback: Remove ferns after first hard frost
- Debris Removal: Clear all plant material to prevent rust
- Soil Test: Annually check pH and nutrient levels
- Mulch Refresh: Apply new 4-inch layer before freeze
- Tool Sanitation: Disinfect shears with 10% bleach solution
- Rodent Protection: Install wire mesh around beds
Disease Control
- Fusarium Wilt: Remove infected plants; solarize soil
- Rust Management: Apply sulfur spray in early spring
- Prevention: Avoid overhead irrigation in established beds
- Resistant Varieties: Prioritize Jersey series hybrids
- Diagnosis: Submit samples to extension labs for testing
- Crop Rotation: Minimum 5-year break before replanting
Pest Exclusion
- Beetle Barriers: Use floating row covers in spring
- Cutworm Traps: Bury cup traps filled with molasses
- Companion Plants: Grow tomatoes to repel asparagus beetles
- Nematode Control: Apply beneficial nematodes to soil
- Monitoring: Install pheromone traps for early detection
- Wildlife: Use chicken wire fencing against rabbits
5 Common Myths
Many gardeners mistakenly believe that asparagus can be harvested immediately after planting crowns or seeds in the first season
New asparagus plants require 2-3 years of establishment before any harvest should occur. During this period, the plant develops a robust root system and stores energy for future spear production. Premature harvesting weakens the crowns, reduces long-term yields by up to 50%, and often causes plant death. Patience during the initial growth phase ensures decades of abundant harvests from this perennial crop.
A persistent myth suggests that asparagus beds require complete replanting every five years to maintain productivity and vigor
Properly maintained asparagus beds thrive for 15-20+ years without replanting. Annual care including balanced fertilization, proper weed control, and crown division every 3-5 years sustains productivity. Yield decline typically indicates poor drainage, disease, or inadequate nutrition rather than age. Renovation should only occur after 30% yield reduction over two seasons, following thorough soil testing.
There is a widespread assumption that varieties like Jersey Giant and Purple Passion perform identically in all climates and soil conditions
Variety selection critically impacts success as hybrids differ significantly in cold tolerance, disease resistance, and heat adaptation. Jersey series thrives in northern zones with rust resistance, while Millennium tolerates heavier soils. Purple Passion offers superior flavor but lower yields in cool climates. Always match varieties to local conditions through extension service recommendations for optimal results.
Some growers incorrectly maintain that overhead watering is acceptable because asparagus requires consistent moisture throughout its growth cycle
Foliar moisture from overhead irrigation promotes fungal diseases like rust and fusarium wilt. Drip irrigation or soaker hoses deliver water directly to roots while keeping foliage dry. This method also conserves 30-40% more water by reducing evaporation. In disease-prone areas, morning watering allows daytime drying, further minimizing pathogen establishment on spears and ferns.
An uncommonly accepted misunderstanding about the use of fall planting in northern climates with below 20°F (-7C) is that it has a low success rate with young crowns
The use of 2-year-old crowns paired with 6 inches of mulch insulation will allow for successful fall planting in USDA zones 4-7. Allowing roots to become established during the cooler autumn months, without energy being directed to spear development, gives the crowns an opportunity to develop a more extensive root system over the winter and develop 20 percent greater spring growth than those planted at the same time of year as their own crowns. Critical points of reference include that you should plant your crowns 6 weeks before the first hard frost of the year and avoid planting on sites that are wet and waterlogged.
Conclusion
A true long-term investment in the garden, asparagus can be a test of your patience. The three years you "lose" waiting for your first crop is the time it takes to develop strong roots that will produce for decades. I've cared for beds in my garden that were twenty years old. The early rewards are for the strong! Your hard work now will yield delicious spears for many seasons to come.
Successful results depend to a large extent upon three conditions: perfect planting time, thorough soil preparation and equally constant care. Get these three right and your Bed should grow with little trouble on your part; miss one and your spears will either prove weak or disease will attack some spurious member. I always have a sample of my soil tested before planting.
"When you start with crowns instead of seeds, it was stated, you'll produce spears in 1 or 2 years sooner than those produced from seedlings. Through the use of crowns, you will avoid the tender seedling stage and be encouraged to go on when you have obtained a head start with the new garden."
With proper care, you'll be harvesting gourmet asparagus for years to come. Imagine going out each spring and gathering sweet, tender spears. There's nothing quite like that first meal from your bed, and as the years go by, it gets better and better! Start now, and you'll thank your past self.
External Sources
Frequently Asked Questions
When is the optimal time to plant asparagus?
Plant asparagus crowns in early spring after the last frost when soil reaches 50°F (10°C), or in fall for warmer zones. Spring planting avoids frost damage to new spears, while fall planting allows root establishment before winter dormancy.
What should never be planted near asparagus?
Avoid planting these near asparagus:
- Alliums (onions/garlic) compete for nutrients and stunt spear growth
- Potatoes increase disease risk and attract shared pests
- Root vegetables like carrots disturb delicate asparagus root systems
Why does asparagus require multiple years before harvesting?
The three-year wait allows crowns to develop robust root systems and energy reserves. Premature harvesting weakens plants, reducing yields by half and shortening the bed's lifespan. Patience ensures decades of abundant harvests from established perennial roots.
How should asparagus beds be prepared for winter?
Winter preparation involves:
- Cutting down ferns after first hard frost
- Applying 6-inch straw mulch over crowns
- Clearing plant debris to prevent disease
- Installing rodent barriers like wire mesh
Are coffee grounds beneficial for asparagus growth?
Used coffee grounds moderately improve soil when composted first. They add nitrogen and organic matter but must be balanced with carbon-rich materials. Avoid direct application as fresh grounds acidify soil and may inhibit growth in alkaline conditions.
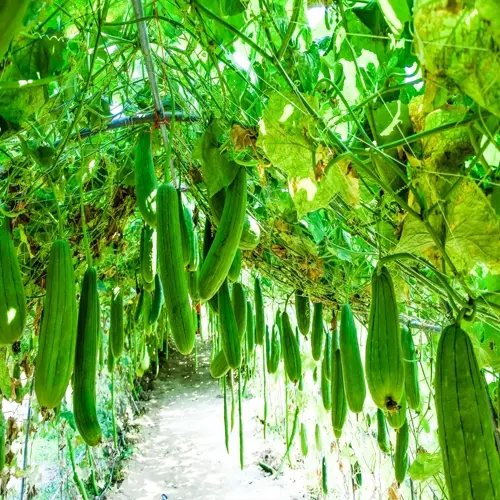
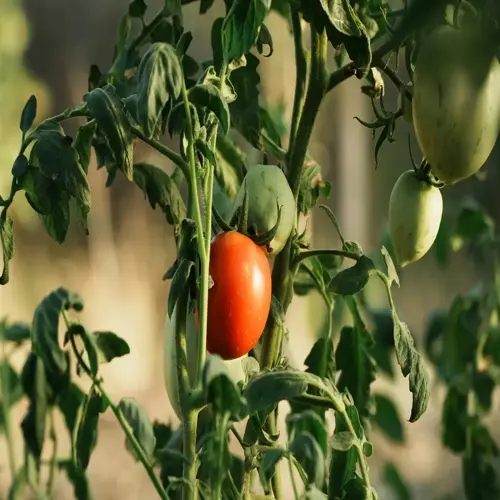
What are the best companion plants for asparagus?
Ideal companions include:
- Tomatoes repel asparagus beetles with solanine
- Parsley attracts beneficial insects that control pests
- Basil improves flavor and deters harmful insects
- Nasturtiums act as trap crops for aphids
Why is salt historically used on asparagus plants?
Salt was traditionally used to suppress weeds in well-drained soils, but modern practices discourage it. Excessive sodium damages soil structure, harms microbial life, and can accumulate to toxic levels. Organic mulches are safer alternatives for weed control.
What maintenance does asparagus need during its first year?
First-year care focuses on:
- Consistent watering without waterlogging
- Hand-weeding within a 8-inch radius
- Applying balanced fertilizer before growth
- Absolutely no spear harvesting
- Mulching to retain moisture
How long do productive asparagus beds typically last?
Properly maintained beds yield for 15-20 years. Key factors include disease-resistant varieties, annual soil testing, crown division every 3-5 years, and avoiding compaction. Decline usually signals soil exhaustion or disease, not age.
What are common mistakes in asparagus harvesting?
Critical errors include:
- Cutting spears below pencil thickness
- Harvesting during wet conditions spreading rust
- Taking over 50% of emerging spears daily
- Using dirty tools that transmit disease
- Continuing harvest when soil exceeds 85°F (29°C)