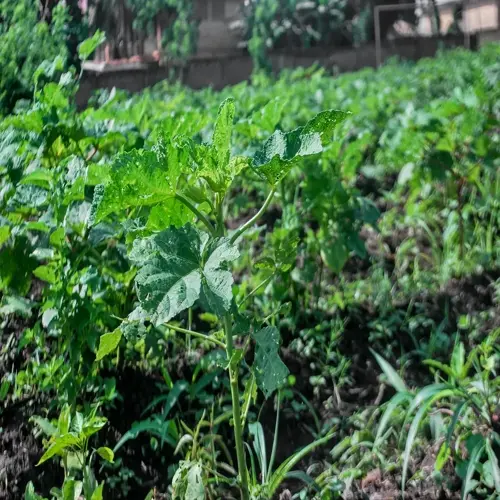

Learning how to grow potatoes becomes a joy when you first dig up a few of your own. There is nothing like hauling out warm little tubers from the ground, the earth fragrant to your fingers, delighting your senses with its solid, dirty weight. You will taste the pleasure in this simple act year after year.
Your reward for little work is very great, for from one potato plant you can sometimes get three, four, or even five pounds. These crops seem to thrive almost anywhere. Potatoes are well worth planting in the ordinary garden, as well as in pots or tubs. The rewards for a little attention are enormous.
Let us walk you through the whole process! From soil preparation with organic matter onwards, we cover choosing your seed potatoes and the best ways to plant them (such as in raised beds). We provide precise instructions on how to care for and harvest your potatoes, as well as how to store them. By the end of your potato season, you'll be feeling pretty pleased with yourself.
Choosing Seed and Varieties
Always choose certified seed potatoes over grocery store tubers. Store-bought potatoes often carry blight and viruses that ruin your soil for years. I've seen an entire crop ruined due to this choice! Those bags from the grocery store say "not for planting" for a very good reason. Certified seeds are disease-tested to ensure their safety for your garden.
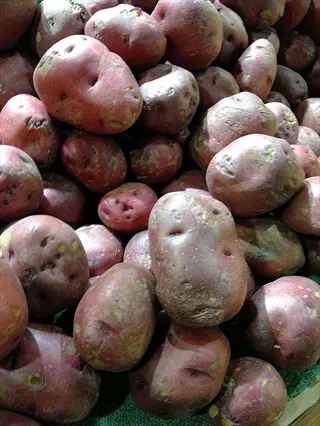
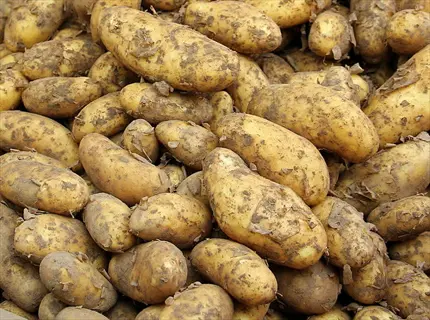
Choose if they suit your climate zone. For cooler USDA zones 3 to 7, consider the Yukon Gold, with its buttery, yellow-fleshed interior. For warmer areas (zones 8-10), the Red Pontiac, with its smooth red skin, is a good option. The Purple Majesty, with its gorgeous violet flesh, will perform well in cooler zones, specifically zones 4 to 8.
Consider your culinary needs as well. Starchy Russets are great for baking; waxy Fingerlings hold shape in a salad. I always plant early Norland for summer eatin' and late Kennebecs for Thanksgiving and Christmas dinners. Choose the right style for your frost dates and soil type.
Certified Seed Sources
- Source Quality: Purchase certified disease-free seed potatoes from garden centers or reputable online suppliers to prevent soil contamination from blight and other pathogens
- Visual Inspection: Examine seed potatoes for firm texture, visible eyes (sprouting points), and absence of mold or soft spots before purchasing
- Size Handling: Cut larger seed potatoes into golf ball-sized pieces ensuring each segment contains at least two healthy eyes for optimal sprouting potential
- Preparation Method: Cure cut pieces in cool humid environment for 48 hours to develop protective calluses before planting
- Risk Avoidance: Never use grocery store potatoes which often contain sprout inhibitors and may carry undetectable diseases that persist in soil for years
- Storage Tips: Keep seed potatoes in breathable paper bags in dark 50°F (10°C) locations until planting time approaches
Planting Preparation
- Chitting Process: Place seed potatoes in egg cartons eyes-up near bright indirect light for 2-4 weeks until sprouts reach 1-2 inches (2.5-5 cm) length
- Timing Strategy: Begin chitting indoors during late winter to accelerate growth before outdoor planting season commences
- Temperature Control: Maintain consistent 60-70°F (15-21°C) temperatures during chitting to stimulate vigorous sprout development
- Spacing Consideration: Position chitting potatoes with adequate air circulation between pieces to prevent mold formation
- Viability Check: Discard any seed potatoes showing shriveling, discoloration or weak sprouts during the chitting period
- Transition Planning: Harden off chitted potatoes by gradually exposing them to outdoor conditions over 7 days before permanent planting
Variety Selection Criteria
- Maturity Timing: Choose early-season varieties (70-90 days) for quick harvests or late-season types (110+ days) for storage capabilities in different climates
- Culinary Needs: Match varieties to cooking purposes - waxy types for salads, starchy for baking, all-purpose for versatile use in meals
- Climate Adaptation: Select cold-tolerant varieties for northern zones and heat-resistant types for southern regions with warmer growing seasons
- Space Considerations: Opt for compact bush varieties when planting in containers or small gardens to maximize limited space efficiency
- Disease Resistance: Prioritize varieties with natural resistance to common local pathogens like blight or scab for reduced maintenance needs
- Yield Expectations: Research average production per plant ranging from 5-10 tubers for standard varieties to 15+ for high-yield fingerlings
Soil Preparation Basics
- Texture Requirements: Prepare loose, well-draining soil amended with 30% organic matter to depth of 12 inches (30 cm) for optimal tuber development
- pH Balancing: Maintain slightly acidic soil between 5.5-6.5 pH using sulfur or pine needles to prevent common scab infections
- Nutrient Management: Incorporate balanced 4-2-2 fertilizer before planting avoiding excessive nitrogen that promotes foliage over tubers
- Moisture Retention: Mix water-absorbing materials like compost or coconut coir to maintain consistent soil moisture during dry periods
- Weed Prevention: Clear planting area thoroughly and apply straw mulch after planting to suppress weed competition with young plants
- Warmth Techniques: Use black plastic covers in early spring to raise soil temperature 5-10°F (3-6°C) faster for earlier planting
Planting Depth Guidelines
- Standard Measurement: Plant seed pieces 4-6 inches (10-15 cm) deep in trenches with eyes facing upward for proper sprout emergence
- Climate Adjustments: Increase depth to 8 inches (20 cm) in sandy soils or hot climates to protect from temperature fluctuations
- Hilling Foundation: Leave 2-3 inches (5-8 cm) of soil piled alongside trenches for future hilling needs as plants grow taller
- Frost Protection: In cold regions, plant shallowly at 3 inches (7.5 cm) initially adding soil gradually after last frost date passes
- Container Specifics: Use minimum 12-inch (30 cm) deep containers filling bottom third with gravel for drainage before adding soil mix
- Spacing Variance: Allow 8-10 inches (20-25 cm) between fingerlings and 12-16 inches (30-40 cm) for larger baking varieties
Yukon Gold
- Maturity Period: Early-season variety ready for harvest in 70-90 days with consistent oval-shaped tubers and smooth thin skin
- Culinary Profile: Buttery yellow flesh maintains texture when boiled or roasted and resists discoloration after cooking
- Growth Habits: Adapts well to raised beds and containers requiring 12-inch (30 cm) spacing between plants in full sun locations
- Climate Suitability: Thrives in USDA zones 3-7 tolerating cooler spring temperatures down to 45°F (7°C) when properly hilled
- Yield Potential: Produces 8-10 medium-sized potatoes per plant with proper watering and organic matter supplementation
- Storage Capacity: Maintains quality for 2-3 months (8-12 weeks) in 40-50°F (4-10°C) dark storage with moderate humidity levels
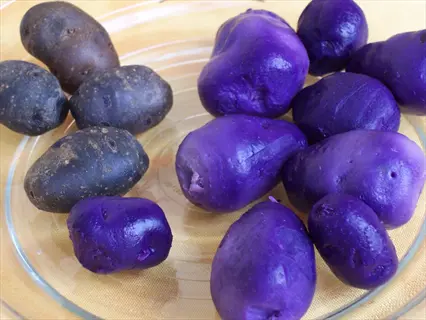
Purple Majesty
- Maturity Period: Mid-season variety requiring 95-110 days to develop deep violet skin and vibrant purple flesh throughout
- Nutritional Value: Contains high anthocyanin levels providing antioxidant benefits with earthy flavor perfect for colorful mashes
- Plant Structure: Vigorous vines grow 24-30 inches (60-75 cm) tall needing sturdy hilling support during stormy periods
- Soil Preference: Performs best in slightly acidic soils (pH 5.5-6.5) amended with composted pine needles or peat moss
- Pest Resistance: Shows natural resistance to Colorado potato beetles but requires psyllid monitoring in warm climates
- Harvest Signals: Wait for complete vine dieback before digging to maximize color intensity and antioxidant development in tubers

Russet Burbank
- Maturity Period: Late-season variety needing 120+ days to form large oblong tubers ideal for baking and french fries
- Skin Texture: Develops characteristic netted brown skin and white flesh that crisps perfectly at high cooking temperatures
- Hilling Demands: Requires aggressive hilling every 10-14 days to protect developing tubers from sunlight exposure
- Water Management: Needs consistent 1.5 inch (4 cm) weekly water during tuber formation to prevent hollow heart disorder
- Climate Adaptation: Prefers long cool growing seasons in USDA zones 4-6 with warm days and cool nights
- Storage Performance: Excellent keeper lasting 5-8 months in 38-40°F (3-4°C) storage with high humidity ventilation
Red Pontiac
- Maturity Period: Early to mid-season variety harvestable in 80-100 days with smooth thin red skin that scrubs clean
- Visual Appeal: Maintains vibrant color after cooking making it popular for salads and holiday presentations
- Growth Pattern: Spreading vines require 14-18 inch (35-45 cm) spacing with regular hilling to maximize yield
- Disease Resistance: Shows moderate resistance to common scab but needs well-drained soils to prevent rot issues
- Container Performance: Adapts well to grow bags and buckets producing round uniform tubers with minimal cracking
- Harvest Flexibility: Allows staggered harvesting with new potatoes available 60 days after planting while main crop matures
French Fingerling
- Maturity Period: Mid-season specialty variety ready in 90-110 days producing rose-colored skin with golden flesh streaks
- Gourmet Quality: Waxy texture holds shape in salads with distinctive nutty flavor enhanced by roasting
- Plant Density: Compact growth allows tight 8-inch (20 cm) spacing in raised beds or intensive planting systems
- Soil Requirements: Demands loose stone-free soil to develop smooth elongated tubers without deformities or constrictions
- Temperature Sensitivity: Requires consistent moisture and mulching in temperatures above 85°F (29°C) to prevent knobbiness
- Culinary Timing: Best consumed within 4 weeks (1 month) of harvest though stores 2-3 months in ideal cool conditions
Planting Step by Step
Plant when dandelions bloom or at least 50°F (10°C) in the soil. This is a sign that the frost threat is over. I always check the soil temperature with a thermometer. Cold soil will delay sprouting, warm soil will hasten its growth. Two to three weeks before the last anticipated frost date is good.
Prepare trenches 6-8 inches (15-20 cm) deep in well-drained soil and mix 3 inches (7.5 cm) of compost into the base. Space rows 36 inches (90 cm) apart for access to hilling in cold areas, plant at a shallow depth of 3 inches (7.5 cm) and cover with soil later.
Place your seed pieces with the eyes facing up, and cover them with 3 or 4 inches of loose soil. If cut, space the seed pieces 10 or 12 inches apart, or whole potatoes from 12 to 16 inches apart. Water with ½ inch immediately after planting.
Soil Preparation
- Timing Indicator: Plant when dandelions bloom or soil reaches 50°F (10°C) - typically 2-3 weeks before last frost
- Trench Creation: Dig 6-8 inch (15-20 cm) deep trenches using hoe or shovel in well-drained soil
- Soil Amendment: Mix 3 inches (7.5 cm) of compost into trench base before placing seed potatoes
- Spacing Plan: Allow 36 inches (90 cm) between rows for hilling access and air circulation
- Microclimate Adjustment: In cold areas, plant shallow (3 inches/7.5 cm) and add soil gradually after frost danger passes
- Warmth Technique: Use black plastic covers to pre-warm soil 1 week before planting in early spring
Seed Placement
- Orientation Rule: Position seed pieces with eyes facing upward for direct sprout emergence
- Depth Standard: Cover with 3-4 inches (7.5-10 cm) of loose soil initially
- Spacing Variance: Place cut pieces 10-12 inches (25-30 cm) apart; whole potatoes 12-16 inches (30-40 cm)
- Fingerling Exception: Space compact varieties 8 inches (20 cm) apart in intensive planting
- Soil Reserve: Pile excavated soil alongside trenches for future hilling needs
- Moisture Start: Water lightly immediately after planting - 0.5 inch (1.25 cm) to settle soil
Initial Care
- Frost Protection: Cover emerging sprouts with row covers if temperatures drop below 30°F (-1°C)
- Water Schedule: Maintain 1 inch (2.5 cm) weekly rainfall equivalent using soaker hoses
- Weed Management: Apply 2-inch (5 cm) straw mulch around plants to suppress weeds
- Pest Prevention: Install insect mesh immediately after planting to block psyllids
- Drainage Check: Ensure no water pooling occurs within 24 hours of heavy rain
- Growth Monitoring: Expect sprouts in 14-21 days depending on soil temperature
Hilling Technique
- First Hill Timing: Begin when plants reach 8 inches (20 cm) height covering stems partially
- Soil Application: Use reserved trench soil to build 4-inch (10 cm) mounds around stems
- Frequency Rule: Repeat hilling every 2-3 weeks until plants flower
- Material Options: Substitute soil with straw for easier harvesting in rainy regions
- Sun Protection: Ensure all developing tubers remain covered to prevent greening
- Depth Goal: Achieve 10-12 inches (25-30 cm) total soil depth over seed pieces by final hill
Moisture Monitoring
- Measurement Method: Use rain gauge or empty tuna can to track weekly water accumulation
- Critical Periods: Increase watering during flowering and tuber formation stages
- Drought Signs: Watch for wilting leaves or soil cracking as urgent hydration signals
- Container Specifics: Water containers when top 1 inch (2.5 cm) soil feels dry
- Overflow Prevention: Ensure soil drains completely within 6 hours of watering
- Temperature Adjustment: Add 0.5 inch (1.25 cm) extra water per week during 85°F+ (29°C+) heat
Northern Climates
- Planting Window: Late April to May after snowmelt when soil reaches 45°F (7°C)
- Variety Choice: Opt for early-season types like Yukon Gold (70-90 day maturity)
- Depth Adjustment: Plant 3 inches (7.5 cm) deep initially to absorb sun warmth
- Frost Response: Cover sprouts with soil or fabric if frost threatens after emergence
- Harvest Timing: Target late August before first fall frost damages tubers
- Storage Prep: Cure potatoes 3 weeks in cool garage before cellar storage
Southern Climates
- Planting Window: February plantings for spring harvest; October for winter harvest
- Heat Mitigation: Use 6-inch (15 cm) straw mulch to keep soil below 75°F (24°C)
- Variety Selection: Choose heat-tolerant types like Red Pontiac or Purple Majesty
- Water Management: Increase to 1.5 inches (4 cm) weekly during 85°F+ (29°C+) weather
- Shade Strategy: Plant near taller crops like corn for afternoon sun protection
- Harvest Cue: Dig potatoes when foliage yellows before summer heat damages tubers
Container Growing
- Vessel Choice: Use 10-gallon (38-liter) buckets with drainage holes
- Soil Mix: Combine 60% potting soil + 40% compost for optimal nutrition
- Planting Depth: Layer 4 inches (10 cm) soil → seed potatoes → 3 inches (7.5 cm) cover
- Space Efficiency: Plant 2-3 seed pieces per container 6 inches (15 cm) apart
- Hilling Method: Add soil gradually as vines grow instead of trenching
- Harvest Ease: Tip containers sideways to retrieve clean potatoes without digging
Essential Care Techniques
Give them 1 inch (2.5 cm) of water weekly by means of drip irrigation or soaker hoses; for best results in flowering and tuber formation, increase to 1.5 inches (4 cm) during those stages. Or make sure the top inch of soil feels dry to the touch. Containers dry out more rapidly, so water when the surface feels dry. Do not overwater; this can cause the potatoes to rot.
Hill soil around the stems every 2 to 3 weeks, starting when the plants reach 8 inches (20 cm). Make 4-inch (10 cm) mounds with soil, straw, or compost. I tend to use straw, especially in wet areas, which makes harvesting easier. Watch that the tubers stay covered, as even a hint of light will cause them to turn green. Cease hilling when the plants flower.
Watch for signs of pests: leaves chewed at the edges signify Colorado beetles, handpick them off daily and bottle them, or spray with neem oil weekly. Yellow leaves indicate a nitrogen deficiency; apply a balanced fertiliser. Purple tinting means a phosphorus shortage, so sprinkle some bone meal over the whole area. Remove any diseased leaves to prevent them spreading.
Water Management
- Volume Standard: Provide 1 inch (2.5 cm) water weekly using drip irrigation or soaker hoses
- Critical Phases: Increase to 1.5 inches (4 cm) during flowering and tuber formation stages
- Drought Response: Water immediately if leaves wilt or soil cracks appear around plants
- Container Care: Check moisture daily - water when top 1 inch (2.5 cm) feels dry
- Overflow Prevention: Ensure soil drains completely within 6 hours of watering
- Rain Adjustment: Reduce watering after 0.5 inch (1.25 cm) rainfall using rain gauge measurements
Hilling Procedures
- Initial Timing: First hill when plants reach 8 inches (20 cm) height covering lower stems
- Material Options: Use soil, straw, or compost - avoid fresh manure which may burn plants
- Frequency: Repeat every 2-3 weeks until flowers appear building mounds gradually
- Depth Target: Achieve 10-12 inch (25-30 cm) total coverage over seed pieces
- Sun Protection: Ensure no tubers remain exposed to prevent toxic greening
- Storm Prep: Reinforce hills before heavy rains to prevent soil erosion
Pest Control
- Common Threats: Colorado beetles (handpick daily), aphids (spray water), psyllids (use mesh covers)
- Organic Solutions: Apply neem oil weekly or introduce ladybugs for aphid control
- Prevention: Rotate crops annually and remove nightshade family weeds nearby
- Monitoring: Inspect leaf undersides weekly for eggs or larvae clusters
- Disease Signs: Watch for early blight (dark leaf spots) and remove affected foliage immediately
- Barrier Methods: Install floating row covers at planting to block flying insects
Nutrient Management
- Deficiency Signs: Yellow leaves indicate nitrogen lack; purple tints signal phosphorus need
- Fertilizer Formula: Use balanced 5-10-10 fertilizer at planting and mid-season
- Application Rate: Side-dress with 1/2 cup (120 ml) per plant 6 weeks after planting
- Organic Options: Apply compost tea or fish emulsion every 3-4 weeks
- Excess Caution: Avoid high-nitrogen fertilizers that promote leaves over tubers
- Soil Testing: Check pH annually maintaining 5.5-6.5 range with lime/sulfur adjustments
Weed Suppression
- Critical Period: Weed thoroughly before plants reach 6 inches (15 cm) height
- Mulching: Apply 3-4 inch (7.5-10 cm) straw layer after first hilling
- Shallow Cultivation: Hoe carefully within 4 inches (10 cm) of plants to avoid root damage
- Natural Herbicides: Use vinegar solution on paths (avoid plant contact)
- Companion Planting: Grow low companion crops like lettuce between rows
- Frequency: Weed weekly during first 8 weeks when competition is highest
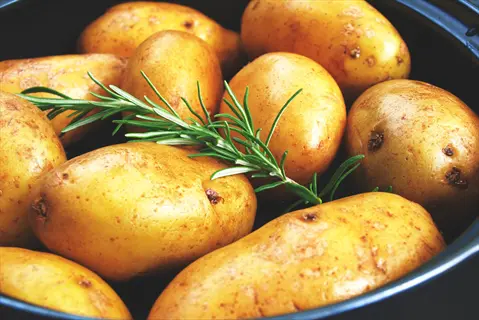
Harvesting and Storage
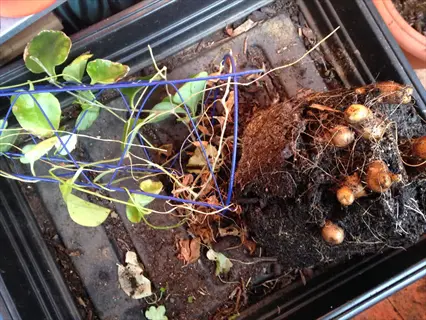
New potatoes: Harvest 2-3 weeks after flowering, when skins rub off easily. Mature: Wait until 90% of vines yellow and die back. Lift gently with a digging fork placed 12 inches away from the plant clump. Be careful not to bruise the tubers, as this invites rot when they are being stored.
Curing potatoes: Cure potatoes at 60° to 65°F with 85 to 90 percent humidity. Separate them with a single layer on screens where they can be kept in darkness. Use fans for air streams, but avoid using them in drafts. The thickening of the skin and healing of some of the more prominent cuts thus effected will lengthen the duration of the store considerably.
Store russets at 40°F (4°C) for 5 to 8 months. Yukon Golds will keep for 2-3 months at 45°F (7°C). Never store fingerlings in plastic bags; keep them in breathable sacks for a month or two. Don't refrigerate potatoes, as the cold converts the starch to sugar, altering their flavor and texture completely.
Handle the tubers as you would fragile eggs. Do not wash the dirt off, but brush it away. Never drop the potatoes, as they are often bruised on the inside, and the outward bruise is not visible until it is too late. Reject the bad at once. I myself wear gloves to prevent the natural oily moisture from getting on the potatoes. It may seem a small thing, but great mischief is done if precautions are not taken.
Harvest Timing Indicators
- New Potatoes: Ready 2-3 weeks after flowering when flowers are fully open; skins will rub off easily
- Mature Potatoes: Harvest when 90% of vines have yellowed and died back - typically 90-120 days after planting
- Weather Considerations: Harvest before temperatures drop below 40°F (4°C) or rise above 80°F (27°C)
- Variety Differences: Early types ready in 70-90 days; late varieties need 110-140 days
- Test Dig: Check one plant first - tubers should be firm and skins shouldn't peel when rubbed
Harvesting Techniques
- Tool Selection: Use digging fork inserted 12 inches (30 cm) away from plants to avoid spearing tubers
- Manual Method: Grasp base of stems and lift gently while loosening soil with other hand
- Curing Preparation: Leave potatoes on soil surface 2-3 hours to dry but not in direct sunlight
- Damage Prevention: Handle tubers like eggs; avoid dropping or bruising which causes rot
- Field Cleaning: Brush off excess dirt gently; do not wash until before use
Curing Process
- Environment Setup: Spread potatoes in single layer on screens in dark 60-65°F (15-18°C) space
- Duration: Cure for 10-14 days with 85-90% humidity for thick skin development
- Air Circulation: Use fans to maintain airflow but avoid direct drafts on tubers
- Healing: Minor nicks and cuts will seal during this process extending storage life
- Inspection: Discard any potatoes showing soft spots or discoloration after curing
Storage Conditions
- Ideal Environment: Dark 40-50°F (4-10°C) with 90-95% humidity to prevent shriveling
- Containers: Use breathable options like burlap sacks, cardboard boxes, or wicker baskets
- Location Options: Root cellars, unheated basements, or insulated garages work best
- Avoid: Refrigerators (too cold) or areas near apples (ethylene gas causes sprouting)
- Monitoring: Check monthly for sprouting or decay; remove affected tubers immediately
Variety Storage Performance
- Long Keepers: Russets (5-8 months / 20-35 weeks), Kennebecs (4-6 months / 16-26 weeks) - store at 40°F (4°C)
- Medium Keepers: Yukon Golds (2-3 months / 8-12 weeks), Red Pontiacs (3-4 months / 12-16 weeks) - store at 45°F (7°C)
- Short Keepers: Fingerlings (1-2 months / 4-8 weeks), new potatoes (2-4 weeks) - use first
- Sprout Prevention: Store with peppermint leaves or maintain below 40°F (4°C)
- Reviving: Soak shriveled potatoes in cold water 30 minutes before use to plump
Small-Space Solutions
Container gardening equals being in the ground if done right. A 10-gallon (38-liter) bag or container will yield the same amount as some of the garden beds, approximately 8-12 pounds (3.6-5.4 kg). I have found that the fabric pots actually outproduce the buckets, plus, the air pruning makes the root systems much stronger. You can also grow some sweet little shrubs in window boxes and harvest 1-2 pounds (0.45-0.9 kg) of fruit. Make sure you stick to the smaller or dwarf varieties.
Mix 60 percent potting soil, 30 percent compost, and 10 percent perlite for the ideal container medium, then add ½ cup (120 ml) of worm castings per gallon. This formula will drain well but still retain moisture. Don't even think about using your garden soil; it will compact in a container, starving roots of the oxygen they require.
Build potato towers with wire mesh to create cylinders 18 inches (45 cm) wide. Layer about 6 inches 15 cm of soil, add seed potatoes and cover, continue this as they grow. To harvest, unwrap the sides and collect your potatoes: About 18-25 pounds (8.2 - 11.3 kg) per tower.
Plant lettuce or radishes between containers. They'll thrive even if growing in the shade of a container. Grow pole beans on a trellis behind your potato bags. Do not plant tomatoes or peppers in the growing area: they'll consume the nutrients that other vegetables need. Marigold repels pests, is not a big eater of space, and may be planted between containers. I interplant quick-to-mature crops like spinach in the ground area before potatoes fill the space.
Container Selection
- Minimum Size: 10-gallon (38-liter) containers with drainage holes - fabric bags or plastic buckets work best
- Material Options: Fabric pots (breathable), plastic buckets (durable), wooden crates (aesthetic)
- Depth Requirement: Minimum 12 inches (30 cm) depth for tuber development
- Mobility Factor: Include wheels or casters for sun-tracking capability
- Quantity: Plant 2-3 seed pieces per container spaced 6 inches (15 cm) apart
Soil Mix Formula
- Base Recipe: 60% potting soil + 30% compost + 10% perlite for optimal drainage
- Nutrient Boost: Add 1/2 cup (120 ml) worm castings per gallon of mix
- pH Balance: Maintain 5.8-6.5 pH using pine fines for acidity
- Moisture Retention: Incorporate water-absorbing crystals at 1 tsp per gallon (5ml per 3.8 liters)
- Layering Technique: Start with 4 inches (10 cm) soil → seed potatoes → 3 inches (7.5 cm) cover
Vertical Growing
- Tower Construction: Use wire mesh cylinders 18 inches (45 cm) diameter lined with straw
- Filling Method: Add 6-inch (15 cm) soil layers → seed pieces → repeat as plants grow
- Harvest Advantage: Unwrap tower sides to access potatoes without digging
- Support System: Secure towers against wind with stakes in corners
- Yield Potential: Produce 15-20 lbs (6.8-9.1 kg) per tower in 4 sq ft (0.37 sq m) space
Companion Planting
- Space Sharing: Interplant with lettuce, radishes, or spinach between potato containers
- Pest Deterrence: Grow marigolds or basil to repel beetles and flies
- Vertical Partners: Train pole beans up trellises behind potato containers
- Root Zone Compatibility: Avoid tomatoes, eggplants, or peppers sharing containers
- Succession Timing: Plant quick crops before potatoes fill space
Balcony Adaptations
- Weight Management: Use lightweight soil mixes with perlite/vermiculite
- Wind Protection: Install trellis panels as windbreaks around containers
- Watering System: Set up drip irrigation with timer for consistent moisture
- Sun Optimization: Rotate containers weekly for even light exposure
- Winter Prep: Move containers indoors to cool garage before first frost
5 Common Myths
Store-bought potatoes work just as well as certified seed potatoes for planting.
Grocery potatoes often carry latent diseases like potato virus Y or late blight that can devastate your garden. Certified seed potatoes undergo rigorous field inspections and lab testing to ensure they're disease-free. Using store-bought potatoes risks introducing incurable pathogens that persist in soil for 4-7 years, potentially ruining future crops of potatoes, tomatoes, and eggplants in the same area.
Green potatoes are safe to eat if you just cut away the colored parts.
The green coloration indicates high concentrations of solanine, a toxic glycoalkaloid that forms when tubers are exposed to light. Solanine isn't destroyed by cooking and can cause nausea, headaches, and neurological issues even in small amounts. Entire potatoes should be discarded if more than 25% shows greening, as the toxin spreads beyond visibly affected areas through the vascular system.
Potatoes require constant fertilization throughout their growing season to produce large tubers.
Excessive nitrogen fertilization actually reduces tuber development by promoting excessive vine growth at the expense of potatoes. Potatoes need balanced nutrition with higher phosphorus and potassium during tuber formation. Over-fertilization leads to hollow heart disorder, increases pest attraction, and causes nitrate buildup in tubers that can convert to harmful compounds when cooked at high temperatures.
All potato varieties require identical spacing, depth, and care practices in the garden.
Different potato types have distinct growth habits - fingerlings need only 8-inch spacing while russets require 16 inches. Early varieties mature faster in cool conditions but lack storage durability, whereas late types need longer frost-free periods. Purple potatoes require extra hilling to prevent greening, and waxy varieties need more consistent moisture than starchy types during tuber formation.
Potatoes must be harvested all at once when the plants die back completely.
Staggered harvesting extends your harvest window - new potatoes can be gently collected 2-3 weeks after flowering while mature tubers remain protected underground for weeks after vine dieback. Leaving main crop potatoes in dry soil actually improves skin curing and storage quality. Only frost or prolonged rain requires immediate full harvest to prevent damage to the tubers.
Conclusion
Few pleasures of the garden are greater than that of growing potatoes under simple methods of treatment. A little trouble produces a really handsome crop and excellent certainty of keeping. Make the ground do your usual work, plant early or late, and then tread softly, wait patiently, and make light of your patches.
Nothing beats the thrill of digging up that first homegrown potato, smooth, unblemished skin, fresh from the earth. You can taste the difference in that instant. This moment, more than any other, convinces you that every bowl of water and every weed you have ever pulled out has been worthwhile. You share your pictures of the spoil with other keen amateur pickers online.
Try different types every year. Grow purple potatoes for their vibrant color, or fingerlings for their exceptional flavor. I tend to grow an early and a late type for successive harvests during the year. You will be surprised at what you uncover. Share your findings in the gardening panel forums, and encourage others.
External Sources
Frequently Asked Questions
How do I start growing potatoes from a potato?
Use certified seed potatoes instead of grocery potatoes. Cut them into pieces with at least two eyes each, cure the pieces for 48 hours, then plant with eyes facing upward. Grocery potatoes often carry diseases and sprout inhibitors that reduce yield and contaminate soil.
When should potatoes be planted in temperate climates?
Plant when soil reaches 50°F (10°C), typically 2-3 weeks before the last frost. Natural indicators like dandelion blooms signal ideal timing. In colder regions, delay planting until after snowmelt while warmer areas allow late winter planting for spring harvest.
What's the optimal method for growing potatoes?
The best approach involves:
- Planting in trenches 6-8 inches deep with eyes facing up
- Hilling soil around stems as plants grow taller
- Maintaining consistent moisture during tuber formation
- Using well-draining soil rich in organic matter
- Choosing disease-resistant varieties suited to your climate
How long until potatoes are ready for harvest?
Growth duration varies by type: early varieties mature in 70-90 days, mid-season in 90-110 days, and late types require 110-140 days. Harvest new potatoes 2-3 weeks after flowering, while mature potatoes need full vine dieback before digging.
Why should I avoid planting store-bought potatoes?
Grocery potatoes often carry blight and viruses that persist in soil for years. They're treated with sprout inhibitors that reduce germination. Certified seed potatoes undergo disease testing and produce significantly healthier yields without contaminating your garden bed long-term.
What are critical mistakes to avoid when growing potatoes?
Key errors include:
- Planting too deep initially which delays sprouting
- Over-fertilizing with nitrogen that promotes leaves over tubers
- Allowing tubers to become exposed to sunlight causing greening
- Watering inconsistently during tuber formation
- Ignoring crop rotation leading to disease buildup
Can potatoes survive winter in the ground?
Potatoes freeze and rot if left in soil below 40°F (4°C). In mild climates, they might survive with heavy mulch but risk pest damage. Always harvest before frost and cure tubers properly for winter storage in cool, dark conditions.
What plants should never be grown near potatoes?
Avoid planting these near potatoes:
- Tomatoes and eggplants (share diseases like blight)
- Cucumbers (compete for nutrients)
- Raspberries (attract similar pests)
- Sunflowers (inhibit potato growth)
- Pumpkins (spread fungal issues through vines)
How can I accelerate potato growth?
Speed up growth by:
- Pre-sprouting seed potatoes indoors before planting
- Using black plastic to warm soil in early spring
- Applying balanced fertilizer high in phosphorus at planting
- Maintaining consistent soil moisture without waterlogging
- Choosing fast-maturing varieties suited to your region
What's the proper way to store harvested potatoes?
Cure potatoes at 60-65°F (15-18°C) for 10-14 days first. Then store in complete darkness at 40-50°F (4-10°C) with 90% humidity. Use breathable containers like burlap sacks and avoid refrigeration which converts starch to sugar.