
Learning how to grow okra opens the door to a nutritional powerhouse. Packed with vitamin C and fiber and low in calories, this native African traveled halfway across the world to become widespread in Southern US cooking. Look for it to render crunchiness in stews and gumbo.
Okra loves heat, but even cooler gardeners can enjoy the fruits of this delicious plant with a few clever tricks. I know gardeners producing from Georgia to Germany who use season extension techniques with okra, and this guide aims to demystify them. It will provide beginners with a straightforward path from seed to harvest.
Using Okra in Cooking
Dealing with too-slimy okra is easy. One trick is to dry-roast entire pods in a 425°F (220°C) oven for 15 minutes, which caramelizes the surface. Another is to add lemon juice or vinegar while cooking. Both reduce mucilage and preserve vitamin C and fiber.
Traditional gumbo uses sliced okra as a thickener; modern cooks adapt by matching it with tomatoes or grilling 4-inch (10 cm) pods. Crispy air-fried okra is a wholesome snack. All three methods maintain the low-calorie level while enhancing taste.
For stir-fries, use high heat to cook them in ½-inch (1.3 cm) pieces. Doing so will tenderize the beans without giving them a slimy texture. Add minced garlic and ginger if you like. This method of preparation takes full advantage of the folate and magnesium in the beans, transforming a plain vegetable into a weeknight classic.

Fried Okra
- Achieve perfect crispiness by maintaining oil temperature at 350°F (177°C) throughout cooking process for consistent golden brown results
- Slice pods into uniform half-inch pieces before coating with cornmeal mixture to ensure even frying and crunch
- Serve immediately with lemon wedges and dipping sauces like remoulade to complement the earthy vegetable flavors
- Buttermilk soaking before breading creates tender interior while preserving the vegetable's natural green color
- Southern versions often include Cajun spices while Asian variations feature five-spice powder for regional flair
- Leftovers maintain texture for short periods when stored uncovered in warm oven below 200°F (93°C)

Okra Gumbo
- Combine sliced okra with holy trinity of onions, celery, and bell peppers in heavy Dutch oven pot
- Natural thickening occurs when mucilage releases during twenty-five minute simmer with ripe tomatoes
- Traditional Louisiana versions include chicken and andouille sausage while vegetarian options use black-eyed peas
- Balance flavors with apple cider vinegar added during final ten minutes of cooking time
- Portion cooled gumbo in freezer containers leaving one-inch headspace for expansion during freezing
- Reheat gently on stovetop to preserve vegetable texture without breaking down the natural thickeners
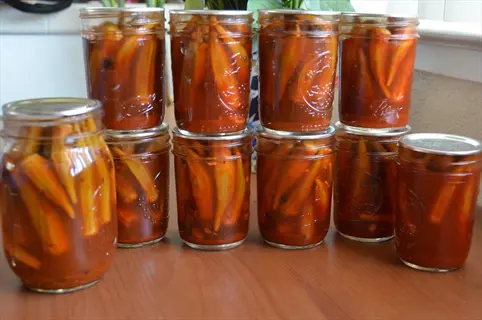
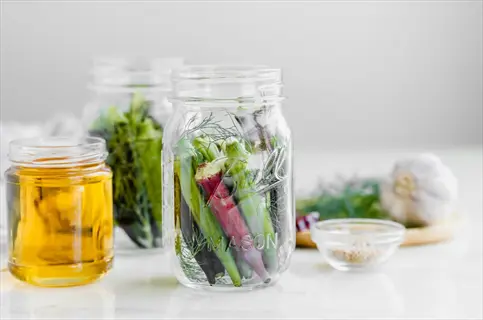
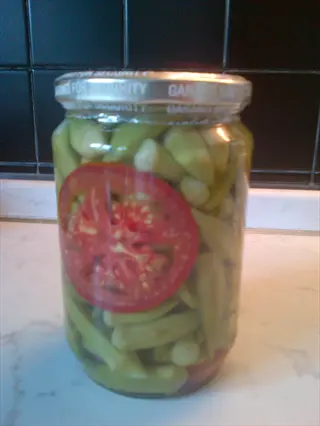
Pickled Okra
- Prepare brine using vinegar-water solution with sugar and salt for balanced sweet-sour flavor profile
- Add grape leaves to jars before processing to maintain crisp texture during preservation
- Include whole spices like mustard seeds and dill heads between okra pods in jars
- Process filled jars in boiling water bath following tested canning guidelines for safety
- Allow pickles to rest for four weeks before opening for full flavor development
- Use pickled pods as garnishes for cocktails or chopped in potato salads for tang
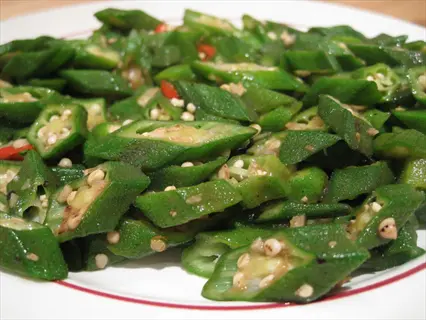
Stir-Fried Okra
- Pre-treat whole pods by quick blanching in vinegared water to reduce slippery texture
- Cut diagonally into one-inch pieces for attractive presentation and even cooking times
- Use high smoke-point oils like peanut or avocado for stir-frying above 400°F (204°C)
- Add aromatics like minced ginger and garlic during last minute to prevent burning
- Finish with sauce mixture of soy and rice wine thickened with cornstarch slurry
- Serve immediately over steamed rice to enjoy crisp-tender texture at its peak

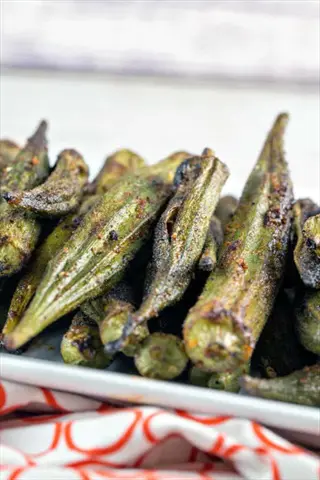
Roasted Okra
- Toss whole pods with olive oil and seasonings before spreading in single layer
- Roast at 425°F (218°C) for fifteen minutes until edges caramelize and crisp
- Flip pods halfway through cooking using tongs to ensure even browning
- Sprinkle with lemon zest after roasting to brighten the deep savory flavors
- Pair with grilled meats or fold into grain bowls for nutritious meals
- Avoid overcrowding baking sheet to allow steam escape and prevent sogginess
Grilled Okra
- Skewer whole pods lengthwise to prevent falling through grill grates during cooking
- Brush with oil and spice rub before placing over medium-high heat coals
- Rotate every three minutes to develop attractive char marks on all sides
- Serve with yogurt-based dips to counterbalance the smoky bitterness from grill
- Soak wooden skewers for thirty minutes beforehand to prevent burning on grill
- Remove when tender but still firm with slight resistance when pierced

Okra Stew
- Brown meat or mushrooms before adding chopped okra and aromatic vegetables
- Simmer with tomatoes and broth until vegetables soften and flavors meld
- Add leafy greens like spinach during last five minutes for color and nutrition
- Traditional West African versions feature peanut butter for rich nutty undertones
- Adjust thickness by cooking uncovered to reduce or adding broth to thin
- Serve over steamed grains like couscous or rice to absorb flavorful liquids

Okra Fritters
- Combine chopped okra with chickpea flour batter seasoned with spices and herbs
- Drop spoonfuls into hot oil maintaining temperature around 365°F (185°C)
- Fry until deep golden brown with crispy exteriors and tender interiors
- Drain on wire racks instead of paper towels to preserve crisp texture
- Serve with cooling raita or chutneys to complement the spiced fritter flavors
- Make batter slightly thick to prevent chopped vegetables from sinking during frying
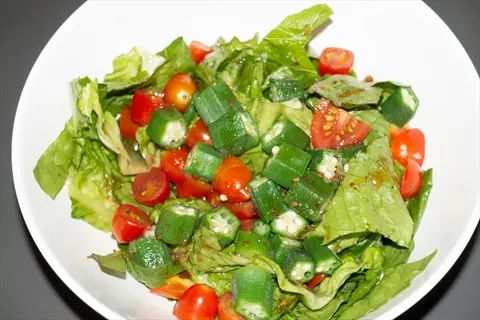
Okra Salad
- Blanch whole pods briefly then shock in ice water to preserve bright color
- Slice diagonally and toss with cherry tomatoes and red onion slices
- Dress with vinaigrette containing lemon juice and Dijon mustard for tang
- Add fresh herbs like basil or mint to enhance the garden fresh flavors
- Include protein sources like chickpeas or feta cheese to make substantial meal
- Chill for thirty minutes before serving to allow flavors to develop fully

Okra Soup
- Sauté chopped okra with onions and garlic until vegetables soften slightly
- Add vegetable broth and simmer until all ingredients become completely tender
- Purée using immersion blender until smooth then stir in coconut milk
- Garnish with toasted seeds or herb oil swirls for visual appeal
- Adjust consistency by adding more broth for thinner or simmering longer for thicker
- Serve warm with crusty bread for comforting meal during cooler weather
Saving Seeds and Storage
Seed maturity: When pods turn brown and are papery dry, hear the seeds rattle inside when you shake them. Choose pods from the strongest plants (preferably those which show no sign of disease) and leave them hanging on the stalk till they split open of themselves. They will then be most viable for the seedling rows for the next season.
Store fresh okra pods in the refrigerator crisper at 45°F to 50°F (7 °C to 10°C) in perforated bags. They should retain their crispness for a week or more. To store for longer periods, blanch and freeze at 0° F. (−20° C.) (for 8 to 10 months, they should not be thawed before using).
Practice certain safety rules. Sterilize your jars by submerging them in boiling water before packing the okra. If you're pressure canning, follow USDA-approved times and procedures scrupulously. If you're pickling, make sure your vinegar brine is sufficiently strong. Discard all jars with bulging lids or odd smells upon opening.
Pod Selection
- Identify fully mature pods by their dark brown color and dry papery texture that makes a rattling sound when shaken gently
- Choose disease-free pods from the healthiest plants showing strongest growth characteristics for optimal genetic viability in future seasons
- Leave selected pods on the plant until they naturally split open at seams indicating complete internal drying and seed readiness
- Avoid pods damaged by insects or showing mold spots which could compromise seed quality and germination potential later
- Harvest during dry weather conditions to prevent moisture absorption that might cause fungal issues during storage period
- Mark chosen plants with colored tape during growing season to easily locate them when pods reach full maturity
Seed Extraction
- Break open thoroughly dried pods over a clean container using your hands to collect small round cream-colored seeds inside
- Separate seeds from chaff debris by gentle winnowing outdoors or using fine mesh kitchen strainers for efficient cleaning
- Discard any discolored, undersized, or damaged seeds showing visible mold spots or insect holes to ensure quality stock
- Work in well-ventilated area to avoid inhaling fine particles that may cause respiratory irritation during cleaning operations
- Place extracted seeds on white paper to easily spot and remove any remaining plant material or foreign objects
- Use tweezers to carefully remove stubborn pod fragments clinging to individual seeds without damaging the seed coats
Cleaning Techniques
- Spread seeds in single layer on paper towels or screens allowing two weeks of air circulation for complete drying
- Ensure drying area maintains consistent humidity below fifty percent with good ventilation to prevent mold development
- Rub seeds gently between palms to remove any remaining pod fragments and debris before final storage preparation
- Rotate seeds daily during drying period to expose all surfaces evenly to air movement and prevent moisture pockets
- Test dryness by attempting to bend seeds which should snap cleanly when properly dried and ready for storage
- Avoid using heat sources like ovens which could damage embryo viability through excessive temperature exposure
Viability Testing
- Place ten representative seeds on damp paper towel inside sealed plastic bag labeled with variety and test date
- Check germination progress after five days in warm location maintaining steady 70°F (21°C) temperature conditions
- Calculate viability rate by dividing number of sprouted seeds by total tested to determine planting success probability
- Repeat test with new seeds if germination rate falls below seventy percent indicating potential storage issues
- Record results in garden journal to track seed viability decline over multiple years for future reference
- Discard seeds showing no signs of life after ten days as they likely lack viable embryos for growth
Storage Preparation
- Store fully dried seeds in airtight glass jars with silica gel packets to absorb residual environmental moisture
- Label containers clearly with variety name and harvest date using permanent markers for long-term legibility
- Keep seeds in dark location maintaining consistent 40-50°F (4-10°C) temperatures to maximize storage longevity
- Divide large seed batches into multiple containers to avoid exposing entire stock to air during occasional use
- Include oxygen absorbers in storage vessels to create anaerobic environment slowing seed deterioration processes
- Place storage containers inside protective bins to prevent rodent damage while allowing easy access when needed
Refrigeration
- Store unwashed pods in perforated plastic bags allowing proper air circulation while maintaining necessary humidity levels
- Keep in vegetable crisper drawer maintaining temperature between 45-50°F (7-10°C) for optimal short-term freshness retention
- Use within seven to ten days maximum before texture becomes unpleasantly limp and natural flavors noticeably diminish
- Avoid storing near ethylene-producing fruits like apples or bananas which accelerate ripening and spoilage processes
- Check daily for condensation buildup and promptly wipe away any moisture to inhibit mold development inside bags
- Place absorbent paper towels within storage bags to capture excess moisture extending crispness for several extra days

Freezing
- Blanch whole pods in rapidly boiling water for precisely three minutes then plunge immediately into ice water bath
- Pat dry thoroughly with clean towels before spreading in single layer on baking sheets for flash freezing
- Transfer frozen okra pieces to airtight containers or vacuum-sealed bags removing as much air as possible
- Maintain quality for eight to ten months when stored continuously at 0°F (-18°C) or below without thawing
- Label packages clearly with freezing date and variety name implementing first-in-first-out rotation system
- Pre-slice okra before freezing for convenient addition directly into cooking pots without additional preparation
Pickling
- Pack trimmed pods vertically in sterilized pint jars with garlic cloves and fresh dill sprigs for flavor infusion
- Prepare brine using vinegar-water solution with measured salt and sugar quantities following tested recipes
- Process filled jars in boiling water bath for ten minutes ensuring safe sealing and long-term preservation
- Store in cool dark pantry locations allowing four weeks minimum for complete flavor development before consumption
- Check jar seals carefully before storage discarding any with compromised lids for safety considerations
- Add natural tannin sources like grape leaves to maintain desirable crisp texture throughout storage period
Drying
- Slice uniform quarter-inch rounds using sharp knives ensuring consistent thickness for even dehydration results
- Arrange pieces in single layers on dehydrator trays without overlapping setting temperature to 120°F (49°C)
- Dry for eight to twelve hours until pieces snap cleanly when bent indicating complete moisture removal
- Store completely cooled pieces in glass mason jars with oxygen absorbers preventing moisture reabsorption issues
- Use within two years as nutritious soup thickeners or rehydrated additions to stews and casserole dishes
- Check monthly for condensation signs and redry if necessary to prevent mold growth in storage containers
Canning
- Pressure can sliced okra with acidic tomato juice ensuring safe pH levels below dangerous botulism thresholds
- Process pint jars for twenty-five minutes at eleven pounds pressure following validated canning guidelines precisely
- Cool jars undisturbed for twenty-four full hours before carefully testing each lid's seal integrity
- Store in dark locations maintaining steady temperatures between 50-70°F (10-21°C) for maximum shelf life
- Discard any jars showing bulging lids or unusual odors immediately without tasting contents for safety
- Rotate stock annually using oldest containers first while consuming within eighteen months for best quality
Pest Management
Deal with aphids and whiteflies using neem oil or related products, mixed at a rate of 2 tablespoons per gallon in water. Apply every 5 days, preferably in the early morning. Insect soap solutions require about 4 tablespoons of soap per gallon of water. General treatment every week, with an emphasis on the undersides of leaves, is recommended. In this way, helpful insects remain uninjured.
Plant basil and marigolds among your okra. Basil repels whiteflies with its pungent aroma, while nematodes tend to stay away from surrounding marigolds. I plant radishes to draw stink bugs from the pods, the stink bugs head toward the waxy domes and ignore my growing okra in the process.
Spot early infestations by looking for curled leaves or sticky residue on the leaves. Aphids suck juice from leaves, leaving yellow and distorted leaves. Stink bugs cause corky white blotches on pods. Spider mites create fine white webbing. Check your plants two times a week during the warm months. Early detection will prevent women from getting infected.
Aphids
- Identify clusters of small green/black insects on undersides of leaves causing yellowing and distortion
- Prevent with reflective mulch and companion planting of garlic or chives that repel aphids
- Treat by spraying insecticidal soap solution (2 tbsp per gallon) weekly on leaf undersides
- Introduce ladybugs or lacewings as natural predators that consume entire aphid colonies
- Monitor with yellow sticky traps placed near plant bases to catch winged adults
- Remove heavily infested leaves immediately to prevent spread to healthy growth areas
Stink Bugs
- Recognize shield-shaped brown insects and fruit dimpling with white corky spots
- Prevent by clearing weeds and planting trap crops like millet away from okra
- Treat with pyrethrin sprays (4 oz per gallon) at dawn when insects are vulnerable
- Hand-pick adults daily using gloves and drop into soapy water for disposal
- Use companion plants like radishes that deter stink bugs through strong odors
- Cover young plants with floating row covers until flowering as physical barriers
Corn Earworms
- Detect larvae inside pods and entry holes surrounded by dark frass deposits
- Prevent by tilling soil post-harvest and planting rosemary as companion deterrent
- Treat with Bt (Bacillus thuringiensis) sprays (1-2 tsp per gallon) on flowers
- Install pheromone traps before flowering to monitor adult moth activity peaks
- Release trichogramma wasps that parasitize eggs on plant surfaces naturally
- Harvest pods promptly when young to reduce larval feeding opportunities
Spider Mites
- Identify fine webbing on leaves and stippling damage from sap-feeding mites
- Prevent by spraying foliage with water and planting coriander companion plants
- Treat with neem oil (2 tbsp per gallon) every five days covering both leaf sides
- Introduce predatory mites like Phytoseiulus persimilis for biological control
- Prune severely infested leaves immediately to reduce population buildup quickly
- Avoid broad-spectrum pesticides that kill beneficial insects worsening outbreaks
Whiteflies
- Spot tiny white insects flying when disturbed and sticky honeydew residue
- Prevent by removing infected debris and planting basil as companion repellent
- Treat with horticultural oil (5 tbsp per gallon) in early morning applications
- Use yellow sticky traps placed just above plant canopy to monitor populations
- Encourage parasitic wasps by planting nectar-rich alyssum near garden borders
- Apply insecticidal soap in weekly rotations to prevent resistance development
Root-Knot Nematodes
- Identify swollen root galls and stunted plants with yellowing lower leaves
- Prevent by solarizing soil and planting marigold companions that release nematicides
- Treat with chitin-rich amendments like crab meal (1 lb per 10 sq ft) before planting
- Rotate crops annually with nematode-resistant varieties like 'Clemson Spineless'
- Apply beneficial nematodes Steinernema feltiae (follow package rates) to soil
- Remove and destroy infected plants immediately to reduce soil contamination
Harvesting Techniques
Harvest okra pods when firm and bright green. They should measure 2-4 inches (5-10 cm) long and snap cleanly when bent. Preferably, they are no more than 3 inches (7.6 cm) long for frying and pickling; larger ones become tough and fibrous. Pick daily during the hot summer weather when the pods grow rapidly.
Always wear elbow-length gloves during harvest since okra wears diminutive hairs that can aggravate skin. Use sharp pruners, cutting each pod ¼ inch above the fruit so that your cuts stay clean. Harvest in the early morning, gathering before the temperatures increase in the day, so that they retain as much crispness and flavor as possible.
Check plants daily, especially in peak season. Pods mature rapidly in hot weather. Overripe ones feel tough and "woody," with pronounced ridges. They are larger than 5 inches (13cm) and also feel hard. Snip them off right away to spur the plant to grow new ones.
Timing and Frequency
- Begin harvesting 50-60 days after planting when first flowers appear and pods develop
- Check plants daily during peak summer months as pods grow rapidly in hot weather
- Harvest early morning when temperatures are cooler to preserve pod crispness and quality
- Prioritize every-other-day harvesting in moderate climates but collect daily in zones above 80°F (27°C)
- Continue harvesting until first fall frost or when plants stop producing new flowers
- Note that frequent picking stimulates more pod production throughout the growing season
Pod Selection Criteria
- Select pods measuring 2-4 inches (5-10 cm) long for optimal tenderness and flavor
- Choose pods with bright green color and firm texture showing no signs of hardening
- Avoid pods with visible ridges or woody stems indicating overmaturity and toughness
- Check that pods snap cleanly when bent rather than folding limply at the joint
- Reject pods with dark spots, insect damage, or yellow discoloration on the surface
- Prefer smaller pods for frying and pickling while saving larger ones for stews
Proper Cutting Methods
- Use sharp bypass pruners or garden scissors to make clean cuts through stems
- Cut stems ¼ inch (0.6 cm) above the pod cap to avoid damaging the plant's nodes
- Hold pods gently during cutting to prevent bruising the delicate green surface
- Cut at a 45-degree angle to allow water runoff and prevent disease entry points
- Disinfect tools with rubbing alcohol between plants to prevent disease transmission
- Wear elbow-length gloves to protect against irritating hairs on stems and leaves
Handling and Transport
- Place harvested pods gently in shallow containers to prevent crushing and bruising
- Avoid stacking pods more than two layers deep to maintain air circulation
- Use baskets lined with breathable cloth instead of plastic bags that trap moisture
- Move harvested okra to shade immediately after picking to prevent wilting in sun
- Handle pods by their stems rather than the body to minimize surface damage
- Transport containers carefully to avoid jostling that causes discoloration spots
Overripe Pod Management
- Identify overripe pods by their woody texture and length exceeding 5 inches (13 cm)
- Remove oversized pods immediately to redirect plant energy to new production
- Save tough pods for seed saving by leaving them to dry completely on the plant
- Cut open overripe pods to check for fully formed seeds before discarding
- Add dried overripe pods to compost piles after removing seeds for future planting
- Note that consistent harvesting prevents most pods from reaching overmature stage
Planting and Care Essentials
Plant okra seeds only when the soil temperature is at or above 75°F (24°C) for good germination. I use a soil thermometer to confirm this before planting, and transplant seedlings at the 4 to 6-leaf stage. Be sure to harden off plants outdoors before setting them out in the garden. Cold soil means poor germination and slow-growing plants.
Space plants 18-24 inches apart in the row with 3 feet between the rows. In raised beds, space them 12 inches apart in grid patterns. Dense planting results in poor air circulation and increases the risk of disease. Wider spaces enable easier harvesting, and the sun shines on all the plants.
Use a balanced fertilizer, such as 10-10-10, when planting. Use a tomato fertilizer with a 3-4-6 ratio while the plant is in flower to promote denser pod production. I apply compost as a side dressing when flowers begin to form on the plant. Deeply irrigate immediately after applying fertilizer to prevent root burn.
Provide full sun for at least 6 hours every day. Water seedlings with 1 inch of water weekly and 1.5 inches if they are flowering. Don't spray foliage or water-till-you-wilt, or you risk leaf diseases. Use soaker hoses laid along the soil line, mulch to the soil line to hold moisture in the hot weather.
Soil Preparation
- Test soil pH using kit or meter adjusting to 6.5-7.0 range with lime if acidic
- Enrich soil with 4-6 inches of compost or aged manure before planting
- Till to 8-12 inch depth for root development in in-ground gardens
- Ensure drainage by incorporating sand in clay soils or peat in sandy soils
- Form raised beds 6-8 inches high if drainage is poor or soil is compact
- Warm soil with black plastic for 2 weeks before planting in cool climates
Planting Methods
- Direct sow when soil reaches 75°F (24°C) planting seeds ½-1 inch deep
- Space seeds 4 inches apart thinning to 12-24 inches after germination
- Transplant seedlings at 4-6 leaf stage hardening off for 7-10 days first
- Plant in rows 3 feet apart or raised bed grids 18 inches apart
- Water thoroughly after planting using tepid water to avoid shock
- Apply light mulch layer after seedlings establish to conserve moisture
Water Management
- Provide 1 inch of water weekly increasing to 1.5 inches during flowering
- Water at soil base using soaker hoses to prevent leaf diseases
- Check soil moisture daily in temperatures above 85°F (29°C)
- Mulch with 4 inches of straw to reduce evaporation and maintain moisture
- Water early morning to minimize evaporation and allow foliage to dry
- Reduce watering frequency when pods mature to concentrate flavors
Sun and Temperature
- Ensure full sun exposure of at least 6 hours daily for optimal growth
- Maintain daytime temperatures of 85-95°F (29-35°C) for best production
- Protect plants with row covers if temperatures drop below 60°F (16°C)
- Provide afternoon shade in regions with temperatures above 100°F (38°C)
- Use cloches for young plants during unexpected late spring cold snaps
- Monitor greenhouse temperatures ensuring ventilation above 90°F (32°C)
Plant Maintenance
- Stake tall varieties over 3 feet immediately after planting using bamboo poles
- Secure stems loosely to supports with soft ties as plants grow taller
- Pinch growing tips at 24 inches height to encourage bushier side growth
- Remove yellowing leaves at base to improve airflow and prevent disease
- Weed weekly by hand within 12 inches of plants to avoid root damage
- Rotate crops annually avoiding nightshades in previous planting spots
5 Common Myths
Okra can only be grown successfully in the hot and humid southern United States regions.
This is false because okra adapts to various climates through strategic techniques. Northern gardeners achieve success by starting seeds indoors 6-8 weeks before last frost and using black plastic mulch to warm soil. Container gardening with dwarf varieties like 'Blondy' allows mobility to sunny spots, while greenhouses extend seasons in cooler zones. Early-maturing cultivars such as 'Annie Oakley II' mature in 50 days, making them ideal for short growing seasons nationwide.
Larger okra pods are superior because they offer more flesh and better flavor for cooking.
This misconception leads to tough, woody pods; optimal harvest occurs at 2-4 inches (5-10 cm) when seeds are immature. Pods exceeding 4 inches develop fibrous textures and bitter flavors due to lignin formation. For tenderness, harvest daily during peak summer when pods snap cleanly when bent. Oversized pods should be reserved for seed saving or composted, as their culinary quality significantly diminishes beyond the ideal size range.
Okra has different types of varieties that produce a slimy substance called mucilage when the vegetable is cooked, which usually creates issues when being used in cooking recipes.
There are various methods used to eliminate or reduce the slimy property of mucilage from okra due to its natural occurrence; The method of dry roasting whole okra pods for 15 minutes at 425 degrees Fahrenheit (218C) caramelizes the exterior of the pod, and the use of an acidic pre-treatment (lemon juice or vinegar) breaks down the sticky, mucilaginous components of okra. When selecting okra varieties, look for those that have low mucilage properties (Clemson Spineless is one) and utilize high heat cooking such as stir-frying above 400 degrees Fahrenheit (204C) to further lower the viscosity (thickness) of okra. By using proper cooking methods and preparation techniques, you can prepare okra to be used in non-slimy dishes such as crispy fritters or grilled skewers.
Okra plants never require support structures since their stems are naturally strong.
Tall varieties exceeding 3 feet need staking to prevent wind damage and pod loss. Install 5-foot bamboo stakes at planting time, securing stems with soft ties as plants grow. Unsupported plants often bend or break under the weight of mature pods, especially after rain. Proper staking improves air circulation, reduces disease risk, and keeps pods off the ground for cleaner harvesting in dense plantings.
Okra demands daily pruning of leaves and stems to maintain productivity and health.
Excessive pruning harms plants; only pinch main stems at 24 inches to encourage branching. Remove yellowing lower leaves weekly for airflow, but avoid cutting healthy foliage that photosynthesizes energy. Over-pruning reduces yields by stressing plants and exposing fruits to sun scald. Focus instead on proper spacing (18-24 inches), balanced fertilization, and pest management for optimal growth without unnecessary trimming.
Conclusion
Okra is used as both an edible crop and an ornamental plant, featuring hibiscus-like flowers. You get attractiveness, beauty, and food all in one garden space. The pods fill your dinner pot while the yellow blooms attract pollinators. It's no wonder that okra is a top choice for small gardens.
Remember our logistical touchstones, our seasonal timeline: plant in the warm soil, water once a week while they're blooming, and harvest once a day in the summer months. It takes 60 days, from seed to edible pod. Keep it watered, and you'll enjoy pod after pod right up to the frost. It feels so straightforward and generous, this rhythm.
Get started on your first okra patch this year. Select a sunny spot on your property and follow the basic guidelines I've outlined. You'll gain confidence with every pod you pick. Share your successes with friends and take us along to help you with your failures. The garden is generous to those who try.
External Sources
Frequently Asked Questions
What are essential tips for growing okra successfully?
The key to thriving okra includes planting in warm soil above 75°F, providing full sun exposure, and maintaining consistent moisture. Use well-draining soil enriched with compost, harvest pods daily at 2-4 inches, and implement organic pest control methods like neem oil sprays.
Can okra grow in cooler climates like Germany?
Yes, with strategic approaches: start seeds indoors before last frost, use black plastic mulch for soil warming, and select early-maturing varieties. Container gardening allows mobility to sunny spots, while greenhouses extend the growing season in temperate regions.
How should I manage pests on okra plants?
Combat pests organically using these methods:
- Apply neem oil or insecticidal soap sprays weekly
- Introduce beneficial insects like ladybugs for aphid control
- Plant companion species like basil to repel whiteflies
- Use row covers as physical barriers during early growth
What are optimal harvesting techniques for okra?
Harvest pods daily when they reach 2-4 inches in length, using sharp pruners for clean cuts. Select bright green, firm pods that snap when bent. Wear gloves to avoid skin irritation from plant hairs, and handle gently to prevent bruising.
Can okra be grown in containers?
Absolutely. Choose dwarf varieties and large pots with drainage holes. Use quality potting mix, ensure 6+ hours of direct sun, and water more frequently than in-ground plants. Container gardening is ideal for limited spaces or cooler climates.
How do I store okra long-term?
Effective preservation methods include:
- Refrigeration: Store unwashed pods in perforated bags for 7-10 days
- Freezing: Blanch and flash-freeze before airtight storage
- Pickling: Use vinegar brines for shelf-stable preservation
- Drying: Dehydrate slices for soups and stews
Does okra require special soil preparation?
Prepare soil by testing pH and adjusting to 6.5-7.0. Enrich with compost, till deeply, and ensure good drainage. For heavy clay, add sand; for sandy soil, incorporate peat. Raised beds warm faster in spring for earlier planting.
What are common okra growing myths?
Debunk these misconceptions:
- Myth: Okra only grows in hot southern climates (truth: adaptable with techniques)
- Myth: All varieties produce slimy pods (truth: proper cooking eliminates sliminess)
- Myth: Plants never need support (truth: stake tall varieties over 3 feet)
- Myth: Daily pruning is essential (truth: excessive trimming harms yields)
How often should okra be watered?
Water deeply once weekly, providing about an inch of water. Increase to twice weekly during flowering/fruiting in heat. Use soaker hoses at soil level, water early morning, and mulch to retain moisture while avoiding wet foliage.
What companion plants benefit okra?
Strategic companions enhance growth:
- Basil repels whiteflies and improves flavor
- Peppers share similar sun/water needs
- Radishes deter stink bugs and beetles
- Marigolds suppress nematodes in soil