There's nothing like the satisfaction of learning how to grow melons. They're sweeter when grown at home than when bought at the stores. Their taste bursts in your mouth. I can never forget my first crop - the fragrance in the garden! You can do it too, wherever you live, although the climate has something to do with it.
This guide provides everything you need to know. We discuss choosing varieties for your region, soil preparation, planting tips, care secrets, and provide clear steps for both beginner and experienced gardeners looking for new insights.
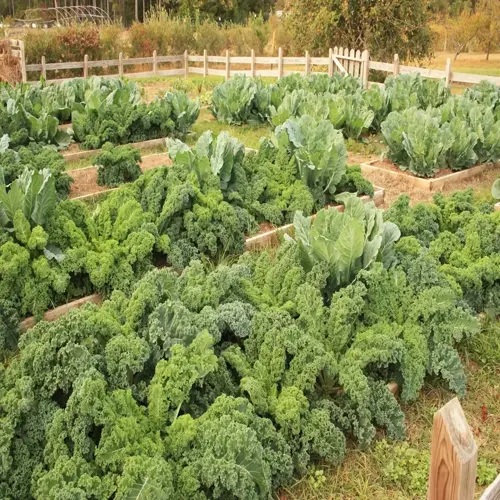
Essential Care: Watering, Feeding, and Protection
Proper watering makes all the difference in caring for melons. I use drip irrigation, which is recommended whenever possible, as it provides consistent moisture and waters the roots directly. It also keeps leaves dry, preventing the fungal diseases that can attack them if they get wet. I run some drip lines every year. I quite literally pound water into the ground to promote a healthy root system.
Switch fertilizers at first flowering. Using a balanced fertilizer with a 10-10-10 NPK ratio, switch to one with a higher potassium content. The fruits begin to pack on the meat, and you'll want to give them a real boost. Using potassium can make a significant difference in the sugar content of your fruits. Fertilize every two weeks during fruiting. Measure carefully to avoid overfeeding.
Choose your pest control methods wisely. I like to use Kaolin clay, which forms a protective barrier on the leaves. I spray this on early in the day and let it dry. Then there's Neem oil, which you use on an existing infestation. For optimal results, try spraying it on your plants at night. I like to use it every other week.
Prevent downy mildew with wise watering. Never water the leaves of a plant, only the soil. Water in the morning if possible. It saves water by preventing evaporation. Give space for circulation. Immediately cut off affected leaves. These simple precautions help prevent the spread of mildew, and, if continued, will keep plants healthy throughout the season.
Watering Schedule
- Provide 1-2 inches (25-50 mm) of water weekly using drip irrigation systems for optimal root growth
- Increase watering during flowering and fruit development stages when plants need most moisture
- Reduce watering by 50% during the final two weeks before harvest to prevent fruit splitting
- Always water at soil level using soaker hoses to keep foliage dry and prevent fungal diseases
Fertilizing Routine
- Apply balanced fertilizer (10-10-10 NPK) at planting time mixed thoroughly into topsoil
- Switch to high-potassium fertilizer like fish emulsion every 10-14 days during fruit formation
- Use half-strength liquid kelp solution for container-grown melons every two weeks
- Discontinue all feeding three weeks before expected harvest date for best flavor development
Pest Protection
- Apply kaolin clay spray (3 cups/gallon) as physical barrier against cucumber beetles
- Treat aphid infestations with neem oil applications during evening hours to avoid sun damage
- Install floating row covers until flowering begins to prevent insect egg deposition
- Place yellow sticky traps near plants to monitor and control flying pest populations
Disease Prevention
- Rotate melon planting locations annually to disrupt soil-borne pathogen life cycles
- Maintain 3-4 foot (90-120 cm) spacing between plants for proper air circulation through foliage
- Remove and destroy infected plant material immediately to prevent disease transmission
- Apply organic sulfur spray preventatively during humid periods to inhibit powdery mildew
Physical Protection
- Install bird netting over plants when fruits form to prevent pecking damage
- Use floating row covers during cool nights below 55°F (13°C) for frost protection
- Place cardboard collars around stems to deter cutworms and soil pests
- Set up windbreaks using burlap screens in exposed garden areas
Harvesting and Storing Melons
The harvest of melons differs in every kind. Cantaloupes slip like marbles from the vine in perfect ripeness; watermelons have to be cut off with sharp shears; honeydews cannot be harvested until the rind shows a change of colour. I always picked them in the morning; they tasted sweeter.
When choosing your fruit for harvest[,] the following ripeness indicators can be used: Cantaloupe is mostly tan colour with golden colouration surrounding the cantaloupe netting. When tapped, a watermelon will often sound hollow. Honeydew has a slightly soft texture at this end. When you press near the stem of the fruit, it should feel somewhat soft[,] which indicates it is ripened.
Cantaloupes are best stored at around 55°F - 60°F. Using a humidifier or other methods (such as over-ripening) can help preserve their flavor. At the same time, giving it away will help you keep your watermelon for a longer time by keeping it cold, regardless of where you store it. Honeydews require a much more humid environment.
Eat melon within three days to retain its sweetness. The sugar percentage declines from the moment it is pulled. I never serve melons unless I know they have been off the vines for less than twenty-four hours. The flavor is incomparably better. I freeze the surplus in cubes and use them that way.
Cantaloupe Ripeness Signs
- Check for full slip stage where stem separates easily from fruit with gentle pressure
- Observe change from green to beige or yellow skin beneath the netting
- Notice strong sweet aroma at the blossom end when fruit is fully ripe
- Feel for slight softening at the blossom end while maintaining firmness elsewhere
Honeydew Harvest Indicators
- Watch for creamy yellow color development on the skin surface
- Feel waxy texture on rind rather than fuzzy or rough surface
- Notice subtle floral fragrance near the stem attachment area
- Check that fruit feels heavy for its size with slight give under pressure
Watermelon Maturity Tests
- Inspect ground spot where fruit rested: turns from white to creamy yellow
- Check for drying/browning of the nearest curly tendril on the vine
- Tap fruit and listen for deep hollow sound rather than dull thud
- Look for rough texture development on skin surface as sugars concentrate
Harvesting Best Practices
- Use sharp pruning shears to cut stems cleanly 1-2 inches (2.5-5 cm) above fruit
- Harvest during morning hours when sugar content is highest
- Handle gently to avoid bruising - never toss or drop melons
- Place harvested fruits in shaded area immediately to prevent sunscald
Optimal Storage Methods
- Store unwashed melons at 45-50°F (7-10°C) with 85-90% humidity
- Keep cut melons refrigerated at 32-40°F (0-4°C) in airtight containers
- Never store whole melons below 40°F (4°C) as chilling damages flesh
- Consume cantaloupes within 5-7 days; honeydews last 2-3 weeks uncut
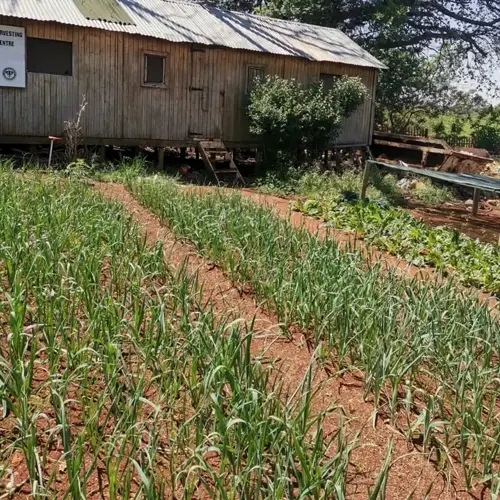
Soil Preparation Essentials
Test your soil pH before planting melons. A kit or meter is best; both give accurate results. The ideal pH is between 6.0 and 7.0 for melon plants. Raise the pH level with garden lime, and lower it with sulfur. A proper balance is necessary for optimal nutrient absorption of essential elements. I wouldn't think of getting started in the spring without testing my soil!
Soil Amendments - Amend according to the type of soil. Clay soil requires coarse sand and compost. Use peat moss and compost for sandy soil. Aged manure is ideal for loamy soil. Work them deep into the top layers. The type of soil dictates what must be added.
Add organic materials according to your plant needs to help improve soil health. For 100 square feet, add 2-3 inches of compost; for 20-30 lbs of well-rotted manure. Fully mix with the top 12 inches of soil. They'll continue to provide nutrients throughout the growing season.
When it comes to planting, there are differences between planting in the ground and using containers. For ground gardening, prepare the garden beds by creating raised mounds to provide adequate drainage. However, for container gardening, mix talkabout with 50% compost, 30% coconut coir, and 20% perlite. Be sure to incorporate worm castings for added nutrition and ensure that all containers have adequate drainage holes.
pH Testing and Adjustment
- Test soil pH using kit or meter - ideal range is 6.0-7.0 for melons
- Add garden lime at 5 lbs per 100 sq ft (2.3 kg/9.3 m²) to raise pH if acidic
- Apply sulfur at 1 lb per 100 sq ft (0.45 kg/9.3 m²) to lower pH if alkaline
- Retest soil 2 weeks after amendment application before planting
Organic Matter Incorporation
- Spread 2-3 inches (5-7.5 cm) of compost over planting area
- Mix in well-rotted manure at 20-30 lbs per 100 sq ft (9-14 kg/9.3 m²)
- Add 1 inch (2.5 cm) layer of leaf mold for moisture retention in sandy soils
- Incorporate amendments to 12 inch (30 cm) depth using garden fork or tiller
Drainage Improvement
- Create raised beds 6-8 inches (15-20 cm) high for heavy clay soils
- Mix gypsum at 10 lbs per 100 sq ft (4.5 kg/9.3 m²) to break up clay
- Install French drains in low-lying areas with 4 inch (10 cm) perforated pipe
- Form planting mounds 4-6 inches (10-15 cm) high for better water runoff
Nutrient Balancing
- Apply balanced fertilizer (10-10-10 NPK) at 1.5 lbs per 100 sq ft (0.7 kg/9.3 m²)
- Add bone meal for phosphorus at 10 oz per 100 sq ft (283 g/9.3 m²)
- Mix kelp meal for micronutrients at 5 oz per 100 sq ft (142 g/9.3 m²)
- Water thoroughly after amendment application to activate nutrients
Container Soil Mix
- Combine 50% compost, 30% coconut coir, 20% perlite for drainage
- Add 1 cup (240 ml) worm castings per 5 gallons (19 L) of soil mix
- Mix 1/2 cup (120 ml) slow-release fertilizer per container
- Ensure containers have drainage holes and saucers to prevent waterlogging
Planting Melons: Seeds and Seedlings
Indoor seed starting starts 3-4 weeks before the last frost. Plant in pots 0.5 inch deep. Keep soil at 75-85°F with heat mats. For direct sowing, wait until the soil warms above 65°F. I do some of each method, depending on how spring is shaping up.
Germination requires a moderate, controlled heat. Aim for 70-90°F for seeds indoors. Thermometers help you gauge soil temperature daily. Outdoors, you'll want a minimum temperature of at least 65 °. Cold soil impedes sprouting! I always cover my outdoor bed in black plastic, which warms it so much faster!
Harden off seedlings in 7-10 days; the author recommends 10 days. Start with dappled shade in full sunshine for 1 hour. Add 1 hour more of sunshine and repeat each day; cut back water, thereby toughening stems. Protect from the wind while turning outdoors. I get them finished on the 10th day.
Spacing depends on how you're growing your grapes. If you're planting in the ground, allow 2 feet (61 cm) between plants. If you're growing in containers, plant 1 grape in each 5-gallon pot. If you're increasing trellised vines, you can plant 1-foot (30-centimeter) spacings. Space to suit your garden.
Indoor Seed Starting
- Sow seeds 3-4 weeks before last frost in 3-4 inch (7-10 cm) pots
- Plant 2 seeds per pot 0.5 inches (1.3 cm) deep in seed-starting mix
- Maintain 75-85°F (24-29°C) with heat mat until germination in 4-7 days
- Thin to strongest seedling after true leaves emerge using scissors
Hardening Off Process
- Begin 7-10 days before transplant by placing outdoors in shade
- Gradually increase sun exposure: 1 hour day 1, +1 hour daily thereafter
- Reduce watering to slow growth and toughen stems before transplant
- Protect from winds and temperatures below 50°F (10°C) during process
Direct Sowing Outdoors
- Wait until soil reaches 65°F (18°C) at 4 inch (10 cm) depth
- Plant 3 seeds every 18-24 inches (45-60 cm) in hills or rows
- Cover with cloche or row cover if nights below 60°F (16°C)
- Thin to 1 plant per station when seedlings have 2 true leaves
Transplanting Techniques
- Water seedlings thoroughly 1 hour before transplanting
- Dig holes twice as wide as root ball, spacing 2 ft (60 cm) apart
- Bury stems up to first true leaves for stronger root development
- Apply black plastic mulch before planting to warm soil
Post-Planting Care
- Water immediately with kelp solution to reduce transplant shock
- Protect with cloches for first week if temperatures drop at night
- Apply straw mulch after soil warms to maintain moisture and heat
- Install trellises immediately for vertical growing varieties
Ideal Climate and Sunlight
All melons require sunshine at all times of their growth, give them six and later on eight or more hours while the leaves are developing; but when fruit is then beginning to form, increase the period of sunshine to eight hours, as it is essential to the elaboration of the sugar required in the fruit. I keep a record of the path the sun takes in my gardens, and I place my plants where they can enjoy the sunlight the longest.
Dramatic Variation in temperature will be necessary. Germination requires a soil temperature of 70-90°F . Fruiting occurs when daytime temperatures are between 80°F - 95°F. Flowering is protected during cool nights that are above 60°F. To understand the differences between soil and air temperatures, I monitor both independently. Knowing this helps to increase plant growth.
Create microclimates in your cooler regions. Plant up against south-facing walls. Use stone paths to hold heat. Put cold frames over seedlings. Set up your water barrel heat sinks. That's how I extend my seasons by 3 weeks!
Calculate your growing degree days for harvest timing! We start counting once all the temps are above 50°F. I target 1500 2000 units for maturity. You add the maximum and minimum temperatures for the day, minus the base of 50. I actually keep a garden journal and calculate this for my crops, as it helps me predict when to harvest!
Sunlight Requirements
- Provide 6-8 hours direct sun daily during vegetative growth stage
- Ensure 8+ hours during fruiting for maximum sugar development
- Use reflective mulches to increase light exposure by 20% in shady areas
- Position plants south-facing with no obstructions for optimal exposure
Temperature Management
- Maintain 70-90°F (21-32°C) daytime temperatures for growth
- Protect plants below 50°F (10°C) with cloches or row covers
- Use black plastic mulch to raise soil temperature 5-10°F (3-6°C)
- Provide afternoon shade when temperatures exceed 95°F (35°C)
Cool Climate Solutions
- Plant against south-facing walls for radiant heat retention
- Use cold frames for 2-3 week season extension in spring/fall
- Install hoop houses with removable covers for temperature control
- Select varieties under 75 days maturity (e.g., Early Hanover)
Heat Accumulation Methods
- Place thermal mass (water barrels) near plants to store daytime heat
- Use stone or brick pathways to radiate warmth overnight
- Create microclimates with windbreaks in exposed locations
- Calculate growing degree days: base 50°F (10°C), target 1500-2000 units
Humidity Control
- Space plants 3-4 ft (90-120 cm) apart in humid regions for airflow
- Water at soil level only to reduce ambient moisture near foliage
- Use drip irrigation instead of overhead sprinklers in tropical zones
- Select mildew-resistant varieties (e.g., Trifecta) for wet climates
Choosing the Right Melon Variety
Always look for varieties resistant to disease. Powdery mildew affects plants in humid areas. Opt for the PMR varieties, such as Trifecta cantaloupe. Fusarium wilt wipes out your plants in warm soils. The different types of Ambrosia are resistant. I lost a lot of plants on this account before I learned it.
Different types of melons will have different taste characteristics. The Cantaloupe has a sweet, musky flavour. With the Honeydew, it has a light, crisp flavour. The flavour of the Watermelon will vary between sweet and refreshing. Asian melons have a floral crispness to their taste. The flavour profile helps to determine the type of melon I will choose each season.
Select cultivars that match the length of your climate. For example, Minnesota Midget (a short-season variety) can be produced from 70 cool days. In contrast, Desert King (a heat-capturing variety) requires 100 hot days. The number of days I use to track from planting to frost ensures I won't be disappointed.
Container gardening works fine. Look into compact varieties if you have a small yard. Bush Sugar Baby fits nicely in a 5-gallon pot. Sugar Pot is perfect for small spaces. Golden Crisp grows vertically on balconies. I cultivate three plants every year on my patio as well. Space limitations disappear with clever choices.
Climate Adaptation
- Choose varieties under 80 days maturity for cool climates (e.g., Minnesota Midget)
- Select heat-tolerant types like Desert King for zones with 90°F+ (32°C+) summers
- Opt for mildew-resistant varieties like Trifecta in humid regions
- Prioritize short-season varieties for mountainous or northern gardens
Flavor Profiles
- Cantaloupes offer classic musky sweetness (e.g., Hale's Best)
- Honeydews provide crisp, subtly sweet flesh (e.g., Honey Pearl)
- Watermelons range from intensely sweet to refreshingly light (e.g., Moon and Stars)
- Asian varieties feature crisp texture with floral notes (e.g., Korean Golden)
Disease Resistance
- Select PMR (Powdery Mildew Resistant) varieties for humid areas
- Choose Fusarium-resistant rootstocks for problem soils
- Opt for virus-tolerant varieties in aphid-prone regions
- Prevent wilt diseases with resistant cultivars like Ambrosia
Space Considerations
- Bush varieties (e.g., Bush Sugar Baby) need only 4 sq ft (0.37 m²)
- Compact vines (e.g., Sugar Pot) thrive in 5-gallon (19 L) containers
- Vertical growers (e.g., Tigger) require strong trellises
- Sprawling types need 6-8 ft (1.8-2.4 m) between plants
Harvest and Storage
- Early varieties for quick yields (65-75 days)
- Long-storage types keep 3+ weeks (e.g., Winter Sweet watermelon)
- Thick-rinded varieties resist shipping damage
- Personal-sized fruits for single servings (1-3 lb/0.5-1.4 kg)
5 Common Myths
Melons require daily watering to stay juicy and sweet.
Overwatering actually dilutes flavor and causes fruit splitting. Melons need deep, infrequent watering (1-2 inches weekly) to develop concentrated sugars. Consistent moisture during fruit development is crucial, but reducing water by 50% in the final two weeks before harvest enhances sweetness. Proper irrigation focuses on root zone hydration without wetting foliage to prevent fungal diseases.
Planting melons near cucumbers makes them taste bitter.
Cross-pollination between melons and cucumbers is impossible due to genetic barriers. Bitterness comes from environmental stress or specific genetics, not proximity. Cucumbers (Cucumis sativus) and melons (Cucumis melo) can't hybridize. Proper spacing prevents disease transmission, but flavor remains unaffected by co-planting. Focus instead on soil nutrition and pest management.
More fertilizer always produces larger melons.
Excessive nitrogen promotes vine growth at the expense of fruit development. Balanced fertilization is critical: use 10-10-10 NPK at planting, then switch to high-potassium formulas during fruiting. Over-fertilization causes hollow heart disorder and reduces sugar content. Soil testing before amending ensures optimal nutrient levels without chemical burn or runoff pollution.
Melons ripen better after being picked from the vine.
Sugar production stops immediately upon harvest. Unlike tomatoes, melons don't convert starches to sugars off-vine. Ripeness indicators like ground spot color, tendril drying, and aroma must be observed before picking. Post-harvest softening occurs, but flavor peaks only when ripened naturally on the plant under proper sunlight conditions.
All melon varieties need identical growing conditions.
Climate adaptation varies significantly: cantaloupes tolerate cooler temperatures (65-80F) while watermelons require intense heat (85-95F). Short-season varieties like Minnesota Midget mature in 70 days, whereas heirlooms like Moon and Stars need 100+ days. Soil pH, spacing, and disease resistance also differ by cultivar, requiring tailored approaches.
Conclusion
Preparation of the soil typically accounts for at least one-third of a good crop. Test the soil to ensure it has good drainage before planting. Rich, loose, and deep earth is a necessity. There are many a week spent over the beds in the spring by me, making things just right. Be thorough in this work, and you will reap great rewards throughout the season.
Select varieties tailored to your climate. In regions with cool summers, opt for short-season varieties. Heat lovers favor southern zones. Container options fit smaller spaces. I choose three varieties for each year. Decide based on which types blossom best in your region.
Maximize the amount of water/time for maximum sweetness. Soaking each week for a deep immersion creates large concentrations of sugar. Cut irrigation dramatically before harvest. I use probes to monitor moisture. If timing is exact, the resulting explosion of flavour is phenomenal and will be evident through your palate.
ELIMINATE MELON GROWTH MYTHS. DON'T WATER MELONS EVERY DAY. CROSS-POLLINATION IS NOT AN ISSUE. Utilize my experience and employ only science-based methods to produce a large number of melons.
External Sources
Frequently Asked Questions
What is the best way to grow melons successfully?
The optimal approach combines soil preparation, climate-appropriate variety selection, and precise care. Start by testing soil pH and amending drainage, choose varieties matching your region's temperature range, provide 6-8 hours of daily sun, use drip irrigation for consistent moisture, and apply balanced fertilization during growth stages.
How long does it take for melons to mature?
Maturity timelines vary significantly by variety and growing conditions. Quick-maturing types like Minnesota Midget cantaloupe need 70-75 days, while larger watermelons may require 85-100 days. Key factors influencing growth speed include soil temperature, sunlight exposure, and proper nutrient management throughout development phases.
Which melon varieties are easiest for beginners?
Ideal starter varieties include compact, disease-resistant types adaptable to diverse conditions:
- Minnesota Midget cantaloupe (cold-tolerant, container-friendly)
- Sugar Baby watermelon (drought-resistant, manageable size)
- Golden Crisp Asian melon (short-season specialist)
- Tigger muskmelon (vigorous but disease-resistant)
What are optimal watering practices for melons?
Melons need deep, consistent moisture with critical adjustments:
- Provide 1-2 inches weekly via drip irrigation
- Increase during flowering/fruit development
- Reduce by 50% in final two pre-harvest weeks
- Always water at soil level to prevent foliage diseases
Do melons require full sun exposure?
Absolutely. Melons demand substantial sunlight for proper growth and sugar development. Provide 6-8 hours of direct sun during vegetative stages, increasing to 8+ hours during fruiting. In partially shaded areas, use reflective mulches to boost light intensity by approximately 20% for optimal results.
How can I accelerate melon growth?
Speed up development through these science-backed methods:
- Pre-warm soil with black plastic mulch
- Select short-season varieties under 75 days maturity
- Apply balanced fertilizer at planting followed by high-potassium feeds
- Use protective covers like cloches during cool nights
What companion plants should be avoided near melons?
Avoid planting these near melon patches due to competition or disease risks:
- Potatoes (spread blight and compete for nutrients)
- Cucumbers (share pests like cucumber beetles)
- Other heavy feeders like squash or pumpkins
- Tall plants that create shade barriers
Why do melon plants flower without producing fruit?
Flower abortion typically results from three primary issues:
- Insufficient pollination (hand-pollinate flowers if bees are scarce)
- Temperature extremes below 50°F or above 95°F
- Nutrient imbalances like excess nitrogen promoting vines over fruit
- Water stress from inconsistent moisture levels
How many melons can one plant produce?
Yield varies by type and growing conditions:
- Cantaloupes: 4-8 fruits per vine
- Watermelons: 2-4 larger fruits
- Compact varieties: 3-5 smaller melons
- Factors affecting yield include spacing, sunlight, and pest management
What are signs of overwatering in melons?
Recognize overwatering through these symptoms:
- Yellowing leaves and stunted growth
- Fruit splitting or diluted flavor
- Root rot evidenced by wilting despite moist soil
- Increased fungal diseases like powdery mildew