
Learning how to grow peas means you'll have a powerhouse of nutrition growing in your garden. All those succulent little pods contain not only a fair amount of protein, but also vitamins A and C. They're a source of beneficial fibre. Peas are always planted as a priority in my spring garden.
You will find that peas are the easiest possible crop to manage, even as a beginner. They require little attention, grow fast, and thanks to their natural ability to withstand frost, can be sown where other crops might not stand a chance. I recall my first pea crop vividly. I hardly did a thing to them, and was rewarded with a mass of sweet, crunchy pods, their first appearance a matter of weeks later.
Peas aren't just for snacking on raw! Toss them into stir-fries for a sweet crunch, blend them into creamy soup, or add them to pasta dishes. I often add the peas from my backyard garden into 2-3 meals every week when I'm harvesting!
Best Time for Planting Peas
Plant peas early enough to 'beat the heat'. They will stand a light frost or two down to 28°F (-2°C). I always sow mine four to six weeks before the last date on which we may expect our spring freeze. That gives them nice cool ground to germinate in before the seedling is liable to be killed by a hard frost of that kind.
Your planting window depends on your location. A gardener in the North wants to plant the moment their soil thaws. Elsewhere, you might be better off making your plantings in the fall after summer heat has broken. My neighbor in Georgia sets out his plants in September for harvests in November. My cousin in Maine waits until the end of April.
Check soil temperature before planting. Pea seeds sprout best when soil temperature is between 40-75°F (4-24°C). Colder soil makes them slow to grow; warmer soil causes them to "run" and makes it hard to start them. I test mine with a kitchen thermometer. Soil at 50°F typically takes 10 days for the seed to germinate, usually.
Peas require full sun for the greatest quantity of pods. Select spots that get 6 hours of direct sunlight per day. Less means fewer flowers, fewer pods, and spindly vines. I never plant in the shade of buildings or trees. In the hot regions of America, a morning with sunshine and afternoon shade is a desirable location.
Cold Climates (Zone 1-4)
- Spring: March-April after snowmelt
- Fall: Late July for early frost areas
- Soil Temp: Minimum 40°F (4°C) for germination
- Tip: Use row covers for late frost protection
Temperate Climates (Zone 5-7)
- Spring: February-March during thaw periods
- Fall: August-September before first frost
- Soil Temp: Optimal 50-70°F (10-21°C)
- Tip: Succession plant every 2 weeks
Warm Climates (Zone 8-10)
- Winter: October-November for cool season growth
- Late Winter: January-February for spring harvest
- Soil Temp: Maximum 75°F (24°C)
- Tip: Provide afternoon shade in hot zones
Coastal Climates
- Year-Round: Plant during cool foggy periods
- Optimal: September-October for winter harvest
- Soil Temp: Maintain 45-65°F (7-18°C)
- Tip: Use windbreaks for ocean breeze protection
Arid Climates
- Early Spring: January-February before heat
- Late Fall: October for winter harvest
- Soil Temp: Critical below 80°F (27°C)
- Tip: Mulch heavily to retain soil moisture
How to Plant Peas Outdoors
Bring in the soil by mixing in two parts garden soil with one part compost. This ratio permits the roots of the peas to spread out freely, with rich compost giving new life to the soil without overpowering the young plants. I always mix these first into the bed before sowing, for by so doing, the whole bed will be of equal quality.
Dig planting trenches exactly 1 inch (2.5 cm) deep. This depth is essential for sprouting to succeed. Place the seed every 2 inches (5 cm). Rake over to cover. But I measure very carefully, for one plunges them too deep, and that hinders them from coming up; and if one sows them too shallow, they are sure to lie bare.
Once the seeds are in the ground, give them a gentle watering with a fine-rose watering can. This shower will not wash the seed out of the ground, nor will it cause any clumping. I always water after planting. The rain maintains the seeds under the earth, at the same time keeping the earth ample.
Put in the trellises before the seeds germinate. This way, you will avoid harmful, late-in-the-game disturbance of those tender little trays of roots. Put them in as soon as the seeds are planted. The nature of the vining var. is to trail or climb when the time is right for them. I know this for certain because I have learned the hard way.
Soil Preparation
- Amend soil: Mix 2-3 inches (5-7.5 cm) compost into top 6 inches (15 cm)
- Ensure drainage: Add perlite if clay-heavy; test percolation rate
- pH balance: Maintain 6.0-7.5; add lime if below 6.0
Seed Treatment
- Soaking method: Submerge seeds 12 hours in room-temperature water
- Alternative: Skip soaking if soil moisture >60%
- Prevention: Discard seeds floating after 1 hour (low viability)
Trench Creation
- Depth: 1 inch (2.5 cm) using hoe or finger
- Row spacing: 12-24 inches (30-60 cm) between trenches
- Proximity: 2 inches (5 cm) from trellis base for vining types
Seed Placement
- Spacing: 2 inches (5 cm) apart; 1 seed per spot
- Bush varieties: 4-6 inches (10-15 cm) between plants
- Covering: Light soil layer; firm gently with palm
Initial Watering
- Tool: Fine-rose can or misting nozzle
- Pressure: Low flow to prevent seed displacement
- Moisture level: Saturate top 3 inches (7.5 cm) of soil
Protection & Mulching
- Netting: Install immediately against birds/rodents
- Mulch: 1 inch (2.5 cm) straw layer for moisture retention
- Cloches: Use for temperatures below 28°F (-2°C)
Pest and Disease Management
As with much of gardening, preventing pests is just as important as addressing problems. Strong, healthy plants are better able to resist challenges in the garden. Start with sufficient airflow gained through proper spacing. I also recommend crop rotation every year. I typically use a row cover early in the season to protect against insects without the need for chemicals. A little prevention goes a long way when saving time and protecting your harvest.
Treat aphids with a soapy water spray. Mix a tablespoon of mild soap with a quart of water and spray it. For powdery mildew, try a milk spray: mix one part milk with nine parts water, and spray at the first sign of the telltale little, hardly discernible white spots. I much prefer these organic solutions because I want my garden to be chemical-free.
You can modify your environment to PUNISH those pestilences! Water the soil, not the leaves, to avoid fern-type diseases. Cover the soil with straw mulch to prevent splashing, space plants to allow for comprehensive sunlight penetration. I prune off lower leaves to allow good air circulation. These little changes render the surroundings inhospitable for the offenders.
Plant companion plants with strong scents near your peas, such as garlic or mint. They will act to repel many common pests, as will marigolds, while radishes will deter the pests from the pea vines. I plant protection companions and principles. They play their part naturally.
Aphids
- Identification: Green/pink clusters on new growth
- Damage: Curled leaves, stunted plants
- Organic Control: Spray with soapy water (1 tbsp dish soap per quart)
- Prevention: Introduce ladybugs; plant chives nearby
Cutworms
- Identification: Night-feeding caterpillars
- Damage: Severed stems at soil line
- Organic Control: Cardboard collars around seedlings
- Prevention: Till soil before planting; remove plant debris
Pea Weevils
- Identification: Brown beetles with snouts
- Damage: Notched leaves; larvae in pods
- Organic Control: Neem oil applications
- Prevention: Early planting; crop rotation
Powdery Mildew
- Identification: White powder on leaves
- Damage: Yellowing, premature leaf drop
- Organic Control: Milk spray (1:9 ratio with water)
- Prevention: Space plants for airflow; water soil not leaves
Fusarium Wilt
- Identification: Yellow leaves, orange stem veins
- Damage: Wilting, plant death
- Organic Control: Remove infected plants immediately
- Prevention: 4-year crop rotation; resistant varieties
Root Rot
- Identification: Stunted growth, black roots
- Damage: Collapsed seedlings
- Organic Control: Improve drainage; add compost
- Prevention: Avoid overwatering; use raised beds
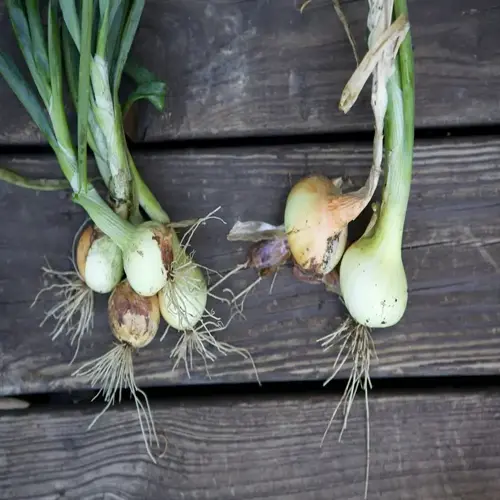
Harvesting and Storing Peas
Be aware of the signs for each. Snap peas should be harvested once they are plump and the peas are visible. Snow peas should be picked while they are flat and bright green (don't wait for the peas inside to show at all), and shelling peas should feel full but not hard. I check them daily, as the pods come to full maturity very rapidly, and fruits picked when they are this ripe have the finest flavor and sweetest flesh.
Use sharp scissors to snip the stems above each pod, rather than pulling the pods from the vine, as this will damage the plant. Hold the vine gently with one hand while you snip with the other; I carry my scissors in my harvest basket. This method will keep your plants producing for weeks.
Choose whichever storage method meets your needs: refrigeration keeps them fresh for several days (2-3) in paper bags, freezing preserves them for at least 8-10 months if blanched first, and drying means you can use peas year round in soups. I freeze most of my harvest for winter meals.
Cool peas immediately after picking. Sugars turn to starch quickly at room temperature. Try to keep harvested pods in the shade, or refrigerate them within an hour. I bring along a cooler to the garden. That's how you hold onto that garden-fresh sweetness you've worked so hard to earn.
Snap Peas
- When: Pods rounded, glossy, peas visible but not bulging
- Frequency: Harvest every 1-2 days during peak season
- Method: Snip stem with clean scissors; avoid tugging vines
- Yield: 20-30 pods per plant over 3 weeks
Snow Peas
- When: Pods flat, bright green, 2-3 inches (5-7.5 cm) long
- Frequency: Pick daily before peas swell
- Method: Cut just above pod; harvest from bottom upward
- Tip: Test tenderness - should snap easily
Shelling Peas
- When: Pods plump but still green, before yellowing
- Frequency: Harvest every 2-3 days
- Method: Support vine with one hand while snipping
- Test: Pods should feel full but not hard
Bush Varieties
- When: All pods mature simultaneously
- Frequency: Single harvest when 80% pods ready
- Method: Cut entire plant at soil level
- Tip: Harvest morning for maximum crispness
Pea Shoots
- When: 4-6 inches (10-15 cm) tall with tender leaves
- Frequency: Cut every 7-10 days
- Method: Snip top 2 inches (5 cm) with scissors
- Regrowth: Harvest up to 3 times per plant
Step-by-Step Growing Guide
Plant 4-6 weeks before your last spring frost. Prepare the soil by mixing in compost and creating 1-inch-deep trenches. Set seeds 2 inches apart. Cover them lightly. I use my garden trowel and the compost bin for this. Water the row lightly using a fine rose can, so as not to disturb the seed.
Look for sprouts within 7-14 days. If frost threatens, cover seedlings with row covers for protection. Thin plants to a 4-inch spacing when they reach 2 inches in height. Trellises can now be installed. I use bamboo stakes and twine. Check every day for pests like cutworms lurking near stems.
Train vines onto supports from weeks 5 to 6, as rapid growth begins. Water deeply twice weekly if no rain falls. Apply straw mulch around the plants. I carry my pruning shears with me to remove any yellowing leaves. Watch for aphids underneath leaves during this productive growth.
Expect flowers by the seventh or eighth week. If there are no bees to help out, gently shake the plants every day. Increase watering to 1.5 inches a week. I always use a moisture meter to determine when to water, ensuring the ground is well soaked. Provide afternoon shade if the temperature threatens to exceed 80 degrees, as it may cause the blossoms to drop.
You should start harvesting in week 9 or 10. Snow peas can be harvested first when the pods begin to flatten. Use scissors in your daily harvest. Bring along a basket and a cooling pack. I prefer to pick during the morning hours for maximum sweetness and crispness. Also, while the vines are heavily laden, support them to prevent breakage.
Week 1-2: Germination
- Soil Temp: Maintain 50-70°F (10-21°C)
- Moisture: Keep top 1 inch (2.5 cm) damp
- Light: Not critical until sprouting
- Tip: Cover with burlap if soil dries quickly
Week 3-4: Seedling Care
- Height: Thin to strongest plants at 2 inches (5 cm)
- Support: Install trellises before roots develop
- Water: 1 inch (2.5 cm) weekly; increase if dry
- Fertilizer: None needed if compost amended
Week 5-6: Vegetative Growth
- Training: Guide vines onto supports daily
- Pest Check: Inspect undersides of leaves for aphids
- Mulch: Apply straw to conserve moisture
- Weeding: Hand-pull weeds near base
Week 7-8: Flowering
- Water: Increase to 1.5 inches (4 cm) weekly
- Pollination: Shake plants gently if no bees present
- Temperature: Shade if >85°F (29°C)
- Disease Watch: Remove yellowing leaves
Week 9-10: Pod Development
- Harvest Start: Pick snow peas first
- Frequency: Harvest every 48 hours
- Nutrients: Side-dress with potassium if pods small
- Support Check: Reinforce heavy vines
Week 11+: Maturation
- Yield Peak: Collect 70% of crop
- Succession: Plant new seeds for fall crop
- Seed Saving: Mark best pods for drying
- Decline: Remove plants when production drops 50%
5 Common Myths
Peas require heavy nitrogen fertilization to produce good yields like other vegetables.
Peas are nitrogen-fixing legumes that form symbiotic relationships with rhizobia bacteria in root nodules, converting atmospheric nitrogen into usable forms without synthetic fertilizers. Excessive nitrogen promotes foliage growth at the expense of pod production, reducing yields by up to 30%. Healthy pea plants need only compost-amended soil and benefit from crop rotation with nitrogen-demanding plants like corn.
Soaking pea seeds overnight is 100% essential to guarantee germination success each and every time.
Soaking bean seed(s), even though it speeds up germination by two (2) to three (3) days in a dry environment, isn't necessary if you are planting your bean seeds directly into some form of moist or damp soil, and/or after a relatively heavy rainfall. According to research conducted on this subject, seeds that are not soaked prior to being placed into damp soil will germinate at a germination success rate of 85% - 90% of the total number of seeds that were planted in that soil at that time. Additionally, there is a risk of soaking your bean seeds for too long, which can lead to (possibly) causing the seed(s) to rot, while certain treated seed varieties should never be soaked. Before following strict soaking guidelines when planting your seeds, you should always monitor your soil moisture appropriately.
Pea plants cannot survive any frost and must only be planted after the last spring freeze.
Peas tolerate light frosts down to 28°F (-2C) due to natural antifreeze compounds in their cells. Established seedlings withstand brief freezing through osmotic adjustment that prevents ice crystal damage. Early planting in cool soil (40F/4C) extends their growing season, with snow peas showing exceptional cold resistance. Protective covers further enhance frost resilience.
Growing peas in containers severely limits their growth and pod production compared to ground planting.
Dwarf and bush varieties like 'Tom Thumb' yield 80-90% of ground-planted equivalents in 12-inch deep containers with proper care. Container advantages include controlled soil pH, reduced disease transmission, and mobility for sun optimization. Key factors are daily watering, trellising for vining types, and monthly compost tea feeding. Urban gardeners report excellent harvests from balcony setups.
Indoor pea cultivation under grow lights cannot produce edible pods, only sprouts.
With 12-14 hours of full-spectrum LED lighting positioned 6-8 inches above plants, indoor peas flower and pod successfully. Maintaining 65-70F (18-21C) daytime temperatures with 40-50% humidity mimics ideal conditions. Hand-pollination using a soft brush transfers pollen between flowers. Expect 60-70% of outdoor yields with varieties like 'Sugar Ann' performing exceptionally well indoors.
Conclusion
Extend your pea harvest by succession planting: sow new seeds every 2 to 3 weeks during the cool seasons. Overwinter with cold hardy varieties under protective covers. I keep peas in production all year by rotating between garden beds and containers, resulting in fresh pods beyond the general spring timeframe.
Indulge in the amazing nutritional harvest of fresh peas from your garden. They pack in plant-based protein for muscle building, vitamin C to ward off disease, and fibre for a happy gut. I toss peas through as many meals as I can each day during pea season. More nutrition than many supermarket supplements!
Peas not only provide me with a healthy crop each year, but also serve as a beautiful example of sustainable gardening in action. They fix nitrogen in the soil and actually improve your soil health without the application of chemical fertilisers. And their water requirements are modest - I have noticed a general improvement in soil quality in the beds where peas are grown each year. All in all, peas are definitely a 'green' crop to grow!
Experiment with different varieties to gain a succession of crops. Mix early snow peas with late shelling types and try a few colorful heirlooms, such as purple-podded. I like to trial two or three new cultivars each year. There's plenty of scope to be had, and the search keeps the garden interesting and lengthens the harvest calendar.
External Sources
Frequently Asked Questions
How do you grow peas for beginners?
Start with cool-season planting in well-draining soil amended with compost. Sow seeds 1-2 inches deep, provide trellis support for vining varieties, maintain consistent moisture, and harvest pods when plump but still bright green.
Are peas easy to grow at home?
Yes, peas are beginner-friendly due to their cold tolerance and minimal requirements. Key factors: plant early in cool seasons, avoid over-fertilization, and provide basic vertical support. They thrive in containers or garden beds with moderate care.
What conditions do peas need to thrive?
Peas require:
- Full sun (6+ hours daily) with afternoon shade in hot climates
- Cool soil temperatures for germination
- Well-draining soil enriched with organic compost
- Consistent watering without waterlogging
- Trellis support for climbing varieties
Can you grow peas in containers?
Absolutely. Use deep containers with drainage holes, select bush or dwarf varieties, and ensure rich potting mix. Key tips: water daily in warm weather, provide mini-trellises, and avoid overcrowding. Container peas yield nearly as well as in-ground plants.
How do you protect peas from pests?
Prevent infestations through:
- Companion planting with mint or garlic to deter insects
- Row covers during early growth stages
- Organic sprays like neem oil for aphids
- Regular inspection of leaf undersides
- Crop rotation to disrupt pest cycles
What are common mistakes when growing peas?
Avoid these errors: planting in warm soil causes poor germination, over-fertilizing reduces pod production, insufficient support leads to disease, late harvesting makes peas starchy, and inadequate spacing promotes fungal issues. Timing and moderation are crucial.
Can peas be grown year-round?
In mild climates, use succession planting: sow early spring for summer harvest, then late summer for fall yield. Overwinter with cold-tolerant varieties under frost cloth. In colder zones, extend seasons using hoop houses or indoor LED setups.
How do you maximize pea yields?
Boost production through:
- Succession planting every 2-3 weeks
- Pinching tips to encourage branching
- Mulching to retain soil moisture
- Harvesting pods daily to stimulate new growth
- Using inoculants to enhance nitrogen fixation
Why do pea plants yellow and die early?
Common causes include root rot from overwatering, fusarium wilt disease, nutrient deficiencies, or heat stress. Prevent by ensuring proper drainage, rotating crops annually, maintaining soil pH balance, and providing shade during temperature spikes.
What companion plants benefit peas?
Excellent companions:
- Carrots (loosen soil for pea roots)
- Radishes (deter beetles)
- Corn (natural trellis for vines)
- Cucumbers (shade soil in summer)
- Herbs like mint (repel aphids)