
Knowing when to plant radishes is the very first secret of growing those speedy vegetables. Radishes mature faster than almost any other garden crop. You'll be picking crisp roots just three or four weeks after they are planted. I remember my first radishes; I was very pleased that such ruby globes had grown so speedily.
Every radish plant provides two delicious harvests in one package. You get the crunchy roots and the nutrient-rich greens. I pop both in my salads for the extra bite and nutrients. The greens have more vitamin C than oranges! Now that's a bang for your buck.
Radishes will grow almost anywhere: in a thin soil of a pot or a corner of ground in your own yard or of your rented apartment. If you have a balcony in your apartment, grow them there at odd corners. They can also be planted between kinds of the slower growing large vegetables. I have them growing in a box on the window sill. They, above all things, are the ideal cultivators of the tiny garden.
Beginners enjoy growing radishes, such as 'Cherry Belle', as pests tend to leave them alone, which should require no sprays whatsoever in a healthy, organic garden. Due to this relative immunity to pests, inexperienced gardeners often feel confident that they can succeed in the vegetable garden with minimal prior knowledge.
When to Plant Radishes
When to plant radishes depends on your local frost dates: For early spring planting, select a planting date that is 4-6 weeks before your last expected frost date. Fall planting works best for radishes if those crops mature (and are harvested) before the first autumn frost, so farmers will choose a planting 4-6 weeks before that date. I always mark that gardening calendar with those dates. In both cases, planting that far ahead encourages the roots to mature during the cool months.
Soil temperature considerably affects radish germination. Imagine having to test the bath water before you venture in! Seeds will sprout best at a temperature of between 50 and 70 degrees Fahrenheit. Until then, a soil thermometer should be used. Personally, I have found that germination ceases below 40 degrees and above 80 degrees. Warmth hastens them.
Sow your radish seed in successive crops every 10-14 days for abundant harvests of salad filler. I scatter a few seeds in open ground each week from early spring through late fall so that we have a regular supply but never an overwhelming abundance.
Move your planting dates accordingly for your zone. If you live in a warmer zone, such as 7-10, you can plant earlier in the spring. Cooler zones (3-5) may need to wait for the ground to thaw before planting. I have been gardening in a 6b zone for several years, and the regional adaptation prevents my greens from bolting when it warms up in summer.
Cool Zones (USDA 2-5)
- Extend spring planting window by 2 weeks
- Use cold frames for early season protection
- Prioritize quick-maturing varieties under 30 days
- Harvest winter radishes after first light frost
Warm Zones (USDA 6-10)
- Plant in partial afternoon shade during summer
- Utilize succession planting every 10 days
- Select heat-tolerant varieties like French Breakfast
- Focus on fall/winter crops for best flavor
Cool Zones (USDA 2-3)
- Extend spring planting window by 3 weeks
- Use cold frames for early season protection
- Prioritize quick-maturing varieties under 30 days
- Harvest winter radishes after first light frost
- Plant in raised beds for faster soil warming
- Avoid fall planting after mid-August
Cool Zones (USDA 4-5)
- Start spring planting 1 week after thaw
- Utilize row covers for frost protection
- Select cold-tolerant varieties like Cherry Belle
- Time fall planting for early September start
- Mulch winter radishes for ground insulation
- Monitor soil temperature with probe thermometer
Temperate Zones (USDA 6-7)
- Plant spring crops in early March
- Utilize succession planting every 10 days
- Provide afternoon shade for summer crops
- Focus on fall planting in late August
- Use shade cloth for temperature control
- Water early morning to reduce evaporation
Warm Zones (USDA 8-9)
- Plant in partial shade during summer
- Prioritize winter planting from October
- Select heat-tolerant varieties like French Breakfast
- Use drip irrigation for moisture consistency
- Plant in containers for temperature control
- Harvest quickly before heat intensifies flavor
Hot Zones (USDA 10+)
- Grow exclusively in cool season months
- Use deep containers with shade covers
- Plant in October through February only
- Select quick-growing varieties under 25 days
- Water twice daily in dry conditions
- Harvest at dawn for crispest roots
Best Radish Varieties
Radish varieties divide into two seasonal groups. Spring/summer types mature quickly in 72-90 days and include Cherry Belle, characterized by its bright red skin and pleasantly mild flavor. Winter varieties take a little longer, 55-70 days, such as the black and exciting Black Spanish. I plant both for year-round crops.
Days to maturity matter when planning. Quick-growing varieties, like French Breakfast radishes, mature in 23-28 days. However, slower-maturing winter types, such as Daikon, require 60-70 days. Depending on where you live, the packet of seeds you pick up at the store will tell you the number of days to maturity. I use this number to schedule the best planting dates around an impending weather change.
They can range from mild to spicy hot; sweet, mild varieties, such as Easter Egg radishes, will add a much-appreciated mellow note to dishes. In contrast, varieties with fruitier notes, like Spicy Black Spanish, have a serious bite. I generally try to match the array with the dish; mild-spirited varieties are suitable for raw salads, while bolder varieties make for good roasting.
Appearance and "over-the-top" beautiful things appeal to the eye, greatly enhancing the dining experience. "Watermelon" radishes reveal pink "flesh" when sliced crosswise, and "China Rose" has beautiful rose-colored skins. I like using these and others in vibrant presentations; their beauty makes ordinary food special. Always, varieties must be of good appearance.
Specialized uses broaden our options. Daikon gaily stands in the pickling range with its crisp "bite." Rat's Tail radish pods do well in a stir-fry. All winter radishes I preserve for eating in the cold months; yet, how many are among those available! Match the variety with your cooking intention for the best results.
Cherry Belle
- Maturity: 22-25 days; ideal for quick spring harvests
- Appearance: Bright red globe shape, crisp white interior
- Flavor: Mild peppery taste perfect for fresh salads
- Growing: Tolerates cool temperatures down to 40°F (4°C)
- Yield: Produces uniform 1-inch (2.5 cm) diameter roots
- Special: Resistant to cracking and pithiness issues
French Breakfast
- Maturity: 23-28 days; oblong shape with distinctive coloring
- Appearance: Crimson top fading to white tip cylindrical root
- Flavor: Subtle spice with extra crunchy juicy texture
- Growing: Thrives in partial shade during warm weather
- Yield: Grows 2-3 inches (5-7.6 cm) long with tender skin
- Special: Excellent for roasting due to dense flesh

Easter Egg Blend
- Maturity: 25-30 days; colorful mix of round varieties
- Appearance: Vibrant purple, pink, white and red hues
- Flavor: Mild sweetness with slight peppery undertones
- Growing: Adapts well to container gardening setups
- Yield: Consistent 1-1.5 inch (2.5-3.8 cm) diameter globes
- Special: Perfect for children's gardens and edible landscaping
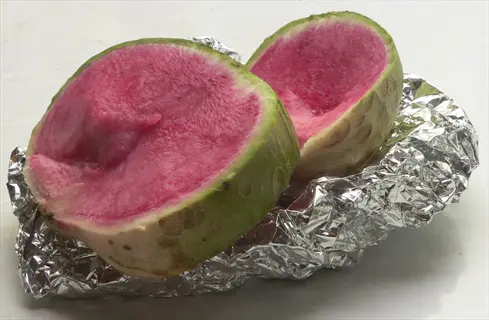
Watermelon Radish
- Maturity: 60-65 days; large winter radish variety
- Appearance: Greenish-white skin with bright pink interior
- Flavor: Mild sweetness with slight peppery finish
- Growing: Requires deep loose soil for proper development
- Yield: Produces 3-4 inch (7.6-10.2 cm) diameter roots
- Special: Stunning in salads when thinly sliced
Daikon
- Maturity: 60-70 days; traditional Asian cylindrical variety
- Appearance: Snow-white roots growing 6-18 inches (15-46 cm) long
- Flavor: Mild crisp flesh perfect for pickling recipes
- Growing: Needs 12+ inches (30 cm) soil depth for straight roots
- Yield: 1-2 pounds (454-907 g) per root under ideal conditions
- Special: Excellent for cover cropping and soil improvement
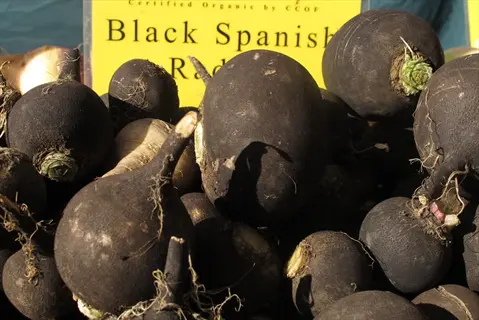
Black Spanish
- Maturity: 55-60 days; heirloom winter storage variety
- Appearance: Charcoal-black skin with pure white interior
- Flavor: Intense peppery bite that mellows when cooked
- Growing: Tolerates light frosts without damage to roots
- Yield: Round roots 3-4 inches (7.6-10.2 cm) in diameter
- Special: Stores well in cool cellars for months
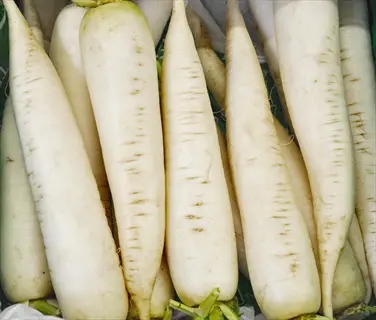
White Icicle
- Maturity: 25-30 days; elongated spring/summer variety
- Appearance: Pure white carrot-shaped roots 5-6 inches (12.7-15.2 cm) long
- Flavor: Crisp texture with moderate spicy kick
- Growing: Performs well in heavy clay soil conditions
- Yield: Continuous production throughout cool seasons
- Special: Resists becoming pithy in warm weather
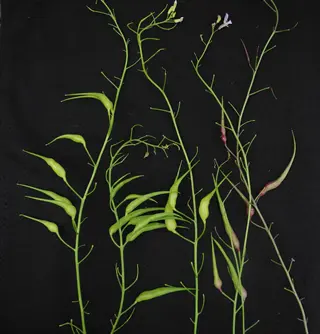
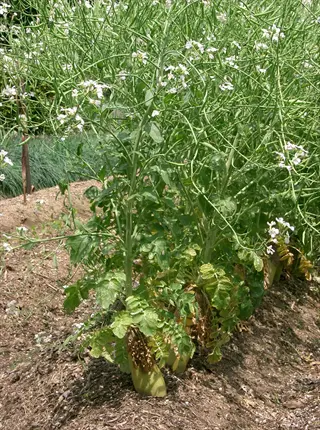
Rat's Tail
- Maturity: 45-50 days for pods (unique edible-podded type)
- Appearance: Slender green seed pods 4-6 inches (10-15.2 cm) long
- Flavor: Spicy crunch similar to snap peas with bite
- Growing: Tall plants requiring support for best yield
- Yield: Continuous harvest of pods throughout summer
- Special: Pods excellent for pickling and stir-fries
Sparkler
- Maturity: 24-28 days; distinctive bi-colored appearance
- Appearance: Round roots with bright red top, white bottom
- Flavor: Sweet crisp flesh with very mild spice
- Growing: Tolerant of slightly warmer conditions
- Yield: Uniform 1.5-inch (3.8 cm) roots with small tops
- Special: Resistant to bolting in fluctuating temperatures

China Rose
- Maturity: 55-60 days; winter storage heirloom variety
- Appearance: Rose-pink skin with white flesh inside
- Flavor: Sweet-spicy flavor that intensifies when stored
- Growing: Requires consistent moisture for smooth roots
- Yield: 4-5 inch (10.2-12.7 cm) diameter roots weighing 1 pound (454 g)
- Special: Skin color deepens after light frost exposure
Planting and Care Essentials
Radishes thrive best in well-drained, light, and well-fertilized soil. Compost should be about 30 to 40 per cent. If possible, add at least 50% or 60%. topsoil, then, say 10 or 20 per cent. of sand to prevent the clay from becoming sticky.
The depth of sowing varies with the type of soil. Plant seeds in loose, sandy soils to a depth of only about ½ inch; in heavy clay, a quarter of an inch will be enough. I test the depth with my fingertip each time before sowing. The right depth prevents them from being washed out or otherwise dried up.
Monitor moisture with the finger test method. Make daily checks by inserting your finger into the soil to the first knuckle. The feeling you seek is that of a moist wrung-out sponge. I check the moisture each morning before the day warms up. Constantly wet soil helps to prevent root damage and bitterness.
Selecting the proper fertilizer is critical. Organic fertilizers, such as compost tea, provide nutrients over time. Synthetic fertilizers typically promote leaf growth rather than root growth. I avoid using fertilizers with a high Nitrogen content. Balanced nutrition yields better radish crops without the danger of Chemical Residues.
Thin seedlings early to allow for proper spacing. Snip off the extra at the soil level when the plants are about two inches tall. Leave two to three inches between your spring radishes; winter ones require four to six inches. I often add the thinning to my salads rather than waste it.
Container mixes are different from garden soil. I would mix 60% potting mix with 30% compost and 10% perlite. I'd also only use pots that are at least twelve inches deep. I'd add extra drainage holes so that my roots don't get swampy. Containers are ideal for gardening in small spaces.
Soil Preparation
- Tilling: Loosen soil to 8-12 inch (20-30 cm) depth using garden fork
- Amendment: Mix 2-3 inch (5-7.6 cm) compost into topsoil
- Leveling: Rake surface smooth for even seed contact
- Drainage Test: Water should absorb within 10 seconds
Sowing Technique
- Depth: Plant seeds 0.5 inch (1.3 cm) deep in rows
- Spacing: Place seeds 1 inch (2.5 cm) apart initially
- Rows: Space rows 6-12 inches (15-30 cm) apart
- Covering: Lightly tamp soil after covering seeds
Watering Protocol
- Germination: Mist daily to keep surface moist
- Established Plants: Water 1 inch (2.5 cm) depth weekly
- Moisture Check: Insert finger 1 inch (2.5 cm) deep - soil should feel damp
- Method: Use soaker hose for deep root penetration
- Timing: Water early morning to reduce evaporation
Nutrient Management
- Fertilizer: Apply balanced 5-5-5 NPK (equal nitrogen-phosphorus-potassium)
- Organic Option: Side-dress with compost tea instead
- Frequency: Single application suffices for radishes
- Avoid: High nitrogen fertilizers prevent root formation
Thinning Procedure
- Timing: When seedlings reach 2 inch (5 cm) height
- Spacing: Thin to 2-3 inch (5-7.6 cm) for small varieties
- Technique: Snip at soil level to avoid root disturbance
- Use: Add thinned greens to salads immediately
Container Soil Mix
- Composition: 60% potting mix + 30% compost + 10% perlite
- Depth: Minimum 12 inch (30 cm) container depth required
- Drainage: Ensure pots have adequate drainage holes
- Moisture: Water when top 0.5 inch (1.3 cm) feels dry
Harvesting and Storing Radishes
The different types of radishes need different harvest times. For spring varieties like Cherry Belle, they can be harvested in 22-30 days, as long as the diameter of the root is around an inch. For winter types, such as Daikon, they take 55-70 days to mature as they grow larger. I wait until I see the pretty shoulders catching colour in the soil, and that's my cue that it's the right time to harvest.
Thoroughly process them directly after harvesting. Cut off the greens to prevent wilt and loss of moisture from the roots. Wash and dry them well, and then store them away. I leave the winter sorts unwashed, putting them away in a cool place, for if well handled, they will remain crisp and juicy for weeks.
Store spring radishes in ventilated bags in a refrigerator at 32-40 degrees Fahrenheit (0-4 degrees Celsius) for short-term storage. Store winter radishes long term at 35-45 degrees Fahrenheit (2-7 degrees Celsius) in a cooler environment (such as by layering unwashed radishes in wet sand). I have successfully used this method to store winter radishes for extended periods of up to three months.
Winter radishes may also have an enhanced flavor due to the conversion of starches to sugars by light frost, creating a sweet taste; no extra seasoning is needed. I will usually leave some radishes growing in the ground all through the first frosts of winter so that the conversion process can take place. This method works well for the China Rose variety of winter radish.
Measure all your storage conditions exactly. The humidity in your root cellars should be maintained at 90-95%. Always use the metric equivalent, so you'd say depth of water is 1 inch (2.5 cm) deep. I record all these details in my garden journal. Exact measurements ensure that everything is stored correctly.
Refrigeration (Short-term)
- Prep: Remove greens, wash and dry roots thoroughly
- Method: Place in ventilated plastic bags
- Temperature: 32-40°F (0-4°C)
- Humidity: 95% relative humidity
- Duration: 1-2 weeks for spring radishes
- Tip: Place damp paper towel in bag to maintain moisture
Root Cellar (Long-term)
- Prep: Brush off soil, do not wash
- Method: Layer in damp sand or sawdust
- Temperature: 35-45°F (2-7°C)
- Humidity: 90-95% relative humidity
- Duration: 2-4 months for winter varieties
- Tip: Inspect monthly for spoilage
Freezing Preparation
- Prep: Blanch sliced radishes 2 minutes
- Method: Flash freeze on tray before bagging
- Temperature: 0°F (-18°C) or below
- Use: Ideal for cooked dishes only
- Duration: 10-12 months
- Tip: Vacuum-seal for best texture preservation
Pickling Preservation
- Prep: Slice or quarter radishes uniformly
- Method: Pack in vinegar brine solution
- Ratio: 1:1 vinegar to water with 2 tbsp (30ml) salt per quart (946ml)
- Storage: Refrigerate after processing
- Duration: 3-6 months
- Tip: Add spices like mustard seed for flavor
Greens Storage
- Prep: Wash and spin dry immediately
- Method: Store in airtight container with paper towel
- Temperature: 32-36°F (0-2°C)
- Duration: 3-5 days
- Use: Best consumed fresh or blanched/frozen
- Tip: Mist greens lightly if wilting occurs
Cold Storage (Long-term)
- Prep: Brush off soil, do not wash
- Method: Layer in damp sand or sawdust
- Temperature: 35-45°F (2-7°C)
- Humidity: 90-95% relative humidity
- Duration: 2-4 months for winter varieties
- Frost Effect: Light frost enhances sweetness in storage
Troubleshooting Common Issues
Radish problems should be recognized according to the specific symptoms they present. All leaves and no roots. Excess nitrogen or heat stress. Test soil for nitrogen over 50 ppm. Organic: Flushing the soil with water. Conventional: Change to a low-nitrogen fertilizer. Prevention: Avoid fresh manure.
Cracked or woody roots indicate a fluctuating water supply. Look for radial cracks around the shoulders. Test the moisture content in your soil. If the difference is more than 30%, that stalwart radish is starting to split. Use straw as mulch for organic prevention. Install drip irrigation if necessary for conventional methods. A consistent watering regimen prevents this from becoming an ongoing problem.
Holes in your leaves? Pests. Shotgun patterns are an indication of flea beetles. Treat organically with neem oil sprays once a week. Traditionally, use pyrethrin-based insecticides, and plant mint near your vegetables for natural pest prevention. Use row covers to deter pests.
Early flowering is an indicator of bolting, which is often caused by excessive heat. Look for flower stalks appearing from plant centers. Check if you have days with temperatures over 80 degrees. Use shade cloth in organic methods. Conventional growers harvest bolt-resistant varieties. Avoid this by planting in cooler seasons.
Yellowing of leaves indicates a nutrient deficiency: Pale Leaves with Yellow Veins are a sign of insufficient iron, and if they are extremely pale then testing your soil for nitrogen levels should confirm that it is below 20 parts per million. Apply compost tea in the organic approach and balanced liquid fertilizer in the conventional one. Crop rotation will prevent deficiencies from returning.
Poor Root Development
- Diagnosis: Soil test for nitrogen levels above 50 ppm
- Immediate Fix: Flush soil with water to leach excess nitrogen
- Organic Prevention: Use compost instead of manure
- Long-term Solution: Plant in cooler seasons
- Companion Plants: Grow with nitrogen-fixing peas
- Visual Indicator: Lush foliage with no root swelling
Cracking/Splitting
- Diagnosis: Check soil moisture variance >30%
- Immediate Fix: Apply consistent 1 inch (2.5 cm) water weekly
- Organic Prevention: Mulch with straw to retain moisture
- Long-term Solution: Install drip irrigation system
- Companion Plants: Shade-tolerant lettuce for coverage
- Visual Indicator: Radial cracks around root shoulders
Pest Infestations
- Flea Beetles: Cover with row covers at planting
- Cabbage Root Maggots: Apply diatomaceous earth around stems
- Organic Spray: Neem oil solution every 5 days
- Companion Solution: Plant mint as repellent
- Trap Crops: Use radishes near squash to lure pests away
- Visual Indicator: Shotgun pattern holes on leaves
Early Bolting
- Diagnosis: Monitor temperatures above 80°F (27°C)
- Immediate Fix: Harvest immediately for edible pods
- Prevention: Plant bolt-resistant varieties like Sparkler
- Shade Solution: Use 30% shade cloth in warm zones
- Watering Tip: Cool soil with afternoon misting
- Visual Indicator: Flower stalks emerging from center
Disease Prevention
- Root Rot: Ensure soil drainage - add perlite if soggy
- Fungal Issues: Rotate crops every 3 years
- Organic Treatment: Apply copper fungicide spray
- Airflow Solution: Space plants properly during thinning
- Sanitation: Remove infected plants immediately
- Visual Indicator: White mold or black spots on leaves
Nutrient Deficiency
- Diagnosis: Soil test shows nitrogen <20 ppm or iron deficiency
- Immediate Fix: Apply balanced liquid fertilizer
- Organic Solution: Side-dress with compost tea
- Prevention: Rotate crops and add organic matter annually
- Leaf Indicator: Pale leaves with green veins
- Soil Fix: Amend with iron chelate if interveinal chlorosis
5 Common Myths
The myth that radishes require unbroken full exposure to the sun for proper development, is one of the most prevalent misunderstandings in horticultural practice by home gardeners.
In fact, in most climates, and especially warmer climates where the excess heat of the sun causes premature flowering, radishes grow best when grown under partial shade$. Radishes actually require only four to six hours a day of direct exposure to sunlight, but the afternoon shade helps relieve the effects of heat stress on the plants. User the optimal amount of exposure to light, the radish grows its roots properly, thus producing radishes without the bitterness and 'woodiness' associated with overexposure to sunlight and excessive heat.
There is a common misconception that larger radish sizes indicate better quality and more developed flavors.
Overgrown radishes become woody and bitter due to natural lignin accumulation as they mature past peak size. Harvesting at 1-2 inches diameter ensures crisp texture and balanced flavor. The optimal stage provides pleasant mildness without excessive pungency, making smaller roots preferable for fresh consumption in salads and dishes.
Some people incorrectly assume that radish greens are toxic and should never be included in meals.
Radish greens are edible and highly nutritious, containing greater concentrations of vitamin C than the roots themselves. They can be safely used in salads, soups, and pesto when harvested young. These leafy greens provide valuable calcium, iron, and antioxidants similar to other salad greens without any harmful properties.
A frequent misunderstanding suggests that radishes need regular fertilizer applications throughout their growth cycle.
Excess fertilizer, especially nitrogen-rich formulations, promotes leafy growth at the expense of root development. Radishes perform best in compost-amended soil with balanced natural nutrients. Over-fertilization causes hollow roots and increases nitrate accumulation, making moderate organic supplementation the recommended approach for healthy radish cultivation.
Many believe that container gardening inevitably restricts radish growth and reduces overall yield potential.
Containers 12+ inches deep support robust radish development when filled with appropriate soil mixtures. Consistent moisture and proper spacing allow container-grown radishes to match ground-grown yields. This method offers advantages like better temperature regulation and reduced soil-borne disease risks while accommodating urban gardening spaces effectively.
Conclusion
Radishes are still one of the fastest-growing vegetables ideal for beginners in the garden. You see results in weeks, not months. This early reward buoys beginning vegetable gardeners. I've watched several friends start their home-growing adventures with radishes.
Timing is everything for radish success. Plant whenever the weather is cool, typically in early spring or fall. Try to avoid the heat of summer, as it can ruin the roots. I tip my plantings to hit the frost for the best results. Get the timing right, and you'll achieve a crisp root every time.
All parts of the radish plant can be used creatively. Add crunch to salads with the root, make pesto or sautéed greens, and roast winter radishes to create sweet, caramelized dishes. Using the entire plant reduces waste and allows for more options when preparing meals.
Experiment as your inclinations dictate. Try your hand at container gardening on balconies. Investigate heirloom varieties, such as Black Spanish, and consider mixing them with companion plants like peas. I rotate my methods each season and recommend you search for whatever works best in your little piece of paradise.
External Sources
Frequently Asked Questions
What's the key to successful radish growth?
The essential factors are proper timing and soil conditions. Plant when soil temperatures reach 50-70°F (10-21°C), ensure consistent moisture without waterlogging, use loose well-draining soil amended with compost, and avoid overcrowding during thinning for optimal root formation.
Do radishes require full sunlight?
Radishes need 4-6 hours of direct sunlight daily but benefit from afternoon shade in warmer climates. Excessive sun causes premature flowering and bitterness, while insufficient light leads to leafy growth with underdeveloped roots. Partial shade conditions are ideal in zones with intense summer heat.
Which plants should not be grown near radishes?
Avoid planting these companions:
- Hyssop and potatoes which inhibit root development
- Other brassicas like cabbage that attract shared pests
- Vining crops that create excessive shade
- Plants requiring high nitrogen fertilization
Can radish seeds be broadcast sown?
Yes, radish seeds can be scattered but require proper spacing adjustments. After broadcasting, thin seedlings to 1-2 inches apart once they reach 2 inches tall. This prevents overcrowding that causes stunted roots while allowing efficient use of garden space.
Is fall planting suitable for radishes?
Fall is excellent for radishes, especially winter varieties. Plant 4-6 weeks before your first expected frost when soil temperatures are 45-65°F (7-18°C). Cooler temperatures enhance flavor development, and frost exposure actually sweetens winter radish varieties like Daikon and China Rose.
How often should I water radishes?
Maintain consistent moisture with these guidelines:
- Germination phase: Mist daily to keep topsoil damp
- Established plants: 1 inch (2.5 cm) water weekly
- Use drip irrigation or soaker hoses for deep penetration
- Check soil moisture by inserting finger 1 inch deep
Why do radishes grow tops but no roots?
This occurs due to excessive nitrogen, overcrowding, or high temperatures. Test soil nitrogen levels and avoid fresh manure. Ensure proper thinning to 2-3 inch spacing, and plant during cool seasons below 75°F (24°C) to direct energy into root development.
What are the best companion plants for radishes?
Optimal companions include:
- Leafy greens like lettuce and spinach for shade regulation
- Peas and beans that fix nitrogen in soil
- Herbs such as mint to repel pests naturally
- Carrots which help break up soil for better root growth
Can radishes thrive in containers?
Radishes excel in containers with proper conditions. Use pots at least 12 inches deep with well-draining soil mix (60% potting soil, 30% compost, 10% perlite). Maintain consistent moisture and provide 4-6 hours of sunlight for successful container harvests.
How do you prevent common radish problems?
Key prevention strategies include:
- Crop rotation every 3 years to avoid soil diseases
- Row covers for flea beetle protection
- Balanced compost instead of high-nitrogen fertilizers
- Consistent watering to prevent cracking
- Proper thinning for adequate root space