
When to harvest onions is a crucial factor in determining their flavour and shelf life. Pick them when they have reached peak maturity for the sweetest, robust taste. Pull them early, and they will stay sharp and small. Wait too long, and they rot fast. Timing really is everything when it comes to the way they behave in your kitchen and beyond!
Watch for the tell-tale signs that your onions are ready. The tops will fall over of themselves, and the necks will have thinned out. Using a fork, gently lift the bulbs from the ground. Cure them in a drying shed or attic. This method applies just as well to red, white, and yellow types.
Onions should not be washed when they are cured, as washing them adds moisture, which can lead to the development of mold and rot. Avoid putting pressure on the tops of green onions, as this can prevent the onions from growing to their full potential. Following these guidelines guarantees that your onions will remain viable for many months after harvest.
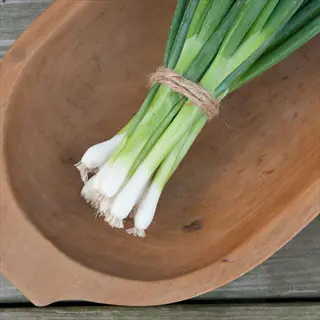
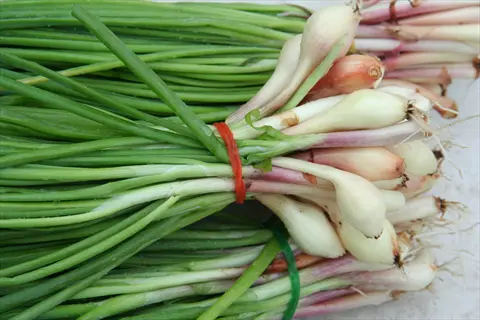
Harvesting Green Onions Early
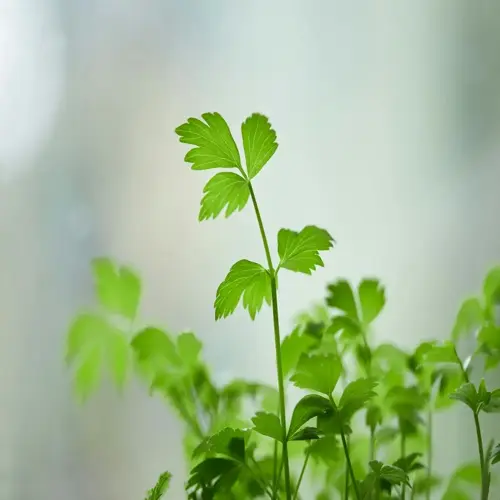
Harvest your green onions early to obtain multiple cuttings from a single planting. Trim any outer stalks as soon as they reach 6 inches tall. This brings on new growth from the center of the plant. You will have access to fresh onions throughout the entire season. There's no need to replant!
You want bright green stalks that are firm and snap cleanly when bent. You also want to avoid any yellowing tips or limp leaves. Because they don't form a bulb, timing becomes an issue. Pull them before the stalks grow hollow; that's when they taste the best.
Use green onions as soon as you cut them. If you can eat them soon after cutting them, you will enjoy their satisfying crunch and gentle bite in salads. Store any extras in the refrigerator, standing up in a jar of water, or in a loosely covered plastic bag. They will stay fresh for a week.
Take note: these are actual scallions that are picked before maturation because they form bulbous roots above/below ground, as storage onions do not (bulb or bulbous root). If the stalks become overly thick, all of the plants must be removed and replanted every couple of weeks. By following this method, you will ensure a continuous supply.
Optimal Harvest Time
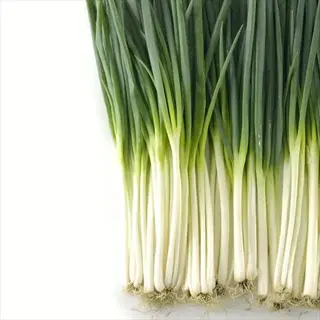
- Height Check: Harvest when green onion tops reach 6 to 8 inches (15 to 20 cm) tall for optimal tenderness
- Visual Cues: Look for vibrant green color and firm stalks without yellowing or wilting
- Growth Stage: Best harvested before bulb formation begins for mild flavor
- Frequency: Can be harvested multiple times per season by cutting above soil line
- Seasonal Timing: Spring to early summer harvests yield sweetest flavor in most climates
- Moon Phase Tip: Some gardeners prefer harvesting during waning moon for longer freshness
Storage Methods
- Refrigeration: Place unwashed green onions in airtight containers with damp paper towels
- Temperature: Store at 32-40°F (0-4°C) to maintain freshness for 1-2 weeks
- Freezing Option: Chop and freeze in sealed bags for 6-month preservation
- Revival Tip: Place limp onions in ice water for 30 minutes to crisp
- Water Storage: Stand upright in jar with 1 inch (2.5 cm) water; change daily
- Drying Method: Slice and dehydrate at 125°F (52°C) for homemade onion powder
Soil Preferences
- pH Range: Thrives in slightly acidic soil between 6.0 and 7.0 pH
- Drainage: Requires well-draining soil to prevent root rot; amend clay with compost
- Nutrients: Needs nitrogen-rich fertilizer every 3 weeks for vigorous growth
- Mulching: Use straw mulch to retain moisture and suppress weeds
- Container Mix: 3 parts potting soil to 1 part perlite for potted onions
- Companion Plants: Plant with carrots and lettuce to deter pests naturally
Pest Management
- Onion Fly: Cover with fine mesh netting; rotate crops annually
- Thrips: Spray with neem oil solution weekly during dry spells
- Slugs: Apply diatomaceous earth around plants; use beer traps at night
- Prevention: Remove plant debris and maintain 6-inch (15 cm) spacing
- Beneficial Insects: Attract ladybugs and lacewings with companion flowers
- Organic Spray: Garlic-chili spray deters most common onion pests
Regrowth Techniques
- Cut Method: Leave 1 inch (2.5 cm) above soil when harvesting for regrowth
- Water Propagation: Place root ends in water; change every 2 days
- Timeline: New shoots appear in 5-7 days; transplant in 2 weeks
- Yield: Each plant regrows 2-3 times before exhausting nutrients
- Fertilizing: Apply liquid seaweed fertilizer after each harvest
- Winter Care: Move pots indoors near sunny window for year-round supply
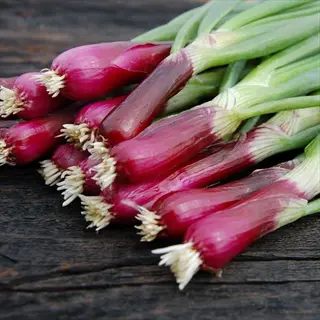
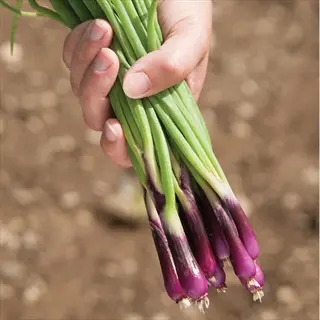
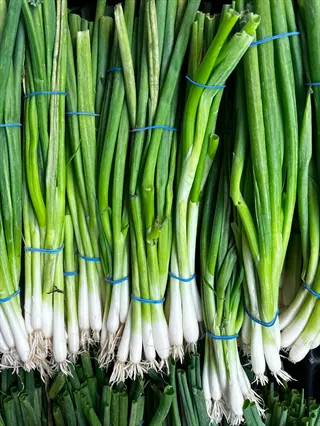
Red Bunching
- Appearance: Vibrant purple-red stems with white bases
- Flavor Profile: Mild and sweet with crisp texture
- Growth Habit: Reaches harvest height in 60 days
- Best Uses: Raw in salads, garnishes, and Asian dishes
- Yield Potential: Produces multiple harvests per planting
- Special Feature: Cold-tolerant for early spring harvest
White Bunching
- Appearance: Pure white stalks with dark green tips
- Flavor Profile: Slightly pungent with juicy crunch
- Growth Habit: Matures faster than red varieties (50 days)
- Best Uses: Cooking in soups, stir-fries, and omelets
- Yield Potential: Forms thick clusters ideal for bunching
- Special Feature: Resists bolting in warm weather
Evergreen Hardy White
- Appearance: Thick white shafts with blue-green tops
- Flavor Profile: Sharp onion flavor that mellows when cooked
- Growth Habit: Perennial variety; survives winters in zones 5-9
- Best Uses: Excellent for freezing and pickling preparations
- Yield Potential: Continuous harvest for 8 months annually
- Special Feature: Tolerates light frosts and poor soils
Tokyo Long White
- Appearance: Extra-long stalks up to 18 inches (46 cm)
- Flavor Profile: Delicate sweetness with no bitterness
- Growth Habit: Ready in 65 days; prefers cool temperatures
- Best Uses: Traditional in Japanese cuisine and miso soup
- Yield Potential: High-density planting yields 40 plants/sq ft
- Special Feature: Resists downy mildew and pink root

Ishikura
- Appearance: Straight, uniform stalks with minimal bulbing
- Flavor Profile: Clean, mild taste perfect for fresh eating
- Growth Habit: Bolt-resistant even in hot summer months
- Best Uses: Sushi garnishes and fresh spring rolls
- Yield Potential: Produces 12-15 stalks per plant cluster
- Special Feature: Retains crispness longer after harvest
Deep Purple
- Appearance: Striking deep purple stalks from base to tip
- Flavor Profile: Peppery kick that intensifies when raw
- Growth Habit: Matures in 55 days; thrives in full sun
- Best Uses: Adds color to salads and grilled vegetable dishes
- Yield Potential: Regrows vigorously after cutting
- Special Feature: Anthocyanin-rich for antioxidant benefits
Parade
- Appearance: Medium-green stalks with slight blue tinge
- Flavor Profile: Balanced pungency suitable for all dishes
- Growth Habit: Fast-growing hybrid ready in 40-45 days
- Best Uses: Versatile for both raw and cooked applications
- Yield Potential: High-yielding with uniform stalk size
- Special Feature: Tolerant of various soil conditions
Guardsman
- Appearance: Thick white stems with dark green foliage
- Flavor Profile: Strong traditional onion flavor intensity
- Growth Habit: Early maturing variety ideal for succession planting
- Best Uses: Excellent for grilling whole or charring
- Yield Potential: Heavy producer even in crowded plantings
- Special Feature: Shows resistance to thrips and smut
Nabechan
- Appearance: Slender, delicate stalks with tender texture
- Flavor Profile: Exceptionally sweet with floral notes
- Growth Habit: Prefers partial shade in hot climates
- Best Uses: Essential in hot pot dishes and delicate sauces
- Yield Potential: Best harvested young at 6 inches (15 cm)
- Special Feature: Retains flavor when frozen without blanching
Welsh Onion
- Appearance: Hollow blue-green stalks resembling leeks
- Flavor Profile: Garlic-onion hybrid flavor profile
- Growth Habit: Perennial; forms large clumps over years
- Best Uses: Both greens and white bases in stir-fries
- Yield Potential: Divide clumps every 3 years for propagation
- Special Feature: Extremely cold-hardy down to -20°F (-29°C)
Best Onion Varieties for Storage
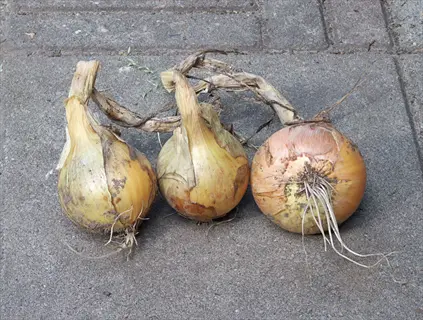
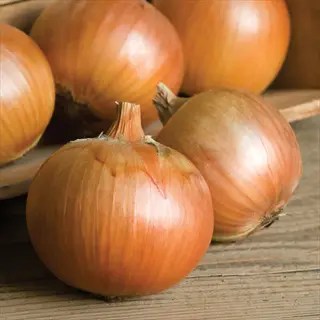
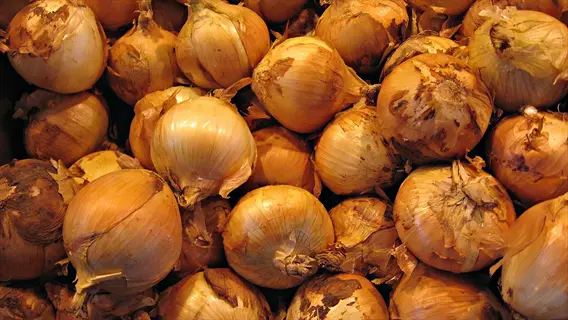
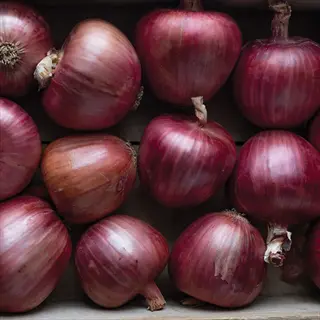
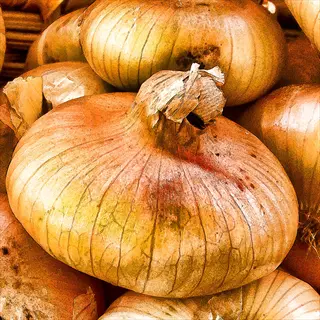
Store onion varieties, such as Copra and Patterson, "keep" in storage for 10 to 12 months. Short keeper varieties, such as Walla Walla, will only last a few weeks, so choose carefully based on your climate and needs. Thick skins and firm flesh typify the keeping onions. These are much more resistant to mold growth and sprouting.
Spot storage onions by noticing their tight papery skins and dense bulbs. Copra is rolled and shows layers of golden brown. "Red Baron" has deep purple globes and white rings. Remember to observe the necks. Thin-necked onions store longer, with no soft spots.
Grow in full sun and well-drained soil. Plant in cool weather, preferably early in the spring. Must have sufficient moisture until the bulbs are "swelling," then that must be stopped until nearly harvest to toughen the skins. A northern climate suits the long-day varieties best.
Copra mellows, starting sharp and sweetening and mellowing as it ages. Patterson mellows and caramelizes well. Red Baron retains its strong flavor, making it an excellent choice for cooking. Sturon gives you the classic onion punch. Store them properly, and they get better for months.
Centurion
- Storage Duration: 10-12 months in proper conditions
- Appearance: Bronze-brown skin with creamy-white firm flesh
- Flavor Profile: Balanced pungency that sweetens with storage
- Maturity Time: 110 days from seed; late summer harvest
- Growing Tip: Plant in well-drained soil with full sun exposure
- Special Feature: RHS Award winner with bolt resistance
Red Baron
- Storage Duration: 8-10 months when cured properly
- Appearance: Deep red globe-shaped bulbs with white rings
- Flavor Profile: Strong bold flavor ideal for cooking
- Maturity Time: 105 days; suitable for northern climates
- Growing Tip: Requires consistent moisture during bulb formation
- Special Feature: Maintains vibrant color when cooked

Pukekohe Long Keeper
- Storage Duration: 12+ months in cool dark conditions
- Appearance: Large brown bulbs with tight golden skin
- Flavor Profile: Intensely pungent when fresh, mellowing over time
- Maturity Time: 120 days; traditional New Zealand variety
- Growing Tip: Responds well to potassium-rich fertilizers
- Special Feature: Resistant to fungal diseases in storage
Sturon
- Storage Duration: 7-9 months without sprouting
- Appearance: Uniform golden-brown bulbs with thin necks
- Flavor Profile: Classic all-purpose onion flavor
- Maturity Time: 100 days; high yield potential
- Growing Tip: Space plants 6 inches (15 cm) apart
- Special Feature: Tolerant of variable weather conditions
Copra
- Storage Duration: 10 months at 35-40°F (2-4°C)
- Appearance: Medium-sized yellow bulbs with firm texture
- Flavor Profile: Sweet-sharp balance perfect for soups
- Maturity Time: 102 days; reliable heavy yielder
- Growing Tip: Stop watering 2 weeks before harvest
- Special Feature: Excellent for northern US and Canada
Patterson
- Storage Duration: 12+ months in commercial storage
- Appearance: Very large yellow-bronze globes
- Flavor Profile: Mild when raw, sweet when caramelized
- Maturity Time: 115 days; needs long growing season
- Growing Tip: Requires deep, fertile soil for best size
- Special Feature: Highest storage rating among hybrids
Hercules
- Storage Duration: 8-10 months with minimal losses
- Appearance: Large flattened globe with golden skin
- Flavor Profile: Robust flavor good for French onion soup
- Maturity Time: 95 days; early maturing storage type
- Growing Tip: Plant after last frost when soil reaches 50°F (10°C)
- Special Feature: Bolt-resistant even in cool springs
Rossi di Milano
- Storage Duration: 6-8 months when properly cured
- Appearance: Flattened red bulbs with purple-striped skin
- Flavor Profile: Sweet Italian heirloom perfect raw
- Maturity Time: 100 days; best in Mediterranean climates
- Growing Tip: Needs consistent warmth for full color
- Special Feature: Retains color when pickled
Cipollini
- Storage Duration: 7-9 months due to dense flesh
- Appearance: Small flattened bulbs with golden-brown skin
- Flavor Profile: Intensely sweet with high sugar content
- Maturity Time: 85 days; early Italian heirloom
- Growing Tip: Plant in blocks rather than rows
- Special Feature: Ideal for roasting whole

Walla Walla
- Storage Duration: 1-2 months only (short keeper)
- Appearance: Huge pale yellow bulbs with thin skins
- Flavor Profile: Exceptionally sweet with juicy crunch
- Maturity Time: 125 days; Pacific Northwest specialty
- Growing Tip: Harvest when necks soften completely
- Special Feature: Protected designation of origin status
Preserving Excess Onions
Dried onions beat frozen storage hands down. Dried, sliced onions in sealed, airtight jars will keep for eighteen months, but frozen onions lose their texture in six months. Dehydration is a rapid process; approximately eight hours at 125°F produces crisp material. You can freeze raw onions, of course, but everything you cook should be thrown in the blender first, or the mushy result will drive you crazy.
Pickle them in a on a 1:1 basis vinegar water brine. Add 2 tablespoons of salt per quart of brine. This applies to pearl onions whole or sliced reds. Quick pickle them in the fridge for use at once. Can them for a year round supply.
When cooking with frozen onions, the best way to start is by roasting them first. Roasting creates a sweet, caramelized layer around the onion as it freezes. Once roasted, they are good for approximately 8 months and can be added quickly to create flavour in stews or pizza.
Note storage limits. Dehydrated onions last longest at 18 months. Pickled jars stay good for 12 months unopened. Frozen roasted onions can be stored for up to 8 months. Raw frozen onions spoil after 6 months.
Dehydrating
- Preparation: Slice uniformly ¼ inch (6 mm) thick; separate rings
- Drying Temp: 125°F (52°C) for 8-10 hours until brittle
- Storage: Store in airtight jars with oxygen absorbers 18+ months
- Usage Tips: Rehydrate in water for soups or grind into powder
- Best Varieties: High-sugar types like Walla Walla or Cipollini
- Yield: 10 lbs (4.5 kg) fresh = 1 lb (450 g) dried
Freezing Raw
- Preparation: Dice or slice; blanch 3 minutes in boiling water
- Cooling: Ice bath for 5 minutes; drain thoroughly
- Packaging: Freeze in single layers first, then bag portions
- Storage: 6 months at 0°F (-18°C); avoid thaw-refreeze cycles
- Usage Tips: Ideal for cooked dishes; texture changes when raw
- Best Varieties: All types except sweet onions (become mushy)
Freezing Roasted
- Preparation: Toss quarters with olive oil; roast 40 min at 400°F (200°C)
- Cooling: Spread on tray; freeze 2 hours before bagging
- Storage: 8 months; caramelized flavor intensifies
- Usage Tips: Add directly to stews, pizzas, or pasta sauces
- Best Varieties: Red onions retain color; yellow develop richness
- Flavor Tip: Add balsamic vinegar before roasting for depth
Pickling
- Brine Ratio: 1:1 vinegar-water with 2 tbsp (30 g) salt per quart (liter)
- Preparation: Pack jars with onions, garlic, peppercorns, herbs
- Processing: Hot water bath 10 minutes for shelf-stable jars
- Storage: 12+ months unopened; refrigerate after opening
- Best Varieties: Pearl onions whole; red onions for color
- Quick Pickle: Refrigerator method ready in 24 hours (1 month shelf life)
Oil Preservation
- Preparation: Sauté sliced onions until golden; cool completely
- Packing: Layer with herbs in sterilized jars; cover with oil
- Storage: Refrigerate 2 months; freeze 6 months
- Safety Note: Must be refrigerated to prevent botulism risk
- Usage Tips: Flavor-infused oil for dressings or sautéing
- Best Varieties: Sweet onions like Vidalia or Maui
Signs Onions Are Ready to Harvest
Test for maturity with the "neck test." Roll the stem where it widens a little to form the neck between your fingers. If the bulbs feel thin and papery, they are about ready to harvest. If a thick, fleshy neck remains, an additional two to three weeks of growth are needed in the field. This simple method saves you from harvesting too early.
Seed-grown onions take 100-120 days to mature. Sets mature in 70-80 days, so plant sets if you want quicker returns from a short season. Seeds will give you a greater choice, but you must be patient till (d "till."). Learn how to plant and when to expect a crop.
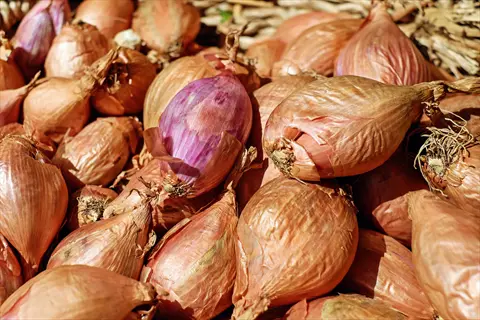
Look for visual signs. The tops yellow and flop over naturally, bulbs push through the soil showing their shoulders, and the outer skins become papery and thin. Red onions actually reveal their colour (thin pellicles of tint) in this way, and all these indicate that the time of harvesting is at hand.
Weather Influences Timing. If heavy rains threaten, harvest before rot sets in. Heat hastens maturity, cool lags. [L]keep an eye on the forecast and the storms. I once lost a good-sized crop because I didn't heed a storm warning. Do not let it happen to you.
Foliage Changes
- Top Fallover: 50-80% of onion tops naturally bend at neck
- Color Shift: Green leaves turn yellow then brown from tips down
- Texture: Leaves become papery and dry to the touch
- Stalk Softness: Main stalk feels thin and flexible near bulb
- Timeline: Occurs 90-100 days after planting seeds
- Set Difference: Sets mature faster in 80 days on average
Bulb Development
- Soil Exposure: Top third of bulb visible above ground
- Skin Formation: Outer layers develop papery texture
- Size Check: Bulbs reach variety-typical diameter 2-4 inches (5-10 cm)
- Shape: Distinctly rounded or flattened depending on variety
- Firmness: Bulbs feel solid when gently squeezed
- Variation: Red onions show color through thin outer skin
Neck Test
- Method: Roll onion neck between thumb and forefinger
- Ready Sign: Neck feels thin and dry with no sliding layers
- Immature Sign: Thick, fleshy neck indicates ongoing growth
- Timing: Can detect maturity 1-2 days before top fallover
- Rainy Weather: Essential check before forecasted wet periods
- Accuracy: Most reliable indicator for long-term storage
Timing Factors
- Day Length: Short-day varieties mature with 12 hours sunlight
- Temperature: Heat accelerates growth; cool delays maturity
- Planting Date: Spring-planted onions ready late summer
- Overwintered: Autumn-planted varieties mature early summer
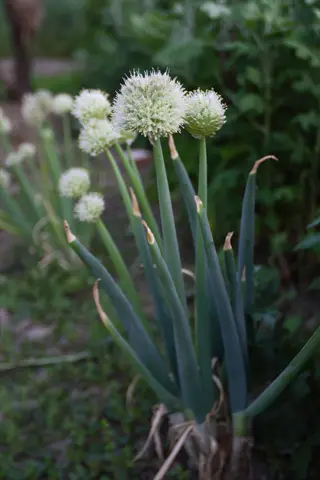
- Bolting Alert: Flower stalks signal immediate harvest needed
- Moon Phase: Traditional gardeners harvest during waning moon
Weather Impact
- Rain Risk: Harvest before heavy rains to prevent bulb rot
- Frost Warning: Lift bulbs if frost threatens mature plants
- Heat Stress: Extreme heat may accelerate maturity prematurely
- Wind Effect: Strong winds can cause premature top fallover
- Humidity: High humidity slows drying; harvest in dry spells
- Ideal Conditions: Dry, sunny weather for 1-2 weeks pre-harvest
Harvesting and Curing Process
Harvesting and Storing The most delicate job of all is harvesting onions. Lift them with a fork, but don't stab them to death. Insert a fork about six inches away from the bulb at an angle and lift gingerly. Don't rifle the tops; hold their base. Place the bulbs in a shallow basket immediately; never drop them from a height or pile them up.
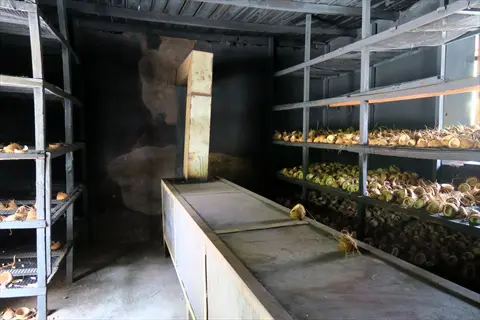
Select field drying only in dry climates. Lay the bulbs tops-to-roots in the same direction. Cover them if rain threatens. For more humid localities, field drying must be out of the question; use mesh racks for indoor curing. Place bulbs of any type in a ventilated area, 1" or more apart, such as 2" apart, with space between each layer. In my opinion, covered porches for drying provide the safest and most reliable results.
Cure at a temperature of 70 degrees to 80 degrees and at a humidity of approximately 50 to 60 percent, with air movement facilitated by fans, and avoid direct sunlight on all but the first two days. Such conditions cure the skin evenly, and bulbs, if turned each day, will be uniformly dry in two to three days.
Test curing finish in three ways. The neck, bend it, it should break "off clean." The bulb should feel rock hard. Shake it near your ear; it should rattle, like a gold miner's style. Well-cured onions will keep for months without rotting.
Pre-Harvest Preparation
- Water Withdrawal: Stop watering 7-10 days before harvest to dry soil
- Weather Check: Choose dry sunny day with no rain forecast for 3 days
- Tool Selection: Use garden fork instead of shovel to avoid cutting bulbs
- Morning Timing: Harvest in early morning when temperatures are cooler
- Glove Recommendation: Wear cotton gloves to prevent skin oils damaging bulbs
- Field Layout: Work from outer edges inward to avoid trampling plants
Lifting Technique
- Soil Loosening: Insert fork 6 inches (15 cm) away from bulb at 45° angle
- Leverage Method: Gently rock fork back to lift bulb with minimal force
- Hand Position: Grasp base of foliage, not stem, when pulling from soil
- Shaking Off Soil: Tap bulb lightly against fork tines; never brush or wash
- Bruise Prevention: Handle like eggs; no tossing or dropping into containers
- Damaged Bulbs: Separate any nicked onions for immediate use
Field Drying
- Placement: Lay bulbs foliage-to-bulb in same growth direction
- Sun Exposure: Leave in full sun 1-2 days; cover if rain threatens
- Turning: Flip bulbs after first day for even drying
- Pest Protection: Cover with lightweight row cover if birds are active
- Soil Removal: Allow dirt to dry completely before gentle brushing
- Night Protection: Move indoors overnight if dew is heavy
Container Transfer
- Basket Choice: Use shallow woven baskets or plastic crates with ventilation
- Layering: Maximum 2 layers with foliage cushioning between bulbs
- Transport: Carry baskets carefully without jostling contents
- Weight Limit: Don't exceed 15 lbs (7 kg) per container
- Shade Transition: Move from field to shaded area gradually
- Debris Removal: Remove loose dirt and plant debris during transfer
Post-Harvest Inspection
- Bruise Check: Examine for soft spots or discoloration
- Disease Signs: Discard bulbs with mold or dark lesions immediately
- Size Sorting: Separate bulbs by diameter for uniform curing
- Root Trim: Clip dangling roots before curing if excessively long
- Moisture Test: Reject bulbs with wet necks or visible moisture
- Curing Priority: Process thick-necked onions first as they cure slower
Setup Requirements
- Spacing: Arrange bulbs in single layer with 1 inch (2.5 cm) between them
- Support Types: Use mesh racks, window screens or slatted wooden trays
- Turning Routine: Rotate bulbs 180° every 3 days for even drying
- Ventilation: Maintain airflow with oscillating fans 6 feet (1.8 m) away
- Light Control: Keep in complete darkness after initial 2-day sun exposure
- Pest Prevention: Cover with cheesecloth if curing outdoors
Completion Indicators
- Neck Test: Stems should snap cleanly when bent, not flex
- Skin Check: Outer layers rustle like paper when handled
- Root Inspection: Roots shrivel completely and break off easily
- Bulb Firmness: No soft spots; uniform hardness throughout
- Weight Change: 15-20% weight reduction from water loss
- Sound Test: Hollow sound when tapped indicates full drying
Post-Curing Handling
- Trimming Technique: Cut stems to 1 inch (2.5 cm) with sterilized shears
- Root Removal: Clip roots flush to basal plate without cutting into bulb
- Cleaning: Wipe with dry cloth; never wash cured onions
- Sorting: Grade by size and discard any with thick necks
- Final Inspection: Check for mold or soft spots before storage
- Rest Period: Let sit 3 days after trimming before long-term storage
Humidity Control
- Hygrometer Use: Monitor levels daily; adjust ventilation accordingly
- Dehumidifiers: Run in enclosed spaces when humidity exceeds 70%
- Desiccants: Place silica gel packets between onion layers in high humidity
- Ventilation Boost: Increase fan speed during rainy spells
- Absorbent Materials: Layer rice hulls under onions in tropical climates
- Warning Sign: Condensation on bulbs requires immediate airflow increase
Troubleshooting Common Issues
- Mold Prevention: Increase spacing and airflow at first fuzz appearance
- Sunscald Fix: Move bulbs away from direct sunlight if skins bleach
- Sprouting Control: Reduce temperature to 60°F (15°C) if shoots emerge
- Soft Spot Treatment: Isolate affected bulbs; increase air circulation
- Insect Deterrence: Use food-grade diatomaceous earth around curing area
- Uneven Drying: Rotate tray positions and bulbs more frequently
5 Common Myths
Many gardeners mistakenly believe that bending onion tops down forcibly helps speed up bulb maturation and development
Forcing onion tops down actually damages the plant by breaking the neck tissue, which interrupts nutrient flow to the bulb and creates entry points for disease. This practice delays maturation by stressing the plant instead of allowing natural physiological processes where leaves fall over when the bulb stops growing. Healthy onions will naturally collapse tops when carbohydrates are fully transferred to the bulb without intervention.
A widespread misconception suggests that onions should be harvested immediately after their green tops fall over completely
While fallen tops indicate approaching maturity, harvesting immediately prevents the critical final bulking phase where onions gain up to 25% more size and develop storage compounds. Waiting 7-10 days allows the neck to constrict naturally and outer scales to dry, significantly improving shelf life. Premature harvesting results in thick-necked bulbs that rot quickly during storage due to excess moisture retention.
Some people incorrectly assume that washing onions with water before storage helps remove harmful bacteria effectively
Introducing water to harvested onions promotes fungal and bacterial growth by damaging the protective papery layers and increasing moisture content in the neck area. Proper curing creates natural antimicrobial barriers through desiccation, while washing destroys these defenses. Any soil should be dry-brushed after curing, as moisture triggers rot pathogens like botrytis that can destroy entire stored crops within weeks.
There exists a persistent false belief that all onion varieties can be stored equally well for long periods regardless of type
Storage potential varies dramatically by cultivar due to genetic differences in sugar content, skin thickness, and dormancy periods. Long-day storage varieties like Copra contain higher pyruvic acid and lower water content, enabling 10-month preservation, while short-day sweet onions like Vidalia last only weeks. Choosing improper varieties for storage leads to sprouting, mold, and texture breakdown regardless of curing methods used.
An enduring garden myth claims that fully mature onions can safely remain in the ground indefinitely without deterioration
Leaving mature onions in soil beyond 2 weeks risks significant quality loss through root regrowth that depletes bulb sugars, secondary infections from soil pathogens entering through cracks, and freeze damage in cooler climates. Rainfall during this period causes bulb splitting and rot initiation. Timely harvest preserves firmness and flavor compounds while preventing irreversible textural changes from excessive water absorption.
Conclusion
Remember the signals: flopped tops, papery necks, and bulbs peeping out of the soil signify it is harvest time! First, cure at 70 degrees F to 80 degrees F with 50 to 60 percent relative humidity for several weeks. If you live in a dry climate, field drying will do. Racks in an indoor shed work better elsewhere. These steps keep the quality you worked hard to obtain.
Select your types of onions based on how long you want to keep or use them. Long-term-storable onions, such as Copra, can be stored for many months. In contrast, sweet types of onions, such as Vidalia, should be used quickly. Therefore, choosing the right onion type for your needs will help you avoid rotten or sprouted onions in your harvest.
Properly stored, your onions will last until next season. You will enjoy them sweet in stews all through the winter, or you may add them to your dehydrated or pickled pile; properly stored, there is no waste and lots of flavor.
Apply what you have learned to the next harvest. Forget the tales about bent tops or early washing. Trust your instincts and common sense when it comes to the weather. Your onions will reward you with quality and flavor. Start planning for your best crop ever.
External Sources
Frequently Asked Questions
How do I know when onions are ready to harvest?
Onions signal readiness through visual cues: approximately half of the tops naturally fall over, necks become thin and dry, and bulbs develop papery skins while reaching their variety-specific size. These indicators typically occur 90-120 days after planting.
Is it harmful to leave mature onions in the ground too long?
Yes, extended ground exposure causes significant deterioration. Bulbs develop root regrowth that depletes sugars, become vulnerable to soil pathogens and rot, and risk splitting from rainfall. Timely harvesting preserves texture and flavor integrity.
Should onions be harvested immediately when tops fall over?
No, waiting 7-10 days after tops collapse is crucial. This allows bulbs to complete final sizing, develop protective scales, and constrict necks naturally. Immediate harvesting results in thick-necked onions prone to rotting during storage.
What are the optimal conditions for curing onions?
Ideal curing requires:
- Temperature range between 70-90°F (21-32°C)
- 50-70% humidity with consistent air circulation
- Dark environment after initial sun exposure
- 2-4 week duration until necks snap cleanly
Can all onion varieties be stored long-term?
Storage longevity varies dramatically by type. Long-day varieties with high solids and thick skins like Copra last 10-12 months, while sweet short-day onions deteriorate in weeks. Choosing improper types leads to sprouting and mold regardless of curing methods.
What's the biggest mistake in onion preservation?
Washing bulbs before storage is catastrophic. Water damages protective layers, introduces moisture that triggers rot pathogens, and destroys natural antimicrobial barriers formed during curing. Always dry-brush soil instead of washing.
Do onions require different harvesting for different climates?
Yes, adjust techniques based on environment:
- Dry climates: Field cure for 2-3 days
- Humid regions: Move immediately to covered racks
- Cold zones: Harvest before frost threats
- Rain-prone areas: Prioritize neck tests before storms
How does weather affect harvest timing?
Weather critically influences schedules. Heat accelerates maturity while cold delays it. Heavy rains demand earlier harvesting to prevent rot, and sustained winds may cause premature top fallover. Always check forecasts during late growth stages.
What's the truth about bending onion tops?
Forcibly bending tops is a damaging myth. It breaks neck tissue, interrupts nutrient flow, and creates disease entry points. Healthy onions naturally collapse when carbohydrate transfer completes without intervention.
Can overwintered onions be harvested at different times?
Overwintered varieties mature earlier than spring-planted onions. Harvest when tops yellow and bulbs size up, typically in late spring. These require prompt curing since their thinner skins offer less natural protection during storage.