
Knowing when to harvest pumpkins can make the difference between tasteless, watery flesh and sweet, flavorful results. Timing also affects how well they store; pick too early, and they will rot quickly, wait too long, and the flesh loses its flavor. This guide will help you master timing from late summer through to frost.
We cover the obvious signs of ripeness, such as hardened rinds and hollow sounds. You learn just how to cut them... We even share refrigeration methods to keep pumpkins fresh for months. It doesn't matter if you grow massive jack-o'-lanterns or pie pumpkins; we take you through each step in detail. ## How do you know when pumpkins are ready to harvest?
When to Harvest Pumpkins
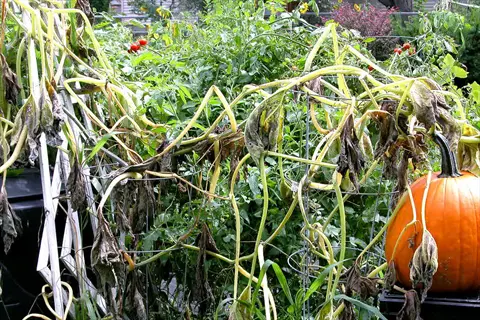
Frost is the deadline for harvest. Once the temperature dips below freezing, the formation of ice crystals inside such cell structures as pumpkins ruptures the cells, resulting in rapid decomposition. In the extreme north (such as Minnesota and northern Vermont), you'll need to have them cut by or before early October. California may allow picking until late October or early November, but check the forecast every day. When you miss it, you can lose your crop overnight!
### Listen for the hollow sound. Pumpkins develop cavities between the flesh and seeds as they mature, and the sound of your knuckle rapping against the rind should indicate a cavity, or a hollow sound is heard, if the fruit is ripe. With unripe pumpkins, the sound is something like a dull thud. Rapping the pumpkin in the autumn fog may produce a false sound. Always conduct tests in dry weather to ensure accurate results.
As an indicator of sugar content, be on the lookout for stem browning. When the vine's stems become corky and brown, it signifies that the vine has ceased transferring nutrients, and the sugars in the fruit have become concentrated. Green stems indicate that sap is still actively being transferred via the stems, or the sugars are not yet fully ripe, and the flavor is still being developed. Be sure to check stems daily, especially during the harvest period.
Regional variations are so important that northern gardeners must attend principally to frost protection, even if they have to gather it a trifle before the flavour has fully developed; the southern grower may often await complete ripeness, but he must not lose sight of stray cold nights. Month and day must yield precedence to local conditions.
Northern Climates
- Peak period: Late August to early October
- Critical note: Must harvest before first hard frost
- Regional adjustment: Coastal areas gain 1-2 weeks over inland
- Temperature trigger: Nighttime lows consistently below 50°F (10°C)
Southern Climates
- Peak period: Mid-September to late October
- Critical note: Humidity increases rot risk if harvested late
- Regional adjustment: Elevate pumpkins during rainy periods
- Temperature trigger: Daytime highs below 80°F (27°C) consistently
Coastal Regions
- Peak period: Early October to mid-November
- Critical note: Salt spray may accelerate rind deterioration
- Regional adjustment: Harvest before heavy autumn storms
- Temperature trigger: Consistent ocean breezes below 60°F (15°C)
Mountain Areas
- Peak period: Early September to early October
- Critical note: Frost occurs 4-6 weeks earlier than valleys
- Regional adjustment: Use row covers for unexpected cold snaps
- Temperature trigger: Day/night fluctuations exceeding 30°F (16°C)
Arid Zones
- Peak period: Late September to late October
- Critical note: Low humidity prevents rot but causes premature drying
- Regional adjustment: Morning harvest preserves moisture content
- Temperature trigger: Daytime highs below 90°F (32°C) consistently
Signs of Pumpkin Ripeness
Feel the rind first, don't trust the colour. And do this even before you look for a split, but press your thumbnail into the skin instead. If the skin is hard and resists the denting of your nail, you have a sign of the hardened rind, i.e., this pumpkin is ready. Remember that the green pumpkin, e.g.: Jarrahdale, will never turn orange, but note it also has this firmness. Rely upon these touch tests rather than visual appearances.
Listen to your pumpkins! Tap the centers with your knuckles. A deliberate sound means air pockets formed inside; unripe pumpkins give a dull thud. For best results, try in dry weather. This sound indicates that the sugar is being concentrated throughout the pumpkin.
Keep a close watch on your vines. When the leaves nearest the pumpkin turn yellow and begin to wither, the process of vine desiccation has commenced. This is a natural progression that continues until the cells cease to draw materials from the vine, causing an increase in the sugar content in the fruit, which is attractively elevated. About 85% vine browning indicates that harvesting time is very near.
Look at the stem texture. It becomes corky and brown when sufficiently ripe, although the thickness varies by variety. The knuckleheads always remain thick and seldom appear to be entirely dry. Never pick unless the stem is green and dry. This indicates that not enough sugar has developed inside the fruit.

Hardened Rind
- Pressure test: Gently press your thumbnail into the pumpkin's skin; mature specimens will resist denting due to hardened rind development that occurs in the final growth stages.
- Surface texture: Look for a waxy sheen and uniform toughness across the entire surface, which indicates the protective outer layer has fully developed to shield the flesh.
- Color consistency: Observe how the pigment deepens to the variety-specific hue without lingering green patches, signaling chlorophyll breakdown and full maturity.
- Thickness measurement: Mature rinds typically measure between 0.5 to 1 centimeter thick, providing durable protection against insects and environmental damage.
- Protection quality: A properly hardened rind effectively prevents insect penetration and minimizes moisture loss during long-term storage periods.
- Growth marker: Final rind hardening occurs approximately 2-3 weeks before peak harvest readiness as the pumpkin transitions to dormancy.
Dried Stem
- Texture change: Examine how the stem transforms from moist and green to a dry, cork-like brown texture as the vine stops nutrient transfer.
- Attachment strength: Check that the stem remains firmly fused to the pumpkin without visible cracks or separation points that could invite rot.
- Harvest indicator: A completely dried stem signifies the vine has terminated all nutrient flow to the fruit, marking biological maturity.
- Storage importance: Maintaining at least 4 inches of intact stem creates a natural seal against fungal infections during long-term preservation.
- Sugar evidence: Look for crystallized sap deposits around the stem-fruit junction, indicating concentrated sugars within the flesh.
- Timing clue: Stem drying typically begins 10-14 days before optimal harvest, providing an early visual cue for planning.
Hollow Sound
- Acoustic test: Use your knuckles to tap the pumpkin's center; a deep, resonant thud indicates air cavities formed during final maturation.
- Physical cause: The hollow sound results from separation between the flesh and seeds as internal moisture content decreases naturally.
- Immature comparison: Contrast this with the dense, high-pitched tap of unripe pumpkins that lack developed internal air pockets.
- Testing technique: For accurate results, suspend the pumpkin slightly while tapping in dry conditions above 60°F (15°C).
- Reliability factor: Larger specimens produce deeper resonance while smaller pie pumpkins may sound slightly less hollow when ripe.
- Environmental note: Humidity and temperature affect sound propagation; test on dry days for most consistent results.
Vine Desiccation
- Progression pattern: Observe how leaves nearest the fruit yellow first before the entire vine browns and shrivels naturally.
- Biological process: This indicates the plant redirecting its final energy reserves to the fruit for last-stage sugar concentration.
- Timing precision: When approximately 85% of the vine has died back, the pumpkin typically reaches peak harvest readiness.
- Disease distinction: Differentiate natural withering from mildew or blight by checking for firm stems without lesions.
- Temperature correlation: Cool nights below 50°F (10°C) accelerate this process as the plant prepares for seasonal dormancy.
- Harvest window: Optimal picking occurs 3-5 days after full vine desiccation begins but before complete plant collapse.
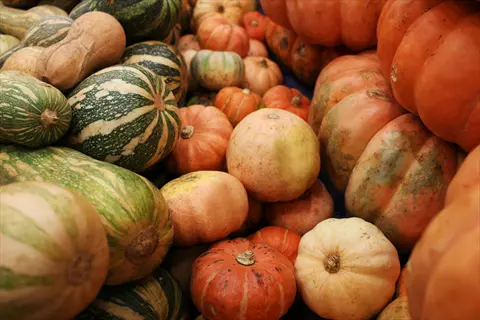
Uniform Color
- Variety standards: Recognize that Jack-O'-Lanterns turn deep orange while Knuckleheads maintain forest green at full ripeness.
- Sun exposure: Rotate pumpkins during growth to ensure even coloration without pale patches from ground contact.
- Blush indicator: White varieties like 'Lumina' develop subtle pink undertones when biologically mature and ready for harvest.
- Covered areas: Check beneath leaves for consistent pigment development since shaded spots may ripen more slowly.
- Hybrid exceptions: Note that cultivars such as 'Jarrahdale' retain their distinctive blue-gray hue throughout maturity.
- Final change: Color stabilization typically occurs 5-7 days before rind hardening completes, providing advanced notice.
How to Harvest Pumpkins
Sterilize Your Tools Before Making Any Cuts: Wipe your pruning shears with isopropyl alcohol to kill any pathogens the pruners may have come in contact with. You do not want to inadvertently spread diseases between plants. Clean blades will also make smoother cuts which allow for faster healing of your stem. Don't forget to also sterilize between different varieties of pumpkins as well!
Cut stems 4-6 inches long at a sharp angle so that rainwater will be shed off. Never break them off; a good, clean cut will prevent a point of entry for rot. When storing them, do not shorten the stems; nature has placed her seal at the end.
Lift pumpkins by cradling them from the bottom with both hands, rather than trying to pick them up by the stem. Spread your fingers wide across the bottom, and distribute the weight across your palms. The stem will not support any pumpkin weighing more than 5 pounds, and carrying them by the stem will most certainly snap the stem off, allowing the fruit to rot later.
Using a dry brush is an acceptable method for cleaning pumpkins. Water washing should be avoided. Pumpkins with wet skin have a higher likelihood of developing mold during storage. To remove dirt from pumpkins, use a lightly dampened cloth to wipe away all moisture before storing. Do not allow pools of water on or around the stem area.
Tool Preparation
- Sterilization method: Clean pruning shears with isopropyl alcohol solution to eliminate fungal spores and bacteria that could infect cut stems.
- Blade sharpness: Verify blades cut cleanly without crushing by testing on a twig; ragged edges invite pathogens into the stem tissue.
- Protective gear: Wear thick gardening gloves to shield hands from vine prickles and pumpkin skin irritants during handling.
- Backup equipment: Keep a sharp knife as alternative for thick stems that exceed shears' cutting capacity safely.
- Sanitation timing: Sterilize tools before each harvest session and between different pumpkin varieties to prevent cross-contamination.
- Workspace setup: Position a clean tarp near vines to place harvested pumpkins immediately after cutting.
Stem Cutting Technique
- Positioning: Hold stem firmly with non-dominant hand while making a single clean cut 4-6 inches (10-15 cm) from fruit's base.
- Angle precision: Cut at 45-degree angle to create water-shedding surface that prevents moisture accumulation around stem base.
- Pressure control: Apply steady pressure without twisting to avoid tearing vine tissue that could spread disease to neighboring fruits.
- Vine inspection: Examine the remaining vine segment for milky sap - its absence confirms nutrient transfer has ceased naturally.
- Multiple harvests: For vines with several pumpkins, cut stems individually rather than severing the entire vine at once.
- Frost emergency: If sudden frost threatens, cut all pumpkins immediately regardless of ripeness to prevent ice damage.
Handling and Transport
- Lifting method: Cradle pumpkin from bottom with both hands, keeping fingers spread for even weight distribution and minimal pressure points.
- Stem protection: Never use the stem as a handle since even mature stems support less than 5 pounds (2.3 kg) of weight.
- Field transport: Use garden carts with padded beds or wheelbarrows lined with straw to cushion pumpkins during movement.
- Stacking prohibition: Arrange pumpkins in single layer with stems facing upward to prevent compression damage to rinds below.
- Weight limits: Lift pumpkins over 25 pounds (11 kg) with knee bend technique rather than back strain to prevent injury.
- Distance management: For long transports, wrap each pumpkin individually in breathable fabric to reduce vibration damage.
Field Cleaning
- Debris removal: Gently brush off soil with soft-bristled brush while avoiding scrubbing that could damage the protective waxy cuticle.
- Moisture control: Wipe with barely damp cloth only if necessary, then immediately dry with towel to prevent water absorption.
- Disinfection: Spot-treat mud stains with vinegar solution (1:3 ratio with water) using cotton swabs for targeted cleaning.
- Inspection protocol: Examine each pumpkin for soft spots, cracks, or insect holes before moving to curing area.
- Cull separation: Designate damaged pumpkins for immediate use rather than storage to avoid contaminating the main harvest.
- Labeling system: Tag varieties with waterproof markers on the bottom for identification during storage rotation.
Post-Harvest Handling
- Field staging: Place cleaned pumpkins on wooden pallets above ground to prevent soil contact while awaiting transport.
- Sun protection: Cover harvest with breathable shade cloth if left outdoors longer than 30 minutes to prevent sunscald damage.
- Temperature buffer: Avoid sudden temperature changes by never moving pumpkins directly from cold field to warm indoor space.
- Harvest log: Record date, variety, and field location for each pumpkin to track storage longevity patterns.
- Equipment maintenance: Clean tools immediately after use with soapy water and dry thoroughly before storage.
- Vine management: Cut remaining vines at soil level and compost disease-free portions to prepare the garden bed.
Curing and Storing Pumpkins
Curing "sweetens" starches into sugars by natural processes. Place pumpkins in an 80-85°F environment with high humidity for 10-14 days. This "hardening-off" period also develops rinds and concentrates flavors. Never neglect this, for a day uncurried cuts short the storage life tremendously.
Keep all temperature extremes within strict limits. Curing is performed at temperatures of 80-85°F, while storage requires temperatures of 50-55°F. The transition should happen over three days with a decrease of 5°F per day. Quick temperature drops will allow condensation to form, welcoming mold growth. Use high-quality thermometers to accurately monitor temperatures during this period.
Regulate ventilation carefully at each stage. Curing requires a strong air flow from fans or freely blown vents to dry the surfaces. Storage requires only moderate air circulation, with one to two air changes per hour being sufficient. Right circulation keeps the ethylene, formed by a ripe fruit, in a dilute state.
Balance the humidity level carefully; some vegetation may shrivel or rot if dryness prevails too long or excessive humidity does not evaporate easily. Curing proceeds best at approximately 80-85% relative humidity. Lower the moisture to approximately 60-70 percent for storage. Use hygrometers. Slight shriveling indicates low humidity, while condensation in the curing room indicates excess moisture.
Curing Process
- Duration: 10-14 days minimum for proper skin hardening and stem drying to seal the fruit effectively against decay organisms.
- Positioning: Place pumpkins on their sides with stems horizontal to prevent moisture accumulation in the stem cavity during the curing period.
- Environment: Maintain 80-85°F (27-29°C) with 80-85% humidity under covered outdoor areas like porches or in well-ventilated sheds.
- Rotation protocol: Turn pumpkins 90 degrees every 2 days to ensure even exposure and prevent flat spots from developing on the rind.
- Sunlight requirement: Provide bright indirect light during curing; direct sun may cause scorching while darkness slows the process.
- Completion signs: Fully hardened rind that sounds wooden when tapped and completely dry, cork-like stem texture.
Storage Preparation
- Inspection criteria: Check for firmness uniformity, absence of bruises or cuts, and intact stems before moving to storage.
- Cleaning protocol: Brush off residual dirt with dry soft-bristle brush only; water washing removes protective bloom and invites rot.
- Sorting system: Group by variety and size since smaller pumpkins generally store 2-3 months less than larger thick-rinded types.
- Curing-storage transition: Gradually reduce temperature over 3 days (5°F/3°C per day) to prevent condensation forming on the rind surface.
- Disinfection: Wipe storage surfaces with vinegar solution (1 part vinegar to 4 parts water) and allow complete drying before use.
- Spacing requirement: Ensure 2-3 inches (5-7.5 cm) between pumpkins for air circulation and easy inspection access.
Ideal Storage Environment
- Temperature range: Maintain consistent 50-55°F (10-13°C); fluctuations beyond 5°F (3°C) trigger condensation and accelerate decay.
- Humidity control: 60-70% relative humidity prevents shriveling without promoting mold; use hygrometers to monitor levels weekly.
- Ventilation: Provide 1-2 air changes per hour using passive vents or low-speed fans to prevent ethylene gas buildup from ripening fruit.
- Light exclusion: Complete darkness preserves quality; even low light triggers sprouting in seeds and flesh degradation over time.
- Surface materials: Use slatted wood shelves with straw bedding or cardboard sheets; never concrete or plastic that trap moisture.
- Elevation: Keep pumpkins at least 6 inches (15 cm) off floors and 2 inches (5 cm) from walls for optimal air circulation.
Long-Term Maintenance
- Inspection frequency: Check every pumpkin weekly for soft spots, mold, or shriveling using touch and smell tests near the stem.
- Rotation practice: Turn pumpkins 180 degrees monthly to redistribute internal moisture and prevent pressure points from developing.
- Ethylene management: Never store with apples or tomatoes which emit gases accelerating pumpkin deterioration and internal rotting.
- Moisture correction: For slight shriveling, place damp towels nearby (not touching) to raise humidity temporarily for 48 hours maximum.
- Isolation protocol: Immediately remove any decaying pumpkins and sanitize the surrounding area with 10% bleach solution.
- Record keeping: Log storage dates and condition changes to identify varieties with superior longevity for future planting.
Problem Solving
- Condensation response: Immediately wipe moisture off rinds and improve ventilation while checking for temperature fluctuations causing the issue.
- Early mold treatment: Spot-treat with vinegar-soaked cloth for small areas; discard if mold penetrates beyond surface or covers >10%.
- Rodent prevention: Surround storage with hardware cloth barriers and peppermint oil cotton balls refreshed every 2 weeks.
- Freeze recovery: Thaw frozen pumpkins gradually in 40°F (4°C) environment before use; flesh becomes watery but usable for purees.
- Shriveling reversal: Submerge severely dehydrated pumpkins in cool water for 1 hour max, then dry thoroughly before returning to storage.
- Temperature emergencies: During heat spikes above 60°F (16°C), temporarily move to basement or root cellar to preserve quality.
Preserving Pumpkins
To preserve this gourd for 12 months, freeze pumpkin cubes. Blanch 1-inch-square pieces in boiling water for exactly 3 minutes, then transfer them to an ice bath to stop enzyme activity, preserving quality and nutrients. Pack into bags, seal them tightly, and remove any air pockets to prevent freezer burn.
Pickled pumpkins do not keep over 6 months. Use vinegar with an acidity level of 5% or higher. If prepared with vinegar of lower acidity, add 2 tablespoons of lemon juice (or vinegar) per quart for safety, to reduce color loss and ensure the pH stays below 4.6. For best keeping, store in a cool, dark place and refrigerate after opening.
Prevent browning during dehydration using an ascorbic acid dip. Soak the thin slices in a solution of 1 teaspoon of ascorbic acid to a quart of water before drying. This apparently halts the action of the oxygen-reducing enzymes that act to preserve the fresh, bright colors. Dehydrate at 135° Fahrenheit for 8 to 12 hours, or until leathery but still pliable.
Adjust blanching times for your different cuts. The puree will need to be steamed until tender, about 15 minutes. The seeds roast best at 300° for 45 minutes. Match your method to the use you intend to make of the vegetables, soups, snacks, and so forth.
Freezing
- Preparation: Peel, deseed, and cut into 1-inch (2.5 cm) cubes; blanch in boiling water for 3 minutes then plunge into ice water.
- Packaging: Drain thoroughly before packing in airtight freezer bags with 0.5-inch (1.25 cm) headspace; remove excess air to prevent freezer burn.
- Puree option: Steam chunks until tender, mash smooth, cool completely, and freeze in 1-cup (240 ml) portions using silicone molds.
- Shelf life: Maintains quality for 10-12 months at 0°F (-18°C); use within 3 months for optimal flavor retention.
- Best uses: Ideal for soups, pies, and baked goods where texture changes are less noticeable after thawing.
- Thawing method: Transfer to refrigerator 24 hours before use; never refreeze thawed pumpkin due to bacterial risks.
Canning
- Pressure requirement: Must use pressure canner at 11 PSI (76 kPa) for cubed pumpkin due to low acidity and density risks.
- Processing time: Pint jars (500 ml) require 55 minutes; quart jars (1 L) need 90 minutes at altitudes below 1,000 ft (305 m).
- Prep standard: Pack raw 1-inch (2.5 cm) cubes tightly with 1-inch (2.5 cm) headspace; add boiling water but no thickeners or dairy.
- Safety check: Discard any jars with cloudy liquid, bulging lids, or off-odors; consume within 12 months for best quality.
- Acidification: For pumpkin butter, add 2 tbsp (30 ml) lemon juice per quart (1 L) to achieve pH below 4.6 for water bath canning.
- Storage: Keep in cool, dark place below 75°F (24°C); rotate stock annually using first-in-first-out system.
Dehydrating
- Pretreatment: Dip 0.25-inch (0.6 cm) slices in ascorbic acid solution (1 tsp/quart or 5 ml/L water) to prevent browning during drying.
- Temperature: Dry at 135°F (57°C) for 8-12 hours until leathery but pliable; thicker pieces may require 14 hours for complete dehydration.
- Doneness test: Properly dried pumpkin should crack when bent but not snap; moisture content below 20% prevents mold growth.
- Conditioning: Store dried pieces in sealed container for 7 days, shaking daily to redistribute residual moisture before final packaging.
- Powder option: Grind brittle-dried pieces into flour; use 1 tbsp (15 ml) powder + 2 tbsp (30 ml) water = 1 tbsp (15 ml) puree equivalent.
- Storage life: 6-12 months in airtight containers with oxygen absorbers; freeze for up to 2 years to maintain vitamin content.
Pickling
- Brine formula: Combine 3 cups (720 ml) vinegar (5% acidity) + 1 cup (240 ml) water + 2 tbsp (30 g) salt + 2 tbsp (30 g) sugar per quart (1 L).
- Spice infusion: Add mustard seeds, cloves, and cinnamon sticks to brine; simmer 10 minutes before pouring over 0.5-inch (1.25 cm) pumpkin cubes.
- Processing: Pack raw cubes into sterilized jars, cover with hot brine leaving 0.5-inch (1.25 cm) headspace; process 10 minutes in water bath.
- Curing time: Allow 4-6 weeks for flavor development; refrigerate after opening and consume within 2 months for food safety.
- Texture tip: Choose firm-fleshed varieties like Sugar Pie; avoid overripe pumpkins that become mushy during processing.
- Creative variations: Add cranberries for tartness or jalapeños for spicy kick; adjust sugar levels based on pumpkin sweetness.
Seed Roasting
- Cleaning: Separate seeds from pulp, rinse in colander under running water while rubbing to remove fibrous strands; pat dry thoroughly.
- Seasoning: Toss with 1 tsp (5 ml) oil per cup (240 ml) seeds + salt/spices; try cinnamon-sugar or cayenne-garlic combinations.
- Roasting: Spread in single layer on parchment-lined sheet; bake at 300°F (150°C) for 45 minutes, stirring every 15 minutes.
- Doneness signs: Seeds turn golden brown and emit nutty aroma; they should snap crisply when cooled completely.
- Storage: Keep in airtight containers at room temperature for 2 months; freeze for 6 months to preserve delicate oils.
- Nutrition: Rich in zinc (2.2mg/oz or 62mg/100g) and magnesium; serving size 1 oz (28g) provides 5g protein and 12g healthy fats.
5 Common Myths
Pumpkins continue ripening and sweetening after being harvested from the vine like tomatoes do.
Unlike tomatoes, pumpkins undergo physiological maturity on the vine where sugar development and color fixation permanently cease at harvest. Post-harvest changes are limited to curing - a process of skin hardening and moisture reduction that prevents rot but doesn't enhance flavor or sweetness. Any perceived improvement is actually starch conversion within existing sugar reserves, not new sugar production.
Green-colored pumpkins are always unripe and should be left on the vine longer to turn orange.
Several pumpkin varieties naturally mature to green, blue-gray, or white hues due to genetic pigmentation. Knucklehead, Jarrahdale, and Australian Blue varieties develop full flavor and hard rinds while maintaining green coloration. Ripeness should be determined by stem dryness, hollow sound when tapped, and rind hardness - not color. Harvesting delays based solely on color expectation cause over-ripening and vine decay.
All pumpkins growing on the same vine reach perfect ripeness simultaneously for single harvest.
Pumpkins develop at different rates depending on pollination timing and position on the vine. The primary fruit near the root base matures 2-3 weeks earlier than tertiary fruits at the vine tips. Each pumpkin requires individual assessment using ripeness indicators like stem desiccation and hollow sound. Bulk harvesting sacrifices optimal quality in later-developing fruits while risking over-ripeness in early developers.
Pumpkin stems are sturdy handles that can support the full weight during lifting and carrying.
Mature pumpkin stems become brittle and cork-like as they dry, bearing maximum 5 pounds (2.3 kg) before shearing off. The stem's vascular structure detaches easily from the fruit's top plate, creating entry points for rot organisms. Proper handling requires cradling the base with both hands to distribute weight evenly across the rind, preventing stem damage that compromises storage longevity by up to 80%.
Pumpkins are best stored in a cold environment. When pumpkins are stored below 40°F; (4°C), they will last longer due to the cooling effect on the natural decay processes of the pumpkin.
Pumpkin cells will break down if the temperature of the pumpkin is stored below 50° (1080000) to -40° (4C), or below-equal to-50to10 . If you store your pumpkins at a temperature below about-the('50') to 55° (10°C to 13°C), the cells cannot grow and survive. If these parameters are not reached, there could be up to 40-60% less yield from the pumpkin crop after just 2 weeks.
Conclusion
Timing: Harvest an immature pumpkin, and the flesh is blander and more watery than it should be. If left to overripen, flavour is lost, and putrefaction sets in. The opportunity of getting them at their proper age passes quickly, and one's chance is at an end before frost occurs. If gathered just when they are ready to eat, the flesh keeps firm and sweet for months to come.
Remember that ripeness signs, harvesting, and storing form one chain. Hard rinds lead to clean cuts that cure properly. This trio decides whether your pumpkins last a matter of weeks or months. Get these three steps right, and you'll enjoy them all winter.
Always trust nature's signals over calendars for the best timing. Hollow pumpkins and dried-up vines are sure signs of pumpkin readiness. The seasons change each year, but your pumpkin plants will tell you when your pumpkins are completely ripe. Watch your pumpkins closely, and they will tell you when they are ready to be harvested.
Now you hold the secrets to winter pumpkin parties. Roast seeds, bake pies, and boil soups from your harvest. Your watching and caring will produce flavors no store can hope to match. Savor that first sweet scoop of orange gold, knowing your garden grew it.
External Sources
Frequently Asked Questions
How do I know when pumpkins are ready to harvest?
Check for these ripeness indicators:
- Hardened rind that resists fingernail pressure
- Completely dried, cork-like stem texture
- Deep hollow sound when tapped
- Vine desiccation near the fruit
- Color uniformity according to variety standards
Can pumpkins ripen after being picked?
Unlike tomatoes, pumpkins don't develop new sugars after harvest. Post-pick changes are limited to curing - skin hardening and moisture reduction. Any perceived sweetness increase is starch converting within existing reserves, not true ripening. Harvest only when fully mature.
Should I harvest pumpkins before frost?
Absolutely harvest before first hard frost. Freezing temperatures damage cell structures causing rapid decay. If frost threatens unexpectedly, pick all pumpkins immediately regardless of ripeness. Frost-damaged pumpkins become mushy and unusable within days.
What happens if pumpkins are harvested too early?
Premature harvesting causes:
- Poor flavor development with starchy flesh
- Inadequate rind hardening leading to quick rot
- Shriveling during storage due to excess moisture loss
- Failure to achieve proper color development
- Shortened storage lifespan by several months
Do pumpkins need special treatment after harvesting?
Essential post-harvest steps:
- Cure for 10-14 days at 80-85°F (27-29°C)
- Clean gently with dry brush only
- Store at 50-55°F (10-13°C) with 60-70% humidity
- Handle by base, never by stems
- Inspect weekly for decay signs
Can green pumpkins be ripe?
Yes, many varieties naturally ripen to green, blue-gray or white. Judge ripeness by stem dryness, hollow sound and rind hardness - not color. Varieties like Jarrahdale or Knucklehead maintain green skin at full maturity.
How should I cut pumpkin stems during harvest?
Use sterilized tools to cut stems 4-6 inches (10-15 cm) long at 45° angles. This prevents moisture accumulation and creates natural rot barriers. Never break stems off - clean cuts preserve storage integrity for months.
What are common pumpkin harvesting mistakes?
Critical errors to avoid:
- Harvesting based on calendar dates instead of ripeness signs
- Using stems as handles during transport
- Washing pumpkins with water before storage
- Storing below 50°F (10°C) causing chilling damage
- Neglecting proper curing before long-term storage
How long can pumpkins stay on the vine?
After reaching full maturity, pumpkins can remain 7-10 days maximum. Beyond this, over-ripening causes:
- Flesh becoming stringy and watery
- Increased susceptibility to ground rot
- Vine deterioration attracting pests
- Reduced storage potential
- Flavor degradation
Are carving pumpkins edible?
Carving varieties lack flavor development and have stringy, watery flesh. While non-toxic, their taste is unpleasant. For cooking, use pie pumpkins like Sugar Pie or Cinderella that develop dense, sweet flesh. Carving types should only be used decoratively.