
Learning how to treat root rot begins with identifying this common plant menace. Root rot occurs when the roots become saturated with excessive water. They become vulnerable to fungi. You may see yellow leaves or wilting. Timely intervention can rescue affected plants.
Screen for root rot quickly. Your plant has a prayer. I saved an orchid once by catching it in time. This quick guide outlines what to look for when finding, fixing, and stopping.
Do not lose hope. Plants bounce back with care. Follow the steps ahead. You will gain confidence. Your green friends will thrive again. Start with knowing the enemy.
What Causes Root Rot
Overwatering drowns the roots in water. They need air to breathe; too much water creates anaerobic conditions. Oxygen disappears, and roots suffocate! I learned that, unfortunately, my fern, which had been in wet soil for days, had mushy roots.
Fungal pathogens thrive in waterlogged soils. Pythium will quickly attack roots weakened by other causes. It moves the caterpillar through the wet soil until it reaches your plants! It can move that quickly in the greenhouse - something I witnessed firsthand. One of my over-watered plants infected three others before the season was through. Keep the soil dry!
With poor drainage, oxygen can't circulate well. Water collects at the bottom, causing roots to rot even when watering is done correctly. Always use a pot with holes, even if no drainage stones are present. Add perlite or even sand to your soil! This simple fix rescued my citrus tree last year!
Fungus gnat spreads root rot, carrying muck from sick plants into healthy ones. Dirty tools do, too. One should always scour the base of each stem cut with sterilized shears and quarantine new plants; otherwise, these silent destroyers will wreak havoc. Preventive measures always pay better than cures.
Signs of Root Rot
Yellow leaves. These usually begin at the bottom of your houseplant and then start making their way up. Your plant backgrounds even after watering. Slow growth. New leaves are small. I once ignored this and lost a prized monstera. Don't delay if you notice these signals.
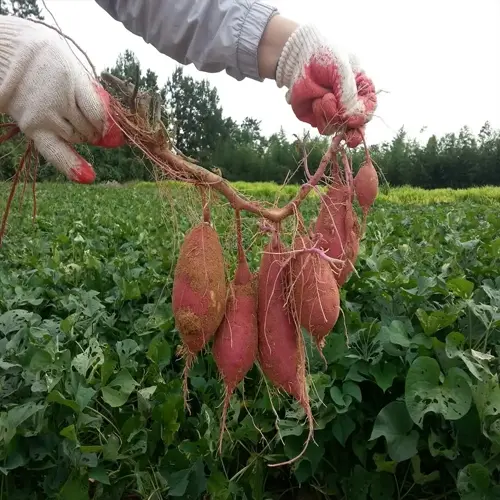
Dig deeper for root rot! Carefully unpot your plant. Healthy roots are white and firm. Rotten roots are brown or black. They mushily crumble when tested. Do the origins smell of rotten eggs? Uh-oh! This smell never lies.
Symptoms that won't let up. Your plant wilts no matter how much you water it; it's got root problems. Fungus gnats hover around the surface of your soil; root problems. Mold forms on your topsoil; root problems. Your plant is rocking in its pot due to root problems.
Never, ever skip the root inspection. Last year, my peace lily deceived me. The leaves appeared fine, but the roots were soft and mushy. Always check underground whenever anything appears off. Your nose knows. Trust that smell of doom as your last warning.
Above-Ground Symptoms
- Slow growth where new leaves emerge smaller or less frequently than normal
- Yellowing leaves typically beginning at lower foliage and progressing upward
- Persistent wilting that continues even when soil moisture is adequate
- Reduced leaf size where new growth appears undersized compared to healthy plants
- Sudden leaf drop occurring without seasonal triggers or stress factors
- Brown lesions forming on leaves, especially along veins or margins
Below-Ground Symptoms
- Darkened roots changing from healthy white to brown or black
- Mushy consistency where roots crumble under gentle pressure
- Foul odor similar to rotten eggs from decomposing tissue
- Slimy residue coating roots indicating secondary bacterial infection
- Easy separation where roots detach with minimal force applied
- Crispy texture in advanced stages as roots completely dry out
Plant Behavior Indicators
- Water resistance where moisture pools on soil instead of absorbing
- Delayed response taking over 24 hours to recover after watering
- Loose anchoring causing plants to wobble in their containers
- Fungus gnat activity swarming consistently around soil surface
- Mold formation white fungal growth on topsoil from excess moisture
How to Treat Root Rot
Begin the treatment for root rot by removing your plant from the pot. Gently rinse the roots in lukewarm water between 68-77°F. Thoroughly wash away the soil to expose any areas of rot. I tend to use a soft shower spray for this purpose to avoid damage, although a hose would also be fine. Throw out old soil (don't compost it) to limit the spread of spores.
Before cutting, sterilize your pruning shears in 70% alcohol. Snip rotten roots above the damaged area until you reach the healthy white tissue, disinfecting your blades after each cut through every potentially infected root. That is how I learned to stop the infection from spreading further. As insurance against this fall, take cuttings from healthy stems ahead of your major pruning.
Mix up a fungicide solution according to directions on the label. Soak the roots for thirty seconds to kill the pathogen if the rot is severe; dilute Buxus Blight 1:100. Air-dry the roots for ten minutes before potting. Save the remainder for use on other plants.
Repot into fresh soil mixed with perlite and in a pot that is roughly 20-30% smaller than the old pot. Water the plant lightly, then place it in the shade for 48 hours. My rescued fiddle leaf fig sprang back to life this way, so check for signs of new growth the next day!
Root Removal & Cleaning
- Gently unpot plant: Turn container sideways while supporting stem base
- Rinse thoroughly: Use lukewarm water (68-77°F/20-25°C) to wash away soil
- Inspect carefully: Identify all dark/mushy roots needing removal
- Discard old soil: Seal in bag to prevent spore spread
Pruning & Sterilization
- Take insurance cuttings: Propagate healthy stems in water as backup before treatment
- Sterilize shears: Dip in 70% isopropyl alcohol or hydrogen peroxide solution
- Cut above rot: Remove damaged sections into healthy white root tissue
- Disinfect between cuts: Wipe blades after each snip to prevent contamination
- Trim foliage: Reduce leaf mass by 30-50% to ease root regrowth burden
Fungicide Treatment
- Prepare solution: Dilute fungicide per label (e.g., Buxus Blight 1:100 ratio)
- Soak roots: Submerge for 30 seconds to eradicate residual pathogens
- Extended drying: Wait 15 minutes if over 50% of roots were removed
- Air dry: Let roots sit 10 minutes before repotting
- Save solution: Reserve mixture for post-repotting application
Repotting Process
- Select smaller pot: Reduce container diameter by 20-30% of original
- Use fresh mix: Combine 70% potting soil with 30% perlite/pumice
- Position plant: Center roots, fill gaps without compacting soil
- Water lightly: Moisten until water drains from holes
Immediate Aftercare
- Place in shade: Keep in indirect light for 48 hours
- Delay watering: Wait 3-5 days before checking moisture
- Hold fertilizer: Resume nutrients after 4 weeks
- Monitor daily: Watch for new growth or recurring wilting
Aftercare for Recovery
Check your soil moisture daily by the finger test. Stick your finger into the dirt 2 inches deep. If dirt sticks to your finger, it's not time to water. Only water when your finger comes out dry. That's how my snake plant was saved. Bottom-watering prevents soil compaction. Just sit pots down in a little shallow water for 15 minutes. They will soak it up. Just drain off the extra.
Start plants in dim light for 72 hours. Ten days afterwards, gradually increase the exposure by placing them daily a little nearer to the windows. Maintain a temperature between 68°F and 77°F, which is fairly even. Avoid drafts of cold air and humidify the atmosphere using pebble trays, rather than sprinkling water on the leaves.
Wait four weeks before fertilizing. For the first two feedings, you should use a half-strength solution. 10-10-10 balanced fertilizer may be used monthly while plants are growing. Flush out the soil in the pots every month to prevent salt from accumulating. My orchids bloomed again after that deliberate restart.
Inspect for bright green shoots in about two to three weeks. Gently tug on the plants after a month. If there's resistance, the roots regrow, but if the plants are still somewhat yellow, they have failed. Try to keep the plants entirely isolated for approximately eight weeks. Use some fans to keep air circulation for about 6 hours a day to prevent fungus on your pieces.
Water Management
- Check soil daily: Insert finger 1-2 inches (2.5-5 cm) deep - water only when dry
- Bottom-water method: Place pot in 1 inch (2.5 cm) water for 15 minutes to prevent compaction
- Avoid misting: Excess humidity encourages fungal regrowth on stressed plants
- Track weight: Lift pot to gauge moisture - lighter indicates need for water
Light & Environment
- Start in shade: Keep in low light (100-200 lux / ~10-20 foot-candles) for 72 hours
- Gradual exposure: Increase light 10% daily to full recommended levels over 10 days
- Maintain warmth: Keep at 68-77°F (20-25°C) - avoid cold drafts below 60°F (15.5°C)
- Boost humidity: Use pebble tray (not misting) for tropical plants
Nutrient Reintroduction
- Wait 4 weeks: Resume fertilizer only after new root growth appears
- Half-strength solution: Dilute balanced 10-10-10 NPK to 50% dose for first 2 applications
- Monthly schedule: Apply every 4-6 weeks during active growth seasons
- Flush soil: Water thoroughly monthly to prevent salt buildup
Monitoring & Troubleshooting
- New growth signs: Look for bright green shoots within 2-3 weeks
- Root check: Gently tug plant after 4 weeks - resistance indicates regrowth
- Failure signs: Persistent yellowing or stem mushiness requires re-treatment
- Quarantine period: Keep away from other plants for 8 weeks minimum
Airflow Management
- Fan circulation: Use oscillating fan 6 hours/day to strengthen stems
- Proper spacing: Maintain 6-12 inch (15-30 cm) gap between plants
- Avoid corners: Position away from stagnant air pockets in rooms
- Seasonal adjustment: Increase airflow during humid summer months
Preventing Root Rot
Watering depends on the plants and the season. Succulents require watering every 2 to 3 weeks, whereas tropical plants prefer to be watered once a week. Use half these watering frequencies in winter. Always check to see if the earth is dry by pushing one finger into it, down 2in. Water only when it is dry.
Mix soil for drainage. Most plants prefer a mixture of 60% potting soil and 40% perlite. Ferns thrive in a 70% coco coir and 30% orchid bark mix, Cacti like half sand, 30% pumice, 20% compost. Refresh topsoil every spring.
Choose pots with a minimum of three drainage holes. Terracotta pots reduce the need for watering by a whopping 30%. When selecting containers, go a size or two bigger than the root ball (at least 1 inch/2.5cm bigger on every side), and empty the saucers within 30 minutes after watering (otherwise the roots will sit in the water).
Monthly: Apply natural fungicides. Make an antifungal spray with chamomile flowers steeped in water. Dust soil and plant leaves with cinnamon powder after watering thoroughly. Use a garlic solution once every two weeks (that works against aphids and other pests but is also anti-fungal). Use yellow sticky traps for fungus gnats. Quarantine new plants for three weeks before adding to your collection.
Optimal Watering Practices
- Check soil moisture: Insert finger 2 inches (5 cm) deep - water only when dry
- Seasonal adjustment: Reduce watering frequency by 50% of warm-season schedule during winter
- Plant-specific schedules: Succulents every 2-3 weeks vs. tropicals every 5-7 days
- Water quality: Use room-temperature filtered water to avoid mineral buildup
Soil Composition Guide
- Aeration mix: 60% potting soil + 40% perlite/pumice for most houseplants
- Moisture lovers: 70% coco coir + 30% orchid bark for ferns and calatheas
- Cactus blend: 50% sand + 30% pumice + 20% compost
- Annual refresh: Replace top 2 inches (5 cm) of soil every spring
Pot Selection & Maintenance
- Drainage holes: Minimum 3 holes for pots under 8 inches (20 cm) diameter
- Terracotta advantage: Porous material reduces watering frequency by 30%
- Saucer management: Empty excess water within 30 minutes after watering
- Size guidelines: Pot diameter should exceed root ball by only 1-2 inches (2.5-5 cm)
Natural Fungicide Applications
- Chamomile tea: Steep 1 cup (30g) flowers in 5 cups (1.2L) water; apply monthly
- Cinnamon powder: Dust 1 tsp (5g) on soil surface after watering to inhibit fungi
- Garlic solution: Blend 3 cloves (15g) with 1 quart (0.95L) water; spray biweekly
- Horsetail brew: Simmer 1 cup (30g) fresh herb in 1 gallon (3.8L) water; use as drench
Environmental Controls
- Air circulation: Maintain 1 ft (30 cm) space between plants
- Humidity range: Keep 40-60% using hygrometer-monitored humidifiers
- Temperature stability: Avoid fluctuations beyond 65-80°F (18-27°C)
- Light optimization: Use grow lights if natural light < 6 hours daily
Pest & Pathogen Control
- Fungus gnat traps: Install yellow sticky cards near all plants weekly
- Biological treatment: Apply mosquito bits (Bacillus thuringiensis) monthly
- Pot sterilization: Soak in 3% hydrogen peroxide solution before reuse
- New plant quarantine: Isolate for 3 weeks before introducing to collection
5 Common Myths
Many gardeners mistakenly believe that overwatering is the sole cause of root rot in plants
While overwatering is the primary trigger, root rot develops through a combination of factors including fungal pathogens like Pythium, poor soil drainage that suffocates roots, and contaminated tools spreading spores. Even underwatered plants can develop root rot if their weakened roots become vulnerable to opportunistic pathogens in the soil environment.
Plants suffering from root rot cannot be salvaged and will need to be thrown away immediately
However, in the case of plant species that can be successfully revived from root rot, early intervention will aid in recovery by using the methods of root pruning, sterilizing roots and repotting. If less than 50% of the plant's roots are affected by root rot, then the chance of recovery exceeds 90%. Even badly damaged plants can be saved via stem cuttings taken above the infected area before the root system is discarded.
A common misconception suggests that adding gravel layers to pot bottoms improves drainage and prevents root rot
Gravel layers create a perched water table that actually traps moisture above the drainage layer, worsening root rot conditions. Effective drainage requires uniformly aerated soil throughout the pot, achieved by mixing perlite or pumice into the entire soil volume rather than creating separate layers at container bottoms.
When houseplant leaves turn yellow, inexperienced owners often incorrectly assume this always signals root rot
Yellowing foliage can result from multiple issues including nutrient deficiencies, pest infestations, natural aging, or incorrect light exposure. True root rot diagnosis requires checking below-ground symptoms like dark mushy roots and foul odor, combined with persistent wilting despite proper watering practices.
Garden soil is safe to use for potted plants since it's natural
Outdoor soil often contains root rot pathogens, weed seeds, and pests unsuitable for containers. Its dense structure compacts in pots, restricting oxygen flow to roots. Sterile potting mixes provide better aeration and disease control, with tailored compositions for specific plant needs that prevent waterlogged conditions leading to rot.
Conclusion
Root rot is thus easily prevented or cured by a little care. Adopt three simple safeguards: good *drainage*, careful *moisture*. sanitation, and you decide the fate of root rot.
Check roots occasionally to catch early signs of problems. Every few months, lift your plants out of their pots to check for firm white roots. That's all it took for mine, and I saved my rubber plant last winter by inspecting its roots then. Catching trouble at an early stage gives it little opportunity to spread and promises almost complete recovery.
When plants receive the correct care, they can recover very easily, even after significant damage has occurred. Given the proper care, harmed plants will also recover, but it may take more time and patience. Keep following the instructions we provided; you will have your garden thriving again! Have faith in nature's capability to recover and in your staff's assistance in this process.
External Sources
Frequently Asked Questions
Can a plant recover from root rot?
Yes, plants can recover from root rot if treated early. Success rates exceed 90% when less than half the roots are affected. Key steps include removing rotten roots, sterilizing with hydrogen peroxide, and repotting in fresh soil. Even severely damaged plants may be saved through stem cuttings.
Does hydrogen peroxide help root rot?
Hydrogen peroxide effectively treats root rot by killing pathogens and oxygenating roots. Use a 3% solution diluted with water to sterilize roots and tools. However, it's not a standalone cure and must be combined with root pruning and repotting for complete recovery.
How to fix root rot without repotting?
While repotting is ideal, temporary measures include:
- Stop watering immediately and let soil dry completely
- Apply cinnamon powder to the soil surface to inhibit fungi
- Use a fan to improve air circulation around roots
- Remove topsoil to expose roots to air for faster drying
Does cinnamon help with root rot?
Cinnamon acts as a natural antifungal agent that can slow root rot progression. Sprinkle powdered cinnamon directly on affected areas after removing rotten roots. While helpful for prevention and minor cases, severe infections require stronger treatments like hydrogen peroxide or commercial fungicides.
Is root rot caused only by overwatering?
Overwatering is the primary trigger, but multiple factors cause root rot:
- Fungal pathogens thriving in wet conditions
- Poor drainage in soil or containers
- Contaminated tools spreading spores
- Fungus gnats transferring pathogens
- Dense soil restricting oxygen flow
What's the strongest natural root rot treatment?
The most effective natural solution combines:
- Hydrogen peroxide root soak to kill pathogens
- Chamomile tea drench for antifungal properties
- Cinnamon powder application on cut roots
- Garlic solution spray to prevent reinfection
- Bacillus thuringiensis for fungus gnat control
How to make homemade root rot spray?
Create an effective spray using natural ingredients:
- Garlic spray: Blend cloves with water, strain, and spray
- Chamomile tea: Brew strong tea, cool, and apply to soil
- Cinnamon solution: Mix powder with warm water
- Horsetail decoction: Simmer fresh herbs in water
Can vinegar treat root rot?
Vinegar isn't recommended for root rot treatment. Its high acidity damages plant roots and beneficial soil microbes. While it may kill surface fungi, it worsens root damage. Use safer alternatives like chamomile tea or diluted hydrogen peroxide instead for effective pathogen control.
What are the first signs of root rot?
Early detection signs include:
- Yellowing lower leaves despite watering
- Wilting that persists after hydration
- Foul odor from soil
- Stunted new growth
- Black/brown mushy roots when inspected
How to prevent root rot in potted plants?
Prevention strategies include:
- Check soil moisture before watering
- Use terracotta pots with drainage holes
- Mix perlite into soil for better aeration
- Sterilize tools between plants
- Apply natural fungicides monthly
- Quarantine new plants for weeks