
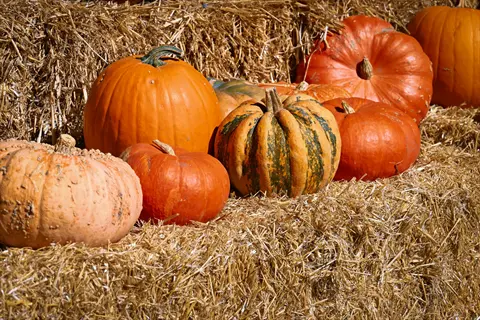
Learning how to grow pumpkins brings family fun right home into your backyard. It's hard to imagine something more cheerful than one of these many-potted giants, and it's not only a great beginner project for creating family Halloween jack-o'-lanterns or homemade pumpkin pie. But I also worked with five seeds last year, and my kids were enrapt as the vines crawled everywhere. You will find both edible and decorative rewards from one plant, and pumpkins are a good vegetable to know as a first-time gardener.
Your pumpkin patch requires three easy elements. Find a sunny corner that receives at least six hours of direct sunlight a day. Don't plant until the soil temperature is tested; your soil must be above 50°F. Roots shouldn't languish in wetness. My first batch failed due to clay soil, and now I still add some compost to the mix. These pom-poms need little more, and you'll have a gourdful of pumpkins.
Pumpkins offer more than autumn decor. Roast the seeds for snacking. Since their flesh already supplies healthful and delicious soups, try them for the soupier kind. Use small pumpkins for colorful accents in your garden. I always save seeds for my sweetest pumpkins from each year to use for next year's crop, and I start from there. You witness the whole gamut of life in one growing season, and few garden projects top this delight. Just start small and enjoy!
Pollination Methods
Bees do all the pollination work here for you (what a life, bees). Attract them by planting marigolds or zinnias around your patch. I always leave a shallow dish of water sitting out, too. More visitors to your garden means better fruit set! You want these buzzing friends working the season through.
When your bees are scarce, hand-pollination will save your crop. Find a male flower, peel back the petals, and gently rub the pollen-covered center over the female blossom. If you haven't noticed, female flowers have little pumpkins at their base. I often use a small paintbrush so I can apply it accurately. With this technique, I get near-perfect rates. Make the transfer early as the flowers begin to fade.
Timing is everything. You want to have each flower fully open before attempting to pollinate it. Humidity helps the pollen stick to the flowers. You also don't want to try to pollinate them in the mid-day heat, or the blooms may dry out. My first attempts yielded no results because I waited too long. Now, I check the patch every morning early. If your flowers are well-watered every day, all day, they will not drop their fruits. Make sure to water them well the night before.
Gosh, did you notice your baby pumpkins shriveling? That's a tell-tale symptom of pollination stress. It is crucial, then, to keep the soil moist while your plants are trying to fruit. It's best never to let the ground dry out completely. I use drip irrigation on a timer, and I also cover them with shade cloth when the weather is scorching.
Mulching Techniques
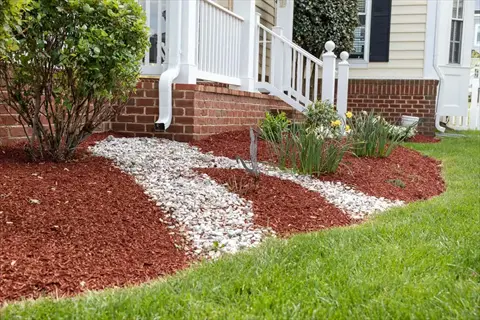
Picking the right mulch has a big impact on your pumpkins. Thinking "organic", straw or compost will improve your soil as it breaks down, and these mulches retain lots of water while keeping weeds at bay. Plastic mulch will heat your soil quickly, but it won't add anything to your soil. I prefer straw since earthworms thrive underneath it, but both options will keep your vines happy.
Wait to spread mulch until the soil at your feet has warmed to at least 75°F (24 °C). If you mulch the soil too soon, the slower warming slows down root growth because, with mulch, the ground is insulated and remains cooler for a longer period. I always check the soil temperature with a soil thermometer before mulching. Waiting until your soil is warm is worth it. Your pumpkins will be stronger for it.
Mulch 6 inches away from the stems of your plants. This prevents rot and discourages pests. Squash bugs love to crawl under damp mulch against the base of the vines. I leave a clear spot around each plant. This one easy habit rescued my fall crop from vine borers last year.
Mulching offers three major rewards. It helps retain the soil moisture, so I weed less often and water less. It guards against the temperature swings that can affect our plants when the summer heat arrives. And it prevents weeds from vying for nutrients with the pumpkins. Overall, I have far healthier plants when they are in consistent conditions. Give it a shot and watch your pumpkins thrive.
Straw Mulch
- Moisture retention: Straw mulch holds water effectively, reducing irrigation needs by 30% during hot summer months for pumpkins
- Weed suppression: Creates a 3-inch thick barrier that blocks sunlight, preventing weed germination without chemicals
- Soil cooling: Maintains soil temperatures 10°F (5.5°C) cooler than bare ground during peak summer heat waves
Grass Clippings
- Nitrogen boost: Fresh clippings release nitrogen as they decompose, feeding pumpkin plants for 4-6 weeks
- Application tip: Apply in thin 1-inch layers to prevent matting and allow proper water penetration to roots
- Caution: Use only untreated grass to avoid herbicide contamination that could damage pumpkin vines
Compost Mulch
- Nutrient enrichment: Slowly releases nitrogen, phosphorus, and potassium as it breaks down near pumpkin roots
- Soil structure: Improves drainage in clay soils while increasing water retention in sandy planting areas
- Application depth: Spread 4 inches thick around plants but keep 6 inches clear of stems to prevent rot
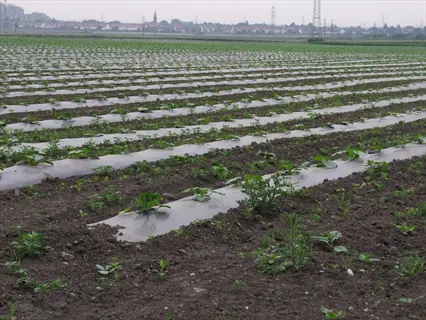
Plastic Mulch
- Early warming: Black plastic raises soil temperature 5-7°F (3-4°C) for faster pumpkin seed germination in spring
- Installation: Secure edges with soil and cut X-shaped planting holes spaced 3 feet apart for vines
- Limitation: Prevents natural vine rooting and requires drip irrigation underneath for proper watering
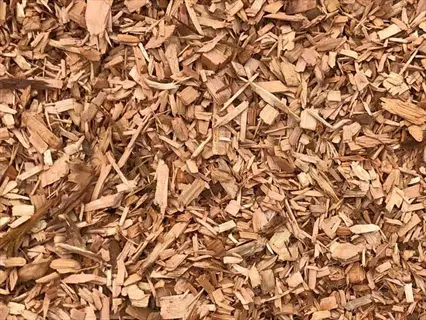
Wood Chips
- Longevity: Lasts 2-3 years without replenishing, making it ideal for perennial pumpkin patches
- Fungal benefits: Encourages mycorrhizal fungi that form symbiotic relationships with pumpkin root systems
- Application: Use only aged chips as fresh wood depletes soil nitrogen during initial decomposition phase
Vertical Pumpkin Growing
Growing pumpkins vertically saves you nearly 70 percent of the ground space and increases air circulation around the plants, thereby lessening the danger of fungal diseases prevalent in crowded patches. I revolutionized my little garden by training the vines upward. You get more space for other crops! The care of pumpkins is also reduced if they grow upward.
Select robust supports, such as trellises or cattle panels, that will hold the weight of your developing pumpkins; so these will need to keep at least 15 - 25 pounds without bending. I have larger galvanized steel arches that are solidly anchored deep in the soil. Test your supports out before your pumpkins have fully developed. You want solid supports for your vines to grow overhead.
Train vines early by weaving the young growth through the supports. Try to lead the tendrils gently up to them every day as the rapid growth occurs. Where the stem ends refuse to weave easily, I use a strand of soft twine. The result is that vines are prevented from snapping off in windstorms, and your pumpkins are kept comfortably off the ground.
They are also resistant to soil pests and rot diseases. I find my pumpkins remain cleaner and healthier since they hang above the mulch. When harvest time comes, you will not see blemishes on the fruit resting on the ground. This protection reduces the need for chemical sprays; give vertical growing a try, and you will have the 'bugs' under control.
Cattle Panel Arches
- Durability: 14-gauge galvanized steel withstands 50+ lb loads without bending or sagging over seasons
- Installation: Bend panels into arches anchored 3 feet apart; ideal for rows between raised garden beds
A-Frame Trellises
- Stability: Angled 4x4 posts provide lateral support for vigorous vines in windy locations
- Customization: Adjustable crossbars accommodate different pumpkin sizes as fruits develop
T-Post and Netting
- Economical: Reusable T-posts with heavy-duty garden netting cost under $30 per 10-foot section
- Flexibility: Nets stretch to cradle growing fruits without restricting vine expansion
Obelisk Towers
- Aesthetic appeal: Decorative metal structures add visual interest while training vines upward
- Compact design: 2x2 foot base fits small gardens; best for mini pumpkin varieties
Fence Integration
- Existing infrastructure: Utilize chain-link or wooden fences as instant vertical growing surfaces
- Sun exposure: Ensure south-facing placement for 6-8 hours of daily sunlight minimum
Preparing Soil and Planting
Sandy or clay soils? Light, sandy soils have the unfortunate tendency to drain very quickly, resulting in the escape of nutrients. To address this, compost must be worked into the soil to retain moisture. Heavier clay soils, however, have the overwhelming tendency to hold the humidity too long, so that coarse sand and organic matter should be spaded in to assist in drainage. I test the soil every year to ascertain the amendments I require to make.
Dig your beds 12-18 inches (30-45 cm) deep before planting and enrich the entire area with aged manure or compost. I add a thick 4 inches of organic matter and then till everything well. Your pumpkins will take off faster with that deep base of nutrients.
Only plant when the soil reaches "65° F. (18° C.)," after frost danger is past. Use a soil thermometer. Direct sow seeds in little mounds 1 inch deep. I start mine indoors 3 weeks earlier for an extra jump ahead. Warm soil provides quick germination and healthier sprouts.
Space plants properly. Three feet apart for bush varieties and five feet for trailing types is necessary to avoid trouble from disease. I stake out the planting locations, as the distance between plants is crucial, allowing the vines space to spread without crowding.
Double-Digging
- Technique: Dig 12-inch trenches, mix soil with compost, repeat in adjacent rows
- Benefit: Creates 24-inch deep root zone ideal for heavy-feeding pumpkin plants
No-Till Cardboard Layering
- Technique: Cover grass with cardboard, top with 4 inches of compost
- Benefit: Suppresses weeds while building organic matter; ready in 2-3 months
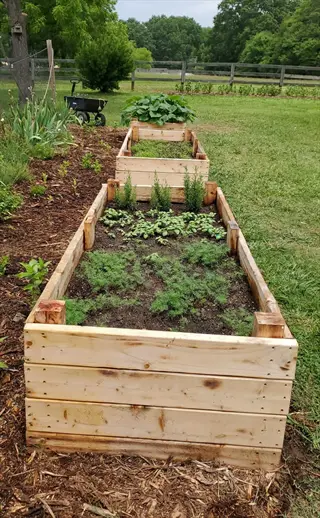
Raised Bed Preparation
- Technique: Fill beds with 1:1:1 mix of topsoil, compost, and coarse sand
- Benefit: Ensures drainage and warmth; ideal for cooler climates
Green Manure Incorporation
- Technique: Grow clover/rye, till into soil 6 weeks before planting
- Benefit: Adds nitrogen and improves soil structure naturally
pH Adjustment
- Technique: Add lime to acidic soils (pH<6.0) or sulfur to alkaline soils (pH>7.0)
- Benefit: Maintains optimal pH 6.0-6.8 for nutrient absorption
Watering and Feeding
Deep water is supplied at a rate of 1-2 inches (2.5-5 cm) per week. This delivers water deep into the soil to a depth of 12 inches, stimulating the roots to follow. I water slowly for over 30 minutes, until the entire soil mass is penetrated; shallow sprinkling results in weak root systems. Deep watering induces drought hardiness.
Check moisture with the finger test. Stick your finger up to the second knuckle, near the plants. It should feel damp like a wrung-out sponge. If it's dry, give water. If it's soggy, you will have yellow leaves. I generally test every three days in hot spells.
Start feeding when vine runners appear. Use a high-potash fertiliser, such as those made for tomatoes. Potassium encourages larger fruit and sweeter crops. I liquid feed every couple of weeks. If there has been a heavy nitrogenous top-dressing of some organic fertiliser earlier in the year, the vines make long leafy growths without producing pumpkins. You must time it wisely to obtain heavy crops.
Organic Options. Compost tea, seaweed extract, and other organic options build soil biology slowly and can be used for best effect early in the growth cycle. For example, when building juice grapes, I ask growers to enhance the soil's biology through compost application and then supplement it with synthetic NPK when it's time for fruit to form and subsequently ripen.
Deep Soaking Method
- Technique: Water slowly for 30 minutes to achieve 12-inch (30 cm) soil penetration
- Benefit: Encourages roots to grow downward, making plants drought-resistant
Morning Watering
- Timing: Irrigate between 5-9 AM when temperatures are coolest
- Benefit: Reduces evaporation by 40% and prevents fungal diseases from nighttime moisture
Drip Irrigation
- Setup: Use tubing with emitters spaced 12 inches (30 cm) apart along vines
- Efficiency: Delivers water directly to roots with 90% less waste than sprinklers
Mulch Moisture Retention
- Application: Maintain 4-inch (10 cm) organic mulch layer around plants
- Effect: Reduces watering frequency by 30% during summer heat waves
Container Watering
- Frequency: Water potted pumpkins daily in heat; check soil dryness at 2-inch (5 cm) depth
- Caution: Ensure pots have drainage holes to prevent root rot from waterlogging
Harvesting and Storage
Harvest Readiness: Check the rind, which should resist a thumbnail pressing it and not dent. Examine the stem where it joins the pumpkin; it will turn corky and then dry out. I always leave a short stem on when I cut them off, I find it prevents rot running in. Never lift one by its stem.
Cure pumpkins in the sun for seven or ten days. If left unprotected to harden, they sweeten the pulp and thicken the skins. Lay them on pallets, leaving a space between, and roll them over once a day. If properly cured, some of them will keep in a winter cellar for several months.
Store in the ideal conditions of 50-55° F. (10-13° C.), humidity 50-70%. Dark cellars or garages with some ventilation are good. I keep a hygrometer. Avoid concrete floors, which wick moisture. Your wines will still be drinking well months from now, but mold won't form because of the dampness.
Check your giant varieties weekly for soft spots. Mine lasts a few months with no trouble if I keep my small decorative types. I wipe all the pumpkins I get with a water and vinegar solution before putting them away. This kills any surface mold or spores that may be starting to grow. The larger the pumpkin, the more frequently it must be checked during the winter.
Rind Hardness Test
- Verification: Press thumbnail against skin; ripe pumpkins show no denting or puncture marks
- Timing: Achieves full hardness 45-55 days after fruit set depending on variety
Stem Drying
- Visual cue: Stem turns corky and brown where it connects to the pumpkin base
- Caution: Never carry pumpkins by stems to avoid breakage that invites rot
Color Saturation
- Development: Uniform deep orange (or variety-specific hue) without green streaks
- Exception: White pumpkins like 'Lumina' ripen to solid ivory without green undertones
Hollow Sound
- Testing: Tap fruit with knuckles; ripe pumpkins produce deep, resonant hollow echoes
- Accuracy: 80% reliable when combined with rind hardness test
Vine Senescence
- Observation: Supporting vines turn brown and dry out as pumpkins reach maturity
- Timing: Harvest before first frost even if vines are still partially green
5 Common Myths
Pumpkins require daily watering to prevent cracking and ensure maximum growth during summer months.
Daily watering actually promotes shallow roots and increases disease risk. Pumpkins thrive with deep weekly irrigation delivering 1-2 inches (2.5-5 cm) of water, which encourages roots to grow downward seeking moisture. This method builds drought resistance while preventing fruit cracking caused by irregular soil moisture fluctuations. Overhead watering should be avoided entirely to minimize leaf fungal issues.
Growing pumpkins in containers is impossible because their extensive root systems need unlimited ground space.
Pumpkins successfully grow in containers when given adequate root space. Select bush varieties and use 20-gallon (75-liter) pots with drainage holes. The key is consistent feeding with balanced fertilizer and trellising vines vertically. Container-grown pumpkins often yield earlier harvests than ground-planted ones due to warmer soil temperatures and reduced pest pressure.
Pumpkins stop developing nutrients once picked and must be harvested only when fully orange.
Pumpkins continue converting starches to sugars after harvest if cured properly. The curing process involves storing them at 80-85F (27-29C) for 10 days, which thickens skins and enhances sweetness. Color development occurs on the vine, but nutritional quality improves post-harvest. Green pumpkins achieve full flavor when ripened indoors away from direct sunlight.
Giant pumpkins are the best choice for cooking because larger size equals superior flavor and texture.
Giant varieties often have watery, stringy flesh developed for size rather than taste. Smaller pumpkins like Sugar Pie or Long Island Cheese offer denser, sweeter flesh ideal for baking. Their concentrated flavor comes from higher sugar content per ounce. For pies and soups, 4-8 lb (1.8-3.6 kg) varieties consistently outperform giants in blind taste tests.
Full sun all day is essential for growing pumpkins, and they require at least 12 hours of direct sunlight to produce any fruit.
Pumpkins actually only require 6-8 hours of direct sunlight a day, but in warm climates, it's ideal to grow them in the morning and then shade them during the afternoon to prevent heat stress. Too much sun can result in sunscald on pumpkin fruits. In hotter areas, providing partial shade on the hottest part of the day improves yields as it conserves soil moisture and decreases the occurrence of blossom drop from high temperatures.
Conclusion
"Pumpkin growing" is all but impossible without the three essentials of well-worked soil, constant watering, and perfect harvesting time. I know, because I lost my first pumpkins due to a lack of good planning. But the reward is worth the effort; you will have luscious fruit if these three things work together. Start and finish well!
Space-saving techniques that maximize airflow and conserve moisture - like vertical trellising and mulching - can give you exponentially bigger harvests in tiny gardens. My newish urban plot produces way more pumpkins than the old rural garden!
Don't listen to any nonsense about watering daily or requiring full sun. When I first started, I thought the contrary, and I lost so many plants. Well, let's shoot that myth down already and have the vines thriving and fast growing, and all pumpkins be sweeter!
Experiment with different varieties to find your local champions: sugar pies, carving giants, decorative minis. Three different types thrive in my microclimate. Your soil and weather create different growing conditions. Discover those each season!
External Sources
Frequently Asked Questions
How easy is it to grow pumpkins?
Pumpkins are moderately easy to grow with proper planning. Beginners succeed by choosing disease-resistant varieties, preparing deep nutrient-rich soil, and maintaining consistent watering. Vertical growing simplifies space management while mulching reduces maintenance. Avoid common pitfalls like overwatering or incorrect harvesting timing for best results.
What is the optimal pumpkin planting time?
Plant pumpkins after the last frost when soil reaches 65°F (18°C). In most regions, this falls between late spring and early summer. For extended harvests, use succession planting every two weeks until midsummer. Soil temperature matters more than calendar dates for germination success.
How much water do pumpkins require?
Pumpkins need deep weekly watering penetrating 12 inches (30 cm), providing 1-2 inches (2.5-5 cm) of moisture. Morning irrigation reduces evaporation and fungal risks. Drip systems or soaker hoses deliver water efficiently to roots while mulch layers help retain soil moisture between sessions.
What pests commonly attack pumpkins?
Common pumpkin pests include squash bugs, vine borers, and cucumber beetles. Prevention strategies:
- Use row covers during early growth stages
- Apply neem oil or insecticidal soap sprays
- Plant pest-repelling companions like marigolds
- Remove diseased foliage immediately
- Elevate fruits with vertical growing to avoid ground insects
Do pumpkins need full sunlight?
Pumpkins require 6-8 hours of direct sunlight daily. Morning sun with afternoon shade prevents heat stress in warm climates. Excessive exposure causes sunscald on fruits, while insufficient light reduces yields. In hot regions, partial shade during peak afternoon hours improves productivity.
How many pumpkins grow per plant?
Yield varies by variety: smaller types produce 8-12 fruits, while giants yield 1-2. Maximize production by:
- Pruning vines after 3-4 fruits set
- Using high-potassium fertilizer during fruiting
- Ensuring adequate pollination
- Providing 5+ feet (1.5+ meters) spacing between plants
- Removing damaged fruits early
Can you grow pumpkins in containers?
Yes, use 20-gallon (75-liter) pots with drainage holes. Bush varieties work best. Key requirements:
- Trellis vines vertically for support
- Water daily during heat
- Use balanced slow-release fertilizer
- Ensure soil depth of 12+ inches (30+ cm)
- Monitor for root-bound stress
What are critical harvesting mistakes?
Avoid harvesting too early, carrying pumpkins by stems, or skipping curing. Wait for hardened rinds and corky stems. Cut fruits with 4-6 inch stems using pruning shears. Always cure pumpkins in sun for 7-10 days before storage to prevent rapid spoilage.
What shouldn't be planted near pumpkins?
Avoid potatoes, fennel, and other heavy root competitors. Ideal companions:
- Corn for vertical support
- Beans to fix nitrogen
- Radishes to deter beetles
- Marigolds to repel nematodes
- Nasturtiums as trap crops
Can store-bought pumpkin seeds be planted?
Yes, but choose organic pumpkins since commercial varieties may be hybrids with unreliable germination. Scoop seeds, rinse pulp off, and dry thoroughly. For best results, start seeds indoors 3-4 weeks before last frost. Note that saved seeds might not match parent fruit traits.