
Introduction
The alocasia plant adds bold tropical drama to any room in your home. People also call it the elephant ear plant or African mask plant for its large striking leaves. The genus holds 96 accepted species from the rainforests of Asia. Their leaves point skyward like open palms catching rain, the exact habit they evolved for beneath dense canopies.
I started growing alocasia 6 years ago with a single Polly from a grocery store clearance rack. That one plant taught me more about humidity and watering than any care guide could. I now keep 12 varieties at home and have killed enough along the way to know what works.
Your alocasia sits in the Araceae plant family. This huge group holds 107 genera and over 3,700 species found around the world. You might know other members like pothos and peace lilies. But this tropical houseplant stands apart with its bold leaf shapes and deep vein patterns. Collectors chase rare jewel types like Silver Dragon while beginners find great results with Polly and Frydek.
In my experience, the right setup from day one saves you months of trouble with these plants. This guide covers which varieties match your skill level and how to mix the right soil. You'll also learn the light and temperature settings that keep your alocasia thriving all year.
8 Popular Alocasia Varieties
Alocasia varieties range from compact desk plants to towering specimens that reach 10 feet tall. Most cultivars sit between 3 and 5 feet, with leaf blades from 8 to 36 inches long. I've grown all 8 of these varieties at home and ranked them by how easy they are for new growers.
Some leaves feel like soft velvet fabric while others look like hammered metal. You'll find a different texture and color in each alocasia variety on this list. The collector plant market has pushed prices up on rare jewel types. But you can still grab great options under $30 at most garden centers.
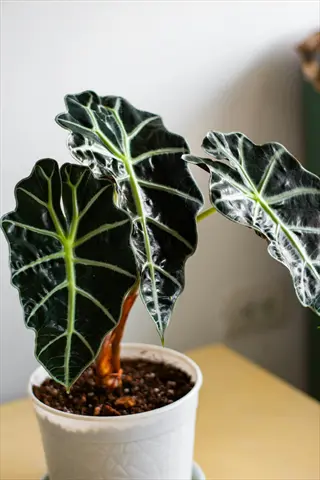
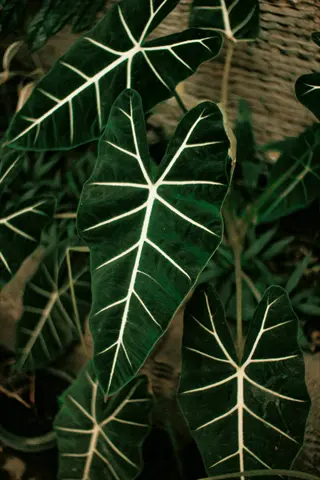
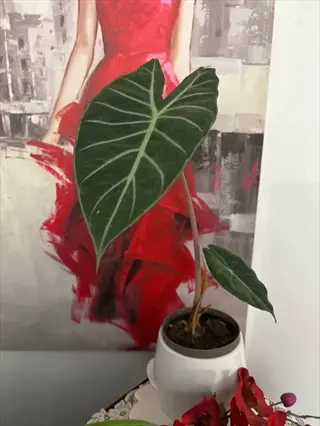
Alocasia Polly (African Mask)
- Leaf Shape: Narrow arrow-shaped leaves with deep green coloring and bold white veins that create a striking contrast, growing up to 18 inches (46 centimeters) long.
- Size: Compact grower reaching 1 to 2 feet (30 to 61 centimeters) tall, making it a perfect fit for tabletops, shelves, and small living spaces.
- Difficulty: One of the most common and beginner-friendly alocasia varieties, though it still needs consistent humidity above 50% to thrive.
- Light Needs: Performs best in bright indirect light near an east-facing window, but tolerates medium light better than many other alocasia types.
- Unique Trait: Produces offsets often, giving new growers plenty of opportunities to practice propagation through division during spring repotting.
- Care Tip: Water when the top inch (2.5 centimeters) of soil feels dry, and watch for leaf drooping as an early sign that moisture levels need attention.
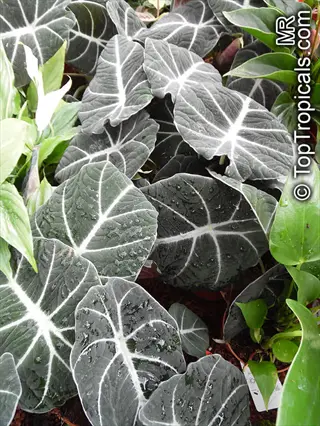
Alocasia Black Velvet
- Leaf Texture: Thick velvety leaves with a deep black-green surface and bright silver veins that feel like soft suede when touched gently.
- Size: Very compact at just 8 to 12 inches (20 to 30 centimeters) tall, one of the smallest alocasia varieties and ideal for desk or nightstand display.
- Difficulty: Moderate difficulty because the thick leaves are prone to root rot from overwatering, so a well-draining aroid mix is essential for success.
- Light Needs: Prefers bright indirect light but handles lower light conditions better than most alocasia due to its dark leaves absorbing more light.
- Unique Trait: The velvety leaf texture is unlike any other common houseplant and creates a dramatic focal point even in a small collection of plants.
- Care Tip: Allow soil to dry slightly more between waterings compared to other alocasia types, as the thick rhizome stores extra moisture for the plant.
Alocasia Frydek (Green Velvet)
- Leaf Texture: Deep green velvety leaves with prominent white veins that run in parallel lines from the center rib to the leaf edges.
- Size: Medium grower reaching 2 to 3 feet (61 to 91 centimeters) tall with leaves that spread 12 to 18 inches (30 to 46 centimeters) wide.
- Difficulty: Good choice for intermediate growers who have mastered basic houseplant care and want a slightly more demanding but rewarding tropical plant.
- Light Needs: Thrives in bright indirect light and develops deeper velvet texture and more vivid white veining when given ample filtered sunlight.
- Unique Trait: The variegated form of Frydek features white and green patches on the velvety leaves and is a prized find among plant collectors.
- Care Tip: Keep humidity above 60% using a humidifier placed nearby, and group it with other tropical plants to create a shared humidity microclimate.
Alocasia Silver Dragon
- Leaf Texture: Pale silvery-green leaves with dark green veining that creates a textured appearance often compared to dragon scales or hammered metal surfaces.
- Size: Compact variety growing 1 to 2 feet (30 to 61 centimeters) tall with thick rounded leaves that stay small compared to other alocasia types.
- Difficulty: Requires careful attention to humidity and watering, making it better suited for growers with some experience caring for tropical houseplants indoors.
- Light Needs: Bright indirect light brings out the metallic silver sheen on the leaves, while too little light causes the coloring to fade toward plain green.
- Unique Trait: The thick rigid leaves feel almost like cardboard to the touch and resist drooping longer than thin-leaved varieties when moisture dips.
- Care Tip: Plant in a small pot with excellent drainage because the compact root system rots fast in oversized containers that hold too much moisture.
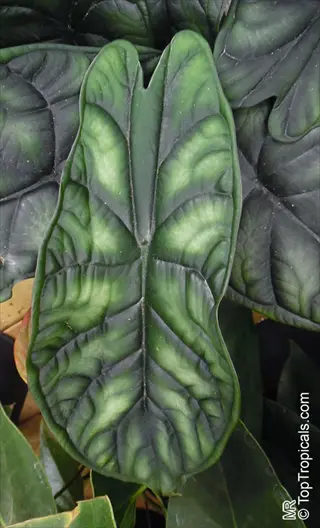
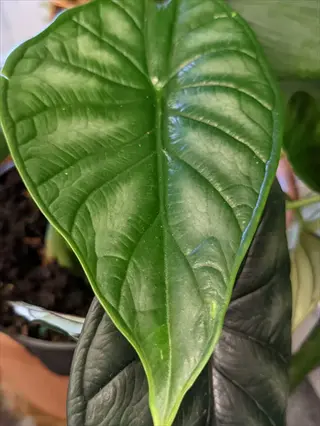
Alocasia Dragon Scale
- Leaf Texture: Thick rigid leaves with deeply etched veins that create a bumpy texture resembling reptile scales, in pale green with dark green grooves.
- Size: Medium grower reaching 2 to 3 feet (61 to 91 centimeters) tall, with individual leaves growing up to 12 inches (30 centimeters) across.
- Difficulty: Challenging variety that demands high humidity above 60% at all times and precise watering to prevent both root rot and leaf crisping.
- Light Needs: Prefers bright filtered light similar to its natural habitat beneath the forest canopy, and direct sunlight will scorch the pale textured leaves.
- Unique Trait: The deeply textured leaves catch and hold tiny water droplets that shimmer in the light, creating a jewel-like display after misting or watering.
- Care Tip: Increase air circulation around this variety to reduce fungal risk, since the deep leaf texture traps moisture longer than smooth-leaved alocasia types.
Alocasia Zebrina
- Stem Pattern: Named for its striking zebra-striped stems featuring alternating yellow-green and dark brown bands that make the stalks as decorative as the leaves.
- Size: Tall grower reaching 3 to 5 feet (91 to 152 centimeters) with large arrow-shaped leaves on long arching stems that create an elegant silhouette.
- Difficulty: Moderate difficulty and a solid choice for growers who want a larger statement plant, as it tolerates minor fluctuations in care better than jewel types.
- Light Needs: Needs bright indirect light to maintain the vivid stem striping pattern, and low light causes the stems to stretch and lose their bold coloring.
- Unique Trait: Unlike most alocasia where the leaves steal the show, Zebrina's most distinctive feature is the patterned stems visible from across a room.
- Care Tip: Provide a sturdy pot or use a decorative heavy planter because the tall stems and large leaves can make this variety top-heavy as it matures.
Alocasia Pink Dragon
- Stem Color: Features soft pink to mauve stems that contrast well with the dark green pointed leaves, adding a unique color accent to any plant shelf.
- Size: Medium grower reaching 2 to 3 feet (61 to 91 centimeters) tall with narrow elongated leaves that give it a more delicate appearance than wider-leaved varieties.
- Difficulty: Moderate care requirements similar to Polly, making it accessible for growers who have kept alive at least one alocasia variety before.
- Light Needs: Bright indirect light enhances the pink stem coloring, while insufficient light causes the stems to turn plain green and lose their distinctive hue.
- Unique Trait: The pink stems become more vivid as the plant matures, and new growth emerges with the most intense color before it deepens with age.
- Care Tip: Rotate the pot a quarter turn every week to ensure even growth, since this variety tends to lean toward the light source more than other types.
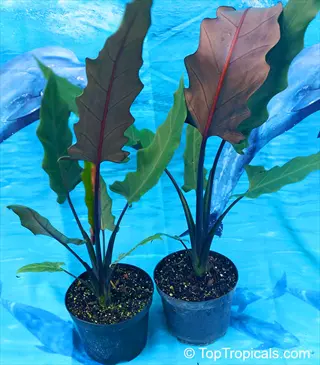
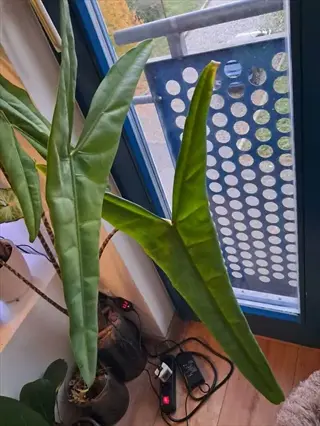
Alocasia Purple Sword
- Leaf Shape: Long narrow sword-shaped leaves with a metallic purple-green sheen on top and deep burgundy undersides that flash color as the leaves move.
- Size: Tall and slender grower reaching 3 to 4 feet (91 to 122 centimeters) with an upright narrow profile that fits well in tight corners and narrow shelves.
- Difficulty: Moderate to challenging because it requires consistent humidity and warm temperatures, dropping leaves fast if conditions change or drafts hit the plant.
- Light Needs: Bright indirect light brings out the metallic purple sheen on the leaves, and morning sun from an east-facing window produces the best coloring.
- Unique Trait: The narrow upright growth habit looks distinct from the broad-leaved alocasia varieties, adding architectural contrast to a mixed plant collection.
- Care Tip: Keep this variety away from air conditioning vents and exterior doors because it reacts fast to cold drafts with leaf yellowing and drooping.
Start with alocasia polly or alocasia frydek if you want a forgiving first plant. Both handle small watering mistakes and bounce back fast. Keep one alive for a year. Then you're ready for an alocasia silver dragon or alocasia black velvet.
Alocasia Soil, Water, and Food
Getting the alocasia soil right is the single biggest factor in keeping your plant alive. Think of your aroid mix like a well wrung sponge. It should stay damp but never drip, with enough air pockets for roots to breathe between each watering session.
I lost my first 3 alocasia plants to root rot before I switched to a well-draining potting mix with chunky bark. The standard potting soil from the store holds way too much water for these roots. Once I nailed the right blend, my alocasia watering schedule became simple and my plants stopped dying on me.
Your alocasia eats more than most houseplants do. Research shows these are heavy feeders that burn through nutrients fast in small pots. You need the right alocasia fertilizer to fuel strong growth. The guide below lays out exact recipes and schedules for you.
Ideal Potting Mix Recipe
- Base Mix: Combine equal parts orchid bark, perlite, and peat moss to create a chunky well-draining blend that holds moisture without getting waterlogged around the roots.
- Drainage Test: After watering, water should flow through the pot and out the drainage holes within 10 to 15 seconds, confirming the mix has proper porosity for alocasia roots.
- pH Level: Alocasia prefers acidic soil with a pH between 5.5 and 6.5, which peat moss provides on its own while coco coir may need a small amount of sulfur added.
- Amendments: Add a handful of horticultural charcoal to absorb excess salts and prevent soil from turning sour, which can happen when organic materials break down in warm humid conditions.
Watering Schedule by Season
- Spring and Summer: Water when the top 1 to 2 inches of soil feels dry to the touch, about every 5 to 7 days based on your pot size and indoor humidity.
- Fall and Winter: Cut watering down to every 10 to 14 days as your plant enters its dormancy period and uses much less moisture during shorter days.
- Water Quality: Use filtered or rain water when you can because alocasia can react to chlorine, fluoride, and heavy minerals found in some tap water.
- Warning Signs: Yellow lower leaves and mushy stems mean overwatering and root rot, while curling edges and soil pulling from the pot signal too little water.
Fertilizing for Strong Growth
- Growing Season: Feed every 2 weeks from spring through early fall with a balanced liquid fertilizer diluted to half strength to avoid burning the roots.
- Winter Rest: Stop all feeding from late fall through winter when the plant enters dormancy, as unused nutrients build up as salt deposits that damage roots over time.
- Heavy Feeders: University extension research confirms alocasia are heavy feeders that need lots of fertilizer, most of all when grown in containers with limited soil volume.
- Slow Release Option: A single dose of slow release granular fertilizer at the start of the growing season can replace liquid feeding for growers who prefer a simpler routine.
Repotting Best Practices
- Timing: Repot every 1 to 2 years in spring when new growth appears, choosing a pot just 1 to 2 inches wider than the current one to prevent overwatering.
- Signs Needed: Roots circling the bottom of the pot, water running straight through without soaking in, or roots growing out of drainage holes all point to repotting time.
- Pot Choice: Use a heavy ceramic or terracotta pot with drainage holes to provide balance for top heavy alocasia plants and allow the soil to dry more evenly.
- Root Inspection: Shake off old soil during repotting and trim any brown mushy roots with clean scissors before placing the plant in fresh aroid mix at the same depth.
Light and Temperature Needs
Your alocasia came from thick rainforest canopy where bright indirect light filters down through layers of leaves. That filtered glow is the key to alocasia light requirements indoors. You want to copy that same filtered glow in your home to get the best leaf color and growth from your plant.
An east facing window gives your plant gentle morning sun without the harsh afternoon rays that scorch leaves. North facing windows also work well in most homes. If you only have south facing glass, pull your alocasia back 3 to 4 feet or hang a sheer curtain to soften the light. I keep my collection near east windows and add a grow light during winter to make up for shorter days.
Alocasia temperature sweet spot sits between 68 to 77°F based on NC State Extension data. Your plant will falter below 50°F, so keep it far from cold drafts near doors and windows in winter. Alocasia humidity should stay at 60% or above for the best results. A small humidifier near your plant shelf handles this job better than misting ever could.
Watch your leaves for clues about light levels. Pale washed out leaves and long stems mean your plant needs more bright indirect light. Dark green compact growth tells you the spot is just right for your alocasia.
Alocasia Propagation Methods
You should start alocasia propagation in spring when your plant exits dormancy with full energy to heal. There are 5 proven ways to make new plants: corms, stolons, cormels, seed, and tissue culture. Most home growers stick to rhizome division and alocasia offsets since those give you the fastest results.
In my experience, your first spring propagation can feel nerve wracking. I pulled my first alocasia pups off a Polly that had gotten too big for its pot. Those 3 tiny pups all grew into full sized plants within one growing season. If you try corm division instead, you'll need more patience since the little bulbs take weeks to sprout.
Rhizome Division
- When to Divide: Separate rhizomes during spring repotting when you can see multiple growing points or stems emerging from the soil, indicating the plant has developed independent root sections.
- How to Divide: Remove the plant from its pot, shake off soil, and use a sterilized knife to cut between natural separation points, ensuring each section has at least one leaf and healthy roots.
- After Care: Plant each division in fresh aroid mix, water it, and place in a warm humid spot with indirect light for 2 to 3 weeks until new roots establish and fresh growth appears.
Offset and Pup Separation
- Identifying Offsets: Look for small baby plants growing at the base of the parent, each with their own tiny leaves and developing root systems that you can separate with care.
- Separation Method: Twist or cut the offset from the parent plant at the connection point, keeping as many roots attached to the pup as you can for the fastest start.
- Success Rate: Offset propagation has the highest success rate of any method because the pup has established roots and leaves, making it the best option for beginners.
Corm and Cormel Planting
- What Are Cormels: Small bulb structures that form along the root system and can be separated and planted on their own to grow into new alocasia plants over time.
- Planting Depth: Place cormels about 1 inch deep in moist sphagnum moss or perlite with the pointed end facing up, then cover and keep warm above 70°F.
- Growth Timeline: Cormels take 4 to 8 weeks to sprout their first leaf, requiring patience and consistent warmth and moisture throughout the growing period.
Stolon Propagation
- What Are Stolons: Underground runners that grow sideways from the parent plant and produce new growing points at their tips, forming independent plants with their own roots.
- Harvesting Stolons: During repotting, look for horizontal stems connecting the parent to small growths and cut the runner once the new plant has at least 2 small roots.
- Best Conditions: Plant stolon cuttings in a small pot with moist perlite and cover with a clear plastic bag to create greenhouse conditions while roots develop over 3 to 6 weeks.
Seed Germination
- Seed Availability: Alocasia seeds must be planted fresh because they lose viability fast after harvest, making this method rare for indoor growers who lack blooming plants.
- Germination Setup: Sow seeds on the surface of damp sphagnum moss in a sealed container at 75 to 80°F with bright indirect light for sprouting.
- Growth Speed: Seed grown alocasia take much longer to reach maturity compared to division methods, with up to 600 days needed to develop into a full sized plant per NC State Extension data.
Alocasia vs Colocasia
Many new growers mix up alocasia vs colocasia all the time. Both go by the name elephant ear plant. But they belong to 3 separate genera in the Araceae family. Each one needs different care, so you need to tell them apart before you start.
Check the leaf stem to sort them out fast. On your Alocasia, the stem joins at a notch on the leaf edge like a shield handle. On Colocasia, the stem plugs into the middle of the leaf like an umbrella handle. Those center joined leaves are called peltate leaves. Alocasia leaves are not peltate and they point up while Colocasia leaves droop down.
You might see Colocasia sold as taro for food around the world. Xanthosoma gives you malanga, a starchy root you can eat. In my experience, garden centers mislabel all 3 types on their shelves. Always check that stem join point so you grab the right plant for your home. Keep in mind that all 3 genera sit in the arum family, and some spread fast in wet areas along the US Gulf Coast.
Alocasia Toxicity and Safety
Alocasia is not one of the pet safe plants you can place on the floor. Every part holds calcium oxalate crystals that cause pain on contact with skin, mouths, or eyes. Many sites call alocasia toxic to pets at a mild level. But NC State Extension rates it at Medium severity, which is a big step up.
In my experience, you should always wear gloves when you prune or repot your alocasia. I once forgot and rubbed my eye after handling a cut stem. The burning lasted for over an hour. If you have pets or kids with contact dermatitis risks, read the safety details below. They'll help you pick the right spot for your plant.
How Calcium Oxalate Works
- Crystal Structure: All parts of the alocasia plant hold needle shaped calcium oxalate crystals called raphides that pierce soft tissue on contact with skin, mouth, or eyes.
- Reaction Speed: Symptoms begin right away upon contact, with burning and swelling of the lips, tongue, and throat happening within seconds of chewing any part of the plant.
- Severity Level: NC State Extension classifies the alocasia poisonous rating as Medium severity, which is more serious than the mild label many online sources use wrong.
Symptoms in Pets
- Dogs and Cats: Drooling, pawing at the mouth, swelling of the tongue and lips, trouble swallowing, vomiting, and loss of appetite are the most common signs of ingestion.
- Horses: Oral pain and trouble swallowing are the main symptoms, though exposure tends to happen in outdoor settings where alocasia grows in landscaped areas.
- Emergency Contact: If you suspect your pet ate alocasia, call your vet right away or reach the ASPCA Animal Poison Control Center at 888 426 4435.
Symptoms in People
- Ingestion: Burning and swelling of the lips, mouth, tongue, and throat along with trouble speaking, nausea, and vomiting can happen from chewing leaves or stems.
- Skin Contact: Touching alocasia without gloves can cause contact dermatitis with itching, redness, and rash, most of all when you handle cut stems or torn leaf surfaces.
- Eye Exposure: Getting sap from your hands to your eyes causes pain, tearing, and swelling that needs flushing with clean water for at least 15 minutes.
Safe Placement and Handling
- Pet Households: Place your alocasia on high shelves, in hanging planters, or in rooms your pets can't reach, and think about using a plant stand at least 3 feet tall.
- Child Safety: Keep your alocasia away from young children who might touch or mouth the leaves, and teach older kids that this plant should never be tasted.
- Protective Gear: Always wear gloves when you prune, repot, or propagate your alocasia, and wash your hands with soap and water after any contact with the plant sap.
Don't let the toxicity scare you away from growing alocasia. Millions of people keep these plants at home with no problems. Just place yours out of reach, wear gloves during care, and you'll enjoy this stunning tropical plant without worry.
5 Common Myths
Alocasia plants purify the air in your home because they appeared in the NASA Clean Air Study research.
The NASA Clean Air Study tested related aroids but not Alocasia specifically, so there is no scientific evidence that alocasia purifies indoor air.
You should mist your alocasia leaves every day to keep the humidity high enough for healthy growth.
Daily misting can cause fungal leaf spots and bacterial infections; using a humidifier or pebble tray provides consistent humidity without wetting the foliage.
Alocasia plants are only mildly toxic and just cause minor stomach upset if a pet chews on them.
Alocasia has medium toxicity severity with calcium oxalate crystals that can cause painful mouth irritation, difficulty swallowing, vomiting, and contact dermatitis in pets and people.
All elephant ear plants are the same species, so care instructions are interchangeable between them.
Elephant ears include three separate genera (Alocasia, Colocasia, and Xanthosoma) with different leaf structures, water needs, and growing habits that require distinct care.
When your alocasia loses all its leaves in winter, the plant has died and should be thrown away.
Alocasia naturally enters dormancy in winter and may lose most or all leaves while the corm stores energy underground, then pushes new growth in spring when conditions warm up.
Conclusion
Your alocasia plant needs just a few things to thrive at home. It wants bright indirect light and a chunky aroid mix that drains well. Keep humidity above 60% and be careful with your watering can. Get those 4 basics right and your tropical houseplant will reward you with bold leaves for years.
Scientists have found that the genus holds enormous variety around the world, but not much has been explored yet. New species keep turning up in the wild. That means the alocasia world is still growing, and you're joining the hobby at an exciting time. In my years of growing these plants, I've watched the selection at local shops triple in size as more growers learn what makes them special.
If you're choosing your first plant, go with beginner-friendly varieties like Polly or Frydek. Set up your growing spot with the right light and a humidifier before you bring the plant home. That prep work makes a huge difference in your first few months of alocasia care.
Don't panic when your alocasia drops leaves in fall and winter. That dormancy is a natural rest period, not a sign that you failed. Cut back on water, stop feeding, and wait for spring. New growth will push up from the corm when the days get longer and warmer again. Trust the process and your alocasia plant will come back stronger than before.
External Sources
Frequently Asked Questions
Why is alocasia so hard to keep alive?
Alocasia plants need consistent humidity above 60 percent, bright indirect light, and careful watering to avoid root rot, which makes them more demanding than many common houseplants.
Is alocasia a good indoor plant?
Alocasia makes an excellent indoor plant when given proper conditions including bright indirect light, warm temperatures, and high humidity.
How often should I water alocasia?
Water your alocasia when the top 1 to 2 inches (2.5 to 5 centimeters) of soil feel dry, typically every 7 to 10 days depending on the season and humidity.
How to tell if alocasia is happy?
A happy alocasia shows firm upright leaves, deep consistent coloring, steady new growth during the growing season, and no signs of yellowing or drooping.
How long do Alocasia live indoors?
Alocasia plants can live for many years indoors when given proper care, with some growers keeping the same plant for over a decade through consistent watering and seasonal attention.
What are common Alocasia problems?
Common alocasia problems include yellow leaves from overwatering, drooping from low humidity, brown leaf edges from dry air, and pest infestations from spider mites.
Where to put Alocasia in a house?
Place alocasia near an east-facing or north-facing window where it receives bright indirect light, or in a humid room like a bathroom or kitchen.
What does a thirsty Alocasia look like?
A thirsty alocasia shows drooping leaves, curling leaf edges, and dry soil pulling away from the sides of the pot.
Do Alocasia like being misted?
Alocasia appreciate humidity but misting can lead to fungal problems on the leaves, so using a humidifier or pebble tray is a safer alternative.
How to get an Alocasia to bloom?
Alocasia rarely bloom indoors, but providing bright indirect light, warm temperatures above 68°F (20°C), consistent moisture, and monthly fertilizing during summer can encourage flowering.