
Orchids represent beauty and elegance in homes everywhere. Unfortunately, many owners face difficulties in determining the best repotting methods and when to repot orchids to ensure the orchid's optimal health. These challenges can lead to real problems, such as root rot and slowed growth. I've seen it often throughout my own orchid-care journey.
If you repot a little too soon or too late, you risk the health of your plant. Roots might get rootbound. Nutrients may become depleted, resulting in fewer blooms. My first Phalaenopsis taught me this the hard way. The leaves turned yellow because I waited too long to repot. I'm hopeful that I can help you learn the right timing so you don't make those mistakes.
Key Signs It's Time to Repot
The roots of your orchid say the most about repotting needs. Healthy orchid roots tend to appear plump and have a greenish-silver hue. Any orchid that has roots that circle tightly in its pot or roots that are poking through the drainage holes can indicate that repotting is necessary. Several years ago, I rescued a Cattleya that had roots that were so tangled they had formed a solid mass. If the potting mix is allowed to decompose into a soggy, dark mass, it will deprive the plant of vital oxygen. Insufficient oxygen suffocates roots, as it did my client's orchid that froze to death last spring.
If you notice a long-lasting sour odor coming from your orchid's pot, never ignore this. The odor indicates there is dangerous bacterial activity using up old medium for survival. A dense medium acts as a barrier to water, so it collects instead of draining properly. I have seen orchids completely drowned within minutes because of this. To check drainage, water the orchid and time how long it takes for the water to drain. Any amount of time longer than 15 seconds may indicate trouble. Stunted growth is the final piece of the puzzle, like my Dendrobium that sat two years without new shoots - until I finally repotted it.
Make these signs for sure. Wet roots plus minimal drainage = act now. Bad-smelling alone = repotting ASAP. I have a record book for the cycles of my orchid's origins, now, so there is no second-guessing. When the time comes for a new space, your plant will make it evident that there is a problem.
Root Health Indicators
- Healthy orchid roots appear firm with white or green coloration when dry and turn green when watered properly
- Overwatered roots become soft and brown indicating rot while underwatered roots turn grayish white and brittle
- Aerial roots growing outside the pot are normal but pot-bound roots circling tightly signal urgent need for space
- Roots escaping over pot edges or through drainage holes show the current container restricts essential growth
- Gently squeeze roots to test health - firm roots are alive while hollow or mushy roots require removal
- New root growth appears with pale green tips while dead roots lack flexibility and show discoloration
Medium and Drainage Issues
- Decomposed potting medium loses its chunky texture becoming compacted like soil which suffocates orchid roots
- Water pooling on the surface instead of draining indicates breakdown of bark or moss blocking air pockets
- Persistent foul odors signal anaerobic conditions where decaying organic matter produces harmful bacteria
- Salt crust accumulation appears as white residue on medium surface from fertilizer or hard water minerals
- Compacted medium prevents oxygen from reaching roots causing gradual decline even with proper watering
- Medium decomposition accelerates in warm conditions and typically occurs within 12-24 months after potting
Root Escape and Binding
- Orchid roots naturally grow outward seeking space and nutrients when confined by small containers that restrict essential development
- Tightly circling roots indicate severe restriction preventing proper nutrient absorption and growth which requires urgent intervention
- Roots protruding over pot edges demonstrate insufficient room for development needing immediate attention to prevent permanent damage
- Gently untangle visible roots to check flexibility since rigid roots signal dehydration and stress requiring prompt repotting action
Medium Decomposition
- Healthy orchid potting medium maintains chunky texture allowing vital air circulation between particles for optimal root respiration
- Decomposed bark breaks down into soil-like consistency compacting around roots and restricting oxygen flow causing gradual decline
- This decomposition typically occurs within twelve to twenty-four months depending on watering frequency and environmental temperature conditions
- Test medium texture by squeezing since crumbling instead of shape retention signals breakdown needing immediate replacement
Odor and Drainage Failure
- Foul odors indicate anaerobic conditions where decaying organic matter produces harmful bacteria threatening root system integrity
- Water pooling on surface shows drainage failure from compacted medium blocking air pockets and creating root rot conditions
- These environments create ideal conditions for pathogens that quickly damage orchid health requiring emergency intervention measures
- Immediate repotting becomes essential when odors persist after proper drying cycles between watering sessions occur regularly
Growth Stagnation
- Lack of new leaf or root growth for over twelve months signals nutrient depletion in old medium limiting development
- Yellowing lower leaves despite proper light and watering indicates insufficient mineral absorption requiring medium refreshment
- Stunted plants often show shriveled pseudobulbs as energy reserves become exhausted over time without replenishment
- Spring offers optimal conditions to address stagnation when warmer temperatures support recovery after repotting occurs
Mineral Accumulation
- White salt crust on medium surface results from fertilizer buildup or hard water mineral deposits altering soil chemistry
- These accumulations change pH balance and create toxic conditions preventing proper nutrient uptake by root systems
- Visible crust typically appears after six to twelve months of regular feeding in unrenewed potting mixtures
- Flushing with distilled water provides temporary relief but repotting offers permanent solution to chemical imbalance issues
Time-Based Indicators
- Most orchids require repotting every one to two years regardless of visible symptoms as preventive maintenance measure
- Phalaenopsis varieties benefit from annual refreshment while Cymbidiums tolerate biennial cycles without significant decline occurring
- Record repot dates on plant labels to maintain schedule and prevent overdue medium degradation from developing
- Seasonal timing remains critical with spring offering optimal recovery conditions after flowering finishes completely
Optimal Timing and Frequency
Spring offers the ideal time of year to repot orchids as temperatures of 60-75°F stimulate root regeneration. Cool nights and warm days mimic the natural growth patterns of orchids, allowing them to thrive. I have always chosen to stagger my repotting to early spring, based on decades of experience, which has allowed me to recover faster. This gives the roots time to re-establish before the summer heat hits.
Different orchids have different repotting schedules. For example, Phalaenopsis need to be repotted yearly because their roots proliferate. Cattleyas can be repotted every two years, although slow-growing ones, such as Cymbidiums, are generally okay with repotting once every three years. I keep a calendar for my collection, one for each species, so that I can track each one's growth tendencies. This way, I can prevent undue stress from rapid repotting.
You should always make emergency repotting a priority, regardless of the season. If root rot or pest issues arise, you must take immediate action (I had to rescue a Miltoniopsis from root decline last winter). Do not leave orchids suffering in toxic conditions (potentially deadly). Just give it extra warmth and humidity during the repotting process of any off-season orchids. The well-being of your plant should be your main concern, and not the timing issue.
Phalaenopsis (Moth Orchids)
- Repot every twelve to eighteen months since their roots outgrow containers quickly requiring consistent space expansion
- Best performed during spring after flowering completes but before summer heat intensifies environmental stress factors
- These monopodial orchids display visible root growth indicators when ready for transition to larger containers
- Frequency increases when grown in warmer conditions which accelerates medium decomposition processes significantly
Cymbidiums & Vandas
- Repot every eighteen to twenty-four months during spring when new growth emerges visibly at the plant base
- Their vigorous root systems require substantially more space than most other orchid varieties demand
- Cymbidiums specifically prefer repotting before pseudobulb swelling occurs signaling impending active growth phases
- Delay repotting procedures if flower spikes are present to prevent premature bloom loss damage
Cattleyas & Oncidiums
- Repot every two to three years during spring as new roots begin forming visibly at the base structure
- These sympodial orchids demonstrate readiness through new lead growth emergence from rhizome sections
- Division becomes possible when plants develop six or more healthy pseudobulbs showing maturity
- Avoid disturbance during bud formation periods to prevent flowering disruption and stress
Dendrobiums & Epidendrums
- Repot every two years during spring before summer growth acceleration phases begin developing fully
- Their distinctive cane-like structures indicate timing through new shoot development patterns
- Repot when canes reach container edges or medium shows advanced decomposition signs clearly
- These resilient varieties tolerate slightly delayed repotting better than more sensitive orchid types
Miltoniopsis & Paphs
- Repot annually during spring since they require consistent moisture retention properties in medium
- Their delicate fine root systems deteriorate rapidly within decomposed organic materials needing replacement
- Watch carefully for new growth appearing at plant bases indicating ideal repotting timing windows
- These sensitive varieties display significant stress symptoms if repotted outside optimal spring periods
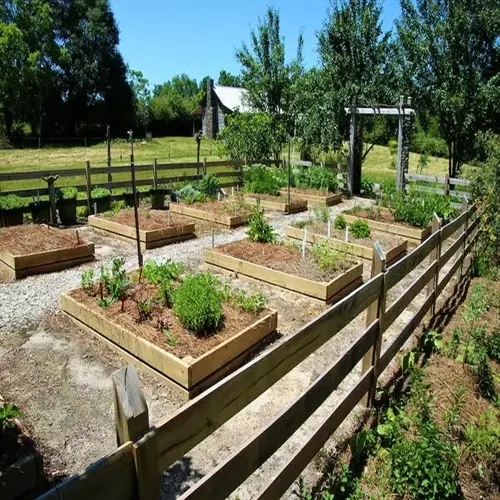
Choosing Pot and Medium
Orchid health depends heavily on the pot material. Terracotta pots dry quickly, which is good for those who struggle with overwatering. At the same time, plastic pots hold moisture for those who are forgetful. For Phalaenopsis orchids, clear plastic allows light to reach the roots for photosynthesis. I avoid glazed ceramics unless it is for decorative outer pots only.
Select a potting medium that matches your watering style. Bark types provide good drainage for people who water frequently, while sphagnum moss is better suited for environments that thrive with dry plants. Coconut husk gives a sustainable balance. In my greenhouse, my medium consists of 70% bark and 30% perlite. Also, always pre-soak potting medium overnight to reduce dehydration shock.
Pot size is exact. Measure the root and add 0.5 inches (1.25cm) to provide clearance. You need 3-4 inch (7.5-10cm) pots for small orchids. Large specimens required 7-8 inch (18-20cm) pots. I measure with a ruler every time I repot.
Never use metal containers, even those with liners. This pulls toxic ions through the liner and into the root system, causing root death in a matter of months. I know this to be true because I witnessed it happen with a client's orchid in a lined copper pot. Use inert materials, such as plastic or terracotta, and you'll be safe.
Small Orchids (2-4 leaves)
- Choose containers 3-4 inches wide (7.5-10 cm) providing 0.5 inch (1.25 cm) clearance around root masses
- Depth should measure 4-5 inches (10-12.5 cm) allowing natural extension without bending or coiling
- Excessively large pots hold surplus water causing root rot in compact root systems
- Clear plastic materials permit photosynthesis monitoring essential for juvenile plant development
Medium Orchids (5-8 leaves)
- Select 5-6 inch (12.5-15 cm) diameter containers allowing 0.75 inch (2 cm) root expansion space
- Base of lowest leaf must position 0.5 inches (1.25 cm) above rim after planting completion
- Terracotta offers necessary stability counterbalancing top-heavy growth formations
- Ensure drainage holes cover 15-20% of base area preventing water accumulation issues
Large Orchids (9+ leaves)
- Utilize 7-8 inch (18-20 cm) pots providing 1 inch (2.5 cm) clearance surrounding root masses
- Heavy terracotta prevents tipping accidents but demands sturdy supporting surfaces
- Multiple drainage holes become essential requiring 4-6 openings minimum for airflow
- Install supportive stakes if plant stability appears compromised after repotting
Mounted Orchids
- Employ shallow 3-4 inch (7.5-10 cm) containers establishing base stability without restriction
- Fill surrounding areas with sphagnum moss avoiding direct root coverage complications
- Decorative ceramic outer pots provide aesthetic weight ensuring proper balance
- Maintain 1 inch (2.5 cm) air circulation space between mount and pot walls
Seedlings & Keikis
- Use 2-3 inch (5-7.5 cm) pots allowing minimal clearance for delicate new root systems to develop properly
- Depth should measure 3-4 inches (7.5-10 cm) accommodating vertical growth without excessive soil volume
- Oversized containers retain dangerous moisture levels leading to fungal issues in immature plants
- Transparent plastic enables constant monitoring of root health without disturbing fragile specimens
Frequent Waterers
- Utilize coarse bark blended with perlite employing 70% bark to 30% perlite ratio combination
- Incorporate horticultural charcoal neutralizing salts from regular fertilization schedules
- Terracotta containers complement fast-draining mixtures through rapid evaporation properties
- Avoid sphagnum moss which retains excessive moisture creating root rot hazards
Occasional Waterers
- Select medium-grade bark incorporating 20% tree fern fiber enhancing moisture retention
- Include 10% sphagnum moss enabling gradual hydration release between watering sessions
- Plastic pots maintain consistent moisture levels beneficial for moderate hydration needs
- Irrigate only when roots transition silvery-white indicating necessary dryness levels
Forgetful Waterers
- Choose sphagnum moss dominant compositions utilizing 60-70% moisture-retentive material
- Combine with coconut husk chips improving aeration while preserving hydration duration
- Employ plastic containers maximizing water retention periods between irrigation cycles
- Add water-retention crystals sparingly extending moisture availability during dry spells
Indoor Growers
- Blend bark, charcoal and perlite applying 50%-30%-20% ratio ensuring balanced drainage
- Include tree fern fiber delivering consistent moisture without saturation complications
- Transparent plastic permits light penetration enabling essential root photosynthesis
- Top-dress with sphagnum increasing local humidity benefiting aerial root development
Greenhouse Growers
- Combine chunky bark with tree fern fiber employing 60%-40% high-drainage mixture
- Supplement perlite improving airflow crucial for humid greenhouse environments
- Terracotta pots counterbalance humidity through natural evaporative cooling effects
- Monitor salt accumulation monthly flushing pots thoroughly to prevent toxicity
Step-by-Step Repotting Process
Prepare everything the night before repotting. Soak your orchid in lukewarm (tepid) water 10-15 minutes (600-900 seconds) to loosen roots. Sterilize tools in a 10% bleach solution to kill any pathogenic organisms. I have a dedicated orchid toolkit that I keep cleaned like this before each use.
Extreme care should be taken when inspecting the roots. Under running water, gently remove the old medium that is still clinging to the roots. Identify dead roots, which will feel mushy and brown when inspected. Use sterilized scissors to trim dead roots, making clean cuts. Sprinkle cinnamon powder onto the cut areas as a natural antiseptic. Protect any healthy roots like a fragile thread.
Properly orient your orchid in the new pot, including a layer of drainage material, such as charcoal, to ensure optimal growth. Position your plant so that the lowest leaf rests 0.5 inches (1.25cm) above the rim of the pot. Fill with medium while using a chopstick to remove air pockets.
Aftercare is critical to successful repotting. Wait at least 48 hours to water to allow the roots time to heal after repotting. To further facilitate healing, keep the plant at 70-75°F (21-24°C) and 50% humidity for one week. I choose to use humidity trays for this purpose, but I never mist the plant's leaves during this sensitive time.
Preparation (Day Before)
- Submerge orchid in tepid water for 10-15 minutes (600-900 seconds) to hydrate roots thoroughly and loosen old medium adhesion
- Prepare new potting medium by soaking in water for 24 hours (1440 minutes) ensuring complete saturation throughout all components
- Sterilize cutting tools using 10% bleach solution immersion followed by thorough water rinse eliminating chemical residues
- Measure and select appropriate pot size allowing 0.5-1 inch (1.25-2.5 cm) clearance around existing root structures
Root Examination
- Gently remove orchid from current pot by squeezing sides and inverting carefully while supporting foliage and root mass
- Shake off old medium while cradling root mass to prevent damage to healthy roots during debris removal process
- Rinse roots under lukewarm water to remove residual debris and enable clear visual inspection of root conditions
- Identify dead roots exhibiting brown/mushy texture versus healthy roots showing firm/green-white coloration
Root Trimming
- Trim dead roots using sterilized pruners making clean 45° angle cuts above visibly damaged sections
- Remove only clearly necrotic tissue preserving healthy root structures and aerial roots completely
- Apply cinnamon powder to cut ends providing natural antifungal protection against potential infections
- Avoid cutting plump aerial roots unless severely damaged as they absorb essential atmospheric moisture
Potting Setup
- Place drainage material like charcoal or lava rock at pot bottom covering 20% of container volume
- Position orchid ensuring base of lowest leaf sits 0.5 inches (1.25 cm) above rim for proper air circulation
- Spread roots evenly in radial pattern avoiding bending or crowding ensuring optimal growth distribution
- Center monopodial orchids; position sympodial types against pot edge accommodating future growth direction
Adding Medium
- Add fresh medium gradually while supporting plant upright and maintaining root positioning integrity
- Use dowel to gently work medium between roots eliminating all air pockets without compaction pressure
- Fill to 0.5 inches (1.25 cm) below rim preserving space for efficient watering without overflow
- Tap pot sides lightly settling medium naturally without compressing essential air spaces
Initial Watering
- Submerge entire pot in tepid water bath for 60 minutes (1 hour) ensuring complete medium saturation
- Drain thoroughly until no water drips from drainage holes approximately 5 minutes (300 seconds)
- Position in bright indirect light avoiding direct sun exposure during initial recovery period
- Withhold next watering for 7 days (168 hours) stimulating new root growth in fresh medium
Aftercare (First 2 Weeks)
- Maintain 65-75°F (18-24°C) temperatures avoiding cold drafts or excessive heat fluctuations
- Provide 40-60% humidity using pebble trays without misting foliage which causes crown rot
- Resume normal watering schedule after 7 days (168 hours) using tepid water exclusively
- Delay fertilization for 30 days (720 hours) preventing nutrient burn during delicate recovery
Aftercare Essentials
The first 48 hours are the most vulnerable time frame for your orchid to recover from this event. You should keep it in 60-70% shade at 70-75°F(21-24°C). Do not water it. I only use a humidity dome for a few hours if my humidity goes below 40%. Watch for signs of immediate stress, like wilting.
Days 3-7 represent the Root Establishment Stage. Each day, gradually increase lighting to 50% full light intensity. Mist the medium surface every three days. The daytime temperature should be maintained at 65-75°F (18-24°C). Keep pots on humidity trays that do not touch the water level.
Keep an eye out for signs of stress and intervene immediately. Reduce light by 30% if the leaves are yellow. If root rot occurs, lengthen drying times between waterings and use cinnamon. If leaves are wrinkled, you need to water deeper. If buds are blasting, you will need to stabilize fluctuations in temperature around: +/-10% maximum.
Document environmental measurements twice per day. Take temperature and humidity readings with a thermometer and a hygrometer to monitor conditions over time. Measure light levels weekly to target a range of 10,000 to 20,000 lux. Monitor root growth by taking photographs every week to identify any potential problems before they worsen or escalate.
First 48 Hours (Critical Recovery)
- Place orchid in 60-70% shaded area receiving only indirect light for 48 continuous hours preventing photochemical stress
- Maintain steady 70-75°F (21-24°C) temperatures avoiding fluctuations exceeding 5°F (2.8°C) differentials day and night
- Withhold all watering allowing root cuts to callous naturally without moisture-induced pathogen exposure risk
- Employ humidity domes only if ambient humidity drops below 40% to prevent desiccation without wetting foliage surfaces
Days 3-7 (Root Establishment)
- Gradually increase light exposure to 50% normal intensity over five days monitoring for leaf yellowing warning signs
- Resume minimal watering by misting medium surface lightly every third day avoiding root zone saturation completely
- Sustain 65-75°F (18-24°C) daytime temperatures allowing 60-65°F (15-18°C) nighttime variations for natural circadian rhythm
- Position atop humidity trays filled with wet pebbles maintaining 50-60% humidity without direct water contact
Weeks 2-4 (Growth Resumption)
- Restore full lighting conditions appropriate for specific orchid species ensuring 10-12 hour daily photoperiods
- Increment watering to weekly 15-minute (900-second) soaks submerging pots completely then draining thoroughly
- Apply seaweed extract solution at quarter strength biweekly stimulating root regeneration without chemical burning
- Inspect root tips weekly for new growth evidenced by bright green coloration signaling successful adaptation
Month 2 Onward (Maintenance)
- Reestablish standard watering regimen based on orchid type and environmental conditions monitoring dryness indicators
- Commence balanced 20-20-20 fertilizer monthly at half strength gradually increasing to full concentration
- Monitor leaf turgor and root color biweekly detecting stress early and adjusting care parameters accordingly
- Reposition orchid to original display location once new leaf growth confirms successful recovery completion
Environmental Monitoring
- Record temperatures twice daily using digital thermometers placed near orchids ensuring optimal range maintenance
- Measure humidity via hygrometers positioned at foliage height maintaining 40-70% orchid-specific requirements
- Quantify light intensity with meters documenting 10,000-20,000 lux preventing photoinhibition or etiolation issues
- Document growth milestones photographically comparing weekly progress to identify abnormalities promptly
Troubleshooting Setbacks
- Address leaf yellowing by reducing light exposure 30% and verifying temperatures remain below 80°F (27°C)
- Combat root rot symptoms extending drying periods and applying cinnamon powder to affected root sections
- Correct leaf wrinkling through increased humidity and deep watering ensuring thorough medium saturation cycles
- Mitigate bud blast by stabilizing environments avoiding temperature/humidity fluctuations exceeding 10% variance
5 Common Myths
Orchids should never be repotted while in bloom since the blooms will die immediately, and the plant itself is certain to collapse
Although repotting your orchid while it is blooming will stress both the blooms and the plant, it will not always kill the flowers when done properly and with care, even if you disturb some roots accidentally. Re-potting increases stress hormones that may cause the flowers to drop even with the best care, but when done carefully, especially for the roots and they remain hydrated, the drop in blooms can be reduced to some degree. Phalaenopsis orchids tolerate repotting even while in bloom better than many of the other orchids.
Orchids must be repotted every year whether they appear healthy and growing or not
You need to repot based on root growth and the decomposition of the medium but shouldn't necessarily stick to a calendar schedule for annual repotting. Some orchids, such as Phalaenopsis, grow quite fast and may need to be repotted every year. Other orchids, such as Cattleyas, have a slower-growing process and may thrive for 2-3 years without repotting. Repotting for no reason interrupts a lot of beneficial root fungi and damages tiny root hairs, which serve a purpose. It's best to wait until there are visible signs of circling roots and decomposition of the medium before hardwood repotting.
It is crucial that all orchid pots have drainage holes so the roots do not sit in water and get root rot
Secondary, decorative pots, which do not have drainage holes, can hold functional, inner pots safely. The major consideration is when watering orchid roots that exist in pots without any drainage holes, do not allow water to pool. Cachepot is a system whereby inner pots are removed for drainage. Regardless of whether a decorative pot has drainage holes, orchids will thrive as long as their roots never sit in standing water.
Sphagnum moss often makes potting mix too acidic of the health of orchids and damages orchid roots
The only live sphagnum moss that drives down pH. Dried sphagnum moss, such as that which is used in potting mix, has a negligible impact on pH. Most orchids are ok in slightly acidic conditions (pH>4.5), which dried sphagnum stabilizes in the potting mix without driving pH down. This seems to be a common misunderstanding; live or fully processed dry moss are not always the same behaviorally in their impact on the pH of a potting mix. The proper process using dried sphagnum moss can achieve a stable pH and excellent moisture retention (when rinsed beforehand).
Orchids are safe in metal pots, but only if they're lined with plastic or other barrier materials
Although orchids may not be in danger if they are lined with plastic or other barrier materials, metal pots remain dangerous when lined as the outcomes of the corroding metal will eventually penetrate any plastic lining. For example, zinc and copper ions released from degrading metal cause root toxicity at very low concentrations and impede proper root development. Over time, a plastic lining will develop micro-cracks allowing toxic elements of the metal to reach the roots. All metal containers should be avoided regardless of lining and for the health of orchids over the long haul.
Conclusion
An understanding of when to repot can significantly impact the health and blooms of orchids. Knowing the right time for repotting prevents decline while stimulating blooms. I've witnessed orchids that have been neglected for years, stun me with beautiful flowers, after appropriate repotting. Attention to root cues and seasons allows this to happen.
Keep in mind the main indicators. Those roots are crowded, and drainage issues exist; That may indicate that action is needed. That, plus the ease of spring, will help. This method helps keep orchids alive for years. I have an orchid that I have been growing for years, and it blooms every year, thanks to this care.
Your actions while repotting will affect the long-term success of the orchid. Adding the correct medium and following the proper aftercare will encourage a healthier plant. Each step is part of plant-focused care, which promotes flowering down the road. I teach this holistic approach to clients to help them avoid losing aftercare plants and preserve the plant's beauty in the long term.
You now possess the skills to be knowledgeable about orchids. Believe your observations and respect nature's pace. Use these ideas confidently. You will be rewarded for your efforts with beautiful orchids for years to come.
External Sources
Frequently Asked Questions
How do I know when to repot orchids?
Watch for these key indicators:
- Roots circling the pot or growing through drainage holes
- Potting medium breaking down into soil-like texture
- Persistent foul odor indicating root rot
- Water draining too slowly after watering
- No new growth for over 12 months
What pot size is best for orchids?
Select pots based on orchid size and type:
- Small orchids: 3-4 inches wide with 0.5 inch root clearance
- Medium orchids: 5-6 inches wide allowing 0.75 inch space
- Large orchids: 7-8 inches with 1 inch clearance
- Always choose pots with drainage holes covering 15-20% of base
When should I avoid repotting orchids?
Never repot during these critical phases:
- When buds or flowers are present
- During extreme temperature conditions
- In winter when temperatures drop below 50°F
- If plant shows signs of severe stress
- During active root growth visible as green tips
How should I handle aerial roots during repotting?
Aerial roots require special consideration:
- Never bury them in potting medium
- Gently guide them toward support structures
- Mist occasionally but avoid soaking
- Preserve intact unless damaged or diseased
- Recognize they absorb moisture from air naturally
What's the most critical repotting mistake to avoid?
The biggest error is using contaminated tools:
- Always sterilize pruners with 10% bleach solution
- Never reuse old decomposed potting medium
- Avoid oversizing pots causing water retention
- Don't water immediately after repotting
- Never repot during flowering phase unnecessarily
How soon after repotting should I water orchids?
Follow this watering timeline for recovery:
- First 48 hours: No watering to allow root callusing
- Days 3-7: Light misting every third day
- Weeks 2-4: Weekly 15-minute soaks
- Month 2+: Resume normal watering schedule
- Always use tepid water to prevent temperature shock
Do orchids require clear plastic pots?
Clear pots benefit certain orchids but aren't mandatory:
- Essential for Phalaenopsis to enable root photosynthesis
- Not needed for orchids without photosynthetic roots
- Can use decorative outer pots over functional inner pots
- Terracotta works well for moisture-sensitive varieties
- Wooden baskets suit high-humidity environments
What's the ideal season for repotting orchids?
Spring is universally optimal because:
- Temperatures between 60-75°F support root recovery
- Matches natural growth cycle initiation
- Allows full recovery before summer heat
- Avoids winter dormancy and fall decline phases
- Coincides with new root development in most species
How long do orchids take to recover after repotting?
Recovery progresses through distinct phases:
- First 48 hours: Critical stabilization period
- Days 3-7: Initial root adaptation phase
- Weeks 2-4: Active regeneration with new growth
- Month 2+: Full establishment with normal care
- Complete recovery visible through new leaves/roots
Can I use regular potting soil for orchids?
Standard potting soil is unsuitable because:
- Orchids need chunky, well-aerated mediums like bark
- Soil compacts suffocating orchid roots
- Lacks drainage causing fatal root rot
- Use specialized orchid mixes containing components like:
- Fir bark, sphagnum moss, perlite, or tree fern fiber