
Knowing when to plant tulips can mean the difference between sparse flowers to display, or an unforgettable spring show. This quintessential spring bloom is dependent on your fall preparation. I've watched as a garden transformed when the timing matched nature's clock. Plant too soon, and the summer heat destroys the corn. Plant too late, and the roots do not have time to establish themselves before the winter chill arrives. Your zone influences the best planting days, but the most important element is the cool fall soil.
Getting the timing of your planting right also plays an important role in the quality of blooms and bulb health. Today, with cool fall temperatures, the roots can grow without stimulating top growth. This underground function prepares for a great display of flowers in the spring. In warmer areas, I will refrigerate the bulbs first; bulb exposure to cold should be considered a must for flower development. It's like giving bulbs a nice, tucked-in winter nap.
Tulips can be successfully grown in various climates using a few straightforward techniques. Since you can't rely on calendar dates to determine when to plant, use soil temperature as an alternative. I use a thermometer from my kitchen to check the ground. You want your readings to be 55°F consistently. Whether you are in Minnesota or Texas, the logic is the same. Please remember that if you plant at the proper time, the bulbs will be resilient enough to thrive year after year.
Companion Planting Ideas
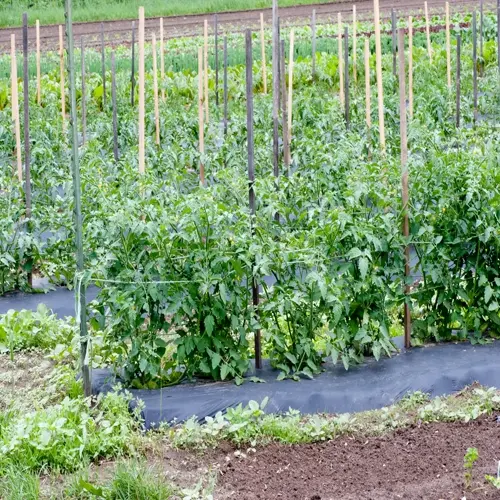
Selecting proper companions helps protect your tulips as well as enhance your tulip garden. Daffodils are great at repelling deer and rabbits naturally. I surround my tulip beds with daffodils that become living security fences. Additionally, their prominent bloom time occurs before your tulips, offering wonderful color layers. Additionally, tall flowers like hollyhocks can create a nice hedge for your tulips, and they won't shade the tulips, of course. Garden group plantings can help deter potential pests and maximize visual experience.
Select Ohio native plants like marsh marigold to contribute to your local ecosystem. These moisture-loving, native perennials do beautifully beside tulips in a spring garden. I use creeping phlox as a carpet of flowers for the ground, as its evergreen leaves are attractive and hide the fading tulip foliage later in the season. Always match height and keep your tulips from being crowded out. So, place shorter species in front and taller species behind your tulips.
Foliage coverage addresses the issue of yellowing tulip leaves post-blooming. Hostas and ferns provide lush cover for tulips as they wither. I prefer using plants with broad leaves to conceal the wilting effectively stems. This keeps your garden looking beautiful throughout early summer. Don't forget to choose companions that have similar watering needs to make maintaining them easier. The transition from spring bulbs to summer perennials will blend seamlessly.
Common Container Mistakes
Poor Drainage can cause tulip bulbs to rot in pots sooner than you think. Always choose a pot with multiple holes in the base for optimal drainage. Pouring some gravel on the bottom should help, too. I learned this the hard way after I lost bulbs to overly wet soil one particularly damp spring. Excessively moist soil compromises the roots and leads to infections from fungus. Make sure water runs out for your first watering of the pot after planting.
Selecting the appropriate container size has a direct impact on root development and bloom quality. Shallow pots restrict roots and growth, resulting in small flowers. For standard tulips, I recommend a pot depth of at least 12 inches. This allows the roots to develop adequately before winter. Crowded bulbs compete for nutrients, resulting in fewer flowers.
If you forget to winter storage in these cold climates, container tulips will be destroyed. It is best to move pots to an unheated garage once the soil freezes. I also cover mine in bubble wrap during the freezing periods. This provides some insulation and keeps the bulbs from freeze-thaw cycles that have created heaving. If you keep them indoors, remember to lightly water them monthly to prevent them from drying out.
Overplanting bulbs will severely reduce the size and amount of blooms produced. Plant bulbs at least 1 inch apart, even in pots or containers. I try to keep mine to 5 bulbs in a 14-inch pot. Although the thought of overplanting is very enticing, the plants will compete with each other for resources, ultimately reducing their overall yield. You want to ensure that each bulb has sufficient space to develop strong stems and roots.
Poor Drainage
- Containers without proper drainage holes cause water to accumulate, leading to bulb rot during winter months. This is the most frequent cause of container gardening failure.
- Solution: Add a one-inch layer of gravel or broken pottery at the base before adding soil to enhance drainage and prevent soil from blocking holes.
Inadequate Container Size
- Small pots restrict root expansion and provide insufficient insulation against temperature fluctuations, which stresses bulbs and reduces bloom quality significantly.
- Solution: Select containers measuring at least 12 inches deep and 12-16 inches wide to accommodate proper root growth and temperature regulation.
Neglecting Winter Storage
- Leaving containers exposed to harsh winter conditions causes soil to freeze completely, damaging bulbs and preventing essential drainage throughout the coldest months.
- Solution: Relocate pots to protected areas like unheated garages or cover with insulating materials such as burlap during freezing periods.
Overcrowding Bulbs
- Planting bulbs too closely restricts airflow and nutrient absorption, resulting in smaller blooms and increased vulnerability to diseases in container environments.
- Solution: Maintain 2-3 inches between bulbs even when using dense planting methods to ensure adequate resource access.
Using Garden Soil
- Garden soil becomes heavily compacted in containers, restricting drainage and root development while potentially introducing harmful pests and diseases to bulbs.
- Solution: Always utilize well-draining potting mix specifically formulated for container gardening to promote healthy growth conditions.
Bulb Selection and Quality
The specific 12cm+ circumference bulbs will provide the best performance with taller stems and larger flowers. These larger bulbs will have more energy storage than smaller bulbs. I always "tape it out" at the store. Larger sizes result in tougher plants that are better equipped to handle the weather. Please don't settle for small bulbs due to their high price and limited flower display.
Bulb firmness is a measure of freshness and viability. If you press lightly, with your thumb or finger near the basal plate, you can appreciate the resilience of the bulb. Healthy bulbs should be firm and solid to the feel and comparable to fresh onions. If there are soft spots, the bulb may be decayed or dehydrated. I'll never choose a lightweight bulb over a dense, heavy bulb. This tactile check is available to ensure we are NOT planting a lemon!
Proper ventilation during storage helps prevent mold growth before planting. Store bulbs in mesh bags or paper sacks. I also avoid plastic bags at all costs. Air circulation helps to keep the outer tunic dry. Please place them in cool, dark spaces such as basements. Good airflow helps keep the bulbs sound for weeks.
Maintain temperature limits consistently during planting preparation and storage. Generally, bulbs should be kept between 50°F and 68°F (10 °C and 20°C). I typically keep a thermometer in my storage area because warmth encourages undesired precocious sprouting. In contrast, colder regions can lead to chilling damage. Maintaining this limited temperature range enables the bulbs to remain ready for planting.
Bulb Size
- Larger bulbs measuring 12cm or more in circumference store greater energy reserves, resulting in taller stems and more impressive blooms. Smaller bulbs frequently produce inferior flowers.
- Measurement Tip: Wrap a flexible tape measure around the bulb's widest section before purchase to verify dimensions.
Firmness and Weight
- Premium quality bulbs feel solid and substantial when held, indicating dense, moisture-rich tissue ready for growth. Lightweight or soft bulbs often indicate dehydration or disease.
- Inspection Tip: Apply gentle pressure to check for resilience without causing damage to the bulb structure.
Surface Condition
- Healthy specimens feature intact, papery outer tunics without cuts or fungal growth. Compromised outer layers increase vulnerability to rot during the essential cold dormancy phase.
- Warning Sign: Discard bulbs displaying visible lesions, soft areas, or white fungal patches immediately.
Basal Plate Integrity
- The root-forming base must appear undamaged with firm, cream-colored tissue. A compromised basal plate prevents essential root development after planting in autumn soil.
- Critical Check: Examine the bottom surface carefully for any dark discoloration or soft spots before planting.
Storage Conditions
- Maintain bulbs in cool environments between 50-68°F (10-20°C) with adequate air circulation before planting. Refrigeration becomes necessary only for warm regions requiring pre-chilling protocols.
- Storage Tip: Utilize mesh bags in dark, ventilated spaces to inhibit mold formation during the waiting period.
Step-by-Step Planting Guide
Planting depth varies with bulb size. Regular tulips require 6 to 8-inch deep holes utilizing the 'three times bulb height' rule, so be sure to measure bulb height before digging. Smaller tulips require 4 to 6 inches of depth, and warmer zones tend to get more depth. I put tape on my trowel to create consistency.
Correct orientation matters for healthy growth. Bulbs are always placed with the pointed end up and the flat basal plate down. This positioning drives roots down and shoots up. I have rescued upside-down bulbs that had a tough time emerging. Correct orientation allows rooting to be directed down and saves energy wasted on correcting this orientation below ground.
Spacing varies from bed to container. For in-ground planting, it's best to space bulbs 4-6 apart for air circulation. In containers, we will use the 'eggs in carton' technique if bulbs are almost touching; it provides full volume without root congestion. I adjust the spacing according to the variety size.
Water requirements will change as the plant grows. Water the soil deeply immediately after planting, then let nature provide the water. Begin watering again once new growth appears in the spring. I check soil moisture frequently while the plant is dormant, especially during dry weather. Do not overwater dormant bulbs, as this can cause them to rot. A steady supply of moisture during bloom will stretch the flowering time.
Prepare Planting Site
- Select a location with well-draining soil and full spring sun exposure. Remove weeds and rocks, then loosen soil to 12 inches deep using a garden fork.
- For containers: Choose pots 12-16 inches wide with drainage holes and fill with quality potting mix.
Determine Planting Depth
- Dig holes or trenches 6-8 inches deep (15-20 cm) for standard tulip bulbs, following the '3x bulb height' rule. Adjust to 4-6 inches for smaller bulbs.
- In warmer zones: Plant 1-2 inches deeper to protect from temperature fluctuations.
Position and Space Bulbs
- Place bulbs pointed-end up, 4-6 inches apart (10-15 cm) in garden beds. For container displays, use the 'eggs in carton' method with bulbs almost touching.
- Critical: Ensure basal plate (root area) contacts soil directly without air pockets underneath.
Backfill and Water
- Gently cover bulbs with soil, firming lightly to eliminate air spaces. Water thoroughly until soil settles - about 1 gallon per square foot (4 liters per 0.1 m²).
- Post-planting: Apply 2-3 inch mulch layer for insulation but avoid covering bulb locations.
Post-Planting Care
- Mark planting locations with labels. Refrain from additional watering unless experiencing drought conditions exceeding two weeks without rain.
- In freezing climates: Protect containers by moving to unheated garages once soil freezes.
Warm Climate Adaptations
Pre-chilling is essential for tulips to grow in warm climates. Bulbs need to be subjected to 12-14 weeks at 40-45°F to mimic winter dormancy. I store bulbs in paper bags in the vegetable drawer of my refrigerator to keep them cool and fresh. Ensure they are not near ethylene-producing fruits, such as apples. This cold treatment triggers the biochemical events that initiate spring blooms.
Strict refrigerator storage protocols should be followed for best results. Start chilling in October to correlate with planting the bulbs in December. Be sure to place bulbs into ventilated containers to avoid moisture collection. I label the bags with the removal date to aid in monitoring. Plant the bulbs straight away once they are removed from cold storage. If you wait to plant the bulbs once they warm up, you will lose the chilling aspect.
Heating soil can be done using soil cooling techniques that offer bulbs protection from warm soil. Apply a 3 to 4-inch layer of light-colored mulch after planting. I prefer straw or shredded wood for their reflective properties. Planting depth can be increased to 8 to 10 inches to add insulation. All layers of soil ensure soil temperature remains below 60°F, the critical temperature threshold for root growth.
Establish realistic expectations for warm zone tulips, as for most varieties, they will not rebloom, and your planting will be annual. I use the Darwin Hybrids because they show excellent heat tolerance. Expect magnificent one-season shows, rather than perennial ones. Additionally, they will provide the most glorious spring extravaganza for the required effort of preplanting.
Pre-Chilling Protocol
- Bulbs require 12-14 weeks at 40-45°F (4-7°C) to simulate winter dormancy. Store in ventilated paper bags in refrigerator, avoiding fruits to prevent ethylene damage.
- Timing: Begin chilling in October for December planting in zones 8-10.
Post-Chilling Planting
- Plant immediately after removal from refrigeration. Delay causes bulbs to warm, negating chilling effects. Complete planting within 24 hours for optimal results.
- Soil Prep: Ensure soil temperature below 60°F (15°C) at planting depth using cooling techniques.
Soil Temperature Control
- Apply 3-4 inch (7-10 cm) mulch layer after planting to maintain soil below 60°F (15°C). Use light-colored mulch like straw or wood chips for maximum reflectivity.
- Planting Depth: Increase to 8-10 inches (20-25 cm) for extra insulation against heat.
Container Advantages
- Pots allow relocation to shaded areas during warm spells. Use 14-inch (35 cm) wide containers with drainage holes and light-colored exteriors to reflect heat.
- Rooting Phase: Place containers in refrigerated space for 4-6 weeks if soil exceeds 60°F (15°C).
Annual Expectations
- Pre-chilled bulbs rarely rebloom in warm zones. Treat as annuals and replant each fall. Focus on varieties like 'Emperor' or 'Darwin Hybrid' with better heat tolerance.
- Watering: Irrigate at dawn to cool soil, providing 1 inch (2.5 cm) weekly until bloom.
Why Fall Planting is Crucial
Vernalization refers to tulips' biological requirement for flowering. For bulbs to trigger bloom biochemistry, they require 10-14 weeks of chilling at temperatures below 55°F. Without this chilling period, the biochemical process isn't activated. I monitor soil temperatures religiously every fall. This is what breaks dormancy, initiating the process of flower development underground.
During the cold period, bulbs convert starches into protective sugars while storing energy. It is during this time, as they produce sugars, that cell damage is prevented by this natural antifreeze. As the energy reserves build to store sugars for spring growth, I see plump bulbs that have been properly chilled, which I measure against shriveled bulbs from a lack of chilling. As temperatures warm up, the reserves of energy are allocated to stem elongation, and the bulbs rapidly elongate.
Align your plant windows to your frost dates for your area perfectly. Zones 3-5: Plant late September to October, when the soil cools. Zones 6-7 plant October-November. Warmer zones 8-9 should delay until November-December, after you have done your pre-chill. I monitor soil temperature with soil thermometers right at the 55°F threshold.
Timing for planting is everything! On-time-planted bulbs are robust and in full flower. Late-planted bulbs are small and weak. Bulbs planted 6 weeks before freezing will establish a healthy root system and develop into large bulbs. Late-planted bulbs will begin to root only and will have thin, weak stems. For example, I have measured 18-inch stems on on-time planted bulbs and only 6-inch stems on delayed planted bulbs.
Vernalization Requirement
- Tulip bulbs require 10-14 weeks below 55°F (13°C) to initiate flowering biochemistry. This cold period breaks dormancy and triggers bloom development.
- Without sustained cold exposure, biochemical pathways remain inactive, preventing spring flowering entirely.
Root Establishment Phase
- Fall planting allows roots to develop in cool soil, absorbing nutrients before winter. Root systems expand 6-8 inches (15-20 cm) during this critical period.
- Spring-planted bulbs prioritize leaf growth over roots, resulting in weaker plants with reduced bloom quality.
Energy Storage Mechanism
- Cold temperatures signal bulbs to convert starches to sugars, creating anti-freeze compounds that protect cells while storing energy for spring growth.
- This energy reserve fuels rapid stem elongation and flower formation when temperatures rise in spring.
Regional Timing Windows
- Plant when soil cools to 55°F (13°C): September-October in zones 3-5, October-November in zones 6-7, and November-December in zones 8-9.
- Missing this window risks insufficient cold exposure, leading to partial or failed blooming.
Late Planting Consequences
- Bulbs planted after ground freeze develop inadequate root systems. Spring growth becomes stunted, with shorter stems averaging 6 inches (15 cm) instead of 18 inches (45 cm).
- Bloom failure rates increase significantly when planted less than 6 weeks before first freeze.
5 Common Myths
Tulip bulbs have to be planted pointy end up in order to get them growing properly.
Pointing bulbs upward has obvious advantages for that first stages of growth, but ultimately tulips will in the end orient themselves back to point vertically downward, a process called gravitropism. The most important consideration is making sure that the basal plate (the part that becomes the roots) comes in contact with the soil. Bulbs that are planted sideways or upside down will eventually orient themselves downward within 2-3 weeks, but this can delay their blooms by an additional 5-7 days in the spring.
Much like daffodils, tulips come back reliably year after year in climates across the globe..
Most tulip varieties experience true perennial behavior only in zones 3-7 with cold winters; they can behave as perennials in warmer zones (8-10) as "annuals" because they do not have sufficient chilling in the winter to perform as true perennials. Darwin Hybrids, for example, may rebloom 2-3 years if conditions are optimal but most modern varieties decline after the show-stopping first bloom because they have been bred for peak performance for only a season or one year.
Putting bulbs in the refrigerator with fruits ruins them because of ethylene gas.
Ethylene from fruits can damage bulbs but, if you store them correctly in a ventilated paper bag, you can keep them from being damaged. Just place the bulbs in the vegetable crisper bin, away from the produce, and keep them at 40-45F (4-7C). The real danger comes from moisture collecting in a plastic bag resulting in rot, not excessive ethylene exposure when the bulbs are in breathable packaging with air circulation.
It's necessary to place bone meal into the planting hole for tulips to bloom successfully.
Recent research finds bone meal to provide little benefit versus a balanced fertilizer. Tulips utilize phosphorus mainly in the fall for producing roots, but most soils usually contain an adequate supply. A soil test is the best way to know if changes are needed. Too much phosphorus can inhibit the uptake of some micronutrients and stimulate rodents to eat through the bulb.
Planting tulips after the first frost ensures that they don't sprout too soon.
Soil temperature is the most important consideration - bulbs that are planted in soils above 60°F (15C) will start to initiate growth that may then freeze at some point. Soil temperature is most ideal to plant when it remains consistently below 55°F (13C), which is often 2- 4 weeks before the first frost in many areas. Planting too early in warm soils increases the chance of fungal disease.
Conclusion
Your success with tulips starts with quality bulbs selected properly, choose firm, heavy bulbs with a 12cm+ circumference. I inspect each bulb beforehand, rejecting any with any soft area or mold. Healthy bulbs have the nutrients they need for sturdy spring growth. If you start with premium stock, you'll give your garden a better chance of success.
For tulips to thrive, time frames for fall planting are not flexible. Follow the soil temperature to 55°F for the planting area. This aligns with the timeframe for rooting. Use a good and simple thermometer to track soil temperature. If you miss this planting time window, you will be left with subpar flowers at best and poor bulb survival at worst.
There are three main principles to remember: proper depth, proper drainage, and proper chilling. Lightly compacted, loose soil is the ideal medium for plant bulbs three times their height deep. Ensure proper drainage to let water freely flow out to avoid rot. Provide proper cold either through the environment or refrigeration. When these principles are followed, you'll have your desired results, beyond your expectations!
Your considered work now produces spring magic. Bright colors will now appear as winter passes. I still get butterflies every year I see the early tulip buds push through the ground. Follow these steps consistently, and your garden will amaze you with stunning beauty when spring comes.
External Sources
Frequently Asked Questions
What month should I plant tulip bulbs?
Plant tulips when soil cools to 55°F (13°C). In colder zones (3-5), plant September-October. Moderate zones (6-7) plant October-November. Warm zones (8-9) plant November-December after pre-chilling.
Do tulips require full sun or shade?
Tulips need full spring sun exposure for optimal blooming. Choose locations with at least 6 hours of direct sunlight daily. Avoid shaded areas under trees or structures that limit light exposure during their growth period.
Will tulips return every year?
Most tulip varieties are perennial only in zones 3-7 with cold winters. In warmer zones (8-10), they typically behave as annuals due to insufficient chilling. Darwin Hybrids offer better perennial performance.
Can I leave tulip bulbs in the ground?
Bulbs may remain in ground in zones 3-7 if well-drained. In warmer zones, dig up after foliage yellows and refrigerate. In containers, move pots to protected areas during freezing temperatures.
How many tulip bulbs should I plant together?
Space bulbs based on planting method:
- Garden beds: 4-6 inches apart (10-15 cm)
- Containers: Use 'eggs in carton' method with bulbs nearly touching
- Mass plantings: 5 bulbs per square foot for dramatic displays
What happens if I plant tulips too deep or shallow?
Proper depth is critical for success:
- Standard bulbs: 6-8 inches deep (15-20 cm)
- Warmer zones: Plant 1-2 inches deeper for insulation
- Shallow planting risks frost damage and weak stems
- Excessive depth delays or prevents emergence
Can I plant grocery store tulip bulbs?
Forced bulbs sold in stores are depleted after blooming. Discard after flowering or plant outdoors only in zones 3-7. Expect 1-2 years recovery before reblooming with proper chilling and care.
How long do potted tulips last?
Potted tulips typically bloom for 2-3 weeks indoors. Extend longevity by:
- Keeping in cool 60-65°F (15-18°C) location
- Providing bright indirect light
- Watering when top inch of soil dries
- Avoiding heat sources and direct sunlight
Should tulips be deadheaded after blooming?
Deadheading redirects energy to bulb development:
- Remove spent flowers but leave foliage intact
- Allow leaves to yellow naturally (6 weeks)
- Foliage photosynthesis replenishes bulb nutrients
- Premature cutting reduces next year's bloom quality
What should I avoid planting near tulips?
Avoid companions that compete for resources:
- Water-loving plants causing bulb rot
- Shallow-rooted species disturbing bulbs
- Aggressive spreaders like mint or ivy
- Plants requiring summer watering during tulip dormancy