
A pea pod, popped open, releases that unforgettable sweet flavor. To snag this garden delicacy, you must know exactly when to plant peas. Timing controls everything, from germination to harvest quality. I learned this from twenty years of experimenting in my own garden.
Planting at the right time helps avoid the transition from sweet pods to starchy disappointments. In this section, you'll find planting windows for spring and fall tailored to your climate, as well as soil preparation tips for optimal early-season growth, and simple, reliable methods for determining your best planting dates.
This instruction manual is designed to help every gardener achieve success in growing peas, regardless of their prior experience. You will discover straightforward advice about soil temperature needs and frost protection. We explore harvest methods to achieve the ideal flavor. My recommendations address potential pitfalls that vary by growing zone.
Soil Preparation Essentials
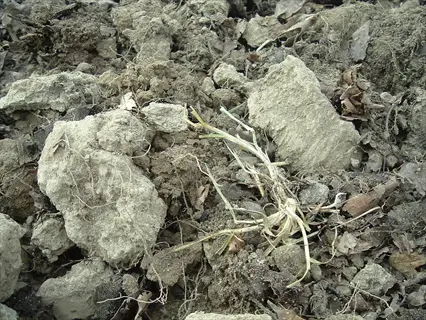
Preparing soil for peas is setting up their ideal comfort zone. pH balance is like their comfort sweater for roots, too acidic between 6.0-7.5 pH is optimum. Find your pH with a simple pH kit from a garden store. I've added lime or wood ash to precision-adjust the acetate when needed. A couple of times, when I was too late with recommendations, plants struggled until I made the pH correction.
Proper drainage is crucial for pea growth, and it can mean the difference between failure and success. Sandy soil drains too quickly, while clay soil can suffocate roots. Use compost to improve sandy soils and hold more moisture. Coarse sand can break up heavy clay soil, allowing air to penetrate more easily. I learned this the hard way, losing seedlings to waterlogged clay before I figured it out. Your pea plants will thank you with vigorous growing thereafter.
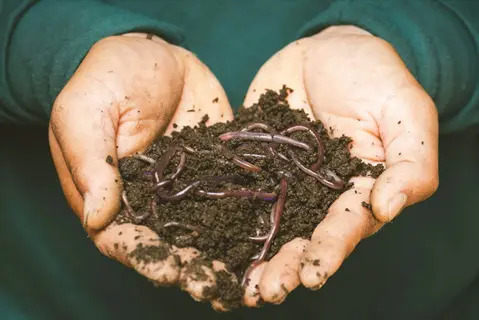
Compost nourishes the nitrogen-fixing bacteria that peas use to make roots food. Microscopic companions that the peas grow with are able to convert air nitrogen into root food. Prior to planting, mix compost that has well-rotted inches deep. Do not use fresh manure because tender roots will burn. My grandmother taught me that balance long ago. Healthy soil brings: less fertilizer runoff in streams.
Phosphorus pollution begins with poor soil management and fertilizer runoff into waterways that chokes aquatic life. Use compost instead of chemical phosphorus products. Get soil tests only to apply what is needed for that year. Your garden choice helps create local ecosystems. I've seen streams become clearer after all my neighbors adopted those practices.
Collect Samples
- Gather soil from 5-6 locations in your garden at 6 inch (15 cm) depth
- Combine samples in a clean container and remove debris for accurate testing
- Allow soil to air dry completely before testing to prevent moisture interference
Prepare Test
- Follow manufacturer instructions for your specific pH testing kit precisely
- Mix soil with distilled water in recommended ratios for consistent results
- Ensure testing tools are clean to avoid contamination from previous uses
Measure pH
- Insert test probe or dip indicator strips into the soil-water mixture
- Wait specified time for color development or digital reading stabilization
- Record pH values from multiple tests to calculate an accurate average
Interpret Results
- Compare color charts or digital readings to determine exact pH level
- Peas thrive in 6.0-7.5 pH range with optimal growth at 6.5-7.0
- Identify if soil is acidic (<6.0), neutral (7.0) or alkaline (>7.0)
Adjust pH
- Add lime to raise pH in acidic soils following package guidelines
- Apply sulfur to lower pH in alkaline soils based on test results
- Retest soil after 2 weeks to verify successful pH adjustment

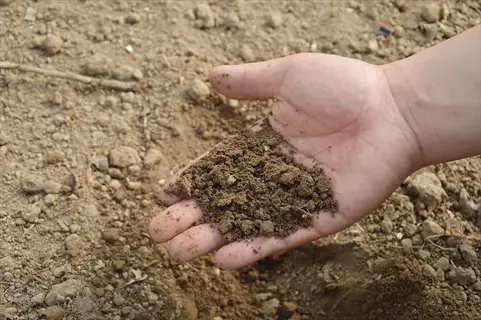
Sandy Soil
- Gritty texture that falls apart when squeezed in your hand
- Drains water extremely quickly often within minutes of watering
- Requires frequent nutrient amendments due to low retention
- Warms rapidly in spring allowing earlier pea planting dates
- Improve with organic matter to boost water-holding capacity
- Feels coarse and won't form a ball when compressed firmly

Loam Soil
- Ideal balanced texture with equal sand, silt, and clay content
- Forms a loose ball that crumbles easily when squeezed gently
- Retains moisture while providing adequate drainage for pea roots
- Rich dark color indicates high organic matter concentration
- Maintains consistent moisture levels without waterlogging plants
- Perfect texture for peas needing well-drained yet moist conditions

Clay Soil
- Smooth sticky texture that forms dense balls when compressed
- Drains slowly remaining waterlogged for days after rainfall
- Benefits from sand amendment to improve drainage capabilities
- Warms slowly in spring delaying optimal pea planting timing
- Prone to compaction requiring regular aeration for root health
- Rich in nutrients but needs structure improvement for peas
Silt Soil
- Fine powder-like texture that feels smooth and floury when dry
- Holds moisture well while still offering moderate drainage
- Compacts easily under pressure forming a dense surface crust
- Requires organic matter to maintain structure for pea roots
- Excellent nutrient retention for sustained plant development
- Feels silky when wet and holds shape briefly when squeezed
Peat Soil
- Dark spongy texture composed primarily of decomposed organic matter
- Retains significant moisture making it prone to waterlogging
- Naturally acidic requiring lime adjustment for pea cultivation
- Rich in organic nutrients but poor in essential minerals
- Improve drainage with sand before planting pea varieties
- Feels lightweight and fibrous when handled in garden beds
Chalky Soil
- Light textured soil containing visible white limestone fragments
- Highly alkaline requiring sulfur amendments for pH balance
- Drains rapidly while being naturally low in fertility
- Warms quickly in spring but dries out during summer months
- Requires frequent organic matter additions for pea growth
- Feels stony and crumbly when handled in garden settings
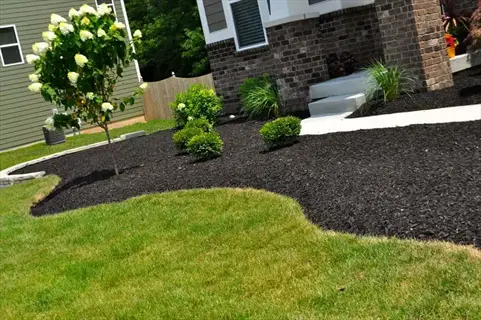
Mulching Techniques
- Apply 2-3 inches of organic mulch around pea plants
- Use straw or grass clippings to suppress weed development
- Maintain 2 inch clearance from plant stems to prevent rot
- Replenish mulch monthly to maintain consistent coverage
- Improves moisture retention during critical growth stages
- Regulates soil temperature fluctuations around pea roots
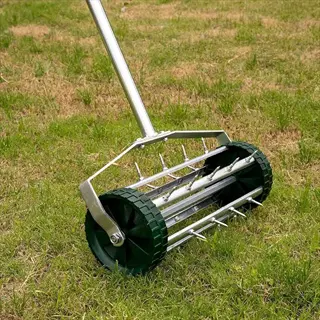
Soil Aeration
- Use garden forks to create 4-6 inch deep holes in soil
- Aerate compacted areas before planting to improve drainage
- Perform aeration when soil is moist but not waterlogged
- Incorporate organic matter into holes for better results
- Reduces soil density allowing better pea root penetration
- Improves oxygen flow to beneficial soil microorganisms
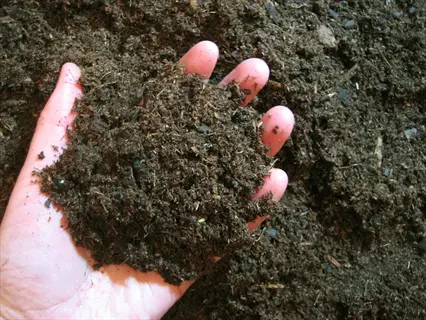
Compost Application
- Spread 2-3 inch layer across planting area before sowing
- Gently incorporate compost into top 6 inches of soil
- Use well-rotted compost to avoid nitrogen depletion issues
- Provides slow-release nutrients throughout growing season
- Improves soil structure for better pea root development
- Enhances water retention in fast-draining sandy soils
Cover Cropping
- Plant legumes like clover 2 months before pea season
- Till cover crops into soil 3 weeks before planting peas
- Boosts nitrogen levels through natural fixation process
- Improves soil structure with deep root penetration
- Suppresses weeds that compete with young pea plants
- Reduces erosion during heavy rainfall events
Planting Methods Simplified
Whether you choose to direct sow or start indoors will influence your entire pea season. Direct sowing is better in cool spring soil when you want roots to establish naturally. Starting indoors gives seedlings a jump start, but the transplanting is trickier. For most varieties of peas in my garden, I prefer direct sowing.
Soil type should dictate planting depth. For heavy clay soil, use a shallow 1-inch deep planting. For sandy soils, seeds need to be planted deeper, at 1.5 inches, to retain moisture more effectively. Always use the depth measurement from the top of the seed, not from the tip of your finger. This is to ensure that you have sufficient precision; otherwise, you may experience germination failures in clay soils, as I have observed.
Preventing transplant shock is essential, and one way to achieve this is to gradually harden off the plants. Plant your seedlings outside for longer periods, over a week. Start with two hours in the morning sun, then increase it. Protect the plants from the wind for that week. My seedlings thrive after a gentle transition to their final garden beds.
The proper spacing helps maximize yield without overcrowding. Bush peas need 4-6 inches of spacing between plants, while the vining types need 6-8 inches. Draw out your rows before planting to get a better sense of the spacing for growth. Crowding reduces air flow and can increase disease risks. Adequate spacing doubled my yield compared to crowded beds.
Timing Preparation
- Wait until soil temperature reaches 45°F (7°C) for optimal germination
- Check frost dates: plant 4-6 weeks before last expected frost
- Prepare soil by removing weeds and breaking large clumps for smooth texture
- Moisten soil 24 hours before planting to create ideal seed environment
Seed Placement
- Create shallow trenches 1-2 inches deep using garden hoe or finger
- Space seeds 2-4 inches apart in rows 18-24 inches apart for growth
- Cover seeds gently with loose soil ensuring no air pockets around seeds
- Label rows with plant variety and sowing date for tracking purposes
Moisture Management
- Water immediately after planting using fine mist spray nozzle
- Maintain consistent moisture until germination occurs (5-10 days)
- Apply light mulch layer after sprouts emerge to retain soil moisture
- Check soil daily: top inch should feel like damp sponge when squeezed
Early Protection
- Install bird netting 3 inches above soil to prevent seed theft
- Use floating row covers during unexpected late frost warnings
- Apply organic slug deterrent like crushed eggshells around seedlings
- Monitor daily for pest activity during first two critical weeks
Thinning and Spacing
- Thin seedlings to 4-6 inches apart when they reach 2 inches tall
- Remove weakest plants by cutting at soil level to avoid root disturbance
- Check final spacing matches variety requirements for optimal growth
- Fill gaps immediately with reserved transplants if germination fails
- Apply diluted fish emulsion after thinning to boost remaining plants
- Maintain weed-free zone around seedlings during establishment phase
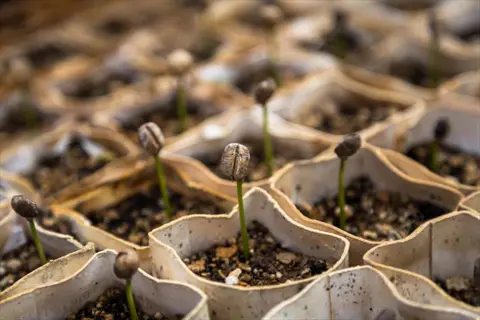
Fiber Pots
- Biodegradable containers made from plant materials like coconut coir
- Plant directly into soil preventing root disturbance during transplant
- Require frequent watering as material dries faster than plastic
- Ideal for peas with sensitive roots that dislike handling
- Decompose within 4-6 weeks after planting into garden soil
- Provide excellent air circulation around developing root systems
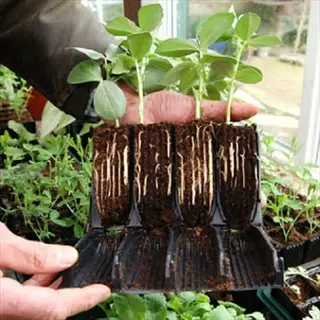
Root Trainers
- Long vertical cells that guide roots downward preventing circling
- Hinged design allows easy opening for minimal transplant shock
- Promote deeper root development for stronger transplant survival
- Reusable for multiple seasons with proper cleaning between uses
- Require special trays that prevent tipping of tall containers
- Accommodate peas up to 8 inches tall before transplanting
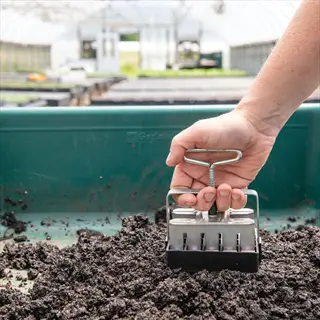
Soil Blocks
- Compressed soil cubes created with specialized blocking tools
- Eliminate container needs by creating freestanding plant units
- Air-prune roots naturally when cubes dry slightly between waterings
- Require precise soil mixture for maintaining cube integrity
- Allow closer spacing than containers under grow lights
- Transplant directly without removing from any container
Plastic Cells
- Reusable plastic trays with individual compartments for seedlings
- Most economical option suitable for large-scale seed starting
- Require careful transplanting to avoid root damage during removal
- Need sterilization with 10% bleach solution between plantings
- Lightweight design allows easy movement under grow lights
- Standard 72-cell trays accommodate 3-4 week pea seedlings
Peat Pellets
- Compressed disks that expand when watered to create planting medium
- Convenient all-in-one system with built-in nutrient starter charge
- Mesh covering maintains pellet shape but may restrict root growth
- Plant entire pellet directly into garden soil during transplant
- Require monitoring for drying out due to exposed surface area
- Suitable for short-term starts (2-3 week pea seedlings)
Essential Care and Support
Different kinds of pea plants require different types of support. Bush peas are compact varieties that only need support from a few short stakes. In contrast, vining peas are tall varieties that require a strong trellis. Surrounded by bush peas does not need support like a shrub on low stakes. Surrounded by vining peas, they need to be vertical, using an upward base. I use tomato cages for bush peas, and trellises for climbing peas.
Monitor soil moisture using a finger test. Push your finger into the soil near plants up to your second knuckle. If the soil is dry, water immediately. If wet, wait another day. Prevent drought stress or root rot with this easy method.
Keep an eye out for nutrient deficiency symptoms on pea foliage. Chlorotic leaf tissue, turned yellow but with green veins, indicates an iron deficiency. Purple edges of leaf tissue indicate low phosphorus. Plants with stunted growth may indicate nitrogen deficiency. Addressing these issues promptly with organic amendments can limit the effects on pod growth.
It is best to install pest exclusion netting early in the season. Lay netting over your supports before flowering and securely anchor the edges with soil or rocks. This barrier will deter birds and insects, while still allowing light and rain to feed the plants. I put netting over my pea plants, and they are not touched. The uncovered plants get damaged.
A-Frame Construction
- Space bamboo canes 50cm apart in criss-cross pattern forming 'V' shapes
- Secure crossover points with garden twine creating stable apex joints
- Install horizontal braces along length to reinforce structure stability
- Anchor base with tent pegs in windy areas to prevent collapse
Netting Installation
- Drape netting over structure ensuring ground contact on both sides
- Secure bottom edges with U-shaped landscape pins every 12 inches
- Add vertical twine ties every 24 inches to prevent wind billowing
- Trim excess netting with scissors for neat appearance and safety
Trellis Adaptation
- Position trellis 4-6 inches from plants for airflow and access
- Add horizontal twine rungs every 3 inches for tendril attachment
- Angle trellis slightly backward to support heavy pod development
- Check stability weekly as plants gain weight during growth
Bush Support
- Install short tomato cages around semi-leafless bush varieties
- Use pea sticks (branched twigs) inserted around plant perimeter
- Create support rings from flexible willow or hazel stems
- Monitor for tangling and gently redirect stems as needed
Maintenance
- Inspect structures weekly for damage from weather or growth pressure
- Retie loose joints immediately to maintain structural integrity
- Trim vegetation blocking sunlight to support base every 10 days
- Reinforce before heavy rain or wind events predicted in forecast
Nutrient Issues
- Yellow leaves with green veins indicate iron deficiency - apply chelated iron
- Stunted growth with purple tint signals phosphorus lack - use bone meal
- Excess nitrogen causes leafy growth without flowers - stop fertilizing
Pest Control
- Aphids: Spray with soapy water (2 tsp dish soap per gallon)
- Pea moths: Install fine mesh netting before flowering period
- Birds: Use reflective tape or decoy predators near planting area
Environmental Stress
- Wilting in heat: Provide afternoon shade with 30% shade cloth
- Poor flowering: Ensure 6+ hours direct sunlight daily minimum
- Leggy growth: Increase light exposure or reduce nitrogen feeding
Watering Problems
- Yellowing lower leaves: Sign of overwatering - reduce frequency
- Crispy leaf edges: Underwatering symptom - increase deep watering
- Blossom drop: Inconsistent moisture - maintain even soil dampness
- Root rot: Improve drainage with perlite or coarse sand amendments
Harvest Challenges
- Tough pods: Harvest earlier when pods are plump but still tender
- Small peas: Caused by heat stress - plant earlier next season
- Bitter taste: Result of irregular watering - maintain moisture
- Low yield: Insufficient pollination - attract bees with flowers
Best Time to Plant Peas
To grow well, peas require quite specific temperature ranges. Plant once soil reaches optimal soil temperatures of 45-75°F; germination will be better, and seeds will break dormancy more easily. Use a soil thermometer to evaluate the temperatures below the soil surface. Remember, Cool-season crops may or may not die/ Bolt during the summer heat. Timing is crucial. Use a soil thermometer to check soil temperature early (beginning of the season), which should start around 4 weeks before Last Frost.
Planting strategies vary tremendously in spring and fall. In northern zones, you plant after the thaw. In southern gardens, you may plant in the winter months. Coastal areas have longer growing seasons than mountainous areas. Only your USDA zone can determine your particular planting windows. I start peas in April in my zone 5 garden.
Frost tolerance changes as the pea plant develops. Seeds can survive very light frosts, but once seedlings emerge, they become sensitive to temperatures below 28°F. During flowering, temperatures below freezing will cause damage to plants. For unexpected periods of cold, use a cover over young plants to protect them from the elements. I typically use a row cover over flowering plants if needed to preserve developing pods.
Microclimates provide individual opportunities for planting. Garden sites in urban plots can receive some added warmth from buildings, allowing for early planting. Rural plots often have colder nights, which enable planting to occur later. South-facing slopes usually warm faster than low-lying areas. Pay attention to your individual situation, just as I do with my city plot.
Spring Planting
- Plant 4-6 weeks before last frost date when soil is workable
- Use cloches or row covers if nighttime temps drop below 28°F (-2°C)
- Succession plant every 2 weeks for continuous harvest until summer
- Choose early varieties like 'Meteor' that mature in 50-60 days
Fall Planting
- Sow seeds 8-10 weeks before first expected frost date
- Plant deeper (2 inches) to maintain cooler soil temperatures
- Use mulch to regulate soil temperature during warm autumn days
- Select frost-tolerant varieties like 'Green Arrow' for late harvest
Winter Planting
- Only possible in zones 9-11 with mild winter temperatures
- Plant in November for January-February harvest period
- Use raised beds to improve drainage during rainy periods
- Choose dwarf varieties that mature quickly before heat returns
Microclimate Adjustments
- South-facing slopes: Plant 1-2 weeks earlier in spring
- Urban gardens: Utilize heat-retaining walls for extended seasons
- Low-lying areas: Delay planting 1 week to avoid frost pockets
- Container gardens: Move pots to optimize sun exposure seasonally
Soil Preparation
- Test soil temperature 4 inches deep before planting
- Cover planting area with black plastic 2 weeks pre-sowing to warm soil
- Incorporate compost 1 week before planting to boost microbial activity
- Avoid working soil when wet to prevent compaction issues
Unexpected Frost
- Cover plants with frost cloth or old bedsheets overnight
- Water soil thoroughly before sunset to retain ground heat
- Use thermal mass like water jugs painted black around plants
- Harvest mature pods immediately if severe frost predicted
Early Heat Wave
- Install 30% shade cloth during temperatures above 80°F (27°C)
- Mulch heavily with straw to keep root zone cooler
- Water deeply in early morning to combat evaporation
- Harvest pods more frequently to reduce plant stress
Excessive Rain
- Create drainage trenches around planting beds
- Elevate rows with additional soil to prevent waterlogging
- Apply fungicide preventatively for diseases like powdery mildew
- Delay planting until soil drains adequately after storms
Wind Protection
- Install windbreaks using burlap screens on windy sides
- Stake young plants securely to prevent stem damage
- Use interplanting with sturdy crops like corn as natural barriers
- Reduce watering frequency to prevent wind desiccation stress
Drought Conditions
- Apply 3-4 inches of organic mulch to conserve soil moisture
- Use drip irrigation instead of sprinklers to reduce evaporation
- Water deeply twice weekly rather than daily shallow watering
- Prioritize morning watering to minimize daytime moisture loss
Harvesting and Storage Tactics
Identify the ideal harvest time by examining the appearance of the pods. Shelling peas have clear visible outlines of developed peas in filled pods. Snow peas remain flat with few seeds, and sugar snaps snap crisply when bent. Harvest daily at peak balance; everything is growing quickly. I pick in the early morning when sugars are more concentrated for flavor.
There are various storage methods, each with a distinct shelf life. You can store fresh leaves in the refrigerator in perforated bags, which help protect their freshness for 5-7 days. Blanching and freezing extend the shelf life to 8-10 months. Vacuum sealing prevents all quality degradation for up to 14 months. Select the methods that best suit your consumption volume patterns and the layout of your kitchen.
Blanching stops enzymes from destroying flavor. Boiling water denatures proteins, which causes the loss of flavors. An immediate ice bath stops the cooking and preserves texture and color. This science means you can enjoy frozen peas that taste near-fresh. I blanch for exactly 90 seconds for the ultimate flavor.
Modern freezing technology significantly enhances preservation. Vacuum sealing eliminates air so ice crystals and freezer burn don't happen. Pre-freezing peas on trays allows for separate portions, facilitating portion control and accuracy. I also add lemon juice to maintain a bright green color. The combination of all these gives me the chance to enjoy summer peas all year round.
Timing Indicators
- Harvest shelling peas when pods are plump but before they bulge with visible pea outlines
- Pick snow peas when pods are flat and seeds are barely developed (3-4 inches long)
- Collect sugar snap peas when pods are rounded and snap crisply when bent
- Check plants daily during peak season as pods mature rapidly in warm weather
Harvest Method
- Use two hands: hold vine with one hand while pinching pod stem with the other
- Cut stems with small scissors to avoid damaging fragile vines during picking
- Start harvesting from bottom of plant working upward as lower pods mature first
- Harvest during morning hours when sugar content peaks for best flavor
Frequency & Yield
- Pick every 1-2 days to encourage continuous pod production
- Expect 1-2 pounds per plant for bush varieties over the season
- Vining types yield 3-4 pounds per plant with regular harvesting
- Stop harvesting when temperatures consistently exceed 75°F (24°C) to allow seed development
Quality Control
- Discard pods with white mold spots or insect damage immediately
- Sort by size: use smaller pods for salads, larger for cooking
- Rinse immediately in cold water to remove field heat and preserve crispness
- Avoid pods left on vine too long - they become starchy and fibrous
Post-Harvest Handling
- Cool peas immediately after picking in ice water bath for 10 minutes
- Pat dry gently with paper towels before storage to prevent spoilage
- Never store damaged pods with healthy ones to avoid mold transfer
- Keep harvesting baskets clean to prevent bacterial contamination
Blanching Science
- Use 1 gallon boiling water per pound of peas for effective enzyme deactivation
- Time precisely: 90 seconds for small peas, 120 seconds for large varieties
- Immediately plunge into ice water for equal time to stop cooking process
- Drain thoroughly on towels before freezing to prevent ice crystal formation
Freezing Innovations
- Pre-freeze peas on parchment-lined trays before bagging to prevent clumping
- Add lemon juice (1 tsp per quart) to preserve bright green color during storage
- Use oxygen absorbers in vacuum-sealed bags to maintain optimal texture
- Label bags with variety and date using freezer-safe markers
Drying Methods
- Sun-dry: Spread single layer on screens, cover with cheesecloth for 3-5 sunny days
- Oven-dry: Use lowest setting with door ajar, stirring every hour for 8-10 hours
- Dehydrator: Arrange in single layers, rotate trays every 2 hours for even drying
- Store completely dried peas in airtight jars with silica gel packs
Canning Procedures
- Hot pack method: Simmer peas 3 minutes before packing into sterilized jars
- Leave 1-inch headspace, add boiling water or brine solution
- Process pints for 40 minutes at 10psi pressure for safe preservation
- Store cooled jars in dark place; check seals before long-term storage
Revival Techniques
- Rehydrate dried peas overnight in fridge with 3:1 water ratio
- Refresh frozen peas by plunging into boiling water for 30 seconds before use
- Restore crispness to refrigerated peas with ice water soak for 15 minutes
- Repurpose canned peas in soups/stews where texture matters less
5 Common Myths
Peas need an entire growth cycle with a constant 24-hour exposure to sunlight for a good yield.
Peas flourish when they receive 6 - 8 hours of direct sunlight per day, because excess sun-time greater than 10 hours experience heat stress affecting yield. Despite being a cool-season crop, peas do best with morning sun and afternoon protection in warm climates, when exposing peas to all-day sun can lead to decline due to increased dryness of soil and roughness of pods. Gardeners are best served by considering an eastern exposure for their sun needs and the need to moderate temperature.
All types of sweet pea flowers are 100 percent edible and can be designed to use as a garnish in a salad without any health concerns.
However, while a few of the ornamental sweet pea flowers (Lathyrus odoratus) contain toxic aminopropionitrile compounds that can cause lathyrism (a serious neurological illness), garden pea varieties (Pisum sativum) encompass edible flowers and these should be eaten with care - identification of which types are edible and which are semi-poisonous is key. Eating the ornamental types can create effects such as abdominal aches, paralysis, and even death (respiratory failure), while mildly poisoning (possibly with nausea) after eating garden varieties is expected, but moderation would eliminate the side effects.
Compact bush pea varieties grow strong enough stems to hold themselves up without needing the support of stakes or trellises throughout their development.
Although bush peas are more self-supported than the vining type, most of the semi-leafless varieties still benefit from a little support to avoid tangling and pod rot. Without some support, stems with an excess of heavy pods will collapse and rest on moist soil causing greater susceptibility to disease. Use short stakes or tomato cages to facilitate air circulation, reduce pest access, make harvesting easier, and encourage happier plant growth.
Pea plants take away important nitrogen from garden soil that will need to be replaced through additional fertilizer after harvest.
Peas are nitrogen-fixing legumes that can benefit soil through their symbiotic associations with rhizobia bacteria in their root nodules. These bacteria fix nitrogen from the atmosphere into ammonium that is available for plant use, leaving behind some nitrogen to benefit subsequent crops. A typical pea crop can contribute a significant amount of nitrogen to the soil, and this makes these plants excellent rotation partners with nitrogen-hungry vegetables without any need for synthetic fertilizer additions in the vegetable crops that follow.
Freshly harvested peas maintain their peak flavor and nutritional quality for several weeks when stored properly in refrigeration.
Peas begin converting sugars to starch immediately after harvest, with noticeable flavor degradation occurring within 24 hours. Refrigeration slows but doesn't stop this process, causing peas to lose their signature sweetness rapidly. For optimal quality, consume or process peas within hours of picking, as freezing or canning immediately after harvest is required to preserve nutrients and sugars at their peak freshness level effectively.
Conclusion
The successful growing of peas is all about timing - from soil preparation to harvest. Cool temperatures in the soil will initiate germination, while preventing frost will protect young plants. The timing of the harvest will dictate whether they are sweet or starchy. These basic concepts all must come together for the best yield, and regardless of climate zone, apply these principles.
Peas can be grown by any gardener. Simply watering based on the finger test for moisture is a straightforward approach for beginners. Advanced growers appreciate fine-tuning the advantages of microclimates. This flexibility allows peas to be rewarding for every gardener. My first pea patch did incredibly well with minimal care.
Proper practices provide real, measurable benefits, correct depth of planting yields healthy plants and higher yields. Timely harvesting maintains fresh-picked sweetness. Correct storage ensures enjoyment for months. These real rewards validate the effort put into the details.
This season is an ideal time to begin. Fall planting is available in some regions with cool autumn soil. Spring gardeners can also prepare beds during the winter months. Pick your time and plant with confidence. Your perfect peas journey starts right now.
External Sources
Frequently Asked Questions
What is the optimal season for planting peas?
Plant peas during cool seasons when soil temperatures reach 45-75°F. Spring planting should occur 4-6 weeks before the last frost, while fall planting requires sowing 8-10 weeks before the first expected frost for proper maturation before freezing temperatures.
Which plants make poor companions for pea cultivation?
Avoid planting peas near these incompatible species:
- Onion family plants which stunt pea root development
- Garlic releases compounds inhibiting pea growth
- Gladiolus flowers that compete for nutrients aggressively
- Potatoes increase vulnerability to shared blight diseases
Can peas be successfully planted in autumn months?
Fall pea planting is viable when timed correctly before frost. Select frost-tolerant varieties and plant deeper than spring sowings. Use mulch to regulate soil temperature and extend the growing season for a late harvest before hard freezes occur.
What is the typical growth timeline for pea plants?
Peas progress through distinct growth phases:
- Germination occurs within 7-14 days in ideal soil conditions
- Vining varieties require 3-4 weeks to establish support structures
- Flowering begins approximately 40-50 days after planting
- Pods reach harvest maturity 60-70 days post-germination
Are peas and cucumbers compatible garden companions?
Peas and cucumbers make excellent companions when managed properly. Peas fix nitrogen that benefits cucumbers, while cucumber vines provide ground cover that conserves soil moisture. Ensure adequate spacing and trellising to prevent overcrowding and disease development.
How should I prepare pea beds for future seasons?
Post-harvest bed preparation involves:
- Cutting plants at soil level instead of uprooting to preserve nitrogen nodules
- Incorporating compost to replenish organic matter reserves
- Planting nitrogen-consuming crops like lettuce in succession
- Applying mulch to protect soil structure during winter months
Do peas and beans thrive when planted together?
Peas and beans coexist productively as both are legumes with similar growth requirements. They share beneficial rhizobia bacteria that enhance mutual nitrogen fixation while requiring comparable soil pH levels and watering frequencies for optimal development.
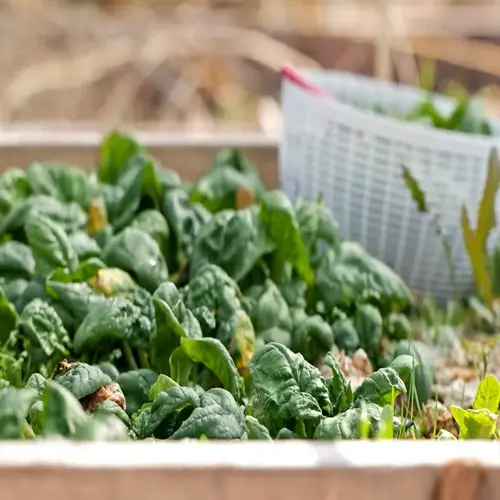
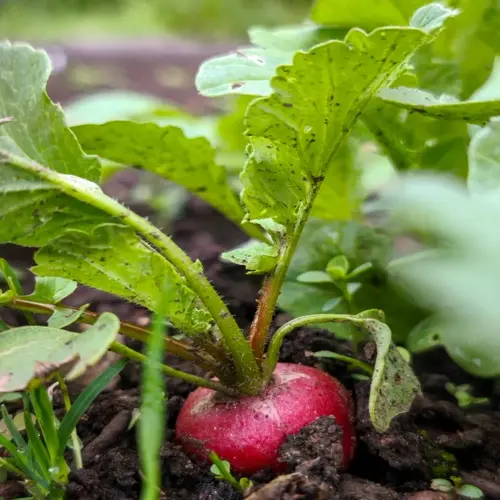
What vegetables are suitable for late season planting?
Ideal cool-season vegetables for late planting include:
- Kale and collards tolerant of light frost conditions
- Root vegetables like carrots and radishes with quick maturation
- Leafy greens including spinach and Swiss chard
- Overwintering garlic and onion sets for spring harvest
How challenging is pea cultivation for beginners?
Peas are among the easiest vegetables for novice gardeners. Their minimal requirements include cool weather, well-draining soil, and basic support structures. Pest resistance and rapid germination make them forgiving first crops with high success rates across diverse climates.
What spacing optimizes pea plant health and yield?
Proper spacing varies by pea type:
- Bush varieties require adequate airflow between compact plants
- Vining types need vertical support systems for upward growth
- Rows should allow convenient harvesting access pathways
- Overcrowding prevention reduces fungal disease transmission risks