
Knowing when to plant carrots turns uninspired store-bought roots into amazing garden delights with characteristically sweet flavor. Grocery store carrots often lack flavor because the commercial agriculture focus may be more on shelf life than flavor. When you grow carrots at home, you truly get to capture the most natural sugars when you align your planting with nature's cycles.
I came upon this after tasting wood from my first-ever carrot harvest. The secret?? Planting timing more than anything drives sugar conversion. Soil quality matters. Variety choice matters. But getting those frost dates right distinguishes between mediocre roots and the candy crisp goodness.
People will be able to find success here as new gardeners. Begin with loose soil. Select adaptable varieties. Pay attention to local frost patterns. In terms of your patience, you'll receive carrots so sweet they crunch like candy from nature. This guide will make timing easy for you, allowing you to create memorable harvests.
Watering and Fertilizing Carrots
Maintaining a consistent moisture level in the ground is key to preventing cracks in carrots. I lost one entire crop of carrots to split roots when I didn't know this! Check the moisture level of the soil every day using the "finger test," where you poke your finger into the soil 2 inches deep. Water only if the soil feels dry, like a piece of stale bread, but not too moist.
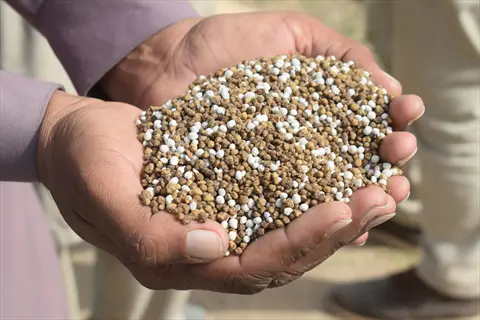
Nitrogen-rich fertilizers promote excessive top growth at the expense of root development. My carrots were topped until I switched to a low-nitrogen mix, such as 5-10-10 or less. Fertilize at planting only. Use a high-nitrogen fertilizer for carrots. It will have root hairs and be too bitter to eat, disappointing every gardener.
Adjust your watering regimen according to the seasons. In summer heat, you should soak deeply every three days. As you approach frost dates in the fall, you should reduce your watering amounts. The carrots require less moisture when the cold reduces activity. Mulch acts as both insulation and a moisture retention agent, providing protection for extended periods.
Watering in the morning is better than in the afternoon or evening. Leaves dry faster, lowering the risk of mold. It is best to use drip lines or soaker hoses, since they deliver water directly to the root zone without losing drops. This technique saves time and enhances the sweetness of carrots.
Watering Schedule
- Carrot seedlings require daily light misting to maintain damp soil surface until germination occurs, typically within 5 to 21 days after sowing.
- Mature plants need 1 inch of water weekly during early growth, increasing to 2 inches when roots expand rapidly.
- Use the finger test method: soil should feel like a damp sponge at 2-inch depth for optimal moisture retention.
- Inconsistent watering causes cracked or bitter carrots; use drip irrigation for uniform distribution.
- Reduce frequency during rainy periods to avoid waterlogged soil, which promotes rot and disease.
Fertilizing Rules
- Avoid high-nitrogen formulas that encourage leafy tops instead of robust root development.
- Apply balanced 5-10-10 fertilizer when greens reach 4 inches tall to support steady growth.
- Side-dress by sprinkling granules along planting rows, then gently incorporate into topsoil.
- Excess phosphorus leads to forked roots; use compost for natural nutrient enrichment.
- Organic options like fish emulsion provide slow-release nutrition without chemical buildup.
Soil Moisture Tools
- Soaker hoses deliver water directly to roots, minimizing evaporation and foliage diseases.
- Moisture meters offer precise readings; aim for 50% saturation between waterings.
- Mulch with straw to retain moisture and regulate soil temperature during heatwaves.
- Rain barrels collect runoff for sustainable watering during dry spells.
- Avoid overhead sprinklers to prevent fungal issues on carrot foliage.
Nutrient Deficiency Signs
- Yellowing leaves indicate nitrogen shortage; apply compost tea for quick correction.
- Purple-tinged foliage signals phosphorus deficiency; bone meal supplements can help.
- Stunted growth with dark green leaves suggests potassium excess; flush soil with water.
- Thin, weak stems require calcium; add gypsum to improve soil structure.
- Bronzed leaf edges denote magnesium lack; use Epsom salt solutions monthly.
Seasonal Adjustments
- Spring: Increase watering as temperatures rise but avoid saturation before frost dates pass.
- Summer: Water early morning to reduce evaporation; shield plants with shade cloth.
- Fall: Reduce frequency as cool weather slows growth; prioritize frost protection.
- Winter: Minimal watering for overwintered carrots; mulch heavily to insulate roots.
- Container carrots dry faster; check moisture twice daily during heatwaves.
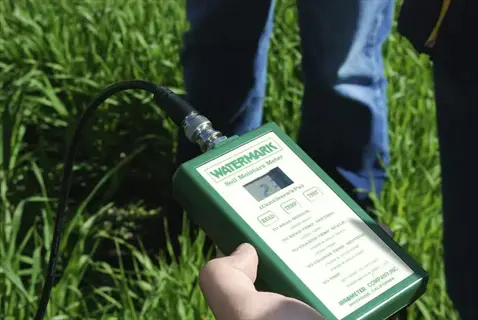
Soil Moisture Meter
- Accuracy: Measures dampness at root level to prevent over or under-watering.
- Usage: Insert probe 4 inches deep; water when reading drops below 50%.
- Benefit: Eliminates guesswork for beginners in varying soil conditions.
- Maintenance: Clean probe after each use to ensure reliable readings.
- Cost: Affordable models start at $12; lasts multiple growing seasons.
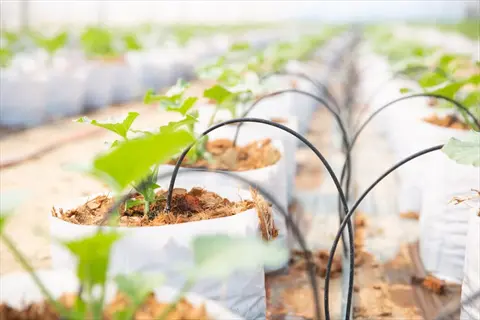
Drip Irrigation Kit
- Efficiency: Targets water directly to roots, reducing waste by 60%.
- Installation: Set up along carrot rows with emitters spaced 6 inches apart.
- Timing: Use timers for dawn watering to minimize evaporation losses.
- Frost Protection: Combine with row covers during unexpected cold snaps.
- Eco Impact: Cuts water usage while preventing soil erosion and nutrient runoff.
Organic Fertilizer
- Formula: 5-10-10 NPK ratio balances root growth without excess foliage.
- Application: Sprinkle 1 cup per 10-foot row monthly during active growth.
- Ingredients: Fish meal, bone char, and kelp provide slow-release nutrients.
- Safety: Non-toxic for pets and children; washes off produce easily.
- Storage: Keep in airtight containers to maintain potency between seasons.
Compost Bin
- Soil Amendment: Mix 30% compost into planting beds for natural fertility.
- Tea Preparation: Steep 1 cup compost in 5 gallons water for liquid feeding.
- Disease Prevention: Suppresses fungal pathogens through beneficial microbes.
- Waste Reduction: Recycles kitchen scraps into nutrient-rich humus.
- Maintenance: Turn pile weekly to accelerate decomposition processes.

Shade Cloth
- Heat Protection: Use 30% density cloth during summer to cool soil.
- Installation: Drape over hoops 18 inches above plants for airflow.
- Frost Shield: Layer with plastic for emergency cold weather coverage.
- Pest Barrier: Blocks carrot fly access while diffusing sunlight.
- Durability: UV-resistant fabric lasts 5+ years with proper storage.
Harvesting and Storing Carrots
Frost converts carrots into candy. I learned this the hard way by harvesting too soon in October. The cold temperatures naturally transform starches into sugars. Leave carrots in the ground through just the light frosts. Your patience will yield sweet, candy-like roots worth the wait.
To check carrot maturity, you can use the Finger Test. Knock the soil off one of the shoulders. Use your thumb to measure the width. Mature carrots feel as thick as the base of your thumb. Never pull your test carrots; they will not grow any further once disturbed. This will save you from harvesting.
Storage options will affect shelf-life. Refrigerated carrots will remain crisp for weeks. Suppose using damp sand inside perforated bags. Cellar storage can last for months; store carrots in wooden boxes filled with moist sawdust. Turn the carrots once a month to prevent any from developing rot spots.
*Go ahead and remove the tops right away. Greens draw moisture from roots. Twist off greens vs cutting. This seals the root crown. Your carrots will stay firm, juicy, and fresh for months. I store mine around some apples, which keep them humid naturally.*
Timing
- Harvest summer varieties 60-70 days after sowing; winter types need 80-90 days for full maturity.
- Light frosts increase sugar content; harvest after 1-2 frosts for maximum sweetness.
- Check maturity by gently exposing the top 0.5 inch (1.3 cm) of root; diameter should be 0.75-1.5 inches (2-4 cm).
- Harvest within 3 weeks of maturity date to prevent woody texture in summer varieties.
- Morning harvest preserves crispness as roots contain maximum water content after cool nights.
Size Verification
- Gently brush soil from carrot shoulders to assess diameter without damaging roots.
- Ideal diameter: 0.75-1.5 inches (2-4 cm) depending on variety.
- Use the finger-width test: mature carrots should be wider than your thumb.
- Avoid leaving carrots in ground beyond maturity date; they become fibrous and split.
- For baby carrots, harvest when roots reach finger-length (3-4 inches/7.5-10 cm).
Harvesting Technique
- Loosen soil with garden fork 3-4 inches (7.5-10 cm) away from row before pulling.
- Grasp firmly at base of greens near root crown; twist gently while pulling upward.
- If greens detach, carefully dig around root with hand trowel to avoid spearing.
- For heavy soils, water deeply 24 hours before harvesting to ease extraction.
- Immediately remove tops: cut greens to 1 inch (2.5 cm) above crown to prevent moisture loss.
Post-Harvest Handling
- Brush off excess soil gently; avoid washing until ready to use to prevent rot.
- Sort carrots: undamaged roots for storage, blemished for immediate consumption.
- Cure winter varieties in single layers in shaded, well-ventilated area for 1-2 days.
- Discard any roots with green shoulders (sun exposure causes bitter flavor).
- Never store damaged carrots with intact ones; one rotten root spoils the batch.
Frost Considerations
- Carrots tolerate temperatures down to 20°F (-6°C) when properly mulched.
- Harvest before ground freezes solid; frozen soil locks roots in place.
- Use row covers for late-fall harvests; remove during daylight for photosynthesis.
- In mild climates (zones 7+), carrots can overwinter under 6-inch (15 cm) straw mulch.
- After hard freeze (-10°F/-23°C), harvest immediately as roots deteriorate rapidly.
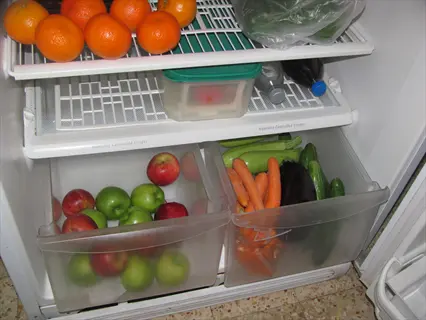
Refrigeration
- Duration: 3-4 weeks maximum freshness
- Preparation: Remove greens; place unwashed in perforated plastic bags
- Humidity: Maintain 90-95% humidity in crisper drawer
- Temperature: Ideal at 32-40°F (0-4°C)
- Tip: Separate from ethylene-producing fruits to prevent bitterness
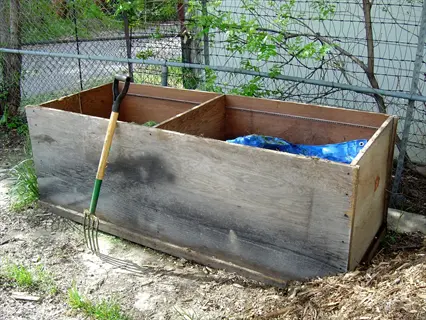
Root Cellar
- Duration: 4-6 months for winter varieties
- Preparation: Layer in damp sand/sawdust inside wooden crates
- Environment: 32-40°F (0-4°C) with 95% humidity
- Containers: Use breathable materials like burlap sacks
- Monitoring: Check monthly for rot; remove affected roots
Outdoor Mounding
- Duration: 3 months in cold climates
- Technique: Dig 12-inch (30 cm) deep pit; layer carrots with straw
- Covering: Mound with 8-inch (20 cm) soil layer topped with waterproof tarp
- Drainage: Ensure sloped site to prevent water accumulation
- Harvest: Access during winter thaws; reseal immediately
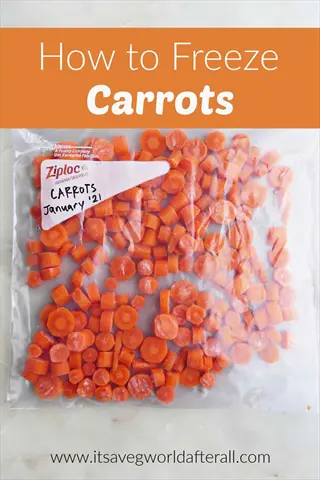
Freezing
- Duration: 10-12 months at 0°F (-18°C)
- Blanching: Boil 2 minutes then ice bath plunge
- Cutting: Slice/dice before freezing for cooking convenience
- Packaging: Use vacuum-sealed bags removing all air
- Thawing: Cook directly from frozen to preserve texture

Dehydration
- Duration: 1+ years in airtight containers
- Preparation: Slice 1/4-inch (0.6 cm) thick; blanch for color retention
- Drying: 125°F (52°C) for 8-12 hours until brittle
- Storage: Glass jars with oxygen absorbers in dark location
- Rehydration: Soak 20 minutes before use in soups/stews
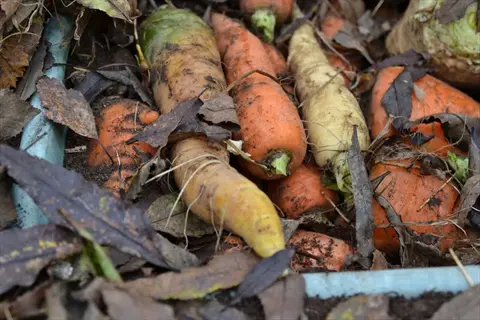
Choosing Carrot Varieties Wisely
Timing of maturity determines your harvest routine. Quick varieties like 'YaYa' combine the qualities of a salad in 55 days. Mid-term varieties like 'Danvers' take 75 days before the root becomes a considerable root. Winter varieties, such as 'Autumn King', take 90 days to mature but become sweeter after the first frost. Choose varieties best suited to your comfort level with waiting!
Soil depth influences variety. My clay garden is perfect for little stubby 'Chantenay' roots. Sandy patches are home to long 'Imperator' types. Container gardeners find the 'Paris Market' compact variety to thrive in short pots. Always refer to seed packets for soil tolerance (depth) before planting.
Try colorful carrots aside from orange. Purple 'Dragon' offers an earthy taste complemented by its rich antioxidant content. The yellow 'Moon' flavored varieties have a buttery taste. White carrots keep fresh in storage. Each color brings different dietary benefits. I plant rainbow rows to have vibrant harvests.
Frost tolerance is significant when planting in the fall. A variety such as 'Autumn King' will freeze deliciously and improve in taste over the winter. 'Resistafly' is tough against cold and pest pressure. The best advice is to check variety descriptions for winter hardiness. These champions will prolong your harvest into the snow days.
Maturity Time
- Early varieties (55-65 days): Ideal for succession planting and quick harvests
- Mid-season varieties (65-80 days): Balance of size and flavor for general use
- Winter varieties (80-100 days): Best for storage and frost-sweetened harvests
- Check seed packets for 'days to maturity' specific to your climate zone
- Stagger plantings of different maturity types for continuous harvest
Soil Adaptability
- Short varieties (4-6 inches/10-15 cm): Tolerate heavy or rocky soils better
- Cylindrical types: Need deep, stone-free soil for straight roots
- Raised bed options: Select varieties bred for container growing
- Clay soil solutions: Choose stubby 'Chantenay' types (3-4 inches/7.5-10 cm long)
- Sandy soil advantage: Supports longer 'Imperator' varieties (8-9 inches/20-23 cm)
Flavor Profiles
- Orange varieties: Classic sweet flavor with high beta-carotene
- Purple carrots: Earthy taste with antioxidant anthocyanins
- Yellow types: Mild flavor with lutein for eye health
- White carrots: Subtle sweetness with crisp texture
- Red varieties: Berry-like notes with lycopene content
Climate Suitability
- Heat-tolerant: 'YaYa' and 'Bolero' resist bolting in warm zones
- Cold-hardy: 'Autumn King' sweetens after frost exposure
- Humidity-resistant: 'Resistafly' deters common pests
- Drought-adapted: 'Danvers' develops deep taproots (up to 8 inches/20 cm)
- Container varieties: 'Paris Market' grows well in pots (as small as 6-inch/15 cm deep)
Disease Resistance
- Carrot fly resistance: 'Flyaway' and 'Resistafly' varieties
- Leaf blight tolerance: 'Bolero' offers strong protection
- Root knot nematode: 'Nelson' has natural resistance
- Powdery mildew: 'Mokum' shows reduced susceptibility
- Always rotate planting locations yearly to prevent disease buildup
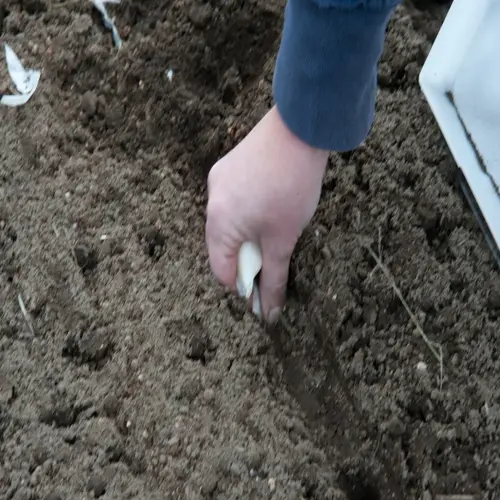
Step-by-Step Sowing Guide
Soil preparation is the foundation of the carrot nursery. Remove all rocks and debris from the top 8 inches of soil. Mix in 30% coarse sand with native soil for excellent drainage. Rake it smooth like a pastry counter. Water deeply one day before sowing seeds for optimal seed contact.
Seeds should be sown shallowly and close together.Creating ¼-inch-deep furrows with a stick works best. Space the seeds every inch along rows that are spaced 12 inches apart. Cover with potting mix only lightly. Tiny seeds need light to germinate. I prefer pelleted seeds for ease of spacing.
Quickly troubleshoot problems germinating sometimes. Slow germination is typically due to cold soil temperatures - try using a row cover. Are fungi an issue? Watering in the morning may be a solution. Are birds eating sweet seeds? Netting may solve the problem. I also delineate the row clearly to avoid disturbing seedlings as they germinate.
Succession planting allows for harvests time and time again. Plant new rows 2-3 weeks apart until midsummer. Choose varieties adapted to the seasons: fast-growing varieties in spring, and frost resistant varieties in fall. This will allow you to fill your basket on a continuous basis from June until snow falls.
Soil Preparation
- Clear planting area of rocks/debris to 8-inch (20 cm) depth using garden fork
- Mix soil with 30% coarse sand and 20% compost for optimal drainage
- Rake surface smooth, creating fine tilth without compacting soil
- Water thoroughly 24 hours before sowing to pre-moisten bed
- Test drainage: Dig 12-inch (30 cm) hole, fill with water; should drain within 4 hours
Seed Placement
- Create ¼-inch (0.6 cm) deep furrows using hoe handle or finger
- Space rows 12-18 inches (30-45 cm) apart for proper airflow
- Place seeds 1 inch (2.5 cm) apart; use pelleted seeds for easier handling
- Cover lightly with seed-starting mix; press gently for soil contact
- Label rows with variety and sowing date using weatherproof markers
Moisture Management
- Mist surface daily with fine-spray nozzle to prevent seed displacement
- Cover with burlap or row cover to retain moisture during germination
- Maintain soil temperature at 2-inch (5 cm) depth: 60-70°F (15-21°C) for optimal sprouting
- Check moisture depth: Top ½ inch (1.3 cm) should stay consistently damp
- Transition to drip irrigation once seedlings establish true leaves
Germination Care
- Expect sprouts in 7-21 days depending on soil temperature
- Remove covers immediately upon first seedling emergence
- Thin seedlings at 2-inch (5 cm) height to 1-inch (2.5 cm) spacing
- Apply diluted seaweed extract (1 tbsp/gal) to strengthen seedlings
- Protect from slugs with diatomaceous earth rings around seedlings
Thinning Technique
- Final thin at 4-inch (10 cm) height to 3-inch (7.5 cm) spacing
- Water before thinning to ease root separation
- Snip extras at soil line instead of pulling to avoid root disturbance
- Use thinnings in salads; greens are edible and nutritious
- Mulch around remaining plants with straw to suppress weeds
Best Soil for Carrot Success
Stone-free soil is essential for growing straight carrots, a lesson I learned the hard way after several years of harvesting forked roots. Remove only the rocks from the top 12 inches of soil. If possible, follow up with a garden sieve to get them all. This provides a handiwork for the roots to grow downward without any matter in their way.
Amend the soil mix according to the garden type. Sandy soil requires 20% compost to retain moisture. Heavy clay soils require 40% coarse sand to allow drainage. Loamy soils require 10% sand. You can test the texture by squeezing the soil in your hand - it should break apart like cookie dough.
Check pH levels well with a probe meter. Carrots prefer a pH of 6.0-6.8. I test the soil every spring before I plant. Add lime for acidic soil or sulfur for alkaline soil. Cheap test strips are foolish. If you want to know the pH of soil for root crops, they are not reliable.
Match depth requirements with carrot varieties. Short varieties such as the 'Paris Market' need 6 inches. Standard varieties, such as 'Danvers', require slightly deeper soil: 8 - 10 inches. Long varieties, such as 'Imperator', require even deeper: 12+ inches. Container gardeners should also opt for deeper pots. Make sure to measure your soil depth prior to choosing seeds.
Texture Requirements
- Carrots need loose, crumbly texture to develop straight, unobstructed taproots
- Ideal composition: 60% native soil, 30% coarse sand, 10% compost
- Screen soil through ¼-inch (0.6 cm) mesh to remove stones and debris
- Test soil texture: Squeeze moist soil; it should crumble easily when released
- Avoid compaction by never working soil when wet
Depth Specifications
- Short varieties ('Paris Market'): Minimum 6-inch (15 cm) depth
- Standard varieties ('Danvers'): 8-10 inch (20-25 cm) depth
- Long varieties ('Imperator'): 12+ inch (30+ cm) depth
- Raised beds: Build sides at least 12 inches (30 cm) high
- Container gardening: Select pots minimum 12-inch (30 cm) depth
pH and Nutrients
- Optimal pH range: 6.0-6.8 (slightly acidic to neutral)
- Test annually using probe meter or lab test kit; avoid litmus strips
- Low pH solution: Add 1 cup (240 ml) agricultural lime per 10 sq ft (0.9 sq m)
- High pH solution: Mix 1 cup (240 ml) sulfur per 10 sq ft (0.9 sq m)
- Avoid fresh manure: Can cause forking; use aged compost instead
Drainage Solutions
- Test drainage: Dig 12-inch (30 cm) hole, fill with water
- Good drainage: Water drops 1-2 inches (2.5-5 cm) per hour
- Poor drainage solutions: Install French drains or raised beds
- Sandy soil fix: Add 20% compost to increase moisture retention
- Clay soil fix: Incorporate 40% coarse sand + 20% compost
Preparation Timeline
- 4 weeks before planting: Remove rocks and weeds
- 3 weeks before: Test pH and amend as needed
- 2 weeks before: Mix sand/compost into top 12 inches (30 cm)
- 1 week before: Water deeply to settle soil structure
- Day before planting: Rake smooth to fine tilth
When to Plant Carrots
Soil temperature guides carrot planting. At 2 inches deep, use a thermometer. Seedling sprouts best at 60-70°F. At temperatures below 45°F, seeds will rot. Above 85°F, germination will fail. I wait until the soil feels like cool skin in the morning to initiate planting.
Spring planting begins 2-4 weeks before your last frost date. Plant in the fall, 10-12 weeks before the first frost of the fall. Northern zones will plant seedlings between April and June, southern zones plant seedlings between February and March. Coastal gardens will either delay planting until the fog lifts or plant the seedlings so they can be grown in fog-tolerant plants. Always track local frost patterns.
Geographical differences are important. Gardeners in the Pacific Northwest can sow March-May. The Desert Southwest has two planting seasons--February and September. In tropical zones, carrots are typically grown from October to March. For specific planting windows, check your USDA zone. Microclimates greatly change these times.
Frost makes carrot flavor magical. Cold nights turn starch into sugars. Leave fall carrots for light frosts. Harvest after several frosty nights. This process makes candy sweet roots. Carrots in stores will never achieve a flavor like that.
Soil Temperature Rules
- Germination range: 45-85°F (7-29°C) with ideal 60-70°F (15-21°C)
- Measure at 2-inch (5 cm) depth using soil thermometer
- Below 45°F (7°C): Seeds remain dormant, risk rotting
- Above 85°F (29°C): Poor germination; wait for cooler temps
- Use cold frames to warm soil in early spring
Spring Planting
- Direct sow 2-4 weeks before last frost date
- Succession plant every 2-3 weeks until early summer
- Protect seedlings with row covers if frost threatens
- Northern zones: Plant Apr-Jun after soil thaws
- Southern zones: Plant Feb-Mar before heat peaks
Fall Planting
- Sow 10-12 weeks before first fall frost date
- Time for roots to mature before hard freeze
- Frost exposure enhances sweetness in carrots
- Mulch heavily for overwintering in zones 6+
- Harvest throughout winter during ground thaws
Soil Preparation
- Loosen soil to 12-inch (30 cm) depth before planting
- Mix in 30% sand for heavy soils to prevent forking
- pH level: Maintain 6.0-6.8 for optimal growth
- Avoid fresh manure; causes root deformities
- Rake to fine tilth for consistent seed contact
Microclimate Considerations
- South-facing slopes: Plant 1-2 weeks earlier in spring
- Low-lying areas: Delay planting until frost risk passes
- Urban gardens: Utilize heat-retaining walls for early starts
- Coastal zones: Account for cooler summers in timing
- Use soil thermometers for site-specific decisions
Bolting Prevention
- Avoid planting in peak heat: Soil >80°F (27°C) triggers premature flowering
- In warm zones: Plant heat-tolerant varieties like 'YaYa' or 'Bolero'
- Provide afternoon shade during summer heat waves
- Maintain consistent soil moisture to reduce stress
- Harvest immediately if flowering stalks appear
5 Common Myths
Adding sugar to the soil will make carrots sweeter through root uptake during the growing process.
This is erroneous; carrots produce their own sugars as a result of photosynthesis. Applying sugar to the soil will actually draw in pests and cause fungal disease without improving flavor. Sweetness is a function of proper maturation, the cool temperatures turning starches into sugars, and genetics intrinsic to the variety. Good growing conditions, like balanced fertilization and adequate watering, will lead to sweeter roots.
Carrots must be placed deeply, at 2-3 inches below the surface for long, straight roots to form properly.
Depth of planting is very important: carrots should not be sown deeper than - inch. Deeply placing seeds uses up the seed's energy by the time it reaches the sunlight, and results in inadequate germination. Straightness of the root is determined by loose-skinned soil that is stone free, not seed depth. Shallow sowing of seed allows for quick emergence and maintaining contact with moisture. Seed should always be covered lightly with vermiculite or fine compost for maximum germination.
You don't need to thin carrot seedlings if you had originally seeded them very far apart in the planting row.
You will need to thin carrots regardless of the initial spacing that you included in your planting, because most seeds will come up at different rates. If the seedlings are very densely packed together there will be lots of competition for limited nutrients, and the root systems will become twisted or stunted. You will want to do some thinning at two points during the growing stage (1-inch and 4-inches) so that each carrot has adequate space. The final spacing should be between 2-3 inches apart (5-7.5 cm) so that there will not be competition for nutrients and the roots can expand naturally without distortion.
Carrots cultivated in containers will be smaller and not as sweet-tasting as if they are grown in garden beds.
Carrots grown in containers can exhibit similar characteristics as in the ground or raised beds if there is sufficient soil depth and soil volume. Plant carrots that are bred for containers (e.g., Paris Market) and ensure the container is a minimum 12 inches (30 cm) deep and filled with a loose, fertile planting mix. Proper watering and fertilizing will overcome the limited soil volume and depth in the container. There are added benefits to growing carrots in containers such as improved pest management, the ability to grow in soil that does not carry soil pathogens and, in some cases, roots that are of better quality than the equivalent grown in the ground or raised bed.
Applying high-nitrogen fertilizer throughout the growing season produces larger carrot roots with better yields.
Excess nitrogen promotes lush foliage at the expense of root development, causing hairy or split carrots. Balanced 5-10-10 (N-P-K) fertilizer applied only at planting and mid-growth provides necessary phosphorus for root expansion. Over-fertilization also increases nitrate accumulation in roots. For optimal growth, conduct soil tests and amend based on deficiencies rather than routine high-nitrogen applications.
Conclusion
The foundation of all your carrot endeavors still rests on soil prep. Loose and stone-free soil, at least 12" deep, allows roots to grow straight and strong. I've seen gardens completely turned around with proper work on the soil. Align this foundation with your frost dates for optimal timing.
Frost dates govern your entire planting schedule. In the spring, sowing can be initiated weeks before the last frost; for fall planting, we align the timing with the predicted first frost date. Once I began tracking these dates, my harvests improved substantially. Your carrots will appreciate being honored for their seasonal rhythms!
Moisture consistency is paramount for carrot quality. Confirm moisture daily with the finger test. The soil should feel like a damp sponge. I water in the early morning to minimize evaporation. This gets me consistently sweet, crisp carrots without cracked roots.
Selecting a variety suitable for your area is the final piece of this puzzle. Suppose you want compact types for containers or iceberg-hardy varieties for northern zones. In that case, I grow rainbow carrots because of their delightful visual aesthetics. Select seeds that suit your soil depth and climate for dependable abundance.
External Sources
Frequently Asked Questions
What month should I plant carrots?
Planting months vary by region but follow these principles: Sow spring carrots 2-4 weeks before your last frost date, typically March-May. For fall harvests, plant 10-12 weeks before first frost, usually July-August. Always verify using local frost date calculators.
Can carrots survive winter in the ground?
Yes, carrots tolerate freezing temperatures when properly prepared:
- Mulch heavily with 6+ inches of straw before ground freezes
- Harvest during winter thaws before roots deteriorate
- Works best in zones 5+ with reliable snow cover
Does one carrot seed grow one carrot?
Each carrot seed produces a single root plant. However, thinning is essential because:
- Seeds often cluster, requiring spacing adjustments
- Crowding causes twisted or stunted roots
- Thin seedlings twice for optimal growth
What's the secret to straight carrot roots?
Achieving straight carrots requires three fundamentals: Stone-free soil loosened 12+ inches deep, consistent moisture verified by finger tests, and avoiding nitrogen-heavy fertilizers. Sandy soil amendments prevent forking while proper thinning eliminates root competition.
Are coffee grounds beneficial for carrots?
Coffee grounds offer limited benefits and significant risks:
- Acidity may lower soil pH below optimal 6.0-6.8 range
- Can create crusting that hinders seedling emergence
- Attract pests without providing substantial nutrients
- Compost thoroughly before use in moderation
Should carrots be planted in full sun?
Carrots require at least 6 hours of direct sunlight daily. In hot climates, provide afternoon shade to prevent soil temperatures exceeding 85°F. Morning sun with filtered afternoon light maintains ideal growing conditions for consistent root development.
What plants should never be near carrots?
Avoid these incompatible neighbors:
- Dill or fennel (inhibit root development)
- Parsnips (share common pests and diseases)
- Potatoes (compete for phosphorus resources)
- Walnut trees (juglone toxicity)
How long do carrots take to sprout?
Germination timing depends on soil conditions:
- 7-10 days in 60-70°F (15-21°C) ideal temperatures
- 14-21 days in cooler 50°F (10°C) soils
- Cover seeds with row cover to maintain warmth
- Soaking seeds may reduce time slightly
Can I grow carrots in containers?
Absolutely! Container success requires:
- Minimum 12-inch deep pots with drainage
- Varieties bred for containers like 'Paris Market'
- Loose soil mix with extra sand
- Frequent moisture checks (containers dry faster)
Why do carrots crack or split?
Cracking results from inconsistent moisture levels. Growth spurts after dry periods cause internal pressure fractures. Prevent splitting with:
- Regular 1-inch waterings during root expansion
- Mulching to maintain soil moisture
- Avoiding heavy fertilization after drought