
Fresh basil elevates any basic meal to gourmet status. Its fragrant leaves serve as the base for pesto, the quintessential Caprese salad, and dozens of Mediterranean-inspired dishes. Home gardeners love growing basil for its delicious taste and easy-to-grow nature. But knowing when to plant basil will determine whether the plant is weak or yields a plentiful harvest.
The timing of your planting has a direct influence on the health and productivity of your basil. If you plant too early, you risk weak plants or frost damage. If your timing process is right on track, you will have bushy plants with a strong flavor. Everything about the plant, including oil concentrations in the leaves and pest resistance is impacted by timing.
To master basil planting, pay attention to three factors. First, understand your climate needs and frost dates. Second, make allowances for unconventional seasonal lengths and temperature variations. Third, link planting timing to harvesting targets for optimal flavor.
Container and Indoor Basil Basics
The timing for growing basil in containers is the same as for growing it outdoors. Wait until the frost has passed and nights consistently stay above 50°F. This avoids cold shock that can slow growth and vigor. Containerized plants enable better management of conditions compared to beds. But, they still want warm roots.
Adequate drainage is crucial to the success of container gardening. Always use pots with plenty of drainage holes on the bottom. Use a quality potting mix, made for containers. Never, ever use a dense garden soil. It will compact and suffocate roots. Your basil will reward you with lush growth.
Light is key to indoor herbs' success or failure, for plenty of sunlight (at least 8 hours a day), place containers near south-facing windows. Rotate pots regularly so that plants grow evenly. Too little light, and the plants become weak and leggy. If there is not enough light for the plants, try some grow lights (12 hours daily). I used a timer to make it easy.
Water when the top inch of potting mix has dried. Containers dry out more quickly than garden soil, so it's essential to check the moisture level daily when the weather is hot. Fertilize monthly with balanced fertilizer. Healthy roots = tasty leaves. With proper care, container growing can greatly extend your growing season.
Pot Selection
- Requirement: Minimum 12-inch (30 cm) diameter per plant for root space
- Material: Terra cotta or fabric pots preferred for breathability
- Drainage: Must have holes at bottom to prevent waterlogging
Light Requirements
- Natural light: South-facing window needed for 6+ hours daily
- Artificial light: LED grow lights required 12 inches (30 cm) above plants
- Duration: Maintain 12-hour light cycles year-round for growth
Watering Schedule
- Frequency: Water when top 1 inch (2.5 cm) of soil feels dry
- Method: Water base only - avoid wetting leaves to prevent mold
- Adjustment: Increase to daily watering during hot summer months
Fertilization Routine
- Type: Balanced liquid fertilizer (10-10-10 NPK ratio)
- Frequency: Every 3-4 weeks during growing season
- Caution: Reduce strength by half to avoid flavor reduction
Temperature Control
- Optimal range: 70-90°F (21-32°C) daytime temperatures
- Night minimum: Never below 50°F (10°C)
- Winter care: Move away from cold windows during freezing nights
Preserving Your Basil Harvest
Basil should be harvested for preservation when plants are approximately 6-8 inches tall, which is when oil content in the leaves is highest. It also matters what age of the leaves you choose to use. Young leaves will preserve the oils/flavors better than older leaves that have gained woody growth. The morning is the preferred time for harvesting basil after the dew has dried but before the heat of the day hits. This way, you can simulate summer flavors during winter with your preserved basil.
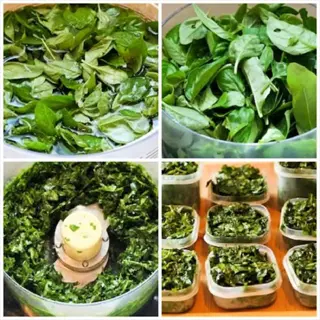
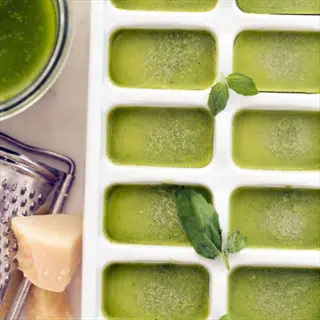
When it comes to preserving the freshness of basil, freezing is the best option. To make pesto cubes, just blend leaves with oil and freeze in trays. When you're ready to use them, toss the frozen cubes directly into still-lukewarm soups or even pasta. If you prefer, you can freeze whole, blanched leaves between pieces of parchment paper. This method preserves the fresh flavor for up to 10 months in the freezer.
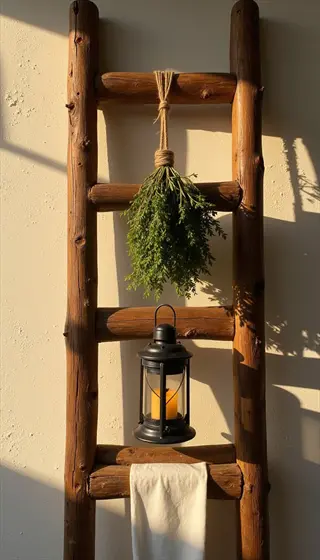
Basil drying is the best long-term storage method. Place small bunches upside down in a cool, dark, well-ventilated place for 2-3 weeks. Once dry, break up the leaves entirely and place them in jars, adding silica packets to each jar to further reduce moisture damage. If you dry basil, it will retain about 70% of flavor potency in a recipe.
For gourmet results, infuse oil. Pack clean, dry leaves in sanitized jars. Fill with olive oil. Refrigerate and use within 3 months. The oil provides marvelous flavor for dressings. Short-term refrigeration keeps the stems in water, similar to a cut flower bouquet.
Freezing Whole Leaves
- Process: Blanch leaves for 2 seconds then ice-bath shock before patting dry completely
- Storage: Layer between parchment in airtight containers for 8-10 months
- Best use: Soups and sauces where texture isn't critical
Pesto Ice Cubes
- Formula: Blend 2 cups basil with ½ cup olive oil, ⅓ cup nuts, garlic and salt
- Freezing: Pour into ice trays, freeze solid, then transfer to bags for 6 months
- Usage: Drop directly into pastas or spreads without thawing
Air Drying
- Method: Hang small bunches upside-down in dark, well-ventilated area for 2-3 weeks
- Storage: Crush completely dry leaves into jars away from light and moisture
- Flavor tip: Retains 70% flavor potency for 1 year when done properly
Oil Infusion
- Preparation: Pack clean dry leaves tightly in jars, cover completely with olive oil
- Storage: Refrigerate for up to 3 months, ensuring leaves stay submerged
- Usage: Flavored oil for dressings with preserved leaves as garnish
Refrigeration (Short-term)
- Method: Stand stems in 1 inch (2.5 cm) water, cover loosely with plastic bag
- Duration: Lasts 7-10 days when stored at 40°F (4°C) in refrigerator
- Tip: Change water daily and trim stem ends to prolong freshness
Freezing Process
- Step 1: Harvest in morning after dew dries for peak oil content
- Step 2: Rinse gently in cold water and spin dry in salad spinner
- Step 3: Blanch in boiling water 2 seconds to preserve color
- Step 4: Shock in ice water immediately to stop cooking process
- Step 5: Pat completely dry with towels before freezing
- Step 6: Arrange in single layer on parchment-lined tray
Pesto Cubes
- Blending: Use 2:1 basil-to-oil ratio for optimal freezing consistency
- Nut options: Pine nuts, walnuts or almonds all work effectively
- Acidity: Add 1 tbsp lemon juice per cup to prevent discoloration
- Freezing: Fill trays ¾ full to allow for expansion during freezing
- Storage: Transfer to vacuum-sealed bags after 24 hours freezing
- Serving: One cube typically seasons one pasta serving
Drying Techniques
- Bunch size: Keep under 10 stems per bundle for proper air flow
- Location: Choose dark area with humidity under 60% for best results
- Testing: Leaves crumble completely when dry enough for storage
- Crushing: Remove stems before crumbling leaves into jars
- Oven alternative: Dry at 90°F (32°C) with door cracked for 4-6 hours
- Storage: Use silica packets in jars to absorb residual moisture
Oil Infusion
- Sterilization: Boil jars and lids for 10 minutes before packing
- Packing: Press leaves down firmly to eliminate air pockets
- Coverage: Ensure oil covers leaves by at least ½ inch (1.25 cm)
- Prevention: Add 1 tbsp vinegar per cup to inhibit bacterial growth
- Storage: Always refrigerate and use within 3 months maximum
- Safety: Discard if cloudiness or off-odors develop
Refrigeration
- Container: Use tall narrow glasses to keep stems upright in water
- Covering: Loosely tent with perforated plastic bag for humidity
- Temperature: Maintain consistent 35-40°F (2-4°C) in crisper drawer
- Maintenance: Trim ¼ inch (0.6 cm) from stems every other day
- Revival: Refresh wilted leaves in ice water for 15 minutes
- Limitation: Not suitable for long-term storage beyond 10 days
Essential Basil Care Routine
Regular basil watering ensures healthy growth. When the top inch of soil is dry, then water deeply every 2-3 days. During heat waves with temperatures above 85 degrees, it's best to water daily in the morning. When watering, always try to water at the base of the soil where it meets the pot to prevent fungal diseases on the leaves. Maintaining this rhythm helps plants avoid wilting, promotes healthy growth, and encourages strong root development.
Pruning basil will greatly affect how much you'll be able to harvest. Shortening the stem tips on a weekly basis will result in more bushy growth. When pruning, always cut above leaf nodes. Cut any flower buds immediately so that the energy can be directed towards leaf growth. You will get twice the harvest with consistent pruning than without pruning.
Adjust your plant care to the season. Spring is all about establishing roots with moderate watering. Summer requires more water and some afternoon shade in hot environments. Fall means cutting back on herb fertilization as growth slows down. Winter means bring your pots inside before the frost!
Monthly herb fertilization with balanced 5-5-5 NPK formula sustains growth. Container plants require feeding every other week, as nutrients leach out over time. Don't over-fertilize! It weakens flavor. Your seasonal care routine enables continuous harvesting from the time of planting until frost.
Watering System
- Frequency: Water when top 1 inch (2.5 cm) of soil is dry - typically every 2 days
- Method: Water soil base only to prevent leaf diseases and fungal issues
- Adjustment: Increase to daily watering during heat waves above 85°F (29°C)
- Signs: Wilting indicates under-watering; yellow leaves signal over-watering
Nutrient Management
- Fertilizer type: Balanced organic formula (5-5-5 NPK ratio) for steady growth
- Frequency: Apply every 3 weeks during active growing season (June-September)
- Container plants: Require bi-weekly feeding due to nutrient leaching
- Warning: Excess nitrogen reduces flavor potency in leaves
Pruning Technique
- Initial pruning: Cut main stem above second leaf node when plant reaches 6 inches (15 cm)
- Maintenance: Weekly removal of top ⅓ growth from each stem
- Flower prevention: Pinch off flower buds immediately upon appearance
- Rejuvenation: Cut back to lowest leaves if plants become leggy
Seasonal Adjustments
- Spring: Focus on root development with moderate watering
- Summer: Increase watering frequency and provide afternoon shade in hot climates
- Fall: Reduce fertilization as growth slows before first frost
- Winter protection: Cover plants or move containers indoors below 50°F (10°C)
Pest and Disease Control
- Common pests: Hand-remove aphids; use neem oil for whiteflies
- Prevention: Ensure proper spacing (12+ inches/30+ cm) for airflow
- Mold issues: Avoid overhead watering; treat gray mold with baking soda spray
- Companions: Plant with marigolds to naturally deter pests
Starting Basil: Seeds vs. Transplants
*Basil seeds* provide rewarding growth, but patience is required to establish them. For best results, start basil seeds indoors 6 to 8 weeks before the last expected frost date. Basil requires warm soil of approximately 70°F to germinate successfully, which typically takes 5-10 days before sprouts appear. After sprouts appear, seedlings grow true leaves from the remainders of their cotyledons, which takes about 4-6 weeks.
Using herb transplants from a nursery allows for instant satisfaction. You buy them, skip the germination process, and plant them. However, even herb transplants require a vital period of hardening off before planting into the garden. Start this process 7-10 days before going outdoors and begin with two hours of sunlight on the first day, increasing by an hour each subsequent day.
Temperature regulation differentiates these techniques. Seeds require constant warmth for germination. Once it's hardened, transplants can weather cool nights. Be sure to wait until overnight temperatures are above 50°F before planting them outdoors. Cold shock inhibits growth and development, regardless of the method used for initiation.
The hardening off process prevents transplant shock. Start with 1 hour of morning sun. Increase exposure by 2 hours daily. Protect your plants from temperatures below 50°F. Plants that are properly hardened off will establish themselves more quickly and with minimal foliage loss.
Timeline
- Start indoors: 6-8 weeks before last frost date
- Germination: 5-10 days at 70-85°F (21-29°C) soil temperature
- Transplant ready: When seedlings have 4-6 true leaves (4-6 weeks)
Planting Method
- Depth: Sow seeds ¼ inch (0.6 cm) deep in seed trays
- Medium: Use sterile seed-starting mix, not garden soil
- Watering: Mist gently to avoid displacing seeds; keep consistently moist
Light Requirements
- Initial: No light needed until germination occurs
- Post-germination: 14-16 hours daily under grow lights 2-4 inches (5-10 cm) above plants
- Natural light: South-facing window minimum 6 hours direct sun
Transplant Preparation
- Timing: Begin hardening off 7-10 days before outdoor planting
- Process: Gradually increase outdoor exposure from 1 hour to full days
- Conditions: Wait until nighttime temperatures exceed 50°F (10°C)
Troubleshooting
- Leggy seedlings: Indicates insufficient light - lower grow lights
- Damping off: Caused by overwatering - water only when surface dries
- Slow growth: Soil temperature below 65°F (18°C) - use heat mat
Time Savings
- Benefit: Skip 4-6 week germination/growth period
- Ideal for: Gardeners with late planting schedules
- Selection: Choose vigorous plants with deep green leaves
Quality Control
- Inspection: Avoid plants with yellow leaves or root-bound pots
- Variety access: Nurseries offer unique types like Thai or lemon basil
- Spacing: Select pots with only 3-5 plants (not overcrowded)
Planting Technique
- Separation: Gently divide root balls if multiple plants in pot
- Depth: Plant at same level as nursery container
- Watering: Soak root zone immediately after transplanting
Hardening Off
- Duration: 7-10 day adjustment period mandatory
- Method: Start with 1 hour morning sun, increase daily exposure
- Protection: Bring indoors if temperatures drop below 50°F (10°C)
Post-Planting Care
- Initial pruning: Trim top 1/3 to reduce transplant shock
- Watering: Daily for first week then reduce to every 2-3 days
- Fertilizer delay: Wait 2 weeks before first feeding
Basil Planting Time Essentials
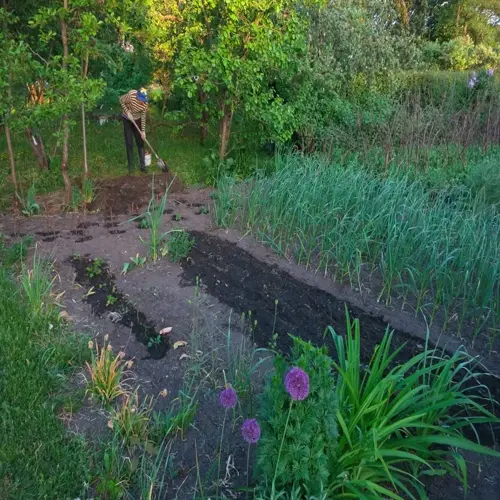
The timing of your basil planting will come down to one indisputable rule. Wait for consistent nighttime temps above 50°F and the last frost date in your area. If you plant any sooner, you risk cold damage that will harm or even kill young plants. This timing also keeps tender basil safe from abrupt chiller temps.
Zone gardening schedules planting by region. Warmer Zones 9 and 10 can begin growing as early as February. Colder zones 3-4 will not be able to grow until late May. Check your specific USDA hardiness zone to know the exact dates. There are also microclimates (near walls or slopes) that might provide earlier planting spots.
Soil temperature influences the success of seeds and transplants. Ideal seed germination occurs with a minimum soil temperature of 60°F. Followed by transplant root establishment, which requires a minimum soil temperature of 65°F. Use a soil thermometer to check the morning temperatures. As a side note, if you have dark mulch, it will warm the cold spring soil more quickly.
Notate your precise planting date every year. Mark how temperature affects growing/harvest times. That gives you personalized basil planting times data. Your garden journal will be the best recommendation for future years. Adapt based on your firsthand experience in your local setting.
Temperature Thresholds
- Absolute minimum: 50°F (10°C) nighttime temperature for survival
- Optimal range: 70-85°F (21-29°C) daytime for vigorous growth
- Soil requirement: Minimum 60°F (16°C) for seed germination
- Danger zone: Below 45°F (7°C) causes irreversible leaf damage
Frost Protection
- Cloches: Use plastic bottles or commercial covers for unexpected cold snaps
- Floating row covers: Protect newly planted seedlings for 2-3 weeks
- Microclimates: Plant near south-facing walls for 5-10°F (3-6°C) warmth
- Emergency measures: Cover with blankets overnight when frost threatens
Soil Preparation
- Drainage test: Dig 12-inch (30 cm) hole; water should drain in 4 hours
- Amendment: Mix 3-inch (7.5 cm) compost layer into topsoil
- pH level: Maintain 6.0-7.5 for optimal nutrient absorption
- Warming tips: Use dark mulch to increase soil temperature 5-8°F (3-4°C)
Planting Depth/Spacing
- Transplants: Set at same depth as nursery container
- Seeds: Sow ¼ inch (0.6 cm) deep with 2-inch (5 cm) initial spacing
- Final spacing: 12-18 inches (30-45 cm) between plants for airflow
- Root care: Gently loosen root-bound transplants before planting
Microclimate Optimization
- Sun exposure: Minimum 6 hours direct sun daily (8+ ideal)
- Wind protection: Use trellises or shrubs as windbreaks
- Slope planting: Choose south-facing slopes for earliest planting
- Reflective surfaces: Position near light-colored walls for heat retention
5 Common Myths
Basil has no problem growing in colder months; after all, it is a hardy herb that grows just like other garden herbs around frost temperatures.
However, Basil is extremely sensitive to cold. Once the temperature drops below 50°F (10C), it sustains irrefutable tissue damage, and the blackening of leaves could occur in a matter of hours when exposed to frost. As for a tropical herb, it requires a minimum warmth continuously after germination, to the point that it can be lost to frost easily over the winter in an unprotected outdoor environment cold climate, even after season extension through techniques such as cloches or row covers.
When basil flowers, it adds complexity to the flavor just like the leaves we eat.
Flowering induces certain biochemical changes that convert the flavor from sweet, peppery to bitter, and reduces the aromatic molecules because the plant is devoting its resources to reproduction. If the buds are pinched off to stop flowering, the original sweet flavor that is important for pesto and other dishes is preserved. Flowering basil will decrease leaf production by 70%, and can also decrease the quantity of essential oil that contribute to authentic Italian flavor, which often incorporates basil.
More fertilizer always results in better basil growth since an abundance of nutrients is directly related to bigger plants and yields.
Too much nitrogen fertilizer results in more leaves and less flavor, the leaves will be bland and will have fewer essential oils. Feeding with 5-5-5 NPK fertilizer once a month keeps plants growing well and maintains the aroma and flavor. The unique flavor of basil contributes to its quality, and too much fertilizer increases susceptibility to diseases and pests.
Basil requires soil that is constantly damp like other water-loving plants and for top results, should be watered deeply every day or every other day.
Basil prefers slightly damp soil with adequate drainage, super wet or soggy soil leads to root rot and fungal diseases. Water every time the first "inch" inch of soil dries out, soaking the soil thoroughly, but infrequently allows for deep rooting, plants in soggy soil will die and allow for diseases and pathogens to grow in the root zone.
Every basil variety requires the same care and growing conditions; they are all the same species of plant.
While they all happen to be basil, different varieties can have incredibly different needs: heat-tolerant types such as Thai basil can take the heat up to 90°F (32C) that would wilt Genovese; purple basils want much more sun than green basils. Lemon and cinnamon basils need a lot less water than sweet basils, which again shows that care must be specific to the variety for best growth and flavor.
Conclusion
Timing is the thread that weaves through every step of basil care like a golden rule; it's the rhythmic quality of timing above all that influences your basil success in the end. The timetable for planting, after the last freeze and before the harvest, right up to the flowering stage, is all connected to the seasons. Timing these steps creates strong plants.
Keep in mind that frost sensitivity dictates where to begin. Temperature takes over daily care for the rest of the season. And the timing of preservation seals is optimal for maximum flavor. These three principles are the basis of your herb gardening. Your planting calendar is your greatest resource.
Use these timing strategies for continuous harvest. Timing is wise to create harvests of succession-planted crops, each separated by a few weeks, to continue your season. Timing also applies to preservation, allowing you to capture those lovely summer flavors for winter storage. Time container gardening to maximize season extension in cooler zones. Lastly, time is the difference between limited harvests and year-round harvests.
Select one timing adjustment to start with this season. It could be tracking soil temperatures or noting frost dates. Small steps create observable gains. Your basil will reward you with a show-stopping display of wonderful growth and flavor, fueled by the timing skill that makes what once felt like effort/graft now feel like effortless abundance.
External Sources
Frequently Asked Questions
What month should I plant basil?
Plant basil after the last spring frost when nights stay above 50°F. Timing varies by region: warmer zones (9-10) can plant as early as February-March, while colder zones (3-4) should wait until late May or early June for optimal soil warmth.
Does basil need full sun or shade?
Basil thrives in full sun with at least 6-8 hours of direct sunlight daily. Insufficient light causes weak growth and reduced flavor. In extremely hot climates, provide afternoon shade to prevent leaf scorching while maintaining vigorous growth and essential oil production.
Can I transplant supermarket basil outdoors?
Yes, but gradually acclimate plants over 7-10 days. Key steps:
- Start with 1 hour of morning sun
- Increase outdoor exposure daily
- Transplant only when nights exceed 50°F
- Plant at same depth as original container
How often should I water basil?
Water when the top inch of soil feels dry, typically every 2-3 days. Increase to daily watering during heat waves above 85°F. Always water at the base to prevent fungal diseases, and ensure containers have drainage holes.
Can basil survive winter indoors?
Yes, with proper care:
- Place near south-facing windows or under grow lights 12 hours daily
- Maintain temperatures between 65-75°F
- Water when soil surface dries
- Avoid cold drafts from windows
Why do basil plants die after flowering?
Flowering signals the end of basil's lifecycle as energy shifts from leaf production to seeds. Pinch off buds immediately to prolong harvests. Regular pruning of top leaves delays flowering and maintains leaf quality for culinary use.
What are common basil harvesting mistakes?
Key errors to avoid:
- Harvesting more than ⅓ of plant at once
- Cutting below lowest leaves
- Picking during midday heat
- Not pruning flower buds immediately
- Using dull tools that damage stems
Do coffee grounds help basil growth?
Coffee grounds can slightly acidify soil and add nitrogen, but use sparingly. Mix no more than ½ inch into topsoil monthly. Excessive amounts cause nutrient imbalances. Better alternatives include balanced organic fertilizer and compost for sustained growth.
How long does basil take to grow from seed?
Basil requires 5-10 days for germination and 4-6 weeks to reach transplant size. Total time to first harvest is 10-12 weeks from seeding. Growth accelerates in warm soil (70-85°F) with consistent moisture and full sunlight exposure.
Can basil and tomatoes be planted together?
Yes, they're excellent companions:
- Basil repels tomato hornworms and whiteflies
- Tomatoes provide partial shade in hot climates
- Both require similar watering frequency
- Plant 12-18 inches apart for airflow
- Avoid crowding roots in containers