
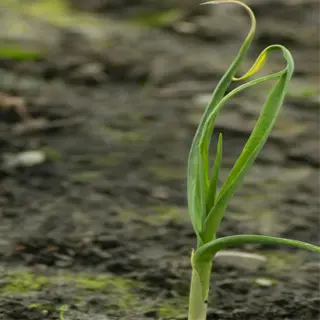
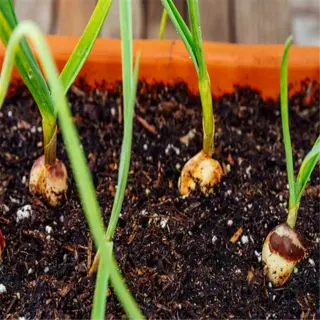
Understanding how to harvest garlic will ultimately affect the quality of your bulbs. Garlic develops through specific stages from its planting until it is ready for harvesting. The green shoots emerge in early spring, followed by leaves. After the garlic has experienced the longest day of the year, it begins forming bulbs.
Harvest timing is indeed more related to your climate zone than the calendar. In cooler climate zones such as 3-5, garlic is typically ready for harvest from mid-July until August. In warmer climate zones such as 6-8, it is often ready by late June. It is important to look at the plants, rather than the calendar. Soil type may also affect this timing.
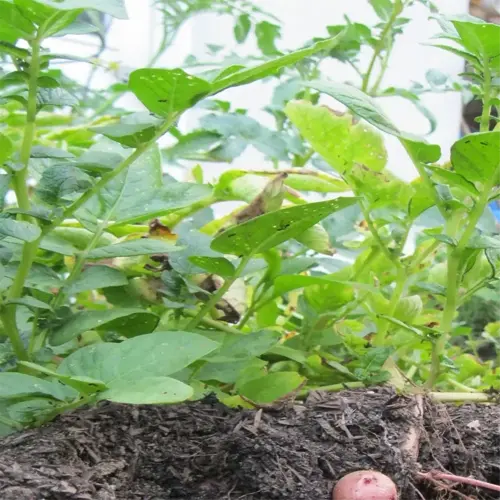
Bulbs in heavy clay soils develop more slowly than in more sandy soils. I remember losing a crop one year because I harvested too early in heavy, dense soil. To test for bulb size, brush all the dirt off of one plant. If the cloves fill the wrappers and there is no gap, it's ready to be harvested.
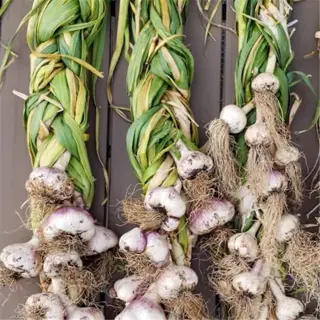
The timing of harvest affects storage longevity. Garlic harvested early will lack protective wrappers and will spoil quickly. Garlic harvested too late could lead to split bulbs with the cloves exposed. The goal is to have the lower 50% of the leaves yellow. The upper leaves should still be green and look vigorous.
Signs Your Garlic Is Ready to Harvest
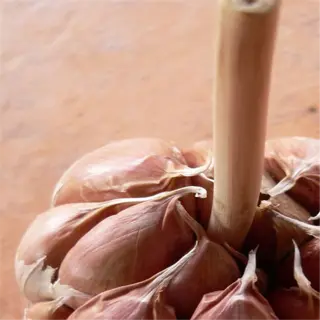
Hardneck garlic, as well as softneck or artichoke varieties, exhibit different signals of readiness for harvest. The hardneck varieties create a clear decision, letting you know when to harvest when there are still 4-5 green leaves lying above ground. Softneck varieties require you to get up close and personal with the bulbs since you want to harvest when they have 1-2 green leaves remaining. All cover the bulb in papery wrappers, but the firmness of the neck indicates the bulb is ready for harvest.
Look at the soil line on the wrappers for evidence of harvest. Hardneck wrappers cling more tightly to the bulb, while softneck wrappers separate more easily. Rubbing the wrapper between your fingers will give you a sense of the moisture level. If the wrapper feels crisp and crackles like parchment, your garlic is likely ready to dig. I've miscalculated this many times before losing whole bulbs to rot.
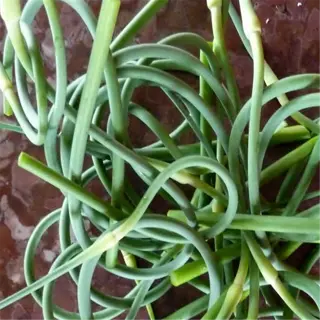
The timing of scape removal directly impacts harvest windows for hard necks. Once curly scapes have been cut away, anticipate approximately 3 weeks for the bulbs to reach full maturity. This waiting period allows the bulbs to expend energy diverted into cloves. So, make sure to note when you harvest scapes and then monitor the actual harvest date. Softnecks do not have scapes, but should still be monitored by leaf-count. Leaf count should yield similar accuracy in judging harvest time.
Once the lower leaves start to yellow, compare bulb sizes every week. Mature hard necks will push up against the soil and show splits in the bulbs. Softnecks may stay below the soil line, making leaf counts important. I made the mistake last season of harvesting a soft neck patch too early. The wrappers fell apart during the cure and after months of growth, I lost all of my progress.
Leaf yellowing pattern
- Lower leaves yellow first while upper leaves maintain green coloration
- Optimal harvest occurs when 50-60% of lower foliage shows discoloration
- Premature yellowing across all leaves suggests nutrient deficiency or disease
- Weekly monitoring recommended during last month of growth cycle
- Compare leaf color to standardized yellowing progression charts
- Discoloration should progress upward from oldest to newest leaves
Bulb wrapper integrity
- Gently remove surface soil to inspect wrappers without damaging them
- Mature bulbs show 3-4 intact papery layers above soil level
- Wrappers should crinkle audibly when rubbed between fingers
- Avoid bulbs with visible splits or fungal spotting on wrappers
- Ideal wrapper color ranges from ivory white to light tan
- Thicker wrappers indicate better storage potential post-harvest

Stem rigidity test
- Apply gentle pressure to stem 2 inches above soil line
- Mature hardneck stems resist bending without snapping
- Softneck stems remain flexible but show reduced elasticity
- Test multiple plants to account for individual growth variations
- Combine with leaf count assessment for accuracy
- Overly rigid stems may indicate delayed harvesting window
Post-scape timeline
- Begin daily monitoring 21 days after scape removal
- Bulb size increases rapidly during final 3-week period
- Harvest window opens when 30% of wrapper layers dry
- Delayed harvesting beyond 28 days risks bulb separation
- Track scape removal dates using gardening journal or app
- Combine with soil moisture tests for optimal timing
Bulb shoulder development
- Inspect bulb shoulders through soil using dental mirror
- Mature bulbs show rounded shoulders without neck constriction
- Undersized bulbs appear tapered at the stem connection
- Compare to variety-specific shoulder shape references
- Measure bulb diameter against expected size charts
- Should account for 75% of expected mature size
Step-by-Step Harvesting Guide
Assess soil moisture levels 48 hours before harvesting. The optimal moisture level is when the soil feels like a wrung-out sponge; it should not be wet and soggy but simply moist. A finger test works well; dig down a couple of inches, and if the soil clumps together (but does not drip), you are ready to go. If the soil is too dry, it will crack the bulbs when extracting them. I learned this the hard way after losing a crop because of extremely hard ground due to drought.
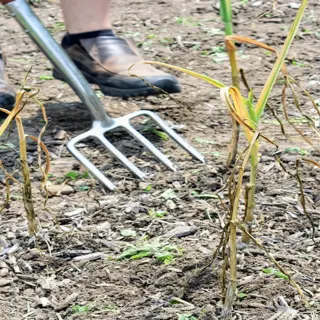
At a 45-degree angle, position your garden fork 6 inches from the base of the plants. Stick it straight down into the soil and rock it back to lift the bulbs without breaking them. Do not ever pull the stems, as that will remove the cloves from the basal plates. Use a garden claw for clay soil instead of a garden fork. To guarantee the integrity of the wrappers, angle the garden tool the right way.
Moist soil requires coddling. Rather than shaking bulbs, simply brush off the mud. Let bulbs dry in an upright position for 12 hours before curing. For dry soil, dust soil off the bulb immediately with a soft brush. Following last fall's rain-soaked harvest, I now always favor drying racks for drying bulbs instead of curing them in the field.
After harvesting, disinfect all tools with a 10% bleach solution. Clear all root fragments and leaf debris from the wooden beds. Rotate crops to break pest cycles. I spread aged compost immediately after clearing fields. This process rebuilds the soil structure before fall, allowing time for cover crops to establish.
Pre-Harvest Soil Prep
- Cease irrigation 7 days before planned harvest date using calendar alerts
- Verify soil moisture at 4-inch (10 cm) depth using manual probe or digital meter
- Create loose perimeter around bulbs with hand trowel to ease lifting
- Remove surface mulch 24 hours prior for natural soil compaction
- Avoid nitrogen-rich fertilizers 3 weeks before harvest timeline
- Mark harvest-ready plants with colored tags for easy identification
Bulb Extraction Technique
- Position spading fork at 45° angle 6 inches (15 cm) from plant base
- Leverage body weight to lift soil mass without yanking stems
- Shake bulbs gently while supporting stem base with opposite hand
- Inspect for damage: discard bulbs with pierced wrappers immediately
- Maintain 2-inch (5 cm) stem length during initial field processing
- Place undamaged bulbs in wide, shallow containers for transport
Field Curing Setup
- Select shaded area with 60-70% humidity for initial drying
- Arrange bulbs in single layer on elevated mesh racks
- Rotate bulbs 180° daily to ensure even airflow exposure
- Monitor morning dew accumulation using moisture sensor strips
- Implement rodent deterrents around curing area perimeter
- Cover with breathable row cover during unexpected rainfall
Post-Harvest Cleaning
- Use soft-bristled brush to remove remaining soil particles
- Avoid washing bulbs with water to prevent mold growth
- Inspect wrapper layers under bright natural light for defects
- Trim roots to ¼ inch (0.6 cm) using sterilized pruning shears
- Group bulbs by size for uniform curing timelines
- Temporary storage in ventilated crates before curing

Curing Environment Monitoring
- Maintain 65-75°F (18-24°C) temperature during first curing week
- Ensure continuous airflow with oscillating fans at low speed
- Measure humidity levels twice daily using digital hygrometer
- Adjust ventilation based on wrapper drying progression rates
- Check for condensation buildup under racks every 12 hours
- Record environmental data in harvest logbook for quality control
Curing and Preparing Garlic for Storage
While curing, hard necks need to be stored at humidity levels between 45 and 55%. In comparison, soft neck varieties need to be stored between 60 and 65%, with minimal adverse effects. I once stored hard necks in conditions with 70% humidity and saw sprouting within a couple of weeks. Use a hygrometer. Porcelain types need less moisture to avoid wrapper decay, while silverskins respond more favorably to elevated moisture levels.
Using sharp scissors, trim cleaned and dried stems a minimum of 1.5 inches above the bulbs. Make your cut at a 45-degree angle so moisture can't pool at the intersection of the bulb and stem. If braiding, leave the stems a minimum of 8 inches but allow them to dry completely. Never make a cut flush to the bulb, as it will lead to rot.
When it comes to curing spaces, creating airflow is more important than temperature. Set fans up to provide a cross-breeze that doesn't blow the fan directly on the bulbs. Open mesh racks trump solid shelves, they allow 360º circulation. I rigged up a used greenhouse with louvered vents to accomplish this. Stagnation spreads mold faster than heat will.
Combat humidity spikes by hanging calcium chloride packets near your bulbs. When the weather is rainy, space your garlic 3 inches apart on the racks. If you see any white hairy mold in the crop, separate that bulb from the rest and wipe it with a cloth dampened in vinegar if the mold is light enough. Last monsoon season, that kept 90% of what would otherwise be rotten, out of ruin!
Ventilation Requirements
- Maintain 1-2 air changes per hour in curing room
- Position fans 3 ft (0.9 m) above bulb level for optimal airflow
- Avoid direct airflow on bulbs to prevent uneven drying
- Monitor CO₂ levels below 1000 ppm using air quality meter
- Install louvered vents for passive air circulation
- Use hygrometer with data logging for humidity tracking
Bulb Inspection
- Check wrapper integrity using LED magnifying glass
- Test stem flexibility - should snap cleanly at 90° angle
- Measure bulb density - 1.05-1.10 g/cm³ indicates proper curing
- Identify mold spores using UV flashlight inspection
- Record weight loss - 15-20% reduction signals completion
- Verify uniform wrapper color across entire bulb surface
Storage Preparation
- Trim roots to ¼" (0.6 cm) using sanitized clippers
- Remove loose outer wrappers while keeping 3-4 intact layers
- Grade bulbs by size: small (<2"/5 cm), medium (2-3"/5-7.5 cm), large (>3"/7.5 cm)
- Apply food-grade diatomaceous earth for pest prevention
- Package in breathable containers with 2" (5 cm) buffer space
- Label with harvest date and variety using waterproof ink
Environmental Monitoring
- Track temperature fluctuations with digital data loggers
- Calibrate hygrometers weekly against reference standards
- Document dew point variations exceeding ±5°F (±3°C)
- Implement automated alerts for humidity spikes above 75%
- Compare ambient conditions to variety-specific curing charts
- Maintain night/day temperature differential below 15°F (8°C)
Post-Curing Handling
- Sort bulbs by storage duration: <6 months vs >6 months
- Apply natural antifungal treatment using cinnamon powder
- Layer bulbs in crates with parchment paper separators
- Implement FIFO (First-In-First-Out) inventory rotation system
- Conduct monthly quality checks for sprouting or soft spots
- Re-cure any bulbs showing moisture reabsorption signs
Storing Garlic for Long-Term Use
Softneck garlic varieties can be stored for a period of 10-12 months in ideal conditions; hardneck varieties last 4-6 months. I once lost a Rocambole crop because I thought they would store like Silverskins. You should be sure to track different varieties of garlic separately. Porcelain varieties come in between 6-8 months if you can control humidity precisely.
At 60-70°F, softnecks require a humidification level of 60-65 percent. Hardnecks perform well at 50-60°F and 50-55 percent humidity. A hygrometer is a useful way to measure humidity, and my $12 model has saved all my bulbs from rotting. Bulbs should be kept in the dark. Light will start to sprout bulbs even in the greatest conditions.
It is necessary to air out mesh bags every week. The slats of wooden crates must have 2-inch outlets in between the slats. I have run small batches in ceramic jars that have cork lids. Just wipe the inside with vinegar monthly. I used cardboard boxes multiple times last winter and because of condensation ruining 30 bulbs the last time, this is a waste of boxes for testing.
To avoid condensation, put silica gel packets underneath container lids. In humid locations, clean containers with cedar shavings. Rotate the bulbs from time to time to capture both sides. Last July, when I saw droplets in my root cellar, cloth sacks with rice in them saved my harvest.
Container Selection
- Choose breathable materials like burlap or untreated wood
- Ensure 2-3 inches (5-7.5 cm) between bulbs for airflow
- Avoid plastic containers - traps ethylene gas accelerating sprouting
- Line metal containers with parchment paper to prevent condensation
- Use UV-resistant containers for sunlit storage areas
Pest Prevention
- Apply diatomaceous earth around container bases
- Install copper tape barriers to deter slugs/snails
- Place cedar wood chips between bulb layers as natural repellent
- Use pheromone traps for pantry moth control
- Freeze bulbs at -20°F (-29°C) for 48 hours pre-storage to kill eggs
Environmental Control
- Maintain 1-2 air changes/hour using computer case fans
- Place hygrometers at multiple height levels in storage room
- Use calcium chloride packets to absorb excess moisture
- Install radiant barrier insulation for temperature stability
- Programmable thermostats with ±2°F (±1°C) accuracy
Quality Monitoring
- Inspect bulbs biweekly using LED headlamp for mold detection
- Weigh sample bulbs monthly - >15% weight loss indicates overdrying
- Test sprout inhibition by planting 2% of stock quarterly
- Conduct squeeze tests - firmness indicates proper preservation
- Document wrapper color changes using Pantone reference cards
Long-Term Monitoring
- Perform monthly visual inspections using 1000-lumen LED lighting
- Check for sprouting by gently pressing bulb bases weekly
- Record ambient conditions in storage logbook every 72 hours
- Rotate stock quarterly using FIFO (First-In-First-Out) system
- Re-calibrate monitoring equipment every 6 months against NIST standards
- Replace desiccants and pest deterrents every 3-4 months
Troubleshooting Common Harvest Issues
Small bulb clusters can be caused by poor soil fertility or overcrowding. An example from too much crowding I planted garlic cloves only 2 inches apart and had a spectacular harvest of marble-sized bulbs. To give garlic the best chance for a full-sized bulb, always plant cloves at least 6 inches apart in amended nutrient-rich soil, such as compost. Additionally, inconsistent watering during the bulbization stretch of growth will reduce bulb size potentially forever.
If you see yellowing leaves early in the season, your plants might have a fungal disease, or nematodes may be affecting your plants. Inspect the roots for lesions, a sign of onion maggots. Last year I lost 20 plants to Fusarium. Treat the soil with biofungicides before you plant. Make sure it drains properly to avoid waterlogged conditions that can cause yellowing.
Bulb splitting happens when you wait too long to harvest and the moisture in the soil fluctuates. After the green leaves have faded down to 5-6, it is time to harvest. Be sure to use a garden fork, and turn it at an angle away from the stems, as this prevents mechanical damage. I only learned this lesson after splitting off 30% of my crop by simply tugging on the stems.
To combat mold, space bulbs are at least 4 inches apart on drying racks in a well-ventilated place. In the extremely humid conditions of the monsoon season, I will also use box fans set to low speed in proximity to curing garlic. If white mold appears, wipe your bulbs down with cloths dampened with vinegar, which some claim will eradicate the spores. When ready, store cured garlic, along with silica gel packets, in breathable containers.
Soil Analysis
- Collect samples from 6" (15 cm) depth using soil probe
- Test for nitrogen deficiency (<20 ppm critical)
- Check potassium levels (200-300 ppm ideal)
- Identify heavy metal contamination risks
- Assess organic matter content (minimum 3%)
Bulb Splitting
- Measure stem diameter at harvest (>0.5"/1.3 cm ideal)
- Record rainfall patterns during final growth month
- Analyze planting depth consistency across rows
- Test bulb density (1.08-1.12 g/cm³ optimal)
- Evaluate clove separation force with dynamometer
Disease Identification
- Use 10x magnifier for fungal spore detection
- Conduct PCR testing for viral pathogens
- Monitor leaf temperature differentials >5°F (2.8°C)
- Implement sentinel plant monitoring system
- Document symptom progression with time-lapse photography
Environmental Stress
- Calculate heat units (growing degree days)
- Track UV exposure using dosimeter cards
- Measure wind shear impact with anemometer
- Install soil moisture sensors at multiple depths
- Correlate weather patterns with growth anomalies
Post-Harvest QA
- Implement weight loss tracking system
- Conduct ethylene concentration tests
- Use infrared thermography for cold spot detection
- Establish controlled atmosphere storage trials
- Perform monthly respiration rate measurements
5 Common Myths
Larger bulbs surely have better storage potential and flavor quality.
Mid-sized bulbs (2-2.5"/5-6.5 cm width) have the best storage potential because they contain balanced moisture. Large bulbs may have a hollow center and split wrappers during curing. Split wrapper and hollow centers provide entry points for mold spores and drying out.
Washing freshly harvested garlic bulbs improves its cleaniness and reduces the chance for disease.
Wetting harvested garlic invites fungal growth and more rapid decay. With a little technique and some judgement, you can dry brush the soil off and put in a ventilated area to dry, keeping the outer protective layers of skin as intact as possible. These protective layers inhibit pathogens while also maintaining the ideal relative humidity of 60-70%.
Refrigeration increases the shelf life of garlic by retarding the sprouting process.
Cold temperatures (under 40F and 4C) stimulate premature sprouting, resulting in bitter (sugar) flavours. For optimal storage in stable enzymatic conditions and naturally dormant garlic, temperatures of 50-60F (10-16C) and moderate humidity is suggested.
Green stems at harvest indicate immaturity and require delayed picking.
3-4 green upper leaves signal perfect maturity - they continue photosynthesizing during early curing while lower leaves brown naturally. Delaying harvest beyond this stage risks bulb splitting and pest infiltration.
All types of garlic have the same storage conditions and times.
Softneck varieties store 6-12 months at 60-70F (16-21C) and hardnecks store 3-6 months. Purple stripe types need to be stored in five to ten percent higher humidity than porcelain types to avoid drying out the wrappers and shriveling of the cloves.
Conclusion
Learning when to harvest garlic requires experience and observing both the color of the leaves and the wrapping of the bulb. I remember harvesting early and having shriveled garlic. Allowing some leaves to turn yellow, 40 to 50%, works to retain intact wrappers. This visual indicator is universal across climates and soil types.
Cure garlic at 60-70°F with airflow for 3 weeks then store hardnecks at 32-40°F. Softnecks tolerate 50-60°F but need 60-70% humidity. I keep a thermostat in the basement, and this inexpensive, $15 thermometer tool will help you avoid storage disasters. You will need to keep an eye on it every week, so watch the thermometer. Depending on the season, you should adjust containers.
A hardneck garlic will deteriorate and require different techniques to work with when you intend to use it within 6 months. Softnecks stored correctly can last around 10-12 months. This past year, I stored a variety of Spanish Roja hardneck garlic alongside the silverskins. By February, the hardneck garlic had sprouted, while the softnecks were still firm and intact. I've learned to mark what I have and when I stored it!
To prevent pests, rotate crops every year and wash out containers with vinegar. I put diatomaceous earth around my curing racks following a mite infestation. I routinely look over my garlic bulbs every week for soft spots. If garlic is affected, isolating the impacted heads is a more effective way to preserve your crop than prior treatments or any kind of reactive treatment.
External Sources
Frequently Asked Questions
How do you know when garlic is ready to harvest?
Garlic is ready when half the lower leaves yellow and bulb wrappers turn papery. Test by gently digging a bulb: cloves should fill wrappers without splitting. Timing depends on variety and local climate conditions.
What happens if garlic stays in the ground too long?
Overripe garlic develops split wrappers and loose cloves, reducing storage quality. Bulbs may rot in damp soil or dry out in heat. Harvest when 50% of leaves yellow but stems remain partially green.
How should garlic be dried after harvesting?
Cure garlic in a shaded, ventilated space for 3-4 weeks. Ideal conditions include:
- 60-70°F temperature range
- Moderate airflow to prevent mold
- Hanging in bundles or on mesh racks
- Intact stems for proper drying
What plants interfere with garlic growth?
Avoid planting garlic near:
- Peas or beans (stunt bulb development)
- Onions (compete for nutrients)
- Asparagus (chemical incompatibility)
- Parsley (inhibits clove formation)
Why does garlic sometimes fail to form cloves?
Clove formation fails due to:
- Insufficient winter chilling for hardneck varieties
- Overcrowded planting spacing
- Excessive nitrogen fertilizing
- Harvesting too early before bulb maturation
Can you replant garlic from the same harvest?
Yes, save large, healthy cloves for replanting. Avoid using damaged or diseased bulbs. Replant in fall for hardneck varieties or early spring for softnecks. Rotate planting locations annually to prevent soil-borne diseases.
Is freshly harvested garlic safe to eat?
Fresh garlic is edible but milder than cured bulbs. Uncured garlic has higher moisture content and shorter shelf life. For optimal flavor and storage, dry bulbs completely before long-term use.
When should garlic scapes be trimmed?
Trim scapes when they form 1-2 loops, redirecting energy to bulbs. Cut with clean shears just above the top leaf. Harvesting too late reduces bulb size; too early risks regrowth.
How does watering frequency affect garlic?
Water deeply once weekly during growth, tapering off as bulbs mature. Overwatering causes:
- Rotting bulbs
- Fungal diseases
- Poor wrapper formation
- Reduced storage longevity
Can moldy garlic be salvaged?
Discard bulbs with black mold or soft spots. White mold on wrappers can be brushed off if bulbs remain firm. Never consume garlic with pungent odors or mushy textures, which indicate bacterial decay.