
Knowing exactly when to harvest broccoli will make a significant difference in your gardening success. Broccoli tastes great and is a cool-season nutritional powerhouse, packed with vitamins A and C. I've seen gardeners double their yields by using correct harvest timing. If you don't time your harvest right, expect to have bitter-tasting loose heads. Timing makes the difference when it comes to flavor.
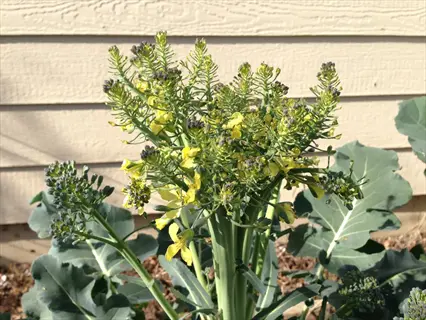
Harvest at the optimal time, and with a few restrictions, you will get sweet, crunchy broccoli flavor. The best flavor develops at temperatures around 60 °F. Heat can quickly turn heads bitter! I check my garden daily in May for bud development. Harvest too early and you have small heads. Harvest too late, and you'll have yellow flowers in the heads, and you'll lose the nutrition.
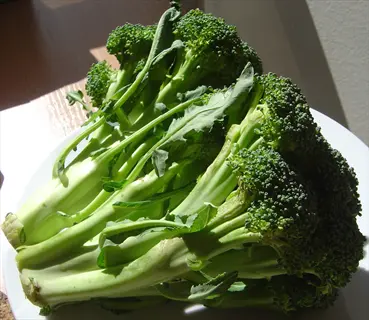
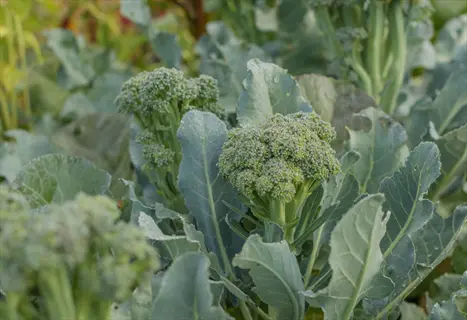
The primary head of broccoli is only the tip of the broccoli iceberg. Side shoots provide additional harvests for months after the primary head has been cut. I often get 20 or more side shoots from each plant throughout the summer. Even the smaller heads taste just as good. The more you pick, the more they grow.
This manual provides you with actionable steps for a successful harvest. You will also learn to recognize visual cues, such as bud tightness and color change events. We will also discuss temperature effectors, cutting methods, and some of my personal tips to avoid common missteps. Let's help your broccoli achieve its full potential.
Broccoli Growing Essentials
Broccoli requires specific temperature conditions to grow. It does well in a temperature range of 45-75°F (7-24°C). If you get outside of that range, plants really suffer. Below 40°F, growth is halted. Above 80°F, some plants will bolt. I am mindful of the temperature when timing my plantings for optimal success. Cool spring and fall plantings are perfectly timed to get around summer heat.
To achieve good head development, full sun is non-negotiable. Broccoli needs at least 6-8 full hours of daily sunlight. Less than that is just weak plants with little heads. I put my beds in full sun but away from any shadows. Morning sun will dry the dew, preventing fungal diseases, and afternoon shade in hot climates.
Soil preparation can make or break your harvest! Amend beds with 3 inches of compost mixed with aged manure, using a 2:1 ratio of compost to manure. I test pH and shoot for a pH of 6.0-7.0. Acidic soils require lime added to the mix. This foundation will prevent delays from nutrient deficiencies later on.
Regular watering has a direct impact on the quality of head formation. Apply 1-1.5 inches of water weekly with a drip irrigation system. I deep soak twice weekly, not light sprays daily. The soil should be moist, but not saturated. A lack of water creates hollow stems. Excess water can develop root rot. Adding mulch adds moisture conservation.
Sunlight
- Critical Requirement: 6-8 hours of direct daily sunlight minimum
- Insufficient light causes small heads and delayed maturity
- Container gardeners: Rotate pots daily for even sun exposure
- Partial shade only tolerated in extreme heat above 85°F (29°C)
Soil Conditions
- Ideal pH: 6.0-7.0 (test and amend with lime if acidic)
- Requires well-draining soil enriched with 3-4 inches of compost
- Heavy clay soils need sand/organic matter amendments
- Avoid waterlogged conditions to prevent root rot diseases
Water Management
- Weekly Need: 1-1.5 inches (2.5-3.8 cm) of water
- Deep watering preferred over frequent light sprinkling
- Mulch with straw/grass clippings to retain moisture
- Container plants require daily moisture checks
Fertilization
- Initial Feeding: Balanced fertilizer (10-10-10) at planting
- Mid-Season Boost: Nitrogen-rich side-dressing at 3-4 weeks
- Organic options: Compost tea or aged manure applications
- Over-fertilization causes leafy growth at expense of heads
Temperature Management
- Optimal Range: 45-75°F (7-24°C) for head development
- Protect seedlings with row covers if temperatures drop below 35°F (2°C)
- Above 80°F (27°C) triggers premature flowering and bitter heads
- Use shade cloth during unexpected heat waves above 85°F (29°C)
Signs of Harvest Readiness
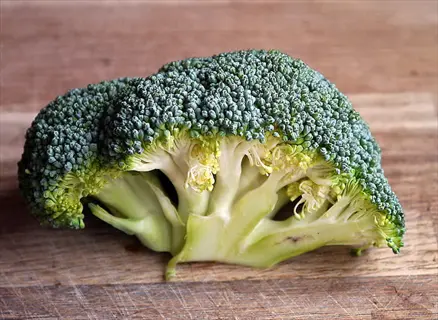
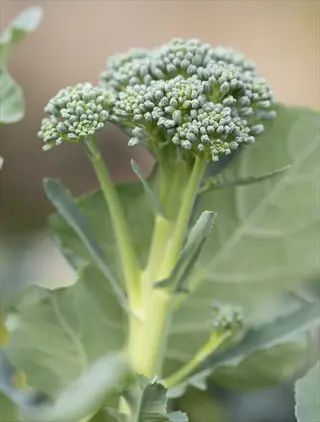
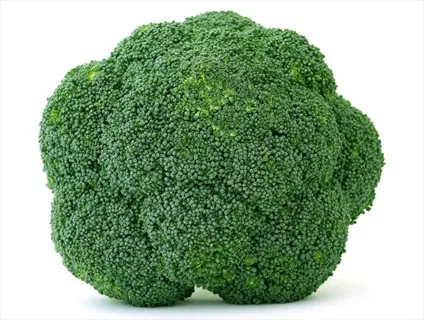
Bud tightness is your best indicator of a good harvest. Look at them every day and look for tight florets with no spaces. I simply gently push on the buds a bit, and if they are a firm bud, then it is time. Any squishiness means they are not ready yet. If there is space between buds, they are overripe. As soon as they start to swell, they need to be harvested immediately.
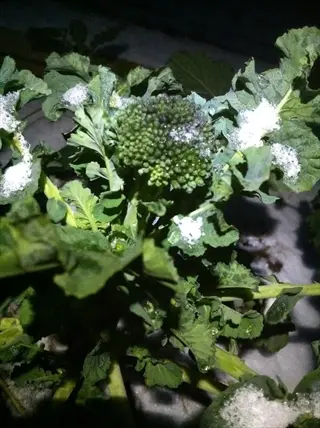
Color changes indicate when to act. Deep green head indicates peak readiness. Purple varieties must show purple color. Yellow marks indicate that harvest should occur now, before the flowering stage. I've lost crops because I didn't heed this. White marks indicate sun damage, which can negatively affect the quality.
Temperature dictates your harvest window. At 60-75°F, you have at least 5-7 days. We harvest at 80°F, you have a 24-hour harvest. Below 50°F, cool weather extends your harvest, and I use shade cloth to protect against heat waves. Frost protection increases your fall harvest.
The main heads and side shoots have a difference in readiness. The main heads require a diameter of 4-8 inches. Side shoots are ready at 2-4 inches, and should have tight bud growth. I harvest shoots every three days. Central heads are harvested just once. Side shoots will produce for months.

Tight Bud Formation
- Primary Sign: Central head buds densely packed without gaps indicating peak readiness for harvest
- Buds should feel firm when gently pressed with no sponginess or softness detectable through light touch
- Ideal bud diameter ranges between 1/16 to 1/8 inch (1.5-3mm) before separation occurs between florets
- Visible separation between buds indicates over-maturity requiring immediate harvesting action
- Optimal harvest window spans 3-5 days when temperatures maintain 65-75°F (18-24°C) conditions
- Heads harvested during this stage maintain maximum nutritional value and optimal crisp texture
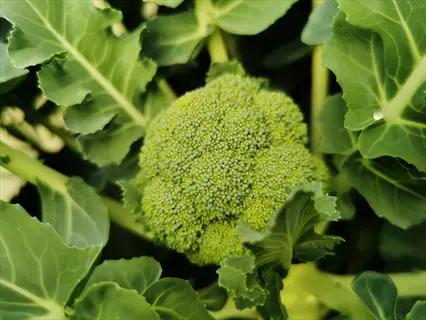
Deep Green Color
- Optimal Hue: Uniform forest green pigmentation without yellow tinge across entire head surface
- Purple-tinged varieties should display vibrant coloration without any fading or dull appearance
- White or pale areas indicate sun damage affecting flavor quality and texture integrity
- Color fade signals nutrient transfer to flowering stage reducing vegetable quality
- Immediate harvest required if any yellow spots appear before flowering progresses
- The deep chlorophyll-rich color correlates directly with highest antioxidant levels
Head Size
- Mature Size: Typically reaches 4-8 inches (10-20cm) diameter depending on specific variety
- Daily measurement recommended when heads approach expected mature dimensions
- Noticeable growth slowing indicates approaching harvest time within days
- Homegrown heads often smaller than commercial varieties but equally flavorful
- Harvest before dome shape flattens which signals transition to flowering
- Size monitoring should begin approximately two weeks before expected maturity
Bud Swelling
- Warning Sign: Individual buds noticeably enlarging preceding flower emergence
- Clear precursor to yellow petal development reducing vegetable quality
- Occurs rapidly within 24-48 hours when temperatures exceed 75°F (24°C)
- Adjacent leaves near head may start pointing upward as swelling progresses
- Requires harvest within 24 hours to preserve texture and prevent bitterness
- Swollen buds develop mealy texture unsuitable for fresh consumption
Side Shoot Development
- Secondary Harvests: Shoots emerging from leaf axils after main head removal
- Ready when reaching 2-4 inches (5-10cm) length with tight bud formation
- Typically develop 4-6 weeks after central harvest during cool conditions
- Color should match central head's deep green without yellow discoloration
- Frequent harvesting every 3-5 days stimulates continuous new shoot production
- Regular cutting encourages plant to redirect energy toward new growth
Stem Thickness
- Structural Indicator: Main stem diameter reaches 1-1.5 inches (2.5-3.8cm)
- Thick stems provide adequate support for developing heads without bending
- Thinner stems indicate insufficient nutrient uptake affecting head development
- Measure stem at soil level where maximum thickness typically occurs
- Stems should feel sturdy and snap cleanly when bent beyond 45 degrees
- Adequate stem girth ensures proper vascular transport to the head
Leaf Position
- Canopy Sign: Upper leaves begin lifting away from developing head
- Natural spacing occurs as head expands creating light exposure gap
- Leaves curling inward indicate heat stress requiring harvest adjustment
- Yellowing lower leaves signal nutrient diversion to head development
- Maintain 6-8 healthy leaves surrounding head for optimal growth
- Leaf angle changes provide early harvest window indication
Head Firmness
- Texture Test: Head should resist finger pressure without indentation
- Soft spots indicate internal deterioration or potential pest damage
- Surface should feel consistently solid without spongy or hollow areas
- Overly hard heads may be underdeveloped requiring additional growth time
- Gentle squeeze test helps determine precise harvest timing
- Firmness correlates with sugar content and post-harvest shelf life
Time Since Flowering
- Developmental Clock: Harvest window opens 60-85 days after planting
- Track planting date to anticipate approximate harvest period
- Early varieties mature faster than late-season broccoli types
- First yellow petals appear 5-7 days after optimal harvest window
- Calendar tracking combined with visual inspection ensures precision
- Microclimate variations may accelerate or delay maturity timing
Plant Height
- Growth Metric: Plants reach 18-36 inches (45-90cm) at maturity
- Height stabilizes when energy shifts from vegetative to head growth
- Measure from soil line to highest leaf tip for consistency
- Compact varieties typically shorter while heirlooms often taller
- Excessive height without head formation indicates nutrient imbalance
- Height assessment provides secondary confirmation of development
Harvesting Techniques
When harvesting, use the angled cutting method for central head harvests. Cut the stem at a 45° angle, approximately 5-6 inches below the head. This prevents water from pooling in the stem cavity during the transport of the harvest. I always have a protractor in my garden kit. Straight cuts can invite rot diseases.
In the morning, harvesting the produce preserves the ideal taste and crunch. Overnight, plant sugars concentrate in the heads, making them sweeter. I attempt to harvest before 8 AM during the summer. Later harvesting extremely quickens wilting. Even in storage, cooler morning temperatures help retain quality.
The methods for harvesting a central head and side shoots differ. For central heads, I use sharp knives or pruners. For side shoots, I use small precision snips and cut off the top ¼ inch. I use a different color tool for each type of cut to prevent confusion between them.
To inhibit the spread of disease, sterilize tools between plants. I dip a pair of blades into 70% alcohol solution after every cut. I always have a jar of disinfectant in my harvesting basket. These extra steps helped me avoid bacterial infections last year!
Tool Preparation
- Sanitization: Clean pruning shears or knife with isopropyl alcohol solution
- Sharpness Check: Ensure blades cut cleanly without crushing plant tissues
- Alternative Tools: Scissors work for tender stems under ½ inch thickness
- Safety: Wear gloves to protect hands from sap and sharp edges
- Sterilization Frequency: Disinfect between plants to prevent disease spread
Central Head Harvest
- Cut Position: Identify 5-6 inches below head on main stem
- Angle Technique: Make 45° cut to shed rainwater away from stem core
- Stem Length: Leave 2-3 inches of stem attached to the plant
- Hand Support: Hold head steady with non-dominant hand while cutting
- Timing: Perform during morning hours when plant sugars are highest
Side Shoot Harvest
- Identification: Select shoots 2-4 inches long with tight buds
- Cut Location: Snip ¼ inch above leaf axil using precise scissor cuts
- Frequency: Harvest every 3-5 days to stimulate new growth
- Selective Picking: Take largest shoots first while leaving smaller ones
- Angle Consideration: Flat cuts acceptable since shoots lack hollow stems
Leaf Harvesting
- Selection: Choose young tender leaves before flowering occurs
- Method: Snap outer leaves downward at stem junction
- Quantity Limit: Remove ≤30% of foliage to maintain plant health
- Timing: Harvest simultaneously with main head for efficiency
- Avoidance: Never cut growing crown where new shoots emerge
Post-Harvest Handling
- Immediate Cooling: Place harvested heads in shade immediately
- Cleaning: Gently rinse with cold water to remove insects and debris
- Storage Prep: Pat dry before refrigeration to prevent mold formation
- Temporary Storage: Use perforated plastic bags for refrigerator storage
- Leaf Processing: Separate leaves for immediate use or blanching
Extending Harvests with Side Shoots
Side shoots are the hidden bounty of broccoli when harvest takes place properly. Once the main head is cut correctly, the plant turns on its energy into lateral growth. I have harvested over 30 shoots per plant, with harvest lasting for many months. This secondary production can actually produce more weight than the original harvest weight.
Encourage ongoing production by employing effective strategies. Use sharp snips to remove side shoots at ¼ inch over leaf axils. Harvest every 3-5 days and select the tallest shoots. I use liquid fertilizer each week and maintain consistent moisture in the soil, which encourages the plants to continue producing.
There is a huge variation in growth times between heads and shoots. The central heads will be ready to harvest in 60-85 days. The shoots are much faster and can reach harvestable size in 14-21 days. I always track the development stages separately. The shoots do proliferate during cooler times of the year, but their growth is slower when it is hot.
From a nutrition perspective, side shoots are equal to the heads in value. They offer the same vitamins A, C, and K. I use shoots just like I do the heads in stir-fries and salads; their delicate nature sometimes leads me to choose them over heads. This can greatly enhance your nutrient-dense harvests.
Post-Main Harvest Care
- Initial Care: Water deeply with nitrogen-rich fertilizer immediately after main harvest
- Protection: Shield cut stem from direct sun using leaf mulch or row cover
- Monitoring: Check for new growth at leaf axils within 7-10 days
- Pest Control: Apply neem oil to prevent aphid infestation on tender shoots
- Temperature Sensitivity: Growth stalls below 50°F (10°C) or above 85°F (29°C)
First Flush (2-3 Weeks)
- Appearance: 1-2 inch shoots with tiny bud clusters
- Care: Maintain consistent soil moisture without waterlogging
- Feeding: Apply balanced liquid fertilizer weekly
- Thinning: Remove crowded shoots to prioritize strongest growth
- Expected Yield: 3-5 shoots per plant reaching harvest size
Peak Production (4-6 Weeks)
- Maturity Signs: Shoots reach 3-4 inches with tight buds
- Harvest Window: 3-4 days per shoot before flowering
- Continuous Harvest: Pick largest shoots every 48-72 hours
- Plant Health: Monitor for yellowing leaves indicating nutrient depletion
- Maximization: Highest yield period produces 8-12 shoots per plant
Late Stage (7-10 Weeks)
- Decline Signs: Smaller shoots (<2 inches) with loose buds
- Revival Tactics: Apply compost tea to stimulate growth
- Selective Termination: Remove unproductive stems
- Final Harvest: Clear all remaining shoots before frost
- Regeneration Limit: Most varieties exhaust after 10 weeks
Season Extension Techniques
- Cold Protection: Use cloches or frost blankets when temperatures drop near freezing
- Shade Management: Install 30% shade cloth during unexpected heat waves above 85°F
- Succession Planting: Stagger new plantings every 2 weeks for continuous supply
- Container Mobility: Move potted plants to sheltered areas during extreme weather
- Root Stimulation: Apply kelp extract to enhance stress tolerance during transitions
Troubleshooting Harvest Issues
Early bolting is a direct result of incorrect temperature management. If the plants experience temperatures above 80°F during head formation, head formation will bolt. Whenever a heat wave is predicted, I will apply shade cloth to protect my plants. If I miss this opportunity even once, the heads are ruined for this planting. I use cool-season planting to avoid the issue entirely.
Blindness (no heads) usually comes from transplant shock damage; rough treatment bruises the growing point. I always lift seedlings by their leaves, not their stems. Cutworm attacks also create blindness. Use cardboard collars at planting for defense.
Small heads are directly related to spacing and nutrient problems. Plants should be planted at least 18-24 inches apart from each other. Crowding of plants leads to competition for resources. I test my soil on an annual basis, and I also add compost to increase boron levels. Boron deficiency specifically inhibits head size development.
We want to approach pest control as a preventative measure, rather than a reactive one. Installing floating row covers as soon as you plant, for example. Spray BT weekly, even when you do not see caterpillars. Companion planting with mint can help repel egg-laying moths. Reacting once damage appears will mean lost harvests.
Premature Flowering
- Cause: Exposure to temperatures above 80°F (27°C) during head formation
- Prevention: Plant earlier in spring/later in fall to avoid summer heat
- Salvage: Harvest immediately; buds remain edible before yellowing
- Variety Choice: Select heat-tolerant hybrids like 'Green Magic' or 'Arcadia'
- Microclimate: Use shade cloth when temperatures exceed 75°F (24°C)
Small or No Heads (Blindness)
- Cause: Damage to growing point during transplant or pest attack
- Prevention: Handle seedlings by leaves; use root guards against cutworms
- Diagnosis: Check for chewed stem tips below soil surface
- Solution: Remove damaged plants; replace with new transplants
- Pro Tip: Maintain consistent moisture during transplant establishment
Loose or Bitter Heads
- Cause: Harvest delay or temperature fluctuations during development
- Prevention: Monitor daily when heads approach maturity size
- Salvage: Use immediately in cooked dishes rather than raw preparations
- Nutrient Factor: Ensure consistent boron supply through compost amendment
- Water Stress: Maintain 1-1.5 inches (2.5-3.8cm) water weekly
Pest Damage (Cabbage Worms)
- Identification: Green caterpillars and chewed leaves/heads
- Prevention: Install floating row covers at planting
- Treatment: Apply Bt (Bacillus thuringiensis) spray every 7 days
- Monitoring: Check undersides of leaves for eggs weekly
- Companion Plants: Grow thyme or mint to deter egg-laying moths
Yellowing Leaves
- Cause: Nitrogen deficiency or waterlogged soil
- Diagnosis: Older leaves yellow first in nitrogen deficiency
- Solution: Side-dress with blood meal or fish emulsion
- Drainage Fix: Amend clay soil with compost to improve drainage
- pH Check: Test soil; adjust to 6.0-7.0 if acidic
5 Common Myths
Broccoli heads must be the same big size found in supermarkets in order to be harvested
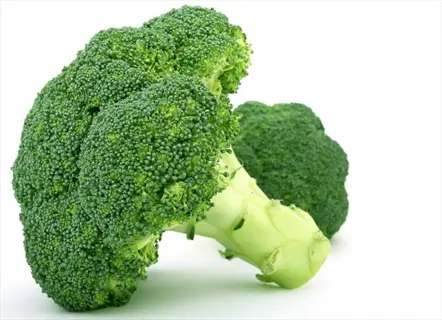
Homegrown broccoli heads are often smaller than those you find commercially, but they are just as good for nutrition. Harvest timing should be based on bud tightness and color, not the size of the heads. When you get to the point of having oversized heads, you typically will have gone past the time of flowering, or you will have an increased bitter flavor. You should aim for heads that are 4-8 inches in diameter and have tight, dense, deep green buds.
Once the main central head is harvested from a broccoli plant, the plant will die.
By managing broccoli correctly, it can produce edible side shoots for several months after harvesting. The cut is best made at a 45 degree angle and 5-6 inches below the head. Once the central head is harvested, lateral growth will respond to the cut. Adequate water, feeding once a month and with different varieties, the plant can produce anywhere from 10-35 side shoots before it is done.
Like other leafy greens, broccoli grows best in conditions of partial shade.
Broccoli requires full sunlight (6-8 hours a day) so that the head can grow properly. When broccoli does not get enough sunlight, the heads will be loose and take longer to mature and have reduced yields. Temporary shade is beneficial during temporarily hot periods, above 85F, but too much shade will lead to the plant wasting energy on leaves and too little energy on forming tightly head and flavorful heads.
Frost exposure will immediately kill full-grown established broccoli plants that are growing in the garden.
Broccoli plants will tolerate light frosts in the 25°F range if they have been carefully hardened. The cold has a flavor enhancement factor as it converts the starch in the broccoli plant to sugars. If the temperature goes below freezing, use a row cover. Harvest before sustaining and heavy frosts below 20°F. Broccoli harvested in the Fall often has a sweeter taste than heads harvested in the Spring because the temperatures are cooler.
All leaves of broccoli are decidedly not edible and should not be consumed.
The leaves of broccoli in fact contain a great deal of nutrition and can be prepared similarly to kale and collards. Young leaves actually have higher amounts of vitamins A and C than the heads. If you like to eat the leaves, take outer leaves off before the blossoms form, sauté in garlic, or add raw to salads. Be sure not to take off more than 30% of the foliage to keep the plant healthy.
Conclusion
The timing of the harvest will ultimately dictate the taste and quality of your broccoli. If timed correctly, you will be rewarded with crunchy, sweet heads. If it is not timed correctly, you will suffer an irreversible decline in quality. The difference is your focus and attention to detail for the critical 4-7 day period. This is the difference between just ok harvests and amazing harvests.
If you harvest the central head correctly, you will receive side shoots as your gardening dividend. Side shoots reward you with more harvests over the course of months for harvesting the central head the right way. I think of side shoots as nature's dividend. Instead of a one-time single harvest yield from each plant, you will now have a continuous producer. The additional fresh food supply can last quite a while.
Troubleshooting knowledge builds confidence for next season. Recognizing the causes of flowering or small heads avoids mistakes in similar situations next time. I have a garden journal to track solutions. The more challenges you address, the more adept you become. You will be able to take on your next plantings with more confidence and control.
Now you have the keys to continuous harvest success. If you use these methods consistently, you will have broccoli available year-round. Begin with transplant management and end with side shoot management. Your garden will give you abundant quantities of nutritious heads. Enjoy a harvest that you've worked hard for.
External Sources
Frequently Asked Questions
How do you know when broccoli is ready to harvest?
Check for these key signs: tight bud clusters without separation, deep green color (or vibrant purple for specialty varieties), firm texture when gently squeezed, and heads measuring 4-8 inches across. Harvest before yellow petals emerge.
Will broccoli regrow after cutting the main head?
Yes, plants produce side shoots for 2-4 months when harvested correctly. Cut the central head at a 45° angle 5-6 inches below the head to stimulate lateral growth. Maintain consistent watering and monthly feeding for continuous production.
What temperature range is ideal for broccoli harvesting?
Broccoli thrives at 45-75°F (7-24°C). Below 35°F, protect plants with row covers. Above 80°F, harvest immediately as heat triggers premature flowering. Cool temperatures enhance flavor while heat reduces quality dramatically within 24-48 hours.
How do you harvest broccoli to encourage regrowth?
Use sanitized tools to cut the main stem at a 45° angle. For side shoots: snip ¼ inch above leaf axils when shoots reach 2-4 inches. Harvest every 3-5 days, prioritizing largest shoots first to stimulate new growth.
What happens if you harvest broccoli too late?
Overripe heads develop loose buds, yellow flowers, and bitter flavor. Nutritional value declines as plants divert energy to flowering. While still edible when cooked, texture becomes tough and unpleasant. Harvest immediately if buds show any swelling.
Can broccoli survive winter in the garden?
Mature plants tolerate light frosts down to 25°F with row cover protection. In zones 8+, winter harvesting is possible. Elsewhere, harvest all shoots before hard freezes below 20°F. Cold enhances flavor but prolonged freezing kills plants.
How many times can you harvest from one plant?
Expect 1 main head plus 10-35 side shoots over 2-4 months. Harvest frequency depends on variety: Calabrese yields 10-15 shoots, while Broccolini produces 25-35. Proper cutting technique extends productivity up to 16 weeks.
Are broccoli leaves edible and how are they used?
Yes, leaves contain more vitamins A and C than heads. Harvest young outer leaves before flowering. Prepare like kale: sauté with garlic, add to soups, or use raw in salads. Avoid removing over 30% of foliage.
Why does my broccoli have small or no heads?
Common causes include: temperature extremes, transplant shock damaging growing points, insufficient sunlight (needs 6-8 hours), or nutrient deficiencies. Prevent by hardening seedlings properly, ensuring adequate spacing, and testing soil pH (6.0-7.0 ideal).
What's the best time of day to harvest broccoli?
Harvest early morning when plant sugars peak for maximum crispness and sweetness. Heads harvested after midday heat have reduced flavor and wilt faster. Cool heads immediately in shade after cutting to preserve quality.