
Brown leaf edges present as dried, crispy margins of leaves. This indicates your plant has been stressed due to environmental factors or watering habits. Unlike diseases, the brown leaf edges are usually attributable to our routine care habits. The first step is to observe the plant's environment and habits.
I have seen numerous gardeners panic when leaves are browning, thinking they have a pest or a disease. But in reality, in most instances, the problem is much easier to identify. You should see if your tap water has chlorine and/or fluoride in it. These chemicals accumulate in the soil, and over time, they will burn the roots and the leaf tips. Filtered water usually solves the problem.
One of the most common mistakes I see is watering on a rigid schedule. Plants will drink differently in the summertime than they do in the wintertime. Instead, you should feel the soil in the top inch. If the soil stays or "clumps" on your finger, don't water. Overwatering can suffocate the roots, and underwatering can leave them gasping for a drink; either way, we need to find a balance! There is zero wiggle room.
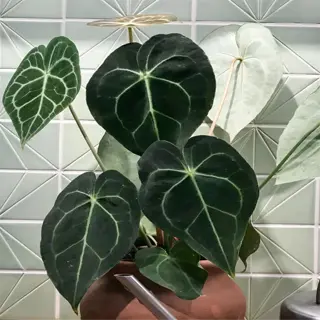
Humidity is more important than you might think! Plants like calatheas which are considered tropical plants will protest dry air with edges that turn brown. To counteract the dryness, you could try grouping your plants, putting pots on pebble trays, or utilizing a humidifier. Even simple tweaks to their environment can simulate the humid microclimates that they thrive in. It may take weeks for your plant to fully recover, but hang in there, it will be worth the wait!
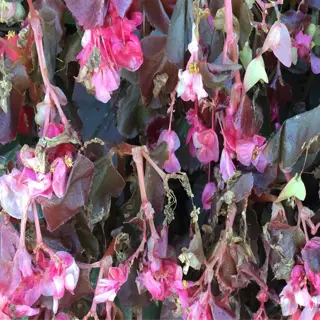
Watering Habits: Overwatering vs. Underwatering
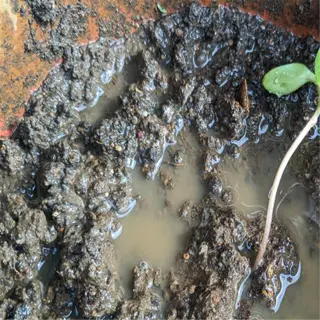
Soil becomes a bubbling swamp when overwatered; when underwatered, it will have roots gasping and suffocating as if out in the desert. I have saved intentional plants, where the roots drowned in muck and black clay, and where the leaves were brittle and crushed into powder at the touch. Your finger is the primary tool; if the top inch feels like a dripping sponge, then let it dry out. If it is a powdery dry, then let it drink deeply.
Terracotta pots helped my fiddle leaf fig plant escape from root rot. Terracotta pots have porous walls that act like lungs; unlike plastic pots, which trap moisture in a tiny prison that suffocates plant roots. Until you get your soil growing mix so that it looks and feels like crumbled cornbread, mix in perlite; in addition to promoting good drainage, the airy soil will keep root systems from staying too wet. Drainage holes in the bottom of a pot are not an option, they are like life support for plants.
Moisture meters were a 'cheat code' for my students. One of my clients was convinced it wasn't going well for her fern because it was 'unlucky' until she inserted the probe and discovered the soil was as dry as a bone. These inexpensive $12 gadgets don't lie! For the old-school folks, you can lift the pot. If it is light, the plant is thirsty. If it is heavy, it is at risk of flooding and root rot.
Different seasons will change your plant's drinking habits. During the humid summer months, my monstera gulps down a drink every week; this can extend to a drink every month under heated winter vents. When watering my plants, I pay attention to their leaves curling inward (they are rationing moisture) or yellowing (they are roots are drowning). Now is the time to adjust the watering schedule to appeal to the plant before the leaf margins turn brown and the final chapter is written.
Overwatered Plants
- Overwatered soil remains soggy for days, depriving roots of oxygen and causing yellowing lower leaves.
- Root rot from overwatering appears as mushy, dark brown roots with a foul odor.
- White mold on soil surfaces indicates excessive moisture and poor airflow around plant roots.
- Leaves may develop edema (blisters) due to cells bursting from water overload.
- Use a moisture meter to ensure soil is dry 2 inches deep before watering.
- Terracotta pots help evaporate excess moisture faster than plastic containers.
Underwatered Plants
- Soil pulling away from pot edges creates gaps that prevent water absorption.
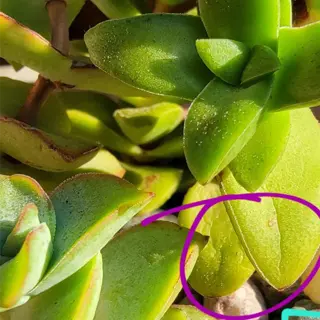
- Crispy leaf edges often start at the tips before spreading inward.
- Slow growth occurs as plants conserve energy due to chronic dehydration.
- Self-watering pots with reservoirs maintain consistent moisture for 7-10 days between refills.
- Peat moss mixed into soil retains 10x its weight in water for thirsty plants.
- Water deeply until 20% excess drains out to ensure full root hydration.
Overwatered Soil
- Soggy soil remains wet for 5+ days, suffocating roots and causing yellow leaves.
- Root rot appears as slimy, blackened roots with a sulfur-like smell.
- Terracotta pots improve airflow, drying soil 30% faster than plastic containers.
- Test moisture with a meter: ideal range is 3-4 (scale of 1-10).
- Repot using chunky orchid bark mix for better drainage.
- Avoid watering if meter reads above 6 to prevent overhydration.
Underwatered Soil
- Soil pulls away from pot edges, creating air gaps up to 0.5 inches (1.3 cm).
- Leaves lose 15-20% moisture before showing visible brittleness.
- Self-watering pots maintain consistent moisture for 7-10 days between refills.
- Water until 20% excess drains out to ensure deep root hydration.
- Peat moss retains 10x its weight in water for drought-prone plants.
- Morning watering reduces evaporation loss by 30% compared to midday.

Moisture Meters
- Analog meters measure soil hydration at depths up to 9 inches (23 cm).
- Ideal for succulents: maintain level 2-3 to prevent root rot.
- Calibrate monthly by testing in a cup of dry and soaked soil.
- Avoid hitting rocks or roots to prevent needle damage.
- Digital models track trends over 14-day periods.
- Budget-friendly options start at $12 (€11, £10).
Self-Watering Pots
- Reservoirs hold 16-32 oz (473-946 ml) of water for 1-2 weeks.
- Wick systems draw moisture upward through cotton or nylon ropes.
- Prevents salt buildup by flushing soil every 4-6 months.
- Ideal for vacations longer than 7 days.
- Avoid using with cacti or drought-tolerant species.
- Top-rated models reduce watering labor by 70%.
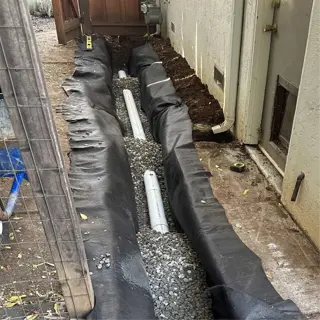
Drainage Solutions
- Perlite increases soil aeration by 40% when mixed 1:1 with potting soil.
- Clay pebbles at pot bottoms improve drainage by 1-2 inches (2.5-5 cm).
- Gravel layers prevent root contact with standing water in saucers.
- Unglazed terracotta pots allow 30% faster evaporation than glazed ceramic.
- Drill 2-3 extra holes in plastic pots to mimic nursery container drainage.
- Elevate pots on wooden slats to prevent water reabsorption from saucers.
Humidity and Environmental Stress
Brown leaf edges alert you to a possible secret dryness in your home because plants like tropical plants such as Monstera require 60-80% humidity for optimal performance with snake plants enjoying only about half that. I, unfortunately, learned this discovery the hard way when my fern's tip burned and crisped like burnt paper. Humidity, therefore, is not a luxury, it's a matter of life and death for these green guests!!
I didn't think a pebble tray would help my calathea feel better so quickly! Simply place some stones and water in a tray, and set the pot on top of the tray. The evaporation of water will provide a bit of humidity for your plant, mimicking the ground cover found on a rainforest floor. For a larger area, a humidifier set to 55% would be like a gentle tropical breeze.
Plants are more susceptible to changes in temperature than one might expect. To maintain most houseplants, it is best to keep environmental temperatures between 55-85°F (13-29°C). I once had an orchid, which dropped its buds overnight after a cool draft hit. As a result, I now keep it away from the windows and vents. The stability of temperature matters more than any specific values or ranges.
Hygrometers are essential. I generally situate mine near my plants, rather than the wall, so I can have real-time measurements of air readings when I water my plants. Drafts might keep you from overwatering, and dry air will extract moisture from the soil faster. Rotate pots weekly so that all sides of the pot have the same access to the light. The posture of your plant tells you what the air doesn't.
Pebble Trays
- Fill shallow tray with 1 inch (2.5 cm) of pebbles and water.
- Place pot atop pebbles, ensuring no root contact with water.
- Evaporation increases humidity by 15-20% within 12 inches (30 cm).
Grouping Plants
- Cluster 3-5 plants to create a microclimate with 10-25% higher humidity.
- Space pots 6-8 inches (15-20 cm) apart for airflow.
- Ideal for compact spaces like shelves or windowsills.
Humidifiers
- Ultrasonic models add 30-50% humidity in 100 sq ft (9.3 m²) areas.
- Maintain 55-65°F (13-18°C) water to prevent bacterial growth.
- Clean weekly with white vinegar to avoid mineral buildup.
Bathroom Placement
- Shower steam provides 80-90% humidity for 1-2 hours post-use.
- Ensure 4+ hours of indirect light daily (e.g., frosted windows).
- Use waterproof saucers to protect surfaces from moisture.
Terrariums
- Glass enclosures trap 85-95% humidity for moisture-loving plants.
- Open lids weekly for 2 hours to prevent mold.
- Use activated charcoal layers to filter stagnant air.
Draft-Proofing
- Place plants 3+ feet (0.9+ meters) from doors/windows
- Use weather stripping on drafty window frames
- Rotate plants weekly to balance light/stress exposure
Temperature Control
- Maintain 65-75°F (18-24°C) daytime; 55-65°F (13-18°C) nighttime
- Avoid placing near radiators/AC units creating >10°F (5.5°C) swings
- Use thermal curtains for windows with direct sun exposure
AC Vent Solutions
- Relocate plants 6 feet (1.8 meters) from AC vents/heaters
- Install acrylic barriers to redirect airflow away from plants
- Set HVAC fan to auto mode to minimize constant airflow
Low Light Adjustments
- Use LED grow lights for 6-8 hours daily at 12-inch (30 cm) height
- Clean leaves monthly to maximize light absorption by 20-30%
- Avoid dark corners below 100 lux (use light meter apps)
Potting Adjustments
- Replace clay pots with plastic/glazed ceramic to reduce evaporation
- Add 1-inch (2.5 cm) gravel layer at pot base for drainage
- Repot root-bound plants into containers 2 inches (5 cm) wider
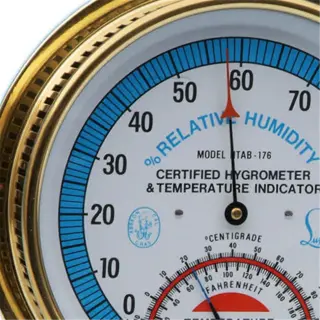
Hygrometers
- Digital models measure humidity ±5% accuracy at 6-inch (15 cm) ranges
- Place 12 inches (30 cm) above soil for canopy-level readings
- Calibrate annually using salt test: 75% RH in sealed container
Pebble Trays
- 1-2 inch (2.5-5 cm) gravel layer holds water without root contact
- Refill every 3-5 days to prevent mosquito breeding
- Combine with fan for 30% faster evaporation in dry climates

Thermal Curtains
- Block 70-80% UV rays while maintaining room temperature
- Install 2-4 inches (5-10 cm) above windows for air gap insulation
- Choose light-colored liners to reflect summer heat

Weather Stripping
- Apply foam tape to seal 1/8-inch (3 mm) gaps around windows
- Reduce draft intensity by 50-60% in winter months
- Replace annually to maintain adhesive effectiveness

Grow Lights
- Full-spectrum LEDs provide 2000-3000 lux at 18-inch (45 cm) height
- Use timers for consistent 12-hour daily cycles
- Adjust intensity gradually to prevent light stress
Nutrient Issues: Fertilizers and Water Quality
The phenomenon of brown leaves edging often signifies problems with an excess of nutrition. If you're in a hurry, synthetic fertilizers provide instantaneous nutrients but also leave salt behind, resulting in crispy leaf tips like over-salted fries. I was able to nurse my peace lily back to health using diluted fish emulsion, suggesting organic options work equally as effectively without the possibility of burning your plant.
Leaf tip burn doesn't happen by chance...it's chemistry! High EC (or electrical conductivity) in the soil means unwelcome salts are hijacking water movement. Test the runoff with a TDS meter, costing about $15. Anything greater than 2.0 mS/cm, and it's time to intervene. Flushing the substrate with rainwater will help reset and restore balance more than tap water often containing minerals that will add to the problem.
The minerals present in tap water are not always visible. The chlorine and fluoride added to all city drinking water may harm sensitive garden plants, such as the tradescantia, also called spiderwort. You may wish to collect rainwater or possibly invest in a reverse osmosis filter (or even a well). I noticed my calathea plant's leaf edges softened (less tenderness) when I stopped watering them directly from the faucet/ tap.
Soil flushing is pampering the plant 101. Pour cold or room-temperature water slowly over the soil until water is running clear from the drainage holes at the bottom of the pot. This will generally be approximately four times the pot's volume of soil. Repeat this every three months or so. This process will remove salt build-up that can compact soil and strangle roots. Instantly your plant is breathing easier!
Tap Water Treatment
- Let water sit 24hrs to evaporate chlorine (not chloramine)
- Add 1 ml/gal (0.26 ml/L) hydrogen peroxide to neutralize fluoride
- Filter through activated carbon to remove 80-90% heavy metals
Rainwater Harvesting
- Collect in food-grade barrels away from roof contaminants
- Test pH monthly (ideal 6.2-6.8 for tropicals)
- Add 1/4 tsp (1g) citric acid per gallon to prevent algae
Reverse Osmosis
- Removes 95-99% TDS (total dissolved solids)
- Re-mineralize with 1/8 tsp (0.6g) calmag per gallon
- System costs: $150-300 (€140-280) for 50 GPD units
Distilled Water
- 0 ppm minerals - ideal for carnivorous plants
- Supplement with 1/4 strength liquid fertilizer weekly
- Avoid for seedlings due to lack of trace elements
Chloramine Removal
- Use catalytic carbon filters rated for 10,000+ gallons
- Test residual levels below 0.5 ppm with test strips
- Boil water 20 mins + aerate 1 hour before use

EC/TDS Meter
- Measures electrical conductivity (EC) from 0-9999 µS/cm
- Ideal soil runoff: 1.2-2.0 mS/cm for most houseplants
- Calibrate monthly with 1413 µS/cm calibration solution
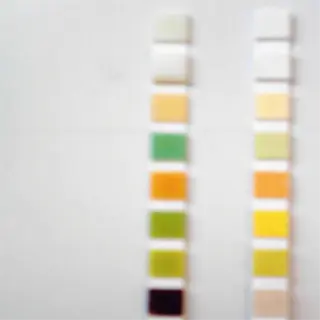
pH Test Strips
- Color-coded range 4.0-9.0 pH (±0.5 accuracy)
- Test both tap water and soil runoff weekly
- Store in airtight container to prevent humidity damage
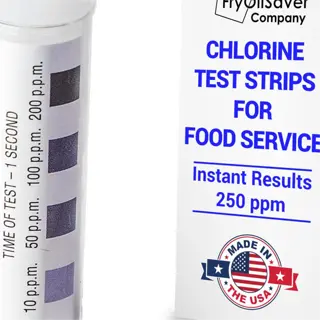
Chlorine Test Kit
- Detects free chlorine levels from 0-10 ppm
- Use DPD tablets for precise colorimetric analysis
- Safe threshold: <0.2 ppm for sensitive plants
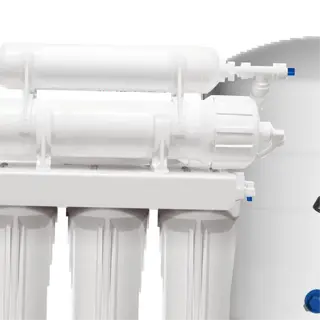
RO Filter System
- Removes 95-99% dissolved salts at 50 GPD flow rate
- Install pre-filters for sediment/chlorine protection
- Replace membranes every 2-3 years ($40-60 cost)
Root Health and Soil Management
Plants that are root-bound need more space because their roots are coiled up like a spring at the bottom of the pot. Planted in a root rot situation is not as severe, but the roots are mushy and black and smell decayed. I've seen both roots in all my years, and if root-bound calls for repotting and root rot suggest surgery. The secret is to tell which is which for your plant to survive.
Soil compaction silently suffocates roots. Instead of draining, water ponds on the surface, creating an oxygen-deficient environment for roots to gasp. My rubber plant almost drowned in the dense soil until I mixed in perlite. The roots can now breathe freely in a crumbly mixture that looks like coffee grounds.
Some plants need repotting more often than others. Fast-growing plants like pothos need a report every year. On the contrary, a snake plant can remain in the same pot for an impressive three years! I like to mark it on my calendar each spring, a Monstera receives fresh soil, and a ZZ plant stays put. Timing matters more than you think.
Although root pruning appears rather harsh, it is a life-saver. Make sure you sterilize your shears with rubbing alcohol first. Then, trim back any roots that are rotten until only firm, white strands remain. For extremely root-bound plants, you will also want to make vertical cuts down the rootball, so it is quartered. I saved a large Fiddle Leaf Fig one time by making some harsh cuts. It truly did save the plant because it grew new, vigorous growth.
Repotting Steps
- Water plant 24hrs pre-repotting to reduce root shock
- Gently loosen outer 1/3 of root mass with fingers
- Use pot with 2+ drainage holes 1-2" (2.5-5 cm) larger than rootball
Soil Mix Recipes
- Tropicals: 2 parts potting soil, 1 part orchid bark, 1 part charcoal
- Succulents: 1 part soil, 1 part pumice, 1 part coarse sand
- Seedlings: 3 parts coco coir, 1 part vermiculite, 1/4 part worm castings
Aeration Tools
- Use chopstick for small pots (<6" / 15 cm diameter)
- Soil knife for large containers to create 4-6" (10-15 cm) deep channels
- Rotate tool clockwise to avoid root tearing
Moisture Monitoring
- Ideal moisture meter reading: 3-4/10 for most plants
- Top 1" (2.5 cm) should dry within 3-5 days
- Heft test: Pot weight indicates 20-30% water loss
Pot Selection
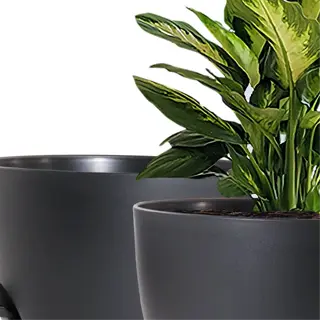
- Terracotta for overwaterers (+30% evaporation)
- Plastic for arid climates (retains moisture 2x longer)
- Fabric pots increase root oxygenation by 40%

Root-Bound Example
- Tangled roots circling the pot's bottom indicate urgent need for repotting
- Use sterile shears to prune 20-25% of the densest root mass
- Repot into container 2-3" (5-7.5 cm) wider to allow 1-2 years of growth
Soil Aeration Kit
- Metal probe creates 6-8" (15-20 cm) deep channels for oxygen flow
- Aerate every 3 months for heavy soils like clay or peat mixes
- Follow with 1/4" (0.6 cm) compost top-dressing to nourish roots
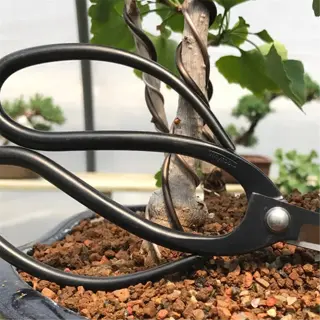
Root Pruning Shears
- Bypass-style blades make clean cuts without crushing root tissue
- Disinfect with 70% isopropyl alcohol before/after each use
- Remove black/mushy roots first, then trim 1/3 of healthy roots for regrowth
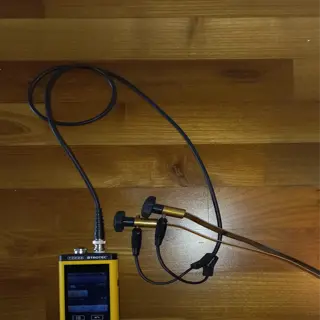
Moisture Meter
- Probe measures 0-10 scale (0 = desert dry, 10 = waterlogged)
- Insert 3-4" (7.5-10 cm) deep for accurate root zone readings
- Calibrate monthly by testing in dry vs. soaked soil samples
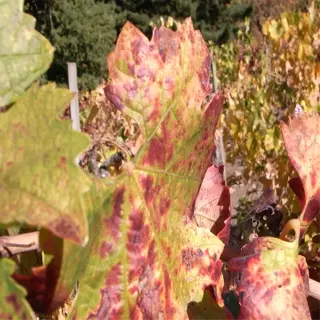
Light and Temperature Extremes
*Sunburn* leaves plants scarred with pale, crispy patches, while *etiolation* makes leaves formless and thin as they reach for light. My one aloe vera, for example, completely scorched and desiccated to a spectral-looking white under intense summer sun, and my snake plant grew etiolated and spindly sitting in my house's darkest corner. Both sides send SOS to warn for help on foliage.
Temperature stress occurs almost unnoticed. Tropical plants such as fiddle leaf figs will shiver when temps dip below 60°F (15°C), and succulents will bake once the thermometer tops 90°F (32°C). Use the USDA hardiness zone as a guide, a Zone 9 plant living in zone 5 will need winter shelter. I have a Meyer lemon tree that did not put out leaves for three years, once I started to monitor indoor temperatures with a $10 thermometer, the lemon became a regular producer.
Light meters can decode the comfort zone of your specific plant. Low-light varieties like pothos flourish in the range of 50-250 lux (light at a north window). Bright-light varieties like cacti want 10,000+ lux (light at a south window). I learned my 'low-light' dracaena was starving at 80 lux, and when I placed it at 400 lux, it started to grow again.
When precision tools are available, there is no need for guesswork. Clip-on thermometers will tell you when there are drafty windows that are killing your orchids. Light meter apps will map your room's bright spots with more reliability than trying to eyeball it. My peace lily stopped yellowing when I learned its sweet spot was 200 lux and 68-75°F (20-24°C). Each time, data beats out intuition.
Light Measurement
- Smartphone apps measure lux (100-500 = low; 10,000+ = direct sun)
- Foot-candle to lux conversion: 1 fc = 10.76 lux
- Adjust placement based on seasonal sun angle changes
Thermal Buffering
- Group plants to create microclimates with 10-15% humidity boost
- Use stone mulch to stabilize root zone temps ±5°F (±3°C)
- Install thermal curtains for windows with >6hr direct sun
Acclimation Protocol
- Increase light exposure gradually: 1hr/day increments over 2 weeks
- Hardening off outdoors: Start in 100% shade, move to dappled light
- Winter prep: Reduce watering 30% when temps drop below 60°F (15°C)
Artificial Lighting
- LED full-spectrum: 30-40w/sq ft (100-130w/m²) for flowering plants
- Duration: 14-16hrs for seedlings; 8-10hrs for mature succulents
- Height adjustment: 6-24" (15-60 cm) above canopy based on intensity
Emergency Response
- Sunburn: Move to shade immediately; trim only fully dead tissue
- Frost damage: Keep plant dry; wait until spring to prune
- Heat stress: Submerge pot in 70°F (21°C) water for 30min
Sunburned Leaves
- Irregular white/yellow patches with crispy brown edges on sun-facing leaves
- Prevent by filtering light through sheer curtains or frosted window film
- Recovery time: 4-6 weeks for new undamaged foliage to emerge
Frost Damage
- Blackened, translucent leaves after exposure to temps below 32°F (0°C)
- Protect with frost cloth or move indoors when <40°F (4°C) is forecast
- Never prune frozen tissue until spring to avoid secondary damage
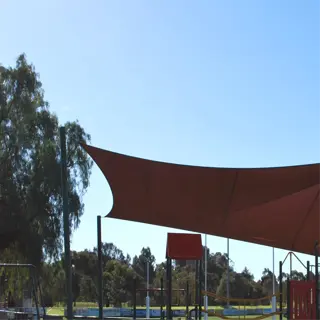
Shade Cloth Installation
- 40-50% UV-blocking cloth reduces light intensity by 1,000-5,000 lux
- Install 12-18" (30-45 cm) above plants using PVC frame
- Adjust seasonally: Use May-September in northern hemispheres

Light Meter in Use
- Hold sensor at leaf level for 60 seconds to measure average lux
- Ideal for succulents: 5,000-10,000 lux; ferns: 100-500 lux
- Calibrate annually against manufacturer's reference standard
5 Common Myths
Daily misting of plants helps to avoid brown leaf edges by raising humidity.
Misting will only provide humidity for a short duration, usually 15-30 minutes at the most. Additionally, misting is discouraged if the leaves are still wet to avoid creating ideal conditions for fungal diseases. Instead, for effective and longer-lasting humidity, pebble trays with 1" (2.5 cm) of water or humidifiers keeping relative humidity (RH) at 50-60% should be made use of.
All plants require sunlight to grow when growing indoors.
Low-light plants (such as snake plants and ZZ plants) can suffer sunburn in direct light! These grow well at 50-250 lux (which is equivalent to north-facing windows). Use light meters to help pair plants with their optimal intensity range.
Yellow foliage always signals overwatering.
Color loss can mean many things: deficiencies, uniform yellowing is often nitrogen deficiency, yellow edges could be from cold stress, and loss of lower leaves with yellowing leaves could be root-bound plants. Before assuming overwatering, check soil moisture, and inspect the roots.
Big pots allow plants to grow faster.
Huge pots keep more moisture than the plant requires, leaving it susceptible to root rot. Repot plants into containers that are just 1-2" (2.5-5 cm) wider than the rootballs. The exceptions to this would be fast-growing palms or monsteras that require potting up to a 4" (10 cm) increase annually.
Tap water is safe to drink for all houseplants, though it does depend on your individual plant.
Sensitive plants like calathea will get brown tips from fluoride/chlorine; so it's best to use filtered water with <50 ppm TDS or rainwater. Cacti/succulents won't notice tap water with up to 400 ppm TDS.
Conclusion
Brown edges on leaves don't mean death. With proper adjustments to your care, plants will bounce back. For instance, I have seen crispy clothes send out perfect new leaves after switching to using filtered water and humidity trays. The return of healthy growth is possible with daily care, not magic. You will help create the will to thrive.
Monitor your progress scientifically. Record your progress once a week in a plant journal, resumes your watering patterns, changes between first saw leaves, and consistency in the humidity. Combine your information with your moisture reader readings to identify a trend. For instance, my client had a dying fern but their moisture measurements revealed that they were overwatering every three days. Numbers do not lie!
The seasons dictate the needs of your plants. Summer growth spurts need more water and winter dormancy means slowing it down. Rotate around to the growing angle of sunlight when the sun starts to change angle. My monstera is very happy because I cut down grow lights from 14 hours to 8 hours once October hits. You have to adapt - or die.
Don't give up just because it's taking a while to see improvement. Many plants need 8-12 weeks to start new healthy growth. I've had orchids that I've nurtured and they looked incompletely hopeless for months before they burst forth with blooms. Just keep doing the right things. What you do today will become healthy, vibrant foliage tomorrow! Resilience goes deeper than damage.
External Sources
Frequently Asked Questions
Why do plant leaves develop brown edges?
Brown leaf edges often result from inconsistent watering, low humidity, or fertilizer buildup. Environmental stressors like temperature extremes, direct sunlight, or chemical-laden water can also damage foliage. Check soil moisture, humidity levels, and water quality first.
How do I fix brown tips on leaves?
Trim damaged tips with sterilized scissors, adjust watering habits, and increase humidity. For severe cases:
- Flush soil to remove excess salts
- Repot root-bound plants
- Relocate plants from drafts/heat sources
Can overwatering cause brown leaf edges?
Yes, overwatering suffocates roots, preventing nutrient uptake and leading to leaf browning. However, underwatering and dry air create similar symptoms. Always test soil moisture 1-2 inches deep before acting to confirm the cause.
What are signs of unhealthy plant roots?
Unhealthy roots appear mushy, dark brown/black, and emit a foul odor. Healthy roots are firm and white/tan. Root issues directly cause brown leaf edges due to impaired water absorption. Gently inspect roots during repotting for early detection.
How do I prevent brown edges on new growth?
Maintain consistent watering, use filtered/rainwater for sensitive plants, and keep humidity above 40%. Avoid placing plants near vents or heaters, and fertilize at half-strength during active growing seasons to prevent salt accumulation.
Should I mist plants to increase humidity?
Misting provides minimal humidity and can promote fungal diseases. Instead, use pebble trays filled with water or a room humidifier. Grouping moisture-loving plants also creates a microclimate with higher ambient humidity.
Can tap water harm my plants?
Tap water containing chlorine, fluoride, or hard minerals can burn leaf tips over time. For susceptible plants like spider plants or prayer plants, use distilled water or rainwater to avoid chemical buildup in soil.
How long does it take for plants to recover?
New growth typically shows improvement within 4-6 weeks after correcting care routines. Existing brown edges won't heal but trimming them stops further tearing. Patience is key, avoid overcompensating with excess water or fertilizer.
Do all plants need the same humidity levels?
No, tropical plants require 60-80% humidity, while succulents thrive in 30-40%. Research your plant's native habitat to replicate ideal conditions. Use hygrometers to monitor and adjust humidity accurately.
Can I reuse soil from a plant with brown edges?
Only if sterilized first. Old soil may contain pathogens or salt deposits. Bake it at 200°F (93°C) for 30 minutes, then mix with fresh potting medium and perlite for improved drainage.