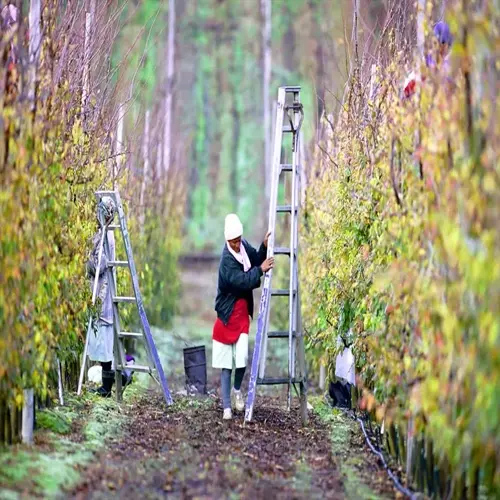

Pruning a rose bush involves removing specific stems to promote the plant's health. You cut away dead or diseased wood to help provide airflow and light through the center of the bush. This strengthens your roses and encourages them to use their energy to grow vibrant blossoms rather than taking precious resources to maintain weakened portions of the bush.
Proper pruning provides larger blooms. It prevents diseases like black spot. Your roses will survive longer, too! I've seen bushes thrive for 20 years with ongoing care. We will discuss when to prune, the tools to use, and the care to take after pruning.
Roses can be a wild mess if not tended properly. They get diseases easily. Bushes that are too thick block sunlight. Properly trimming and shaping your rose plants keeps them tidy and productive. It's like giving your plants a fresh start every year. That discipline is the key to your garden success!
Essential Pruning Tools
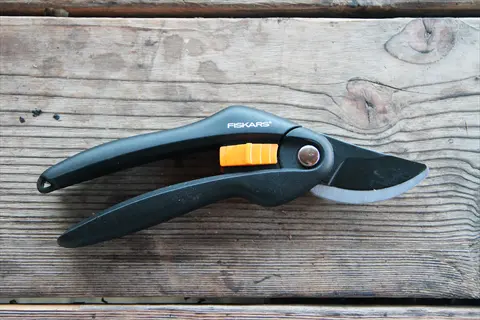
When it comes to pruning rose bushes safely and effectively, choose the right pruners for the job. Bypass pruners are like scissors to live stems, but give clean cuts for fast healing. Use anvil pruners for deadwood, as they are less likely to crush when cutting thick, dry canes. I carry both types in my gardening belt, saving hassle and time when switching tools during the cutting process.
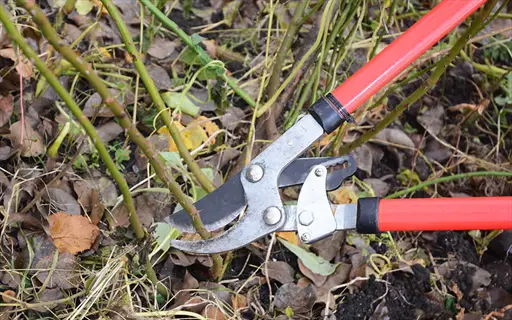
Extended reach loppers can reach deep into a bush without getting scratched by thorns. They have extended handles that provide leverage for cutting through thick canes. Choose models with non-slip grips. I recall pruning my neighbor's diseased roses. Well-designed loppers will save your arms from thorn injuries. Safety is paramount when tending roses.
Disinfect tools between plants by wiping the blades with an alcohol solution before each cut. This will prevent the black spot from spreading. I keep a bottle of solution in my pocket when I prune. Thick leather gloves will also protect your hands. Get gloves that weigh between 227 and 283 grams. They will keep out the thorns while allowing you to feel the stems.
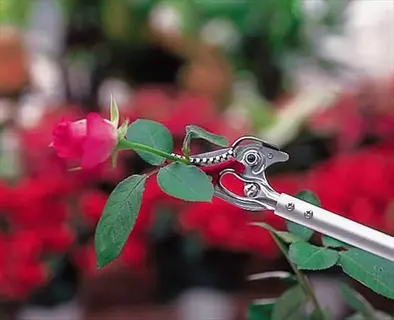
Bypass Hand Pruners
- Bypass pruners feature curved blades that slide past each other for clean cuts on live stems up to 1.27 cm thick without crushing plant tissue. This scissor-like action promotes faster healing.
- High-quality models have replaceable blades and cushioned grips reducing hand fatigue during prolonged pruning sessions. Invest in professional-grade pruners that maintain sharpness.
- Regularly sharpen blades using a diamond file at the original bevel angle to ensure effortless cutting. Dull blades tear stems leaving ragged wounds vulnerable to disease entry.
- Clean after every use with isopropyl alcohol or bleach solution to prevent disease transmission between plants. Pay special attention to sap buildup near the pivot point.
- Store with protective blade covers in a dry environment to prevent rust formation. Apply light machine oil to joints monthly during active pruning seasons.
- Test cutting capacity by attempting to slice through paper; clean cuts indicate proper sharpness while tearing signals needed maintenance.
Loppers
- Loppers provide extended reach and leverage for cutting thicker canes between 2.54-5.08 cm in diameter that hand pruners cannot manage. Long handles allow access to interior branches.
- Bypass-style loppers offer cleaner cuts on living wood while anvil types better suit deadwood removal. Telescopic models adjust for different reach requirements in dense bushes.
- Select loppers with gear mechanisms for increased cutting power with minimal effort. Avoid plastic components that crack under pressure from thick rose canes.
- Maintain by tightening pivot bolts when blades develop side play and lubricating joints with silicone spray. Wipe down handles after use to prevent grime buildup.
- Position the cutting blade closest to the main cane when removing branches to leave a smooth surface. Improper alignment causes crushing damage to remaining stems.
- Store hanging by handles rather than resting on blades to preserve edge alignment and prevent accidental dulling from contact with surfaces.
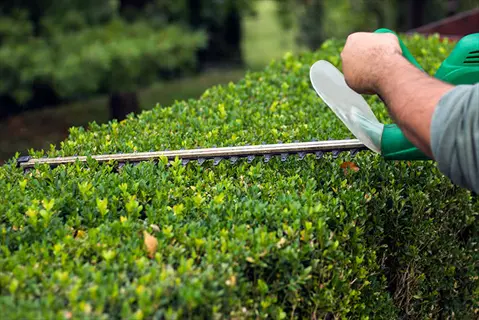
Hedge Trimmers
- Hedge trimmers efficiently remove dead tips and shape outer foliage but should never replace hand tools for precision cuts near buds. Use primarily for bulk reduction before detailed pruning.
- Electric models offer consistent power for leveling overgrown shrubs while cordless versions provide mobility without trip hazards. Gas trimmers suit large-scale rose gardens.
- Wear safety goggles during operation as flying debris causes eye injuries. Always disconnect power before clearing jammed blades or performing maintenance.
- Clean teeth after each use with stiff brush and disinfectant solution. Resin buildup reduces cutting efficiency and transfers pathogens between plants.
- Sharpen blades following original tooth angles using a round file. Dull teeth tear foliage rather than cutting cleanly causing brown edges on leaves.
- Store in protective blade covers to prevent accidental contact injuries and maintain sharpness. Hang vertically to avoid blade warping over time.

Gloves and Disinfectant
- Rose pruning requires elbow-length leather gloves with reinforced palms and fingertips for complete thorn protection. 227-283g leather provides optimal balance between protection and flexibility.
- Select gauntlet-style cuffs that tuck under long sleeves preventing thorns from sliding inside. Breathable linings reduce sweat buildup during extended pruning sessions.
- Disinfect tools between plants using seventy percent isopropyl alcohol solution or one part bleach to nine parts water. Pathogens spread easily through contaminated blades.
- Clean gloves inside-out regularly with saddle soap to remove plant sap and prevent material stiffening. Air dry away from direct heat sources to maintain leather suppleness.
- Replace gloves when stitching weakens or leather develops unrepaired punctures. Compromised protection leads to painful thorn injuries and potential infections.
- Maintain disinfectant effectiveness by replacing solutions daily during intensive pruning work. Contaminated solutions lose potency against common rose diseases.
Pruning Saw
- Pruning saws handle canes over 5.08 cm thick that loppers cannot cut. Folding models with curved blades allow access to dense interior growth without damaging adjacent stems.
- Triple-cut teeth design cuts on both push and pull strokes for efficient removal of thick branches. Replaceable blades extend tool lifespan for heavy-duty use.
- Select blades with rust-resistant coating for longevity in humid conditions. Blade lengths between 15-25 cm offer best maneuverability in rose bushes.
- Clean sap residue after each use with citrus-based cleaner to maintain cutting efficiency. Store blades dry and unfolded to prevent binding at hinge points.
- Make preliminary undercuts before final cuts to prevent bark tearing on heavy limbs. Support branches during cutting to avoid sudden drops that damage remaining canes.
- Sharpen teeth periodically with a triangular file following original angles. Dull saws require excessive force increasing accident risks during pruning.
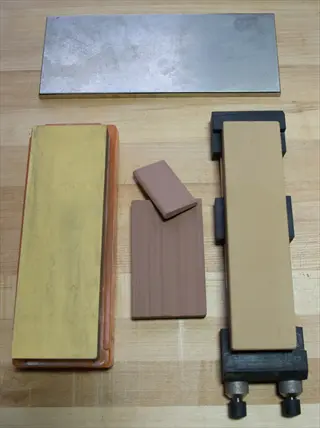
Sharpening Stone
- Sharpening stones maintain optimal cutting edges on pruners and loppers. Dual-grit stones offer coarse 400-grit for reshaping and fine 1000-grit for polishing edges.
- Lubricate stones with water or honing oil before use to prevent metal filings from clogging pores. Wipe surfaces clean between grit changes for consistent results.
- Hold blades at original factory angles typically 20-30 degrees while sharpening. Use guide attachments for beginners to maintain consistent bevels.
- Test sharpness by slicing through paper towels; clean cuts indicate proper edge alignment while tearing reveals uneven sharpening requiring correction.
- Clean metal filings from stones after each use with stiff brush and soapy water. Store in protective cases to prevent chipping and contamination.
- Resurface flattening stones annually using coarse sandpaper on glass to maintain true surfaces. Warped stones create uneven edges reducing cutting efficiency.
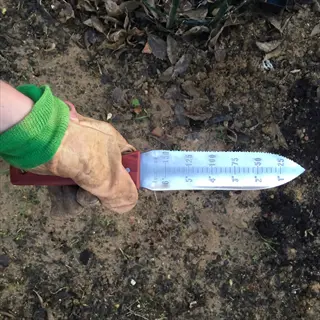
Garden Knife
- Hori hori knives perform delicate root pruning during transplanting and remove suckers below graft unions. Serrated edges cut through tough roots while pointed tips dig soil efficiently.
- Stainless steel blades resist corrosion from soil moisture and sap. Full-tang construction provides strength for prying tasks without blade snapping.
- Use for precise cuts when removing small suckers emerging from rootstock. Clean blade immediately after cutting sap-producing growths to prevent sticking.
- Disinfect after each plant contact using alcohol wipes to prevent disease transmission. Avoid bleach solutions that accelerate corrosion on carbon steel blades.
- Store in protective sheaths to maintain edge sharpness and prevent accidental injuries. Hang on tool belts for quick access during intensive pruning sessions.
- Sharpen serrated edges using tapered round files matching tooth profiles. Dull knives crush rather than cut plant tissue causing unnecessary damage.

Root Pruning Shovel
- Root pruning shovels feature sharpened straight blades for severing roots when transplanting mature roses. Narrow blades minimize soil disturbance near root zones.
- Long handles provide leverage for cutting through dense root masses. Step platforms on blades allow full-body weight application for tough cuts.
- Polish blades before use with file or grinder for smooth cutting action. Dull blades tear roots creating entry points for soil-borne diseases.
- Clean soil from blades immediately after use to prevent corrosion. Apply light oil coating before storage in dry conditions.
- Cut roots radially around drip line before lifting plants. Severing major roots 2-3 months before moving stimulates fibrous feeder root growth.
- Disinfect blades between plants with alcohol solution to prevent pathogen transfer. Focus on cleaning areas contacting root tissues directly.

Protective Eyewear
- ANSI-rated safety glasses shield eyes from flying wood chips and thorns during pruning. Wrap-around designs prevent debris entry from sides during overhead work.
- Anti-fog coatings maintain visibility during strenuous activity in humid conditions. Ventilated frames reduce lens fogging without compromising protection.
- Replace scratched lenses immediately as imperfections distort vision increasing accident risks. Store in protective cases when not in use.
- Clean lenses with microfiber cloths and lens solution after each use. Avoid abrasive materials that create scratches reducing optical clarity.
- Select tinted lenses for sunny conditions reducing glare. Clear lenses suit overcast days or working in shaded garden areas.
- Combine with face shields when using power tools for maximum protection. Regular glasses don't provide adequate impact resistance for pruning tasks.
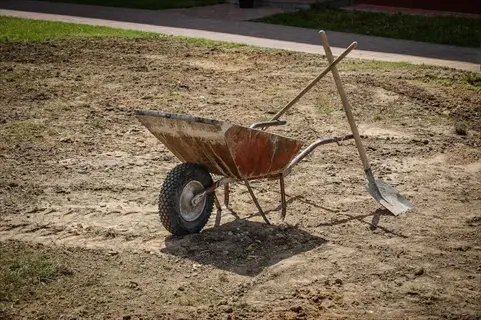
Wheelbarrow
- Heavy-duty wheelbarrows transport pruned canes and debris efficiently. Polyethylene tubs resist puncture from thorns and don't rust like metal alternatives.
- Pneumatic tires navigate uneven terrain better than solid wheels while carrying heavy loads. Maintain proper tire pressure for smooth maneuvering.
- Load thorny branches with cut ends facing downward to prevent snagging clothing or skin. Cover loads with tarps when moving through high-traffic areas.
- Clean debris from tub after each use to prevent disease spread. Disinfect surfaces contacting diseased plant material with bleach solution.
- Store inverted during offseason to prevent water accumulation and tire dry rot. Lubricate axle points annually with waterproof grease.
- Position near work area to minimize walking distance with armfuls of cuttings. Multiple collection points reduce fatigue during large pruning projects.
Best Pruning Timing
Pruning times vary for shrub roses and climbing roses. Prune shrub types, like Knockouts, in late winter, before growth starts. Climbing roses will need pruning after the blooms are done in the spring. From experience, I learned this lesson when I pruned climbers too early. The climbers lost all their first blooms that season.
Do not prune in the fall, ever! When we cut back the stems, the plant sends out tender new growth. New growth can freeze during the cold winter spells. That disturbs the entire health of the plant. Frost damage can result in unsightly, dead patches on the bush. I've seen shrubs take years to recover after a single fall cut.
Your USDA hardiness zone governs the local timing. Zone 4 gardeners, ready, set, prune... in April, after the major cold has passed. In Zone 9, gardeners can prune any time in January, before early spring. Make sure to find out your zone online. This prevents cutting during the risky periods of frost. Your roses will reward you.
Look for bud swelling on stems. Nature is telling you when to start spring pruning. Buds will look plump and light green. I put the swelling of buds on my test bush on my calendar. It works better than the predicted date every year.
Late Winter (February-March)
- Prune most roses when buds swell but before spring growth emerges. This timing allows plants to direct energy into new flowering wood.
- Complete hybrid tea pruning before new shoots exceed 1 inch (2.54 cm). Severe cuts during active growth cause excessive sap loss weakening plants.
- Trim shrub roses by one-third to one-half their height. Selective cuts maintain natural shape while stimulating abundant summer blooms.
- Avoid pruning during freezing temperatures. Wait until daytime temperatures consistently exceed 30°F (-1°C) to prevent cane damage.
- Disinfect tools between plants especially after removing diseased wood. Pathogens spread rapidly during moist late winter conditions.
- Apply dormant oil spray after pruning to control overwintering pests like scale insects and mite eggs hiding in bark crevices.
Early Spring (April)
- Prune climbing roses immediately after their first bloom cycle. Spring-flowering varieties set buds on old wood so winter pruning removes flowers.
- Remove winter-killed cane tips above healthy outward-facing buds. Cut back to green growth showing no signs of frost damage.
- Delay pruning in regions experiencing late frosts. Protect newly cut canes with burlap if temperatures drop below 27°F (-3°C).
- Transplant roses before leaf emergence. Minimize root disturbance and water thoroughly to establish before summer heat.
- Fertilize with balanced 10-10-10 formula after pruning. Nutrients support rapid regrowth but avoid high-nitrogen blends causing weak stems.
- Monitor for aphids on tender new growth. Blast insects with water or apply insecticidal soap before populations explode.
Summer (June-August)
- Deadhead spent blooms weekly to encourage reblooming. Cut above first five-leaflet junction facing outward from plant center.
- Remove suckers below graft unions immediately upon appearance. These vigorous shoots drain energy from desired rose varieties.
- Limit major pruning during heat waves above 90°F (32°C). Plants under heat stress struggle to heal pruning wounds efficiently.
- Shape overgrown shrubs lightly after flush blooming. Never remove over one-quarter of foliage during summer to prevent sunscald.
- Water deeply before and after pruning during drought conditions. Hydrated plants recover faster from cutting stress.
- Disinfect tools more frequently in humid conditions. Fungal spores spread easily through contaminated blades during warm moist weather.
Fall (September-November)
- Avoid structural pruning after late summer. New growth stimulated by fall cuts lacks hardening for winter survival.
- Remove only dead or diseased wood after first frost. Sterilize tools with alcohol solution between each cut to prevent disease spread.
- Tie climbing canes securely before winter winds. Loose branches suffer cracking damage at pruning points from ice accumulation.
- Apply final fertilizer six weeks before first frost date. Potassium-rich blends promote cane hardening without encouraging new growth.
- Mound 6-8 inches (15-20 cm) of soil around graft unions after ground freezes. Insulation prevents freeze-thaw cycles damaging vulnerable tissue.
- Leave hips on species roses for wildlife food. These seed pods signal plants to enter dormancy instead of producing vulnerable new growth.
Regional Exceptions
- Prune Zone 9-11 roses in January before spring growth. Warm climates lack distinct dormancy requiring earlier scheduling.
- Delay pruning in Zone 4-5 until April. Subzero winter temperatures kill canes requiring removal of winter-damaged wood first.
- Adjust for elevation: high-altitude gardens prune 2-4 weeks later than lowland areas at same latitude due to prolonged cold.
- Coastal regions with mild winters may prune twice yearly. Light summer shaping follows main late winter structural pruning.
- Desert climates prune during coolest months (December-January). Avoid cutting during extreme heat above 100°F (38°C).
- Monitor microclimates: south-facing walls warm faster requiring earlier pruning than north-facing exposures in same garden.
Rose Types Pruning Guide
Various rose varieties require different pruning techniques. Shrub roses, such as Knockout roses, are heavily pruned, utilizing approximately one-third of their growth. Hybrid teas are pruned much harder, sometimes even to 8-18 inches long. I found this out when my hybrid teas were spindly and weak due to pruning too easily. I now prune each variety differently.
Climbers have distinct timing requirements. You should prune them immediately after their spring flowers fade away. The flowers emerge from old wood. If you prune too soon, you will eliminate the flowers for next year. I once ruined a climber's flowers by pruning before they bloomed. Now I wait for the petals to drop.
Knockout roses are tolerant of light pruning. They are tough and do not require heavy cutting. I usually remove dead stems and thin out the centers when they are crowded. I tend to prune my Knockouts more quickly than other varieties. They recover quickly and flower profusely afterward.
Young roses will require some special care. Do not aggressively prune during the first season. Consider it more important to focus on growing roots than on shaping them. I lost two new bushes because I pruned too much early on. Now I just cut broken branches until the plants are established.
Shrub Roses (Knockouts/Floribundas)
- Prune when dormant in late winter before bud break. This timing minimizes stress while maximizing summer blooms.
- Remove dead or diseased wood first, cutting back to healthy green growth. Disinfect tools after diseased material.
- Thin crowded centers by removing inward-growing branches. Aim for vase-shaped structure improving air flow.
- Cut above outward-facing buds at 45-degree angles. This directs new growth away from plant center.
- Retain strong young canes; remove oldest woody stems annually. Older canes produce fewer blooms.
- Avoid shearing into geometric shapes. Selective cuts maintain natural form while encouraging flowering.
Hybrid Teas/Grandifloras
- Prune severely in late winter to 8-18 inches (20-46 cm). Hard pruning stimulates strong flowering stems.
- Identify the graft union and remove all growth below it. Suckers drain energy from desired variety.
- Select 3-5 healthy canes to retain; remove others at base. Choose canes spaced evenly around plant.
- Make cuts 0.25 inch (6 mm) above outward-facing buds. Angled cuts shed water preventing rot.
- Remove thin stems thinner than pencil diameter. Weak growth produces small blooms prone to disease.
- Apply sealant only on cuts larger than 1 inch (2.5 cm). Smaller wounds heal naturally without protection.
Climbing/Rambling Roses
- Prune after spring bloom finishes. Early-blooming varieties set buds on previous year's growth.
- Identify primary structural canes and secondary flowering laterals. Train main canes horizontally for maximum blooms.
- Remove 1-2 oldest canes at base annually. Replacement canes should be trained during growing season.
- Shorten side shoots to 2-3 buds from main canes. This concentrates energy into flower production.
- Tie new canes loosely to supports as they grow. Avoid constricting stems that expand with maturity.
- Remove dead flowers by cutting back to first five-leaflet. This encourages repeat blooming on modern varieties.
Special Cases
- Prune newly planted roses minimally in first year. Focus on removing broken branches only.
- Delay pruning for winter-damaged plants until spring. Frost-killed wood protects lower canes.
- For repeat-blooming varieties, deadhead spent flowers to first five-leaflet junction facing outward.
- Remove rootstock suckers immediately by digging to origin. Cutting at soil level encourages regrowth.
- Renovate neglected roses over 3 years: remove one-third oldest canes annually to avoid plant shock.
- Discontinue pruning 8 weeks before first frost date. Late cuts stimulate frost-tender new growth.
Disease Prevention
- Disinfect tools with alcohol solution between every plant. This prevents spreading black spot and mildew.
- Prune during dry weather conditions. Wet conditions facilitate fungal spore transmission through wounds.
- Remove all pruned material from garden beds. Infected debris harbors overwintering pathogens.
- Cut at 45-degree angles to allow water runoff. Flat cuts trap moisture encouraging rot.
- Avoid pruning during active disease outbreaks. Wounds create entry points for existing infections.
- Apply fungicide spray after major pruning sessions. Protective coatings shield fresh cuts from pathogens.
Step-by-Step Pruning Process
Gather your sharp bypass pruners, loppers, and some disinfectant. You may use alcohol before making cuts to clean your blades. Wear thick gloves for thorn protection ideally. I generally inspect my bushes first for deadwood and tangled areas. This way, I can prepare for anything that may adversely affect the cutting procedure.
Old canes can be identified by their woody, dark bark and thickness. They also tend to fill in the middle of the bush and will bloom poorly. Remove old canes first, cutting them at ground level. I emphasize removing these old canes over younger green stems. This provides opportunity for new stems.
Make all cuts at 45-degree angles just above outward-facing buds. This directs new growth outward and away from the center. Cuts made at an angle will shed water off, preventing rot. I check the position of each cut before cutting. The proper angles keep the bushes open and healthy.
Over three seasons, rejuvenate egregiously overgrown bushes. In year one, remove one-third of the old canes. Year two, remove another third. Year three sculpt remaining growth. I saved my neighbor's wild rose in this fashion. Patience avoids shocking the plants.
Preparation Phase
- Gather bypass pruners, loppers, hedge trimmers, gloves, and disinfectant solution. Ensure tools are sharpened and cleaned before starting.
- Inspect rose bushes for overall structure and problem areas. Identify deadwood, diseased stems, and congested growth patterns needing attention.
- Time pruning during late winter dormancy when buds swell but before spring growth emerges. Avoid pruning during freezing temperatures or rain.
- Disinfect tools with alcohol solution before first cut and between plants. This prevents disease transmission through contaminated blades.
- Wear puncture-resistant gloves and protective eyewear. Rose thorns cause painful injuries and eye protection shields from flying debris.
- Clear workspace around bushes for safe movement. Remove garden debris that might interfere with pruning activities.
Dead/Damaged Wood Removal
- Identify dead canes by brittle texture and brown coloration. Cut at base where cane meets crown or main stem.
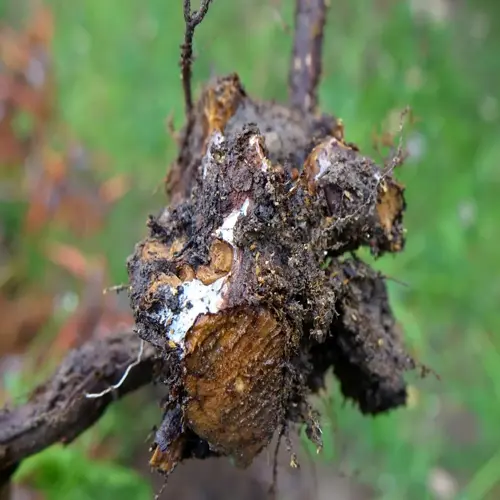
- Remove diseased wood showing cankers, mold, or unusual discoloration. Cut 6 inches (15 cm) below affected area into healthy tissue.
- Eliminate broken or split branches. Make clean cuts just above healthy buds to prevent further tearing.
- Cut rubbing branches that cause bark wounds. Remove the weaker of two crossing canes to prevent disease entry points.
- Clear winter-killed tips back to green growth. Make cuts 0.25 inch (6 mm) above outward-facing buds at 45-degree angles.
- Disinfect tools after each diseased cane removal. Dip blades in alcohol solution for 30 seconds before next cut.
Structural Renovation
- Identify oldest canes by thick diameter and dark, woody bark. These produce fewer blooms and congest the center.
- For partial renovation: Remove 30% oldest canes at ground level. Use loppers for clean cuts without crushing tissue.
- For severe overgrowth: Cut all canes to 6 inches (15 cm) height. This drastic approach sacrifices blooms for one season.
- Extract cut canes carefully using loppers as tongs. Pull straight out to avoid damaging surrounding growth.
- Remove inward-growing branches pointing toward center. Cut at origin to open bush interior for light and air.
- Eliminate spindly growth thinner than pencil diameter. Weak stems cannot support blooms and harbor pests.
Shaping and Finishing
- Reduce height by 6-12 inches (15-30 cm) overall. Taller bushes require deeper cuts for balanced proportions.
- Cut 0.25 inch (6 mm) above outward-facing buds. Angled cuts shed water preventing rot in the new bud eye.
- Maintain vase shape in shrub roses. Create open center with canes radiating outward at 45-degree angles.
- Trim climbers to lateral buds on main canes. This encourages flowering spurs without reducing framework.
- Balance canopy density by thinning crowded areas. Remove secondary branches competing with primary canes.
- Step back frequently to assess symmetry. Adjust cuts gradually rather than removing large sections at once.
Aftercare and Cleanup
- Collect all pruned material immediately. Diseased wood requires bagging and disposal not composting.
- Disinfect tools with bleach solution after finishing. Scrub sap residue and dry thoroughly before storage.
- Apply organic fertilizer around drip line. Use balanced 10-10-10 formula to support new growth.
- Water deeply until soil is moist 12 inches (30 cm) down. Hydration accelerates wound healing and bud development.
- Mulch with 3 inches (7.5 cm) compost around base. Maintain 2-inch (5 cm) clearance from canes to prevent rot.
- Monitor for pest activity on fresh cuts. Treat aphids or mites with insecticidal soap at first sight.
Overgrown Bush Renovation
- Year 1: Remove deadwood and 30% oldest canes. Preserve younger growth for current season blooms.
- Year 2: Eliminate another 30% original canes. Begin training new basal shoots as replacements.
- Year 3: Remove remaining old growth. Shape new canes into balanced framework.
- Fertilize monthly during growing season. Use half-strength liquid fertilizer for gentle nourishment.
- Water twice weekly in absence of rain. Deep irrigation encourages deep root establishment.
- Protect regenerating bushes with burlap during frost. New growth is vulnerable to freeze damage.
After-Pruning Care
After trimming, your roses require care, and then a bit later.. Water deeply initially to help wounds heal. Remove all cuttings to prevent diseases. Care for the long-term with fertilizer starts in 4-6 weeks. I water my bushes within one hour of pruning.
When feeding fresh pruned roses, use a balanced 10-10-10 fertilizer. Apply it around the drip line as new growth comes on. If you water the soil first, you will avoid burning new roots. I broadcast the granules and then lightly rake them in. It feeds the plants and keeps root burn from shocking the sensitive roots.
Monitor soil moisture daily during their recovery. Stick your fingers 2-3 inches down near the stems. If the soil is too dry, water until the top 12 inches of soil are moist. New growth wilts quickly without enough moisture. You may want to consider using reminders on your phone to check on your roses daily.
Be vigilant for pests on new growth, especially. Check daily for aphids or spider mites. Spray in case of first sighting. I always have a magnifier with me to see tiny bugs at first sight. Quick action will stop pest infestations, which can sap the strength from plants that are trying to recover.
Tool Maintenance
- Disinfect all pruning tools immediately after use with 70% isopropyl alcohol solution. Soak blades for 5 minutes to kill pathogens.
- Remove sap residue with stiff brush and citrus-based cleaner. Sap buildup attracts pests and corrodes metal surfaces.
- Sharpen blades using diamond file following original bevel angles. Dull tools crush plant tissue increasing disease risk.
- Oil pivot points with light machine oil to prevent rusting. Apply sparingly to avoid attracting dust and debris.
- Store tools in dry location with protective blade covers. Hang tools vertically to maintain edge alignment.
- Inspect tools monthly during growing season. Replace worn parts to maintain cutting efficiency.
Soil Nutrition
- Apply balanced 10-10-10 fertilizer 4-6 weeks after pruning. Nutrients support new growth without forcing excessive foliage.
- Use organic compost as top dressing around drip line. Spread 2-inch (5 cm) layer maintaining 3-inch (7.5 cm) cane clearance.
- Water thoroughly before fertilizing to prevent root burn. Dry soil concentrates chemicals damaging feeder roots.
- Incorporate slow-release granular fertilizer into topsoil. Nutrients release gradually over 3 months matching growth cycle.
- Test soil pH annually maintaining 6.0-6.5 range. Acidic soils require lime while alkaline soils need sulfur.
- Supplement with Epsom salts (1 tablespoon per gallon of water) monthly. Magnesium promotes chlorophyll production for vigorous growth.
Moisture Management
- Water deeply immediately after pruning until soil is moist 12 inches (30 cm) deep. This hydrates plants during recovery.
- Install drip irrigation systems for consistent moisture. Avoid overhead watering that spreads fungal diseases.
- Check soil moisture 2-3 inches (5-7.5 cm) deep before watering. Soil should feel like damp sponge not soggy.
- Increase frequency during heat waves above 85°F (29°C). Water early morning to minimize evaporation losses.
- Apply 3-4 inches (7.5-10 cm) organic mulch around base. Mulch reduces evaporation and regulates soil temperature.
- Monitor for drought stress signs: wilting or curled leaves. Deep water immediately if symptoms appear.
Pest Surveillance
- Inspect new growth daily for aphid colonies. Blast insects with strong water spray before populations establish.
- Apply insecticidal soap at first sign of thrips or spider mites. Cover leaf undersides where pests hide.
- Install yellow sticky traps near bushes. Traps monitor flying insects like rose midges and leafhoppers.
- Release ladybugs or lacewings for biological control. Beneficial insects consume up to 50 aphids daily.
- Remove affected leaves showing black spot or powdery mildew. Dispose in sealed bags not compost piles.
- Apply neem oil preventatively every 14 days. Oil coats leaves deterring pests without harming beneficials.
Frost Protection
- Cover bushes with burlap when temperatures drop below 28°F (-2°C). Secure covers to prevent wind damage.
- Mound 6-8 inches (15-20 cm) soil around graft unions after ground freezes. Remove excess soil in spring.
- Wrap tree roses with frost cloth securing with twine. Pay special attention to vulnerable graft unions.
- Water thoroughly before expected freeze. Moist soil retains heat better than dry soil.
- Avoid fertilizing 8 weeks before first frost date. Nitrogen stimulates tender growth vulnerable to cold.
- Prune frost-damaged wood only after last spring frost. Damaged canes protect lower buds from further cold.
Growth Monitoring
- Document new growth weekly with photos. Compare development against expected recovery timelines.
- Measure cane elongation monthly. Healthy growth should show 3-6 inches (7.5-15 cm) monthly.
- Pinch back leggy growth to encourage bushiness. Pinch above leaf nodes when stems reach 12 inches (30 cm).
- Adjust watering based on growth rate. Faster growth requires more frequent irrigation.
- Support heavy blooms with soft plant ties. Prevent cane breakage from wind or rain weight.
- Record bloom dates and abundance. Poor flowering indicates need for nutritional adjustments.
5 Common Myths
To encourage better and healthier flowering, roses of any variety need to be hard pruned each year to about 8 inches from the ground.
Roses differ in how they require pruning by variety. Shrub roses like Knockouts, for instance, can benefit from lighter pruning where only about a third is removed. However, in prune them back too much, you are losing your flowering capabilities. Modern roses bloom on new wood so extreme pruning is unnecessary and can be detrimental. This said, when you cut back your roses a lot, you put them into stress which takes them longer to bloom. The use of techniques does depend on the variety, so the better you can identify the rose variety, the more success you will have.
Pruning in fall assists roses in winterizing by getting rid of extra growth that could freeze and damage the plant.
Pruning after late summer causes the plant to grow tender new growth that is susceptible to winter frost damage. The plant is now using energy to overcome pruning wounds rather than establishing hardening on canes for winter. This could increase the risk of dieback and lowers cold tolerance. Major pruning for roses should always be done during dormancy prior to spring growth. For winter prep, simply remove deadwood and mound soil on top of the grafts, without cutting into live stems.
Numerous gardeners are convinced that using sealants or paint on their freshly cut rose canes can successfully prevent diseases from invading their plants.
Unfortunately sealants can immobilize moisture against the cut surfaces creating an environment predisposed to fungal infections. Roses can progressively compartmentalize the wound through callucing if cuts are made cleanly and at an angle, to avoid the fungal and bacterial invasions. This biological adaptation provides better protection for their wounds than any artificial substances. Sealants will block the natural healing process and may allow pathogens to spread within the artificial application. Investing in good technique and disinfected tools is the most effective defense.
Many people incorrectly believe they can avoid pruning Knockouts, because of their self-cleaning and disease resistant nature.
Knockouts tolerate a bit of neglect to pruning, light pruning annually helps keep their shape and prevents leggy, tall growth. When they haven't been pruned, Knockouts will create incredibly dense centers that reduce air flow, which opens the plants up to the risk of powdery mildew and spider mites. Cutting back some of the oldest canes will prompt the plant to push up new vigorous growth, and once again start the cyclical bloom. Pruning annually will take advantage of the plants genetic potential for disease resistance and flowering before the plant begins its spring growing season.
Pruning back hard always produces a higher flower output because it reallocates energy from growth into producing more flowers effectively.
Any amount of over-pruning (more than an appropriate amount of relatively normal pruning) reduces photosynthetic ability by removing too much leaf area, causing long-term damage to the plant. While moderate pruning may temporarily stimulate new growth, if over 50% of the canes are removed, then the energy is now being used for the plant's survivability rather than compositional blooming. Balanced pruning allows for retention of adequate leaves for sugar production while opening the canopy. The recommended amount of change varies by variety, although generally, it is conservatively recommended to stay below one-third of the total amount of cumulative growth.
Conclusion
Pruning your roses isn't just for aesthetics - it's crucial for plant health. When you take out dead wood and open up the center of the plant, you prevent disease from taking hold. Healthy bushes can better withstand insect infestations and live longer. This attention to detail yields plants that are more vigorous for longer periods.
You just need to keep three principles in mind: right season, right tools, and right cuts. Cut in the correct season for your type of rose. Sharp, disinfected pruners. Angled cuts above buds. I've been doing it for years in the cutting garden and I get great success.
When you practice *good pruning*, it will lead to long-term success. You will have more flowers and healthier plants. Your garden will become a showpiece. I have seen potential bushes transformed into a showpiece with diligent care and attention. They rewarded you with beautiful flowers that your neighbors admire.
Pick up your pruners this weekend. Begin with one bush and use what you have learned. Don't wait for the right conditions. I pruned roses in light rain last spring, and those bushes bloomed the best that summer. Your roses need you now.
External Sources
Frequently Asked Questions
When is the optimal time for pruning rose bushes?
The ideal pruning period is late winter when buds swell but before spring growth emerges. This timing minimizes stress while directing energy into new flowering wood. Avoid pruning during freezing temperatures or active growth phases.
What are critical mistakes to avoid when pruning roses?
Key errors include using dull tools that tear stems, pruning during fall which stimulates frost-vulnerable growth, and applying sealants that trap moisture. Always disinfect tools between plants to prevent disease spread like black spot.
How should I prune severely overgrown rose bushes?
Renovate overgrown roses over three years:
- Year 1: Remove deadwood and 30% of oldest canes
- Year 2: Eliminate another 30% of original growth
- Year 3: Remove remaining old wood and shape new canes
Do all rose varieties require the same pruning approach?
No, pruning techniques vary significantly:
- Hybrid teas: Cut back to 8-18 inches in late winter
- Climbers: Prune after spring bloom, training canes horizontally
- Shrub roses (Knockouts): Lightly remove one-third of growth annually
Why is tool sterilization important for rose pruning?
Disinfecting tools with alcohol solution between cuts prevents transmitting diseases like black spot and powdery mildew. Pathogens spread rapidly through contaminated blades, especially during moist conditions. Sterilization should occur before the first cut and after each diseased cane removal.
Can pruning at the wrong time kill rose bushes?
Pruning too late in fall stimulates tender growth that dies in frost, weakening the plant. Early spring pruning on climbers removes flower buds. While poorly timed pruning rarely kills bushes immediately, it causes bloom loss and increased disease susceptibility.
What aftercare is essential following rose pruning?
Post-pruning care includes:
- Deep watering to moisten soil 12 inches down
- Applying balanced 10-10-10 fertilizer after 4-6 weeks
- Mulching with 3 inches of compost around the base
- Daily pest monitoring on vulnerable new growth
Should I prune newly planted rose bushes?
Limit pruning on first-year roses to removing broken branches only. Young plants need energy for root establishment rather than recovering from cuts. Light shaping may occur in spring, but avoid heavy pruning until the second year.
How much should I cut back hybrid tea roses?
Prune hybrid teas severely to 8-18 inches in late winter. Retain only 3-5 healthy canes spaced evenly around the plant. Remove all weak growth thinner than a pencil diameter to stimulate strong flowering stems.
What's the proper angle for rose pruning cuts?
Make 45-degree angled cuts 0.25 inches above outward-facing buds. This angle sheds water away from buds, preventing rot while directing new growth outward. Avoid flat cuts that trap moisture or inward-facing cuts that crowd the center.