Ultimate Guide to Growing Peppers in Pots

Written by
Liu Xiaohui
Reviewed by
Prof. Samuel Fitzgerald, Ph.D.To grow peppers in pots, select compact varieties growing in containers with a depth of 12 inches or more.
For DIY soil mixes, the best combination is 60 percent compost; compost will offer optimal nutrition and drainage.
Water pepper plants when the top 1-2 inches of soil are dry.
The most flavorful pepper is harvested when it is in the breaker stage and can ripen off the vine.
Ensure consistent watering to prevent blossom end rot adding calcium will also help!
A properly cared for container pepper will yield the same as a garden pepper plant.
Article Navigation
Growing peppers in pots makes fresh harvests available to anyone, even without any yard space. You can easily control soil quality and exposure to sunlight. You can even bring plants inside during storms, and you can easily avoid common pests in the garden, naturally. I started with two pots on my apartment balcony several years ago.
By moving pots inside when frost is anticipated, you can gain benefits such as extended seasons. Choose compact pepper varieties specifically designed for container gardening. Emphasize soil mixtures and watering consistency. This guide will discuss variety selection, pot setup, and care steps.
Best Pepper Varieties for Pots
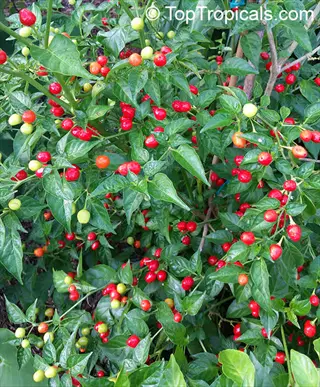
By selecting compact pepper varieties, you will greatly increase your chances of success with container gardening. For example, the 'Patio Snacker' bell pepper will produce around 15-20 fruits on plants that are less than 18 inches tall. Other compact varieties include Thai 'Bird's Eye' peppers, which can grow abundantly in a 3-gallon (11-liter) container. Compact varieties make small-space gardening a breeze!
If your horticultural space is limited and you want to achieve high pepper production, consider docking your plants in the short-season, flavorful 'Shishito' paprika varieties. One plant fills a 19-liter (5-gallon) pot and yields 30-40 wrinkled peppers each week when grown at peak levels. Another option is 'Dwarf Medusa' varieties. They grow sideways instead of up, so they thrive well in window sills, balcony railings, and gardens.
If you're a hot pepper enthusiast, consider trying 'Apache' or 'Black Pearl'. These ornamental varieties will thrive in your standard 2-gallon (7.5-liter) containers. Expect your plant to produce over 50 colorful fruits. The plants also produce colorful, purple foliage, which enhances their appearance while they are fruiting. Use a container of the same size as the adult size of the plant or foliage for best growing outcomes.
Mini Sweet Pepper
- Compact Growth: Reaches 18-24 inches tall, perfect for small containers
- High Yield: Produces 30-50 miniature sweet peppers per plant
- Container Size: Thrives in 3-gallon pots with 12-inch depth
- Flavor Profile: Crisp, sweet peppers ideal for salads and snacking
- Color Change: Ripens from green to vibrant yellow or red
- Harvest Time: Ready in 60-70 days after transplanting
Carmen Pepper
- AAS Winner: Award-winning Italian frying pepper for containers
- Productivity: Yields 15-20 large tapered peppers per plant
- Container Needs: Requires 5-gallon pot with 14-inch depth
- Flavor Development: Sweetens significantly when ripened to red
- Disease Resistance: Tolerant to tobacco mosaic virus
- Growth Habit: Compact 24-inch plants with upright fruit
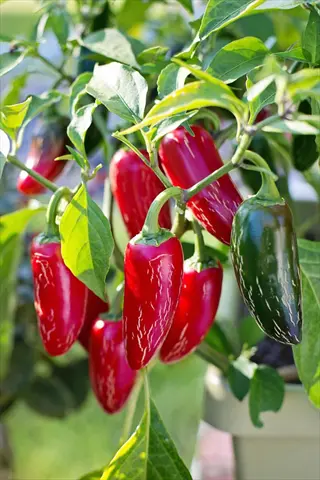
Jalapeño Pepper
- Container Adaptability: Grows well in 3-gallon pots with 12-inch depth
- High Yield: Produces 50-70 medium-hot peppers per plant
- Corking Indicator: Brown lines signal perfect harvest time
- Heat Level: Medium spice ideal for salsas and pickling
- Compact Size: Matures at 24-30 inches tall
- Disease Resistance: Resistant to potato virus Y
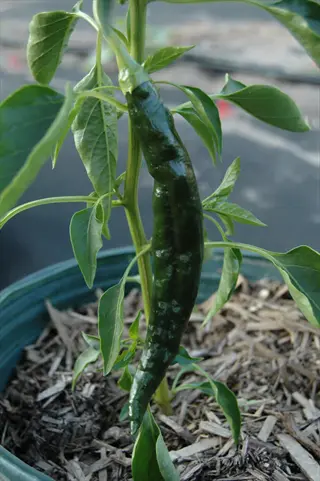
Cayenne Pepper
- Vertical Growth: Tall plants need 14-inch deep containers
- Prolific Producer: Yields 40-60 slender hot peppers per plant
- Drying Quality: Thin walls perfect for making pepper flakes
- Support Needs: Requires staking in 5-gallon containers
- Heat Level: 30,000-50,000 Scoville units
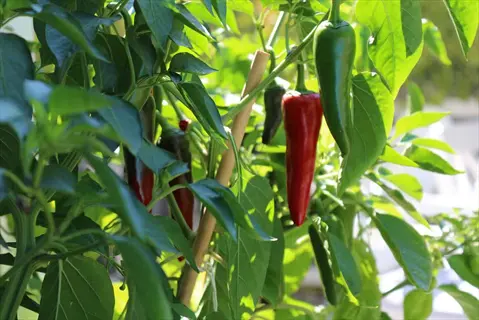
- Ripening Process: Transitions from green to bright red
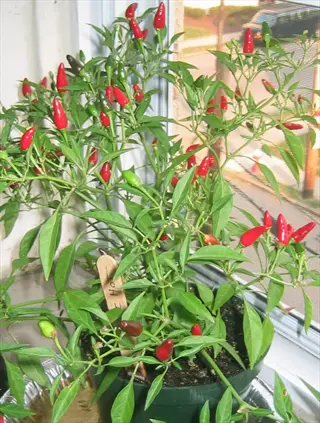
Thai Hot Pepper
- Extreme Productivity: 100+ peppers per plant in containers
- Compact Habit: Bushy 24-inch plants suit 3-gallon pots
- Culinary Use: Essential for authentic Thai and Vietnamese dishes
- Heat Level: 50,000-100,000 Scoville units
- Fruit Orientation: Peppers grow upright facing the sky
- Disease Tolerance: Resists bacterial leaf spot
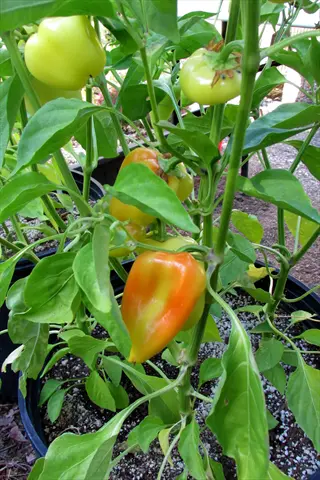
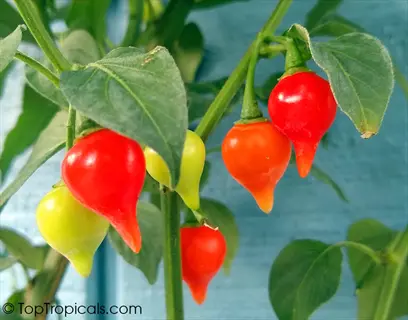
Orange Blaze Pepper
- Color Display: Vibrant orange peppers brighten container gardens
- Container Size: Needs 5-gallon pot with 14-inch depth
- Yield Potential: 10-15 thick-walled blocky peppers
- Growth Habit: Stocky 20-inch plants with dark foliage
- Flavor Profile: Sweet with crisp juicy texture
- Sun Requirements: Full sun for best color development
Cayennetta Pepper
- Compact Size: Ideal for 3-gallon containers on patios
- High Yield: 50-80 small tapered hot peppers per plant
- Early Maturity: Ready for harvest in just 60 days
- Disease Package: Resistant to tobacco mosaic virus
- Ornamental Value: Attractive upright fruit presentation
- Heat Level: Moderate 30,000-40,000 Scoville units
Holy Mole Pepper
- Container Friendly: Grows well in 5-gallon containers
- Unique Flavor: Rich smoky taste for authentic mole sauces
- Yield Capacity: 20-30 medium-sized peppers per plant
- Color Change: Ripens from green to chocolate brown
- Plant Structure: Sturdy 24-inch bushes need minimal support
- Disease Resistance: Tolerant to common pepper viruses
Pretty N Sweet Pepper
- Ornamental Value: Colorful mini peppers on compact plants
- Container Size: Thrives in 3-gallon pots with 12-inch depth
- High Yield: Produces 40-60 bite-sized sweet peppers
- Color Variety: Mixed yellow, orange and red fruits
- Growth Habit: Neat 18-inch plants ideal for small spaces
- Harvest Period: Continuous production all season
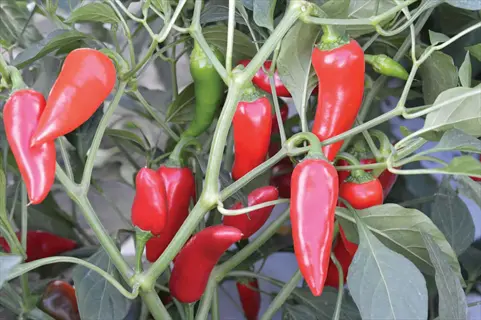
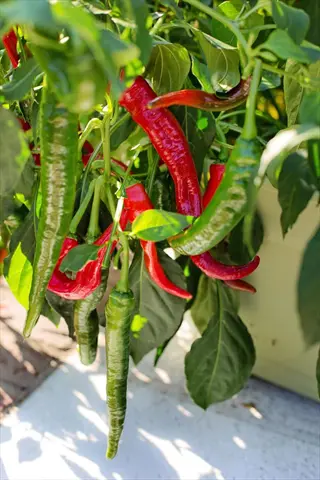
Flaming Flare Pepper
- Visual Impact: Long red peppers on compact plants
- Container Needs: 5-gallon pot with 14-inch depth
- Yield Potential: 30-50 thin-walled hot peppers
- Heat Level: Medium 5,000-30,000 Scoville units
- Growth Habit: Upright 24-inch plants with minimal spreading
- Culinary Use: Perfect for fresh salsas and hot sauces
Container and Soil Setup
Grow bags made of fabric provide excellent drainage and air pruning to keep roots healthy. Plastic pots are lightweight, but require multiple drainage holes to avoid waterlogging. Terra-cotta pots look traditional, but they dry out quickly in hot weather. All mediums are suitable for different types of peppers based on their moisture needs.
Draining needs obviously depend on the type of pepper. While hot peppers, including habaneros, require quick-draining setups with numerous extra holes, bell peppers prefer consistent moisture in deep containers of 12 inches (30 cm) or more. Always use a premium potting mix garden soil specifically for container veggies.
To build a soil blend, use equal portions of compost, coco coir, perlite, and worm castings. For a 5-gallon (19L) pot, it takes 3 gallons of compost, which is easy. I learned that healthy soil outperforms bagged soil in preventing root rot.
Fabric Grow Bags
- Drainage: Superior airflow prevents waterlogging
- Root Health: Air-pruning promotes dense root systems
- Depth Requirement: Minimum 12 inches (30 cm) depth
- Best For: Hot climates where soil dries quickly
- Size Range: 3-10 gallon options
- Maintenance: Foldable for storage but may stain
- Lifespan: 3-5 growing seasons
Plastic Pots
- Drainage: Requires multiple ½-inch holes in bottom
- Depth Requirement: Minimum 12 inches (30 cm) depth
- Weight: Lightweight and easy to move
- Best For: Balconies with weight restrictions
- Size Range: 1-25 gallon options
- Heat Retention: Dark colors warm soil faster
- Lifespan: 5+ years with UV protection
Terra Cotta
- Drainage: Porous walls allow moisture evaporation
- Depth Requirement: Minimum 12 inches (30 cm) depth
- Aesthetics: Classic look for decorative spaces
- Best For: Mediterranean climate gardens
- Size Range: Limited to 12-inch diameter max
- Fragility: Breaks easily in freezing temperatures
- Weight: Heavy when filled (over 15 lbs for 5-gallon)
Self-Watering Pots
- Water System: Reservoir provides consistent moisture
- Depth Requirement: Minimum 14 inches (35 cm) depth
- Best For: Frequent travelers or hot climates
- Size Range: 5-7 gallon capacity optimal
- Maintenance: Clean reservoir monthly to prevent algae
- Root Protection: Prevents root rot with water-level indicator
- Lifespan: 3-4 years with proper care
Recycled Containers
- Eco-Friendly: Repurposed buckets or food containers
- Depth Requirement: Minimum 12 inches (30 cm) depth
- Preparation: Drill 6+ ½-inch drainage holes in bottom
- Best For: Budget-conscious gardeners
- Material Safety: Avoid containers that held chemicals
- UV Protection: Paint exterior to prevent plastic degradation
- Size Range: 5-gallon buckets ideal for peppers
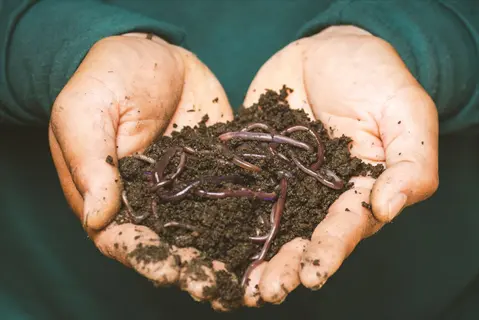
Worm Castings
- Application Rate: 1 cup per 5-gallon container
- Benefits: Slow-release nitrogen and phosphorus
- Microbe Content: Contains beneficial soil bacteria
- Usage: Mix into top 3 inches of soil monthly
- Storage: Keep in sealed container to maintain moisture
- Alternative: Composted manure at same ratio
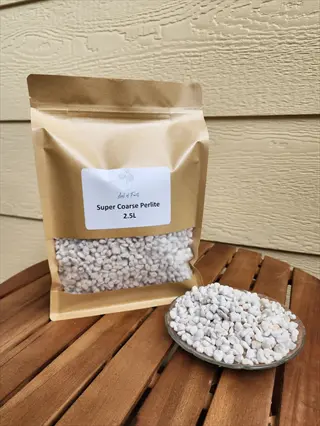
Perlite
- Function: Creates air pockets in dense soil
- pH Neutral: Doesn't alter soil acidity
- Usage Ratio: 1 part perlite to 4 parts soil
- Drainage Test: Water should drain within 10 seconds
- Safety: Wear mask when handling to avoid dust
- Alternative: Coarse sand for heavier mixes
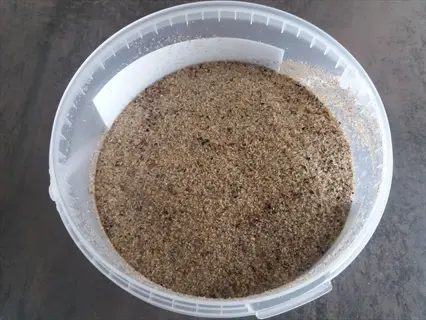
Bone Meal
- Nutrient Profile: High phosphorus (11-15%)
- Application: 2 tbsp per container at planting
- Purpose: Promotes strong root development
- Caution: May attract rodents if surface-applied
- Release Rate: Slow breakdown over 4 months
- Alternative: Rock phosphate for organic gardens
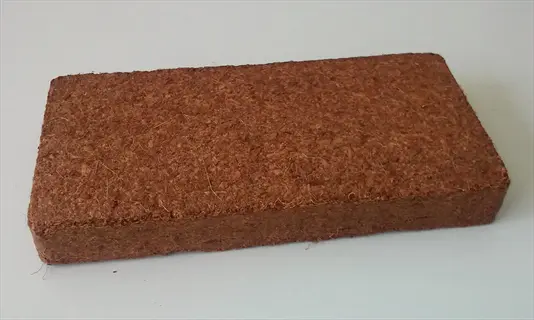
Coco Coir
- Preparation: Soak bricks in warm water to expand
- Water Retention: Holds 10x its weight in moisture
- pH Level: Neutral 6.5-7.0 ideal for peppers
- Sustainability: Renewable alternative to peat moss
- Usage: Replace peat moss in DIY mixes
- Expansion Rate: 1 brick = 8 quarts hydrated coir
Kelp Meal
- Trace Minerals: Rich source of magnesium and zinc
- Application: 1 tbsp per gallon of soil mix
- Growth Stimulant: Contains natural plant hormones
- Stress Resistance: Helps plants withstand heat/drought
- Usage Frequency: Apply every 2 months during season
- Alternative: Liquid seaweed extract for foliar feeding
Planting and Care Guide
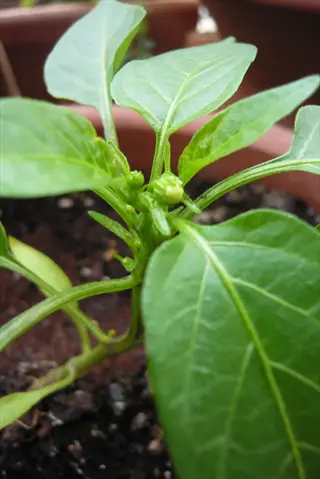
Transplant your peppers after the last frost when the soil reaches 65°F (18°C). Select seedlings ideally with 4-6 true leaves that have been hardened off outdoors for 3 weeks. You will dig holes that are the same depth as the nursery pot in 12-inch (30 cm) containers. Loosen the roots gently before planting to avoid circling.
Modify your watering schedule as per growth stage. Seedlings require daily moisture to a depth of 1 inch (2.5 cm). Flowering plants need watering every 3-4 days when the top 2 inches (5 cm) dry down to the finger knuckle deep. Best practice with mature peppers is to water deeply once a week. Consistency is key to preventing blossom drop.
Caring for peppers is all about observation. I check for any signs of stress on the leaves daily. Fertilize small plants with a half-strength 10-10-10 solution. During fruiting, switch to high-phosphate feed. Always water before fertilizing to prevent root burn. Healthy plants will reward you with heavy harvests.
Transplant Timing
- When: After last frost when soil reaches 65°F (18°C)
- Night Temperatures: Consistently above 55°F (13°C)
- Seedlings: 6-8 weeks old with 4-6 true leaves
- Hardening: Complete 3-week outdoor acclimation first
Container Preparation
- Drainage: Ensure 3-6 drainage holes per container
- Soil Fill: Leave 1 inch (2.5 cm) space below rim
- Planting Depth: Match nursery pot soil level
- Root Handling: Gently loosen root ball if root-bound
Initial Watering
- First Water: Soak soil until water drains from bottom
- Frequency: Water daily for first week after transplanting
- Depth Check: Soil should be moist 4 inches (10 cm) deep
- Avoid: Wetting foliage to prevent fungal diseases
Pre-Planting Preparation
- Container Depth: Minimum 12 inches (30 cm) for all varieties
- Soil Mix: Prepare DIY blend 1 week before transplanting
- Location: Choose full-sun spot with 6-8 hours direct light
- Spacing: Allow 18-24 inches (45-60 cm) between containers
First Fertilization
- Timing: 10-14 days after transplanting
- Formula: Balanced 10-10-10 liquid fertilizer
- Application: Dilute to half-strength for young plants
- Method: Apply to moist soil around plant base
Spring Care
- Fertilizing: Apply balanced 10-10-10 fertilizer at planting
- Pest Check: Inspect weekly for aphids and spider mites
- Support: Install stakes when plants reach 12 inches (30 cm)
- Pruning: Remove first flower buds to boost growth
Summer Care
- Heat Protection: Use 30% shade cloth above 90°F (32°C)
- Watering: Water early morning to reduce evaporation
- Fertilizing: Switch to high-phosphorus 5-10-10 formula
- Harvest: Pick peppers regularly to encourage production
Fall Care
- Frost Protection: Cover plants when temps <55°F (13°C)
- Water Reduction: Decrease frequency by 50%
- Final Harvest: Pick all peppers before first frost
- Overwintering Prep: Trim plants to 8 inches (20 cm) height
Early Spring Prep
- Container Check: Inspect for cracks and clean thoroughly
- Soil Refresh: Replace top 3 inches (7.5 cm) with new mix
- Pruning: Trim dead branches before new growth starts
- Fertilizer Prep: Test soil pH and adjust to 6.0-6.8 range
Winter Dormancy
- Indoor Placement: Near south-facing window or under grow lights
- Watering: Once monthly to prevent root desiccation
- Temperature: Maintain 55-65°F (13-18°C)
- Pest Control: Inspect leaves weekly for indoor pests
Harvesting and Storage Tips
Pepper harvesting is different for sweet and hot varieties. For bell peppers, harvest when they are glossy and firm using pruning shears. For habaneros, harvest when the colors are more pronounced, wearing gloves to avoid a skin rash. Always cut the stem ½ inch above the fruit to prevent harm to the plant.
Refrigerating fresh peppers, in perforated bags, makes them edible for a week or two. Diced peppers are freezeable (after blanching) for ten months. Sliced peppers (1/4-inch thick) are dried at 135°F (57°C), with year-long storage. Align preservation technique to your culinary needs.
You can try pickling in pint jars for zippy sandwich toppings. Fermenting hot peppers also works well in a 3% brine solution for delicious probiotic sauces. I keep my dried peppers in sealed jars with silica packs. This is storage like I mentioned, with flavor and nutrition for tasting at any season.
Bell Peppers
- Ripeness Signs: Glossy skin, firm texture, full color (red/yellow/orange)
- Harvest Time: 60-80 days after transplanting
- Method: Cut stem with pruners 1 inch (2.5 cm) above fruit
- Green vs. Ripe: Green peppers edible early; wait for color change for sweetness
Jalapeños & Thick-Walled Peppers
- Ripeness Signs: Deep color with corking lines
- Harvest Time: 70-85 days after transplanting
- Gloves Required: Use when handling to avoid skin irritation
- Method: Twist gently while supporting stem
Cayenne & Thin-Walled Peppers
- Ripeness Signs: Vibrant red color and slightly soft texture
- Harvest Time: 65-75 days after transplanting
- Continuous Harvest: Pick ripe peppers weekly to prolong production
- Method: Snip clusters with shears
Ornamental Peppers
- Harvest Note: Prioritize visual appeal over flavor
- Timing: Leave on plant until full color development
- Preservation: Dry on plant for decorative use
- Handling: Avoid touching eyes after contact
Habanero & Super Hot Peppers
- Ripeness Signs: Waxy sheen and color change to final hue (orange/red)
- Harvest Time: 90-100 days after transplanting
- Safety Gear: Wear gloves and eye protection during harvest
- Method: Cut with shears leaving ½ inch stem attached
Freezing Methods
- Whole Peppers: Ideal for stuffing later; remove seeds before freezing
- Pureed: Blend with oil for frozen flavor cubes
- Flash Freeze: Spread pieces on parchment-lined tray before bagging
- Thawing: Use directly in cooked dishes without defrosting
Drying Approaches
- Sun Drying: Requires 3-5 sunny days; cover with mesh
- Oven Method: Lowest setting with door slightly open
- Dehydrator: Most efficient; maintain 135°F (57°C)
- Storage: Keep in airtight jars with silica packets
Pickling Variations
- Vinegar Brine: Basic 1:1 water/vinegar with salt and spices
- Fermented: Salt brine for probiotic benefits
- Refrigerator Pickles: Quick method without canning
- Flavor Combos: Add garlic, dill, or mustard seeds
Specialty Preservation
- Pepper Jellies: Combine with sugar and pectin
- Hot Sauces: Ferment or cook with vinegar base
- Smoking: Use wood chips before drying for chipotle
- Infused Oils: Pack in sterilized bottles with herbs
Oil Infusion
- Preparation: Dry peppers completely before submerging in oil
- Oil Choice: Use high-smoke-point oils like grapeseed or sunflower
- Storage: Refrigerate and use within 2 months
- Safety: Acidify with vinegar (1 tbsp per cup) to prevent botulism
Troubleshooting Common Issues
Yellowing leaves are signs of pepper issues such as too much water, or not enough nitrogen - check soil two inches deep for moisture. Consider fish emulsion fertilizer for organic solutions. If you need to go chemical, use a balanced fertilizer, and that should help. This can affect plants at any stage of growth, but generally, seedlings react the worst.
Blossom end rot looks like dark spots on the bottoms of the fruits. It's caused by calcium deficiency during fruit formation. Use crushed eggshells in the soil for organic treatment, or gypsum for a faster conventional treatment. Water regularly to help avoid this common stress in peppers.
Leaf curl typically indicates the presence of aphids or viral diseases. You should spray neem oil - the easiest way to manage organically. Leave infected leaves alone, remove them, and if the infestation is widespread, use insecticidal soap. The best approach is disease prevention through weekly scouting as the plants are flowering and especially during the early growth stage.
Yellowing Leaves
- Causes: Overwatering, nitrogen deficiency, or poor drainage
- Solution: Let soil dry between waterings; apply fish emulsion fertilizer
- Check: Soil moisture 2 inches deep; improve drainage with perlite
- Affected Stage: All growth phases
Flower Drop
- Causes: Temperatures >90°F (32°C), low humidity, or poor pollination
- Solution: Provide afternoon shade; mist plants; hand-pollinate flowers
- Timing: Most common during summer fruit set
- Prevention: Plant heat-tolerant varieties
Blossom End Rot
- Causes: Calcium deficiency from inconsistent watering
- Solution: Water regularly; add crushed eggshells to soil
- Application: 1 tbsp gypsum per gallon of soil mix
- Affected Fruit: First developing peppers
Stunted Growth
- Causes: Cold soil <60°F (15°C), root-bound plants, or pests
- Solution: Use black pots to warm soil; repot if root-bound
- Inspection: Check roots for nematodes or aphids
- Recovery Time: 2-3 weeks after correction
Leaf Curling
- Causes: Aphid infestation, herbicide drift, or viral diseases
- Solution: Spray with neem oil; remove affected leaves
- Prevention: Avoid weed killers near garden
- Isolation: Quarantine new plants for 1 week
Water Management
- Schedule: Water when top 1 inch (2.5 cm) soil is dry
- Method: Use drip irrigation or bottom-watering
- Timing: Early morning to prevent fungal issues
- Check: Install soil moisture meter
Nutrient Balance
- Testing: Soil test every 3 months
- Organic Options: Compost tea every 2 weeks
- Deficiency Signs: Purple stems = phosphorus; yellow veins = iron
- Avoid: High-nitrogen fertilizers during fruiting
Pest Control
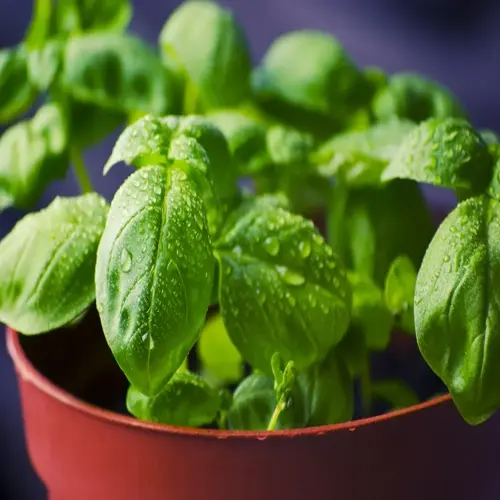
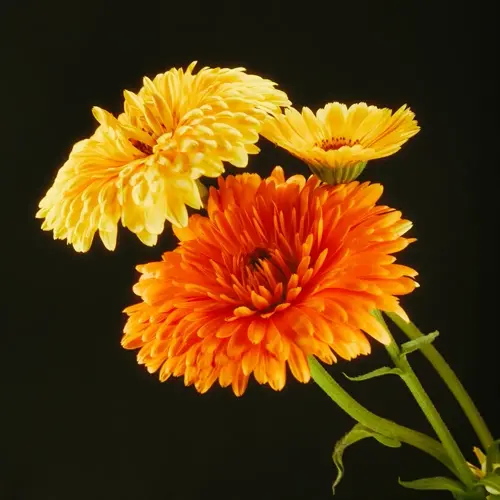
- Companion Plants: Basil repels aphids; marigolds deter nematodes
- Barriers: Row covers for young plants
- Beneficials: Release lacewings for aphid control
- Sprays: Neem oil application every 10 days
Environmental Protection
- Heat: 30% shade cloth above 90°F (32°C)
- Cold: Move pots indoors below 50°F (10°C)
- Wind: Use windbreaks for exposed balconies
- Humidity: Pebble trays for indoor plants
Sanitation Practices
- Tool Care: Sterilize pruners with alcohol
- Debris Removal: Clear fallen leaves weekly
- Pot Rotation: Turn containers monthly for even growth
- Soil Replacement: Refresh top 3 inches annually
5 Common Myths
Peppers do best in very large containers, such as 10-gallon containers, to produce respectable yields in pots.
Most varieties of peppers will do well in 5-gallon containers, as this is enough room for roots to grow and produce a lot of fruit. Smaller pepper varieties, such as the Thai hot peppers, can produce very well in a 3-gallon pot. The point is to have enough depth (12 inches or more or 30 centimeters or more) instead of having excess volume. A container that permits proper watering and fertilization, in an appropriate size, will outpace a bigger pot where the soil can sometimes stay overly wet.
Daily watering of pepper plants is crucial for fruitful production and healthy plants.
Overwatering will create more problems than underwatering, such as root rot and leaching of nutrients. If the top 1-2 inches (2.5-5 cm) of soil is dry, the plant will benefit from deep, infrequent watering. If the pepper plant is established, 3-5 days is a good guideline depending on temperature for watering. The plant benefits from thoroughly soaking the roots and promoting healthy root systems. Watering pepper plants every day will wash nutrients away and create an anaerobic environment that will stunt growth and greatly decrease yields.
If hot peppers are grown near sweet peppers, the sweet peppers will be hot, because hot and sweet peppers can cross-pollinate.
Cross-pollination will only affect the genetics of the seeds, not the current fruit you produce on any plant that season. If you grow peppers from cross-pollinated seeds, the plants produced may exhibit hybrid characteristics, but the fruit produced on a current plant will remain true to type. You can also grow hot peppers and sweet peppers in adjacent containers without any flavors contaminating each other. The isolation of plants is only necessary when saving seed, not when you usually grow in containers.
Peppers must ripen fully on the plant; they won't develop proper flavor if picked early.
Peppers continue ripening off the vine once they've reached the breaker stage (when color change begins). Harvesting at this point actually reduces plant stress and encourages more production. Fruits picked when showing 10-20% color will fully ripen indoors with identical flavor and nutrition. This technique extends harvests in cool climates where frost might end the season prematurely.
Peppers that are grown in containers will invariably produce lower yields than those grown directly in the soil of the garden.
When given proper care, peppers grown in pots can yield the same as, or greater, than those planted in the ground. Containers provide superior control over soil quality, moisture, and nutrients, which is something that is not achievable in gardens. By taking advantage of the container placement, you can achieve optimal sun exposure as well as provide mobility that can protect them from extreme weather. Most commercial growers use containers for higher yields per square foot, especially when they use compact hybrid varieties bred to be grown in pots.
Conclusion
Container gardening makes it possible for everyone to grow peppers, no matter the space available. All you need are some pots, soil, and sunshine. I converted my small balcony into a temporary pepper garden. And blooms and harvests take patience and some basic care. This is a method anyone can follow.
Your journey will take you from a variety of selection to harvesting your ripe fruits. Every step will teach lessons about the needs of plants in the process. Seeing the seedlings grow into productive plants is a daily source of satisfaction and reward. Homegrown peppers taste infinitely better than any store-bought. There is a payoff for that tireless effort and attention, much like in life.
Use different kinds of peppers and observe various growing methods. Try different types of unusual peppers, such as purple UFOs or chocolate habaneros. Compare the use of organic fertilizer with conventional fertilizer. Discover the strategies that work best for your unique environment. Enjoy the flavor of your own pepper harvest again.
External Sources
Frequently Asked Questions
What container size works best for growing peppers in pots?
Peppers thrive in containers with at least 12-inch depth and 5-gallon capacity. Compact varieties like Thai peppers need 3-gallon pots, while larger bell peppers require 5+ gallons. Ensure drainage holes and use lightweight soil mixes for healthy root development.
Can I grow peppers year-round in containers?
Peppers can grow year-round indoors with proper conditions:
- Winter care: Move pots indoors before frost; use grow lights for 12+ hours daily
- Temperature: Maintain 65-85°F (18-29°C) with humidity above 40%
- Pollination: Hand-pollinate flowers using a soft brush
- Pruning: Trim leggy growth to encourage bushiness
How often should I water potted pepper plants?
Water when the top 1-2 inches of soil dries out. Frequency changes with growth stages: daily for seedlings, every 3-4 days during fruiting. Always water deeply until it drains from the bottom, and reduce frequency in cool weather.
Do peppers need full sun when grown in containers?
Peppers require 6-8 hours of direct sunlight daily. In hot climates, provide afternoon shade to prevent sunscald. Rotate pots weekly for even light exposure, and supplement with grow lights if indoor conditions lack sufficient natural light.
What homemade fertilizers work for container peppers?
Effective organic options include:
- Compost tea: Steep compost in water for nutrient-rich liquid fertilizer
- Eggshells: Crush for calcium to prevent blossom end rot
- Banana peels: Bury for potassium boost during flowering
- Epsom salt: Dissolve 1 tbsp per gallon for magnesium
Can I grow different pepper varieties together?
Yes, but follow these guidelines:
- Spacing: Keep pots 18-24 inches apart to prevent disease spread
- Cross-pollination: Doesn't affect current season's fruit flavor
- Companions: Basil improves growth; avoid fennel which inhibits peppers
- Separate: Hot and sweet varieties if saving seeds
Why do pepper flowers drop before fruiting?
Flower drop results from stress factors: extreme temperatures above 90°F (32°C), inconsistent watering, or low humidity. Solutions include providing afternoon shade, maintaining soil moisture, misting plants, and hand-pollinating during calm mornings.
How do I harvest peppers for continuous production?
Harvesting techniques:
- Timing: Pick when fruits reach full color and firmness
- Method: Use pruners to cut stems, leaving a short stub
- Frequency: Harvest regularly to encourage new flowers
- Ripening: Early-picked peppers finish coloring indoors
Are coffee grounds beneficial for potted peppers?
Used coffee grounds provide slight nitrogen boost and improve soil texture. Mix sparingly into topsoil (no more than ¼ cup per plant monthly) to avoid acidity imbalance. Always compost grounds first rather than applying fresh.
How do I revive a struggling potted pepper plant?
Revival steps: Check roots for binding, repot if necessary; flush soil to remove salt buildup; prune dead growth; apply balanced fertilizer; ensure proper drainage; and relocate to optimal light conditions. Most plants recover in 2-3 weeks.