
Tomato blossom end rot annoys many gardeners with leathery dark spots spoiling valuable fruits. This is not a disease, but a physiological disorder related to calcium redistribution problems in maturing tomatoes. The first symptoms will be water-soaked areas at the blossom end of green tomatoes.
Your peppers, cucumbers, and melons are at risk of similar outcomes due to their calcium-dependent fruiting patterns. I have witnessed entire zucchini crops suffer due to variations in irrigation during heat events. The good news? You manage the cause of the issue with good gardening skills.
Don't stress over damaged tomatoes. We're instead talking about methods of prevention that we can address together. Consistent watering routines and soil management can take everything to a whole new level. My worst season was recently, and with the same methods, I turned it around - I saved about eighty percent of my crop.
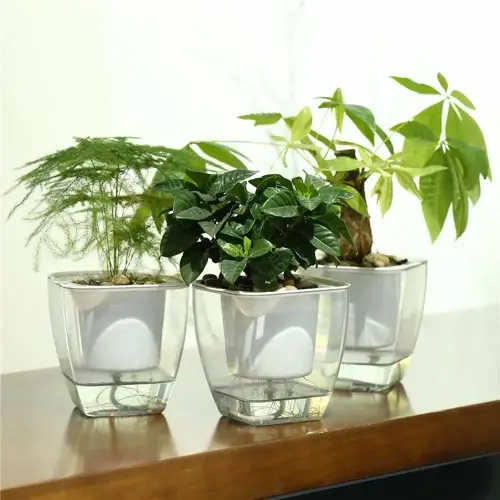
Container Gardening Solutions
Growing tomatoes in pots is pretty much a science. To assure proper root development, you need containers that hold at least 10 gallons of soil. Anything less will limit root development and/or lead to water stress. I discovered this after I first tried to grow a container crop in small buckets and failed miserably.
Watering container plants takes attention. To check soil moisture, insert your finger in the soil up to about two inches. When the soil feels dry, water the plants thoroughly. When it gets hot in the summer, expect to water twice a day. The patio tomatoes I am growing have enjoyed it so much that I have avoided blossom end rot.
Mix calcium amendments right into the potting soil. One cup of crushed eggshells or half a cup of gypsum per five gallons of soil. Starting from the very beginning prevents deficiencies. I mix mine before planting to ensure consistency.
Utilize light-weight mulches such as shredded bark or coconut coir. Spread two inches of material over the soil surface to maintain a high moisture content. Heavy materials that compact won't accomplish this. The above pile doesn't lose soil to evaporation. Just one simple layer keeps roots cooler and reduces water loss by thirty percent.
Container Specifications
- Minimum capacity: Always use containers holding at least 5 gallons (19 liters) of soil to prevent root binding issues that restrict growth.
- Material considerations: Select breathable containers like fabric pots or terracotta that allow air exchange around root zones.
- Drainage requirements: Ensure adequate drainage holes to prevent waterlogging, with 1 hole per 6 inches (15 cm) of container diameter.
- Depth guidelines: Maintain minimum 12 inch (30 cm) soil depth for proper tomato root development in limited spaces.
Water Management
- Irrigation systems: Install drip irrigation with timers to maintain consistent moisture levels without daily manual intervention.
- Frequency adjustments: Water twice daily during temperatures exceeding 85°F (29°C) to combat rapid soil drying in containers.
- Volume control: Provide enough water to moisten entire root ball until drainage occurs, typically 1-2 quarts (0.9-1.9 liters) per session.
- Monitoring method: Check soil moisture 2 inches (5 cm) deep before watering; skip if still damp to prevent oversaturation.
Soil Composition
- Drainage enhancement: Mix 30% perlite or vermiculite into standard potting soil to improve aeration and prevent compaction.
- Calcium integration: Add 1 cup (240 ml) crushed eggshells or 0.5 cups (120 ml) gypsum per 5 gallons (19 liters) of soil mix.
- Nutrient balance: Incorporate slow-release tomato fertilizer with 5-10-10 NPK ratio during initial soil preparation.
- pH maintenance: Test container soil monthly; apply lime if pH falls below 6.5 to maintain calcium availability.
Mulching Practices
- Material selection: Use lightweight organic mulches like coco coir or pine needles at 2 inch (5 cm) depth for evaporation control.
- Application timing: Apply immediately after transplanting to regulate soil temperature and moisture from early growth stages.
- Replacement cycle: Refresh mulch layer every 6 weeks to maintain effectiveness and prevent decomposition issues.
- Edge clearance: Keep mulch 2 inches (5 cm) from plant stems to avoid moisture-related stem rot problems.
Container Placement
- Sun exposure: Position containers to receive 6-8 hours of direct sunlight daily for optimal fruit development.
- Wind protection: Use windbreaks like trellises when placing containers on balconies to reduce moisture loss.
- Temperature management: Move containers to shaded areas during extreme heat above 95°F (35°C) to prevent stress.
- Accessibility: Ensure containers are placed within easy reach of water sources for consistent irrigation maintenance.
Seasonal Timing Tips
Plant tomatoes only when soil temperatures reach 60°F (15°C) or warmer. Cold soil prevents calcium absorption, leading to early rot. I use a basic soil thermometer to check first before transplanting. Planting too early in the spring, you may lose your first set of fruit.
Seasonal watering adjustments are essential. Water deeply every 3 days in the spring, gradually increasing to daily watering as the summer heat intensifies. Use drip irrigation for optimum moisture retention. I set my timers to run at dawn to minimize evaporation and undue stress to your plants.
Shield your plants during heatwaves when the temperature is above 90°F (32°C). Install 30% shade cloth that applies from 10 am to 4 pm to prevent blossom drop. I attach mine to basic frames made from PVC, which will provide instant support/ protection. Additionally, mist your plants' leaves early in the morning for an added cooling effect.
Adjust care to your ecosystem. In humid places, space plants 3 feet apart to allow for airflow. In arid areas, sow buried clay pots to conserve water. In coastal gardens, consider adding windbreaks to protect against salt spray. I adapted my Texas garden with these techniques.
Spring Preparation
- Soil warming: Use black plastic mulch to raise soil temperature 1-2 weeks before planting for earlier safe transplanting.
- Frost protection: Install floating row covers when night temperatures drop below 50°F (10°C) to shield young plants.
- Planting depth: Set transplants 1 inch (2.5 cm) deeper than nursery pots to encourage robust root development.
- Initial watering: Maintain consistent moisture without saturation to help seedlings establish strong root systems.
Summer Maintenance
- Water scheduling: Irrigate at dawn and dusk during temperatures above 85°F (29°C) to reduce evaporation stress.
- Heat protection: Install 30% shade cloth during peak afternoon hours to prevent blossom drop and sunscald.
- Mulch refresh: Replenish organic mulch to 3 inches (7.5 cm) depth monthly to maintain soil moisture retention.
- Fertilizer pause: Suspend nitrogen applications during extreme heat to prevent excessive foliage growth.
Heatwave Response
- Emergency shading: Deploy temporary shade structures when temperatures exceed 95°F (35°C) for more than 3 days.
- Deep watering: Increase irrigation to 2 gallons (7.5 liters) per plant daily during prolonged heat stress.
- Foliar cooling: Mist plants early morning with plain water to reduce leaf temperature without promoting disease.
- Fruit protection: Harvest nearly ripe fruits early to prevent sun damage and blossom end rot development.
Fall Transition
- Water reduction: Gradually decrease watering as temperatures cool to match slower plant transpiration rates.
- Frost preparation: Cover plants with thermal blankets when night temperatures approach 45°F (7°C).
- Late harvest: Pick all remaining fruits before first frost even if slightly immature to prevent rot loss.
- Soil amendment: Incorporate compost after harvest to replenish nutrients for next season's planting.
Regional Adjustments
- Humid climates: Increase plant spacing to 3 feet (90 cm) for better airflow and reduced fungal pressure.
- Arid regions: Use ollas (clay pots) buried beside plants for slow, deep watering efficiency.
- Coastal areas: Create windbreaks to protect plants from salt spray that can damage foliage and fruits.
- Mountain zones: Select early-maturing varieties that fruit before first fall frost dates arrive.
Choosing Resistant Varieties
Opt for resistant tomato varieties such as Roma and San Marzano, allowing for natural protection. Their thicker fruit walls stabilize calcium uptake during growth. These tomatoes are used as my primary growing crop every season. Steer clear of varieties that are susceptible to disorder: Early Girl or their size, such as beefsteaks, struggle with calcium distribution.
Cultivate companion plants to support the health of your tomato plants. Basil enhances soil structure around the roots, and beans fix nitrogen, which improves tomato growth without draining calcium from the soil. I also use marigolds as cover cropping between tomato plants to reduce nematode populations that destroy roots. They are companions that will provide you with a buffer zone for your tomato plants.
Select determinate varieties that exhibit a compact growth form. The size control will channel more calcium to the fruit. Mountain Merit and Celebrity Tomatoes notably provide this. I intentionally do not use sprawling heirlooms, which tend to demonstrate rot issues in trials.
Look for regional types suitable for your own climate. For example, heat-tolerant Solar Fire is an appropriate choice for southern gardens. At the same time, cold-hardy Glacier is well-suited for short growing seasons. Coastal areas should consider salt-tolerant types, like the newly released Seaside. I tend to choose varieties that match the conditions, with the hope of getting regular harvests and avoiding blossom end rot issues.
Resistant Traits
- Determinate growth: Bush-type varieties like Roma often handle calcium uptake more efficiently during fruiting stages.
- Thicker cell walls: Plum tomatoes naturally develop denser tissues that better retain calcium during rapid growth phases.
- Compact root systems: Varieties with concentrated roots absorb moisture more consistently in varying soil conditions.
- Moderate growth rate: Plants with steady development balance nutrient demands better than fast-growing types.
Companion Plants
- Legumes: Beans and peas fix nitrogen in soil without excess salts that interfere with calcium absorption.
- Basil: Repels pests while improving soil structure around tomato roots through subtle root exudates.
- Marigolds: Deter nematodes that could damage roots and impair nutrient uptake capabilities.
- Borage: Attracts pollinators while its deep roots bring minerals closer to the surface soil layer.
High-Risk Varieties
- Early Girl: Fast growth and heavy fruiting make calcium distribution challenging during dry spells.
- Beefsteak types: Large fruits require more consistent calcium supply than their physiology often provides.
- Cherry tomatoes: Continuous fruiting creates constant calcium demand that roots struggle to meet.
- Heirloom varieties: Many lack modern breeding for calcium efficiency in diverse growing conditions.
Planting Strategies
- Succession planting: Stagger plantings of resistant varieties every 3 weeks for continuous harvest.
- Microclimate placement: Position susceptible varieties in protected areas with consistent soil moisture.
- Container selection: Grow high-risk varieties in 10+ gallon pots for better root zone control.
- Soil preparation: Amend planting holes with 1 cup crushed eggshells for varieties needing extra calcium.
Regional Recommendations
- Hot climates: Choose heat-tolerant Celebrity or Solar Fire varieties that maintain fruit quality.
- Humid regions: Select disease-resistant Mountain Pride or Defiant varieties for added protection.
- Short seasons: Opt for quick-maturing Glacier or Stupice varieties that fruit before stress peaks.
- Coastal areas: Use salt-tolerant varieties like Seaside that handle challenging mineral balances.
What Causes Blossom End Rot
Calcium forms robust cell walls in young tomatoes. Suppose there is insufficient calcium in the fruit. In that case, cells break down at the blossom end, resulting in the typical leathery spots. Plants require a steady supply of calcium during the fast growth stages of fruit development.
Environmental stress breaks down calcium movement. With drought, calcium becomes less soluble, and with excessive water, the roots become waterlogged and drown. I have experienced heat waves with temperatures above 90°F (32°C), during which the plant prioritizes calcium transport to its leaves over fruit production. Extremes in humidity also factor into transport efficiency.
The chemistry of the soil is the ultimate determinant of calcium availability. Acidic soils (pH less than 6.0) sequester calcium, while higher phosphorus or potassium levels compete with calcium uptake. Soil testing is warranted every season. I balance mine at about 6.5-7.0 pH for best access.
Healthy roots consistently absorb calcium. Compacted soil, nematodes, or tillage damage limit uptake. I protect the roots of my plants with mulch and avoid digging close to them in my garden. Container tomatoes must be planted in deep containers to develop a solid root system.
Calcium Deficiency Mechanisms
- Insufficient soil calcium: Occurs in sandy or heavily leached soils where calcium washes away before plants absorb it.
- Locked calcium availability: High phosphorus or potassium levels chemically bind calcium, making it inaccessible to plants.
- pH imbalance impact: Soil pH below 6.0 reduces calcium solubility, while above 7.5 promotes binding with carbonates.
- Competitive cation interference: Excess magnesium, potassium, or ammonium ions block calcium absorption at root sites.
Water Stress Factors
- Drought cycles: Dry soil prevents calcium dissolution and transport through xylem vessels to developing fruits.
- Overwatering damage: Saturated soil suffocates roots, reducing their ability to absorb dissolved calcium nutrients.
- Inconsistent moisture: Fluctuations between wet and dry conditions disrupt steady calcium flow to fruit tissues.
- Evaporation rates: High temperatures increase leaf transpiration, diverting water (and calcium) away from fruits.
Root System Disruptions
- Physical damage: Tilling or weeding near plants severs feeder roots responsible for calcium absorption.
- Soil compaction: Dense soil restricts root growth and oxygen availability, limiting nutrient uptake efficiency.
- Container restrictions: Pot-bound roots cannot expand to access sufficient calcium reserves in confined soil.
- Nematode infestation: Root-knot nematodes damage root hairs, reducing calcium absorption surface area.
Environmental Stressors
- Temperature extremes: Cold soil below 55°F (13°C) slows root activity, while heat above 95°F (35°C) stresses plants.
- Humidity effects: Low humidity increases transpiration, diverting calcium to leaves instead of developing fruits.
- Salinity issues: High salt concentrations in soil or water create osmotic stress that hinders calcium uptake.
- Rapid growth spurts: Fast vegetative growth from excess nitrogen demands more calcium than roots can supply.
Cultural Practice Errors
- Nitrogen overapplication: Promotes excessive leaf growth that monopolizes available calcium resources.
- Improper fertilization: Ammonium-based fertilizers increase soil acidity and interfere with calcium uptake.
- Shallow planting: Seedlings set too high develop weak root systems that cannot access subsoil calcium.
- Mulching neglect: Bare soil experiences wider moisture and temperature fluctuations that stress plants.
Prevention and Care
Before planting, you should test your soil. A quick home test kit is sufficient to determine pH levels and calcium availability. Good soil pH levels for good calcium uptake are 6.5-7.0. I test mine every year in the spring and mid-summer season. You can quickly adjust acidic soils with lime or alkaline soils with sulfur.
Water thoroughly and consistently. Soak the soil 6-8 inches deep each time. Use drip irrigation or soaker hoses for consistent moisture. I run mine for 45 minutes every three days. This helps prevent drought stress, which can lead to blossom end rot.
Use appropriate calcium amendments. Mix 1 cup of crushed eggshells, or ½ cup of gypsum, for each square yard before planting. For plants already established, side-dress each month with calcium nitrate as a calcium source. I haven't used excessive amounts, which can cause a nutrient imbalance.
Cover exposed soil with 3-4 inches of straw or shredded leaves to help regulate soil temperature and moisture. I also update my mulch once a month to inhibit the growth of weeds. I have also observed, through my own testing, that red plastic mulch actually increases calcium uptake in tomatoes.
Soil Preparation
- pH balancing: Apply lime to acidic soils or sulfur to alkaline soils to maintain optimal 6.5-7.0 pH range for calcium availability.
- Calcium enrichment: Incorporate 1 cup (240 ml) crushed eggshells or 0.5 cups (120 ml) gypsum per square yard (0.8 m²) before planting.
- Organic matter: Mix 3 inches (7.5 cm) compost into topsoil to improve water retention and nutrient distribution capabilities.
- Drainage correction: Add perlite or sand to heavy clay soils at 25% volume to prevent waterlogging issues.
Water Management
- Deep irrigation: Water slowly for 30-45 minutes to moisten soil 6-8 inches (15-20 cm) deep, encouraging deep root development.
- Consistency tools: Use drip systems with timers to deliver 1-1.5 inches (2.5-3.8 cm) weekly, adjusting for rainfall and temperature.
- Monitoring method: Check soil moisture by inserting finger 2 inches (5 cm) deep; water when dry to the first knuckle.
- Container care: Water container plants twice daily during temperatures above 85°F (29°C) to prevent rapid drying.
Fertilizer Application
- Balanced formulas: Use 5-10-10 NPK ratio fertilizers with added calcium during initial planting and fruit set stages.
- Nitrogen control: Limit nitrogen applications to 0.5 pounds (227g) per 100 square feet (9.3 m²) per growing season.
- Foliar supplements: Apply calcium chloride spray (2 tbsp/gal water) weekly during flowering as temporary support.
- Organic options: Side-dress with worm castings or compost tea every 4 weeks for slow-release nutrient delivery.
Mulching Practices
- Material selection: Use organic mulches like straw or shredded leaves at 3-4 inch (7.5-10 cm) depth for optimal insulation.
- Application timing: Mulch immediately after soil warms in spring to maintain consistent moisture and temperature levels.
- Weed suppression: Replenish mulch layer monthly to block weeds that compete for water and nutrients.
- Specialized options: Use red plastic mulch for tomatoes to reflect specific light wavelengths that boost calcium uptake.
Monitoring Systems
- Soil testing: Check pH and nutrient levels every 3 weeks using home test kits during active growing seasons.
- Plant observation: Inspect new fruits daily for early water-soaked spots indicating calcium deficiency onset.
- Weather tracking: Use simple rain gauges to adjust irrigation amounts after natural precipitation events.
- Record keeping: Log watering schedules and fertilizer applications to identify patterns affecting plant health.
5 Common Myths
Blossom end rot is caused by bacteria or fungi that enter the tomato fruit from the outside.
This is a physiological disorder due to lack of calcium in developing fruit tissues, rather than any specific disease causing infection. It is simply when plants cannot transport enough calcium to cells developing at the blossom end quickly enough for rapid tissue expansion, resulting in cell wall collapse and leathery lesions. Affected fruit, unlike a fungal disease, is not infected with spores or spreading lesions, and there is no transmissible aspect to the disorder, nor can it be transferred to uninfected plants by contact or air.
Adding more calcium to the soil via eggshells or some commercial supplement are not enough to immediately cure the problem with the affected tomatoes.
The plant's uptake of calcium comes from the consistent moisture in the soil which dissolves the calcium, transporting it through the roots. Additions of amendments to the soil will not provide benefit if the strongest drought, poor pH, or root damage are the reason that the plant is not able to take up the calcium. Again, this could take weeks of improvement as the plant directs calcium to vegetative growth, and the damaged existing fruit does not return to a healthy state. We need to be more concerned about the consistency of water and pH as a priority before addition of more calcium supplements.
Blossom end rot is a problem only of tomatoes so your other crops are not at risk.
Peppers, eggplants, cucumbers, and melons are just as vulnerable because they all have similar fruiting physiology. Just like tomatoes they take calcium up passively through the water flow in their xylem vessels, and a shift in moisture will compromise this uptake. Gardeners should be aware of early-stage symptoms of blossom end rot in all crops, including water-soaked spots on peppers and eggplants, and practice all of the same watering measures in all crops to protect the harvest from blossom end rot.
Foliar calcium sprays can quickly reverse blossom end rot by feeding nutrients directly to fruit.
Calcium cannot penetrate mature fruit skins effectively through foliar sprays; plants absorb it primarily through roots. While sprays provide temporary support to leaves, they don't correct the underlying transport issues causing fruit deficiency. Root zone management, consistent watering, pH adjustment, and avoiding root damage, remains essential for long-term prevention rather than superficial treatments.
When you notice blossom end rot on a plant, that crop is ruined and no longer salvageable.
If you notice blossom end rot on immature fruit for the first time, you may still try to intervene early enough to save any subsequent fruit. However, you will need to remove affected tomatoes to enable the plant to redirect calcium to the new growth. You should also correct your watering policies as well as any nutrient deficiencies in the soil and or environment. In 2-3 weeks, provided you are managing moisture more consistently, conducting soil tests to further assess what's needed, and using diluted fertilizers to keep conditions balanced you will likely have healthy fruit again from most plants.
Conclusion
Blossom end rot can be prevented with careful management of your water and soil conditions. Your tomatoes can perform brilliantly if you do this right. I've spoken to countless gardeners about this problem. Consistent watering remains the most effective defense against this maddening condition.
Understanding plant biology addresses the issue. The transport of calcium depends on moisture consistently reaching the root zone. Spread this understanding to your practice by watering your plants deeply. The plants will reward the grower with healthy fruits that do not have leathery spots.
Put those solutions into action today. Test your soil's pH this weekend. Set up a drip irrigation system to ensure a consistent water supply. Choose resistant varieties for next year. You control the outcome by taking small actions each day.
Communicate your success to other gardeners. Keep a journal to track your accomplishments and achievements. Celebrate every harvest you achieve without rot. These fundamentals will make your garden flourish. Your successful tomatoes will be a result of your care and attention.
External Sources
Frequently Asked Questions
What causes blossom end rot in tomatoes?
This disorder occurs due to calcium deficiency during fruit development, primarily caused by inconsistent watering disrupting calcium transport. Other factors include soil pH imbalance, root damage, or rapid plant growth outpacing nutrient absorption.
Can overwatered tomatoes develop blossom end rot?
Yes, oversaturated soil suffocates roots and prevents calcium uptake. Maintain consistent moisture without waterlogging by:
- Using drip irrigation for controlled watering
- Checking soil moisture before irrigating
- Ensuring containers have drainage holes
Are tomatoes with blossom end rot safe to eat?
The unaffected portions remain edible after cutting away damaged areas. The condition isn't caused by pathogens, so it poses no health risk. However, promptly remove affected fruits to redirect calcium to developing tomatoes.
Do coffee grounds help prevent blossom end rot?
Coffee grounds minimally increase calcium but primarily add nitrogen which can worsen the condition if overapplied. Better calcium sources include:
- Crushed eggshells mixed into soil
- Gypsum amendments
- Balanced calcium-rich fertilizers
Can milk provide calcium for tomato plants?
While milk contains calcium, it's inefficient for plant absorption and may attract pests. Use soil-applied calcium amendments like gypsum instead, which dissolve gradually for sustained root uptake without odor issues.
Does Miracle-Gro cure blossom end rot?
Some formulations contain calcium but won't fix existing rot. Focus on core solutions:
- Stabilizing watering consistency
- Adjusting soil pH to 6.5-7.0
- Removing affected fruits promptly
Why use baking soda around tomato plants?
It temporarily raises soil pH to improve calcium availability but isn't a standalone solution. Combine with organic matter and consistent watering for effective prevention without altering soil chemistry drastically.
Can you save seeds from affected tomatoes?
Yes, blossom end rot doesn't affect seed genetics. Extract seeds from healthy sections, rinse thoroughly, and dry completely before storage. However, choose disease-resistant varieties for future plantings.
What natural fertilizers prevent blossom end rot?
Use calcium-rich organic amendments that release nutrients gradually:
- Crushed oyster shells
- Finely ground bone meal
- Gypsum powder
- Composted eggshells
How often should I test soil for prevention?
Test pH and nutrients every 3-4 weeks during growing season. Maintain optimal conditions through:
- Spring pre-planting soil preparation
- Mid-season pH checks
- Post-harvest amendment adjustments