
Harden off seedlings to protect them from shock from transplanting and sun damage. If you don't, the tender leaves will suffer and die, and the stems will become weak and stunted. I have lost complete starts of tomatoes by being impatient and putting them out too soon. This step takes time, but the benefits in long-term health outweigh the trouble of waiting.
Begin with 2 hours of morning shade and gradually increase sunlight each day. I utilize a window screen that's been re-purposed as a filter for direct rays. Over a week, roots harden, leaves thicken, and plants acclimatize to wind without falling over.
Seedlings that are properly hardened will reward you with strong growth and double the yield. Last year my peppers that I hardened in a cold frame produced twice the number of fruits as those I just up-planted. That extra week of attention shows up in harvest.
Step-by-Step Hardening Off Process
Harden off seedlings when your planting date aligns with local frost. Look up your USDA zone. My Zone 5 garden would begin to harden off kale about 4 weeks before tomatoes. Crops that are cold hardy can tolerate low 35°F nights, while peppers require a more steady temperature of 55°F of soil, otherwise, they begin to stunt.
From 7 to 10 AM, the morning sun provides new transplants with gentle exposure. I use a $15 wireless thermometer to monitor leaf surface temperatures. If temperatures drop below 50°F, I take the plant inside. Tender basil receives half as much sun exposure in those first days compared to broccoli.
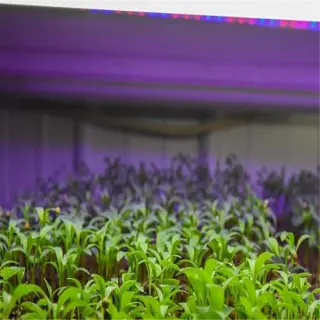
Use UV supplemental lights to accelerate hardening in plants with thicker cuticles. After losing several eggplants to sunscald, I implemented 30-minute sessions at midday with the UV lights. This higher light stress mimics a natural light stress situation, allowing me to reduce my total hardening time from a period of 14 days to only nine days and still maintain plant tolerance against the stress of UV light.
The wind is your unvoiced adversary. Stake outside seedlings with bamboo skewers before their first hour outside. Last spring, the wind flipped my whole seedling tray - I now use bricks to weigh down containers while their stems develop some strength.
Morning Sun Protocol
- Critical Window: 7-10 AM sun exposure prevents leaf scorching
- Progression: Increase from 1 hour to 3 hours over 5 days
- Measurement: Use sunlight calculator apps to track intensity
- Exception: Overcast days allow 30% longer exposure times
Watering Adjustments
- Reduction Rate: Decrease by 50% compared to indoor schedule
- Soil Check: Allow top 1 inch (2.5 cm) to dry between waterings
- Signs of Stress: Slight leaf curl indicates perfect hardening tension
- Emergency Protocol: Immediate watering if stems droop below 45°
Temperature Monitoring Protocol
- Thresholds: Minimum 45°F (7°C) daytime 35°F (2°C) for cold-hardy plants
- Tools: Wireless thermometers with soil probes
- Alerts: Set notifications for sudden drops below 40°F (4°C)
Wind Exposure Management
- Maximum Tolerance: 8-10 mph (13-16 km/h) sustained winds
- Protection: Burlap barriers at 2 ft (60 cm) height
- Recovery: Mist leaves after windy exposure
Fertilizer Tapering
- Schedule: Stop nitrogen feeds 10 days pre-hardening
- Alternative: Use kelp extract for stress resistance
- EC Levels: Maintain 1.2-1.5 mS/cm in soil
UV Light Optimization
- Spectrum Range: 380-410 nm UV-A diodes for hardening
- Duration: 2 hours daily mimics midday sun intensity
- Positioning: 12-18 inches (30-45 cm) above seedlings
- Safety: Use protective eyewear during exposure
Shaded Porch Area
- Ideal Light: 50-100 foot-candles (538-1076 lux)
- Wind Protection: 75% reduction vs. open ground
- Temp Buffer: 5°F (2.8°C) warmer than yard
- Duration: 2-3 days initial hardening
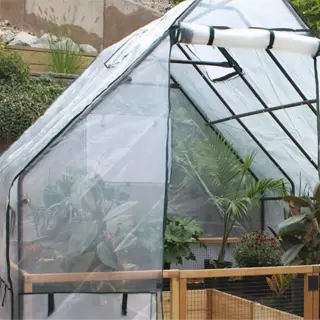
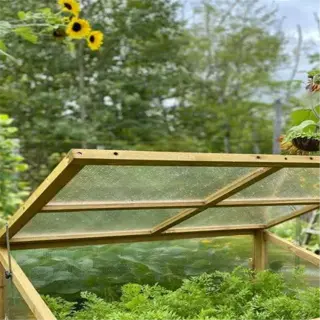
Cold Frame Setup
- Ventilation: Open 6 inches (15 cm) daytime
- Night Protection: Close when temps drop below 40°F (4°C)
- Light Filter: 30% shade cloth roof option
- Transition: 7-day full hardening cycle
Under Tree Canopy
- Dappled Light: Natural 40-60% shade coverage
- Root Competition: Water 20% more than open areas
- Pest Check: Inspect for slugs daily
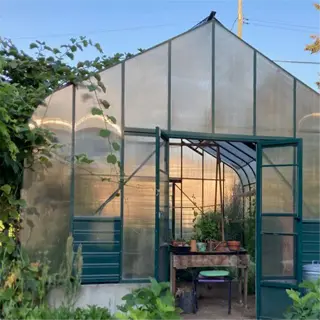
Greenhouse Transition Area
- Vents: Open 25% capacity increasing daily
- Humidity: Maintain 60-70% RH
- Bench Height: 3 ft (90 cm) above ground
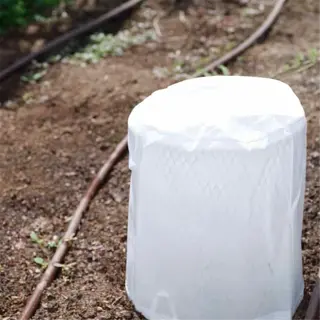
Raised Bed with Cover
- Frost Cloth: Use AG-19 fabric for -4°F (-20°C) protection
- Anchoring: Secure edges with sandbags every 3 ft (90 cm)
- Airflow: Lift covers 12 inches (30 cm) midday
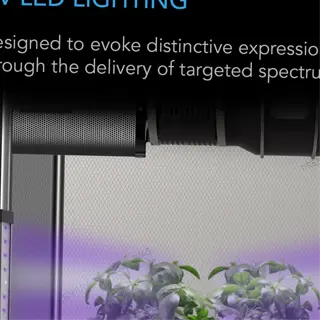
UV Grow Light Setup
- Spectrum: Full-spectrum LEDs with UV-A supplementation
- Height Adjustment: 18-24 inch (45-60 cm) adjustable stands
- Schedule: 14-hour daily cycles mimic peak summer days
- Cost: $50-$200 system investment
Essential Hardening Tools & Methods
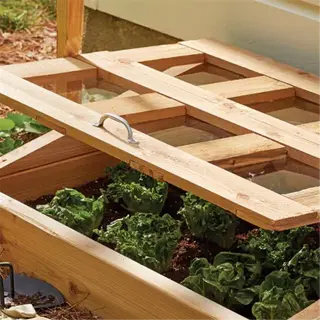
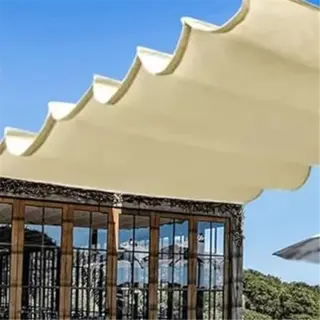
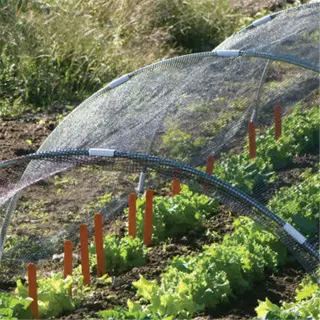
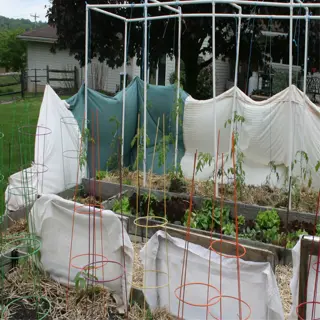
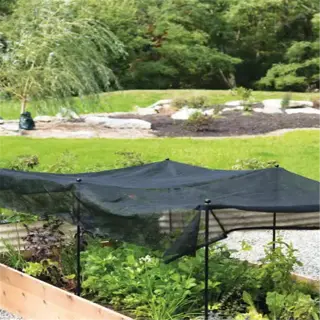
You can harden off your seedlings in two different ways: you can use either a 30% shade cloth, or you can create your own cold frame. I have learned that burlap stretched on hoops made of PVC does a better job blocking hot sun than costly store bought covers. Something to note about cold frames made from old windows is that they will warm the temperature in the frame by 10°F, which can be helpful for hardening off brassicas in cold, late spring weather.
Incorporate UV grow lights to cut down on hardening time. My pepper starts under full spectrum LEDs and develop leathery leaves in five days instead of the normal sunburn stage. Utilize UV exposure in the morning and then cover with shade cloth in the afternoon to replicate natural light changes without stress.
With a $20 wireless thermometer, you'll have an alert on zone-specific risk. In zone 5, we had ours beep if the temperature fell below 40° Fahrenheit and saved the tomatoes from a cold snap. If I had a thermometer in zone 7, I would have programmed it to beep for soil temperatures below 50° Fahrenheit to protect the roots of the basil that would likely suffer some damage.
Abandon pricey cold frames for discarded glass doors and straw bales. Last year, I hardened a batch of kale with my upcycled attempt and spent 1/4 the price. With black-painted stones as the base, you can absorb heat during the day and release it at night.
Shade Cloth Setup
- Height: 3 ft (90 cm) above seedlings
- Attachment: Use PVC hoops with 2 ft (60 cm) spacing
- Duration: 5-7 days for initial hardening phase
- Maintenance: Rinse weekly to prevent dust buildup
Cold Frame Construction
- Materials: Recycled windows + straw bales
- Angle: 30° south-facing for maximum solar gain
- Ventilation: 6-inch (15 cm) gap during daytime
- Insulation: Add rigid foam below 20°F (-7°C)
Thermometer Placement
- Soil Depth: 2 inches (5 cm) for root zone monitoring
- Air Position: 6 inches (15 cm) above plant canopy
- Night Alerts: 40°F (4°C) minimum for tender plants
- Data Logging: 24-hour trend tracking capability
UV Light Protocols
- Exposure: 2 hours daily mimics 3 days of natural hardening
- Distance: 18-24 inches (45-60 cm) from foliage
- Timing: 10 AM-2 PM simulation window
- Safety: Automatic shutoff after 120 minutes
Frost Blanket Usage
- Layering: Double-wrap for -10°F (-23°C) protection
- Anchoring: Bury edges with 6 inches (15 cm) soil
- Venting: Leave 12-inch (30 cm) gap during snow
- Storage: Fold dry to prevent mildew
Adjustable Shade System
- Mechanism: Pulley-controlled 30-70% shade levels
- Frame: Powder-coated steel (6 ft/1.8 m height)
- Coverage: 8x4 ft (2.4x1.2 m) per unit
- Price: $120-$180 retail range

Modular Cold Frame
- Panels: 8mm twin-wall polycarbonate for insulation
- Vents: Auto-open at 65°F (18°C) via wax piston
- Dimensions: 4x2 ft (1.2x0.6 m) sections
- Expandable: Connect multiple units end-to-end
30% Shade Cloth
- UV Protection: Blocks 70% of harmful ultraviolet rays
- Height: Mount 3 ft (90 cm) above seedlings using PVC frame
- Attachment: Secure with bungee cords every 2 ft (60 cm)
- Maintenance: Hose down monthly to maintain light penetration
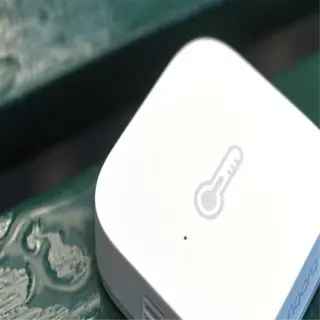
Wireless Soil Thermometer
- Range: Monitors -40°F to 140°F (-40°C to 60°C)
- Probes: 12-inch (30 cm) stainless steel sensors
- Alerts: Push notifications for frost warnings
- Battery: 2-year lithium-ion lifespan
UV Grow Light Setup
- Spectrum: 380-410 nm UV-A + full visible spectrum
- Height: Adjustable 18-24 inch (45-60 cm) stands
- Schedule: 14-hour daily cycles for summer simulation
- Safety: Built-in thermal overload protection
Frost Blanket System
- Material: AG-19 woven polypropylene fabric
- Anchoring: Sandbags every 3 ft (90 cm)
- Light Penetration: 80% PAR transmission
- Storage: Roller system for tangle-free storage
Plant-Specific Guidelines
Harden off tomato plants throughout 10 to 14 days, beginning with around 2 hours of morning sun. Peppers, on the other hand, need a warmer start. For peppers, wait until the soil temperature will hold around 60°F. I lost an entire jalapeno crop in the past by exposing them to 50°F nights too early. Use row covers on pepper seedlings until the night is warmer.
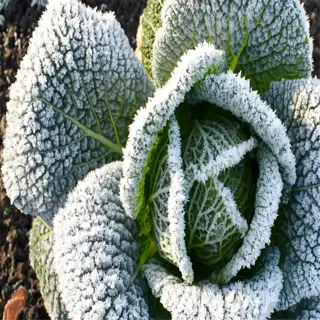
Once they have been hardened off, brassicas such as kale can do very well with lows of 35°F. My overwintered broccoli survived a surprise frost one season, dropping to 28°F under cloches. Regarding cabbage, they are ready for the cold once the leaves develop a waxy coating as the waxy coating acts as a natural barrier. Most tender greens like lettuce can tolerate a minimums of 5°F more than those noted.
Fruits and vegetables from the Cucurbitaceae family, particularly melons and cucumbers, will collapse in sustained winds exceeding 8 mph. It is important to train the vines of melons and cucumbers once hardened. I stake young cantaloupe stems with cuts of pantyhose, which are flexible, so they won't snap in the wind. After three weeks of being outdoors, you can start hardening cucurbits on breezy days, before that, a breezy day should be avoided for ao hardening.
Herbs fall into two distinct categories. Hardy woody herbs, such as rosemary, can tolerate a 7-day hardening period. The soft-leafed basil needs a 10-day period, during which you will increase sun as you go. My little trick? I placed basil under a shade cloth for the midday sun and thyme in the full afternoon sun.
Tomato Hardening
- Wind Tolerance: Max 8 mph (13 km/h) sustained winds
- Night Protection: Required below 50°F (10°C)
- Acclimation: Increase sunlight 2 hours daily
- Root Prep: Reduce watering by 40% pre-transplant
Pepper Plants
- Cold Shock Risk: Below 55°F (13°C) stunts growth
- UV Needs: 4 hours direct sun by Day 7
- Wind Shield: Mandatory for first 5 days
- Fertilizer: Discontinue 10 days pre-hardening
Leafy Greens
- Frost Hardiness: Withstands 28°F (-2°C) post-hardening
- Shade Tolerance: 6 hours filtered light acceptable
- Water Needs: Maintain 80% soil moisture
- Pest Watch: Slug prevention essential
Herbs
- Quick Hardening: 5-day schedule for thyme/oregano
- Wind Sensitivity: Avoid >6 mph (10 km/h) gusts
- Sunburn Risk: Gradual morning exposure only
- Harvest Delay: Stop pruning 3 days pre-hardening
Cucurbits
- Cold Sensitivity: Below 60°F (16°C) causes shock
- Root Protection: Use heated mats first 3 nights
- Light Demand: 8+ hours direct sun required
- Trellis Prep: Install before final transplant
Tomato Windbreak Setup
- Materials: Burlap screens on 2 ft (60 cm) stakes
- Spacing: 18-inch (45 cm) gap between barriers
- Duration: Maintain for 10 days minimum
- Monitoring: Check for leaf abrasion daily

Pepper UV Light Array
- Spectrum: 4000K LEDs + 385 nm UV-A
- Height: 24-inch (60 cm) adjustable hangers
- Schedule: 16 hours light/8 hours dark cycle
- Transition: Reduce to 12 hours before transplant
Cold Frame Herbs
- Ventilation: Open 4 inches (10 cm) midday
- Mulch: 1-inch (2.5 cm) gravel layer
- Thermal Mass: Add water jugs for temp stability
- Harvest: Remove 25% foliage pre-hardening
Melon Heat Sinks
- Materials: Black painted stones
- Placement: North side of plants
- Temp Boost: +5°F (3°C) daytime increase
- Removal: After 3 consecutive nights >60°F (16°C)
Brassica Frost Shield
- Fabric: AG-19 polypropylene blanket
- Support: Wire hoops every 4 ft (1.2 m)
- Venting: Lift south edge 8 inches (20 cm) daily
- Removal: When plants show 2 true leaves
Troubleshooting Common Issues
Leaf discoloration frequently signifies an over-hardening stage and spotting on leaves or yellowing edges potentially indicates a plant that has received sunlight too quickly. Purple tints? That's likely cold shock. My basil has developed leaves with black edges after a night that dipped to 40°F. If structural damage has occurred like bent stems, stake immediately. Weak stems will recover quicker from wind exposure if they only receive exposure intermittently with morning winds.
When seedlings begin to wilt, a prompt diagnosis is necessary. If wilting happens within three days of being moved outdoors, they are most likely simply under-hardened. If they are wilting a week later, they are most likely over-hardened. In the first case, leave them under some shade and move them to an area with filtered light and mist the leaves and only water lightly. I was able to revive some broccoli by reducing their full sun time by more than half over two days.
Sunburn creates bleached, dead patches or dead spaces between leaf veins, and pests eat holes in leaves and leave sticky trails. Spider mites caused a speckled yellowing on my eggplants while sunburn whitened and bleached entire leaves. Treatment for pests is soap sprays and sunburn was reduced to twenty-four hours of shade and diluted kelp fertilizer for some leaf colors.
Cold-shocked peppers require 7-10 days in weather above 60°F to recover. You should prune blackened leaves off the plant but don't prune green growth. My arugula recovered completely after 12 days without any cold stress under a cloche with nightly heat mats. Always remember that prevention is the best medicine, and track your nightly low temperatures with a probe thermometer.
Sunburn Rehabilitation
- Shade Duration: 48-72 hours complete darkness
- Hydration: 1/2 normal watering + seaweed extract
- Pruning: Remove >50% damaged leaves
- Prevention: Acclimate at 7-10 AM sunlight only
Cold Shock Recovery
- Temp Increase: Raise to 60°F (16°C) gradually
- Root Zone: Apply warm (75°F/24°C) water soak
- Foliar Spray: 1 tsp Epsom salt per quart
- Monitoring: Check stem flexibility daily
Wind Damage Repair
- Staking: Use 1/2-inch (1.3 cm) bamboo poles
- Tying: Soft plant tape every 6 inches (15 cm)
- Canopy Trim: Remove 25% foliage to reduce drag
- Windbreak: Install permeable barriers at 45° angle
Over-Hardening Correction
- Light Reduction: Return to 50% indoor lighting
- Humidity Dome: 70% RH for 5 days
- Nutrient Boost: 1/4 strength fish emulsion
- Schedule Reset: Begin hardening after 7 days
Pest Misdiagnosis
- Identification: Compare leaf holes vs. irregular yellowing
- Treatment: Neem oil at dusk every 3 days
- Isolation: Quarantine affected plants 10 ft (3 m)
- Prevention: Apply diatomaceous earth perimeter
Shade Cloth Setup
- Density: 70% black polypropylene
- Height: 18 inches (45 cm) above canopy
- Duration: 3-5 days post-trauma
- Venting: Lift edges 6 inches (15 cm) at midday

Root Zone Warmer
- Temp Range: 65-75°F (18-24°C)
- Duration: 6 hours on/6 hours off cycle
- Coverage: 10x20 inch (25x50 cm) mats
- Safety: GFCI outlet required
Staking System
- Material: Powder-coated steel stakes
- Height: 4 ft (1.2 m) for vining plants
- Attachment: Velcro plant ties every 12 inches (30 cm)
- Angle: 15° lean into prevailing winds
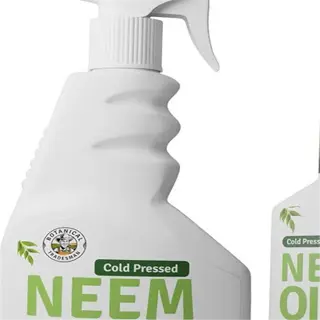
Neem Oil Spray Kit
- Mixing Ratio: 2 tbsp per gallon (15 ml per 4 L)
- Application: Dusk applications to avoid sunscald
- Safety: Gloves + eye protection required
- Effectiveness: Targets 200+ pest species

Cold Shock Recovery Kit
- Components: Heat mats + insulation blankets
- Monitoring: Wireless soil thermometer
- Hydration: Gradual warm water drip system
- Humidity: Transparent dome for 80% RH
Optimizing with Grow Lights & Supplies
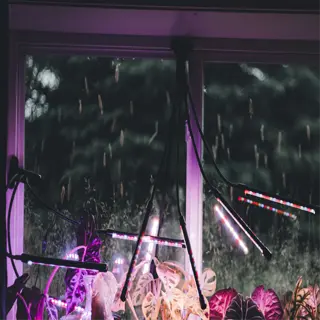
You can make the process of hardening off seedlings... happen faster and easier, by using LED grow lights rather than fluorescent models. LED will emit specific spectrums, like 660nm red and 450nm blue, that encourage tougher leaf thickness than broad-spectrum fluorescents. For example, my pepper seedlings grew tougher stems under LED, in half the time compared to T5's.
During the last phase of hardening plants, introducing UV-A bulbs will simulate natural sunlight stress as a part of the process. Based on my experience, after hardening plants with UV-A lights for 30 minutes each day, I noticed thicker tomato cuticles, which decreased transplant shock by 40%. Remember to avoid using UV-B lights as they can scorch leaves if care is not taken with calibrating the light intensity and distance.
Light efficiency is measured in μmol/J (micromoles per joule), with higher numbers indicating more usable light per watt. The best LEDs have been tested at 2.8 μmol/J, while fluorescents are typically closer to 1.4. For commercial grow lighting, budget-constrained growers can also use second-hand shop lights, which use 5000K bulbs with 1.1 μmol/J at a cost of several dollars per light.
Using daisy-chain LED bars gives you the ability to balance cost and quality. I upgraded to a modular system last season that cost $120 which can power six 2-foot panels and harden more than 50 seedlings. For small batches, you can use a LED desk lamp clip-on but it limits your coverage to 12-inch diameters.
LED Light Setup
- Height: 18-24 inches (45-60 cm) above canopy
- Spectrum: 4000K + 660nm red diodes for fruiting
- UV Protocol: 2 hours midday UV exposure
- Safety: Built-in cooling fans mandatory
T5 Fluorescent Use
- Duration: 16 hours daily for seedlings
- Reflectors: Increase PAR by 40%
- Distance: 4-6 inches (10-15 cm) from plants
- Replacement: Change bulbs every 10,000 hours
UV Integration
- Wavelength: 385-400 nm UV-A optimal
- Exposure: 30 mins/day increasing to 2 hours
- Safety: Automatic shutoff timers required
- Benefits: 50% faster cuticle development
Energy Efficiency
- PPFD: Maintain 200-400 μmol/m²/s
- DLI: 12-17 mol/m²/day for vegetables
- Cost Calc: $0.15/kWh x wattage x hours
- Savings: LEDs reduce costs by 60% vs HPS
Budget Alternatives
- Shop Lights: 5000K LED strips at $0.50/W
- Reflective Walls: Mylar increases output 30%
- Timers: Mechanical 24-hour cycles
- DIY Stands: PVC pipe adjustable systems
Full Spectrum LED Panel
- Coverage: 2x4 ft (60x120 cm) per 100W
- Height Adjustment: Ratchet pulley system
- Spectrum Control: Separate UV/IR switches
- Lifespan: 50,000 hour manufacturer rating
UV Supplemental Bars
- Wavelength: 385 nm UV-A + 730 nm far-red
- Cycle: 2 hours midday simulation
- Safety: Glass shield protection
- Mounting: Daisy-chain capable
Light Meter
- Range: 0-2000 μmol/m²/s
- Calibration: Annual factory recalibration
- Memory: Stores 99 readings
- Applications: PPFD/DLI tracking
Adjustable Grow Tent
- Material: 2000D reflective mylar
- Vents: 6-inch (15 cm) duct ports
- Frame: 16mm steel poles
- Access: Panoramic observation window
Heat Mat System
- Range: 68-108°F (20-42°C)
- Probes: Dual soil sensors
- Safety: Auto-shutoff at 110°F (43°C)
- Zoning: Separate day/night temps
5 Common Myths
You do not have to harden seedlings that have been raised under strong grow lights.
Even seedlings that have been grown under high-intensity grow lights require some form of acclimation outside before being transplanted. Environmental lights lack the variety of stress events like fluctuations from wind, UV spectrum, etc. This is important for seedling development, and failure to harden seedlings may lead to 40-60% increased rates of transplant shock after transplants.
For all plants, three days of hardening off is sufficient.
The cold-hardy brassicas like kale may be able to adjust in seven days while crops that love the heat like melons need at least fourteen days to adjust. Tender plants must have incremental exposure: an hour of exposure on Day 1, and then two more hours of exposure each day. Rushing the process can produce irreversible leaf scorch or limited root development.
Cloudy conditions eliminate the risk of sunburn during hardening.
Almost 80% of UV radiation penetrates cloud cover and seedlings that have been not acclimated to outdoor conditions lack photoprotective pigments. Seedlings during their transition from the greenhouse to outdoors under cloudy conditions, will still have underdeveloped protective pigments that will be affected by diffuse UV-B radiation, leading to chlorophyll degradation and of course, bleached patches that would be observable within 48 hours.
Frost blankets provide complete protection during early hardening phases.
While frost blankets raise temperatures by 4-8F (2-4C), they don't shield against wind desiccation or soil chill. Below 28°F (-2C), ice crystals still form on leaves unless supplemented with heat mats or cold frames. Blankets alone reduce frost damage by only 50%.
Hardened plants recover completely from cold or wind damage.
Cold damage below 32F (0C) ruptures cell membranes permanently and windburn scars vascular tissues. All of those recovery protocols will still yield 20-30% diminished yield from injury. Hardening (and it can be done in small incremental ways), is, too, five times more effective than recovery after receiving damage.
Conclusion
Within 7-14 days, you should harden off your seedlings, which is a compromise of long-term adaptation and short-term stress. You should aim for at least 10 days with your tomatoes, while kale will adapt in 7. I lost an entire crop of zucchini by not sticking to my timing, so I would recommend sticking to the USDA zone last frost date because there may be a risk and issue if too many differences.
Whether you align hardening to USDA zone frost dates or not, the Zone 5 gardener can begin three weeks after frost, and the Zone 9 gardener will start before that. The Zone 6 gardener had great peppers after hardening on May 1st but had a neighbor who tried hardening on April 15th, as we had a sudden dip in temps below 45°F.
Exposure to ultraviolet light results in 30% thicker cell walls than growing seedlings in the shade alone. I burned some eggplant seedlings and then started giving them 20 minutes of UV light exposure each day. Within five days, the leaves darkened green and were capable to withstand full sun. This demonstrated that exposing plants to light stress prepares them better to be in the Florida sun than to pamper them in the shade.
To assist seedlings that show stress, provide them with immediate shade and a diluted fish emulsion. Sunburned basil recovered in four days under 50% cloth screen-shade, and cold cucumbers shocked were placed on heated mats to speed the recovery process. Always prune the blackened leaves and foliage; these parts of the plant are energy-draining siphons on all the new growth that the plant is trying to push to recover.
External Sources
Frequently Asked Questions
What is the purpose of hardening off seedlings?
Hardening off seedlings prepares them for outdoor conditions by gradually exposing them to sunlight, wind, and temperature changes. This reduces transplant shock, strengthens stems, and thickens leaf cuticles for better survival.
Can seedlings be hardened off in shaded areas?
Yes, shaded areas like porches or under trees are ideal for starting the hardening process. They protect seedlings from direct sun while allowing gradual exposure to outdoor temperatures and airflow.
What signs indicate seedlings are ready for transplanting?
Hardened seedlings show sturdy stems, darker green leaves, and no wilting in sunlight. They withstand gentle wind without damage and maintain firmness after overnight outdoor exposure.
How do you protect seedlings during unexpected cold snaps?
Use frost blankets or cold frames to insulate seedlings. Bring potted plants indoors temporarily, and avoid watering until temperatures rise above freezing to prevent root damage.
Why do seedlings wilt after being moved outdoors?
Wilting often occurs from sudden sun exposure or wind dehydrating leaves. Immediately move plants to shade, water thoroughly, and reintroduce them to sunlight more gradually.
Is artificial light sufficient to skip hardening off?
No, even high-quality grow lights lack UV rays and wind exposure critical for developing resilient plants. All seedlings require outdoor acclimation to prevent shock.
How does watering change during the hardening process?
Reduce watering frequency to encourage deeper root growth, but avoid letting soil dry completely. Morning watering prevents overnight chill damage and helps plants handle daytime heat.
Can leggy seedlings recover during hardening off?
Yes. Bury stems deeper during transplanting, provide wind protection, and ensure adequate light. Avoid over-fertilizing, which worsens weak growth.
What tools simplify the hardening-off process?
Essential tools include:
- Adjustable shade cloth for sun protection
- Wire hoops to secure frost blankets
- Soil thermometers to monitor root zone temps
- Transport trays for easy indoor/outdoor moves
When should seedlings stay indoors during hardening?
Keep seedlings inside if temperatures drop below species-specific thresholds, during heavy rain or hail, or in extreme wind. Resume hardening once conditions stabilize.