Spotting Signs of Root Rot Early

Written by
Tina Carter
Reviewed by
Prof. Martin Thorne, Ph.D.Yellowing lower leaves and slow growth are early indications of root rot.
Noticing the soil is drying slowly is a sign of potential root problems that require immediate attention.
The presence of mushy stems at the soil level indicates that root rot is well advanced.
If you notice a foul, rotten egg smell coming from the soil, that means root rot infection is severe.
Early detection of root rot will allow the plant to recover successfully.
Inspections of the root quarterly will prevent root rot before seeing plants symptoms.
Article Navigation
Identifying symptoms of root rot early can save your plants! I recall finding my favorite peace lily with yellow leaves and stunted growth, and I thought it just needed fertilizer. Upon inspecting the roots, I found brown, mushy roots. The lesson I learned was the importance of context when saving plants and the key role of early detection.
If the root rot is caught early, permanent damage can be avoided. There is a window of opportunity during which you can react before the damage becomes permanent. The goal of this guide is to help you figure out what those first signs look like. This will include hints that you may see, as well as preventative measures. By the end of this guide, you will come away with knowledge that you can practically use to protect your plant companions.
Don't panic if your plant has root rot; it's not a death sentence if you act quickly. I have saved many plants from root rot because I recognized it promptly. You can model this procedure with the right approach. We will tackle treatment options and prevention methods together. So, don't lose hope, as recovery is entirely realistic with early intervention.
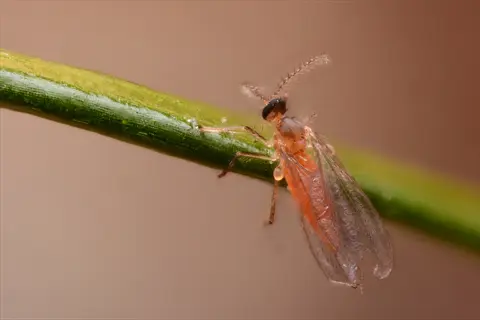
Fungus Gnat Management
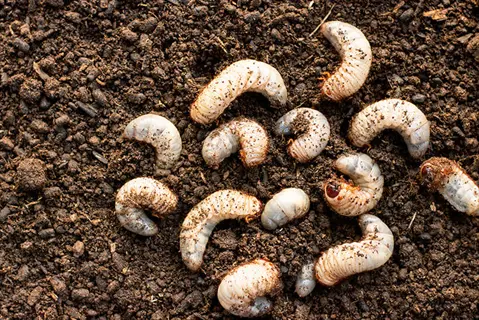
Fungus gnats serve as root rot carriers, transferring plant pathogens from plant to plant. The little flies lay eggs in moist soil, and their larvae feed on roots. The larvae feeding on roots damage root tissues and create points of entry for the rot fungus. I've seen infestations convey disease throughout an entire plant collection in a matter of weeks if the infestation is not controlled. It's critical to respond to gnat infestations to break the cycle of infection in your indoor garden.
Begin with non-chemical, pet and child-safe solutions. Put a half-inch (1.3 cm) layer of coarse sand on top of your potting mix. This layer prevents adult gnats from laying eggs. Allow the soil to dry completely between waterings, as larvae require moisture. Sticky yellow traps are highly effective for capturing flying adults. These methods eliminated my gnat problem without chemicals.
For heavy infestations consider regional products available to prevent fungi or insects that threaten them, such as GnatNix (a product made from quartz) or diatomaceous earth. You can also light sprinkle diatomaceous earth on soil surfaces to dehydrate any larvae. Use mosquito bits in watering can containers specifically for North American gardeners. European gardeners and plant lovers could use nematodes. Remember: always use biological controls first rather than chemical pesticides. Even in organic gardening, safety first!

Yellow Sticky Traps
- Place adhesive traps horizontally near soil surface to capture adult fungus gnats. These bright yellow cards attract flying insects effectively reducing breeding populations. Replace every two weeks or when fully covered.
- Position multiple traps around affected plants especially during warm humid conditions. This method provides visible evidence of infestation levels without chemicals. Monitor weekly to assess control effectiveness.
- Combine with other techniques for comprehensive management. Sticky traps alone won't eliminate larvae in soil but break reproduction cycles. Use as early warning system for new outbreaks.
- Install traps immediately after noticing flying adults near plants. Early intervention prevents egg-laying and reduces future generations. Check daily during peak infestation periods.
- Choose non-toxic options safe for indoor use. Many commercial traps use natural adhesives without pesticides. Verify safety for homes with children or pets.
- Supplement with visual monitoring of plant leaves. Sticky traps capture adults while regular inspections detect early larval damage. Document trap counts weekly.

Soil Moisture Control
- Allow top 1-2 inches (2.5-5 cm) of soil to dry completely between waterings. Fungus gnat larvae require moist environments to survive and develop into adults. This dehydration method targets their life cycle.
- Check moisture depth with your finger before watering decisions. Overly damp topsoil creates ideal breeding conditions for these pests. Adjust watering frequency seasonally based on temperature changes.
- Improve air circulation around soil surface using small fans. Increased evaporation speeds drying while making the environment less hospitable. Position fans to create gentle consistent airflow across pots.
- Water plants from below using saucers instead of top-watering. Bottom watering moistens roots without saturating surface layers where gnats lay eggs. Remove excess water after 30 minutes.
- Use porous soil mixes containing perlite or coarse sand. These materials improve drainage and accelerate drying times between water applications. Avoid dense moisture-retentive soils.
- Monitor humidity levels with hygrometers near plant groupings. Maintain ambient humidity below 60% to discourage gnat activity. Employ dehumidifiers in enclosed spaces if necessary.
Biological Treatments
- Apply Bacillus thuringiensis israelensis products like mosquito bits to soil. These natural bacteria specifically target fungus gnat larvae without harming plants or beneficial insects. Follow package instructions for mixing rates.
- Water treated solution into top layers where larvae reside. The bacteria produce toxins that disrupt larval digestive systems within hours. Reapply every 10-14 days until infestation resolves.
- Combine with nematode applications for severe cases. Steinernema feltiae nematodes actively hunt and parasitize fungus gnat larvae in moist soil environments. Use during cooler hours for best survival rates.
- Introduce predatory mites like Hypoaspis miles to containers. These soil-dwelling predators consume eggs and early-stage larvae. Apply during evening hours to avoid sunlight exposure.
- Use botanical insecticides like neem oil as soil drenches. Azadirachtin compounds disrupt growth cycles of developing larvae. Apply weekly for three consecutive weeks.
- Rotate treatments to prevent resistance development. Alternate between bacterial and botanical solutions monthly during persistent problems. Record application dates for tracking.
Physical Barriers
- Add 0.5 inch (1.3 cm) sand or gravel layer on soil surface. This desiccating barrier prevents adult gnats from laying eggs while blocking emerging larvae. Choose coarse materials that drain quickly.
- Reapply after heavy watering if material settles. Maintain consistent depth coverage to ensure effectiveness. Avoid fine sands that compact and reduce soil aeration over time. Monitor for gaps regularly.
- Combine with diatomaceous earth for enhanced control. Food-grade powder damages insect exoskeletons through physical action. Apply thin dusting on sand layer refreshing after watering events.
- Cover drainage holes with fine mesh screens. This prevents gnats from entering pots while allowing water drainage. Secure mesh with waterproof tape or silicone.
- Encase pots in breathable fabric sleeves. Floating row covers allow air exchange while creating physical exclusion barriers. Secure tightly around plant bases.
- Use decorative stones as functional barriers. Larger aggregates provide weight while maintaining air gaps in the soil profile. Rinse stones monthly.
Plant Quarantine
- Isolate new plants for two weeks before introducing to collections. This prevents introducing fungus gnats from nurseries or stores. Keep in separate room during observation.
- Inspect all incoming plants for flying adults or larvae. Check soil surfaces and underside of leaves carefully. Use magnification tools for thorough examinations.
- Treat quarantine plants preventatively with soil drenches. Apply biological controls like nematodes even without visible signs. Repeat treatment midway through quarantine.
- Monitor isolated plants with yellow sticky cards. Place traps near pots to detect any adult activity early. Record findings daily in a log.
- Avoid sharing tools between quarantined and healthy plants. Sterilize equipment with isopropyl alcohol after each use if crossover occurs. Use separate watering cans.
- Discard severely infested plants during quarantine. Remove from home immediately to protect other plants. Seal in plastic bags before disposal.
Temperature Manipulation
- Use seedling heat mats under pots to raise soil temperature. Maintain 77-86°F (25-30°C) to accelerate larval development beyond sustainable rates. Apply for 48-hour periods.
- Reduce ambient temperatures below 60°F (15°C) if possible. Cool conditions slow gnat reproduction and development cycles significantly. Use during winter months.
- Alternate warm and cool treatments to disrupt breeding. Cycle between heat mats and cooler locations every three days. Monitor soil temperatures with probes.
- Avoid extreme temperatures that stress plants. Most houseplants tolerate 60-85°F (15-29°C) ranges without damage. Adjust gradually over several days.
- Combine temperature control with reduced watering. Cooler soils dry slower requiring less frequent irrigation. Adjust schedules based on thermometer readings.
- Utilize greenhouse ventilation systems for larger collections. Automated vents maintain optimal temperature ranges while reducing humidity levels. Program daily cycles.
Companion Planting
- Grow repellent plants like basil among susceptible species. Strong aromas from culinary herbs deter adult fungus gnats naturally. Cluster pots together for maximum effect.
- Incorporate carnivorous plants like Pinguicula in displays. These insectivores capture adult gnats on sticky leaf surfaces. Provide adequate light and distilled water.
- Use marigolds as decorative pest deterrents. Their root secretions suppress soil-dwelling larvae populations. Replace plants every three months.
- Position lavender near frequently watered plants. The scent masks attractive odors from moist organic soils. Prune regularly to maintain fragrance.
- Rotate companion plants seasonally for continuous protection. Change deterrent species every three months to maintain effectiveness. Track planting dates.
- Combine with yellow sticky traps for layered defense. Companions reduce landings while traps capture those that approach. Monitor trap counts weekly.
Soil Replacement
- Remove and replace top 2 inches (5 cm) of infested soil. This physically eliminates eggs and young larvae before they mature. Perform during dry periods.
- Sterilize fresh soil by baking at 180°F (82°C) for 30 minutes. This kills any existing pathogens or pests before use. Cool completely before application.
- Incorporate diatomaceous earth into new soil mixes. Add 1 cup per gallon (236 ml per 3.8 liters) of potting medium. Mix thoroughly before repotting.
- Water with hydrogen peroxide solution after repotting. Use 1:4 ratio of 3% peroxide to water to oxygenate roots. Repeat weekly for three weeks.
- Cover fresh soil with decorative stones or sand. Create immediate physical barrier against new infestations. Choose materials contrasting with soil color.
- Dispose of old soil in sealed bags outdoors. Never compost infested material to prevent reinfestation. Clean pots thoroughly before reuse.
Vacuuming Adults
- Use handheld vacuums to remove flying adults daily. This immediate reduction prevents egg-laying and interrupts breeding cycles. Empty canisters outdoors immediately.
- Target plants during early morning activity peaks. Gnats are most active at dawn when humidity is highest. Repeat daily until control is achieved.
- Combine vacuuming with sticky trap monitoring. Count captured adults to measure infestation levels. Record numbers to track progress.
- Attach hose extensions for hard-to-reach areas. Use crevice tools for precise suction around dense foliage. Avoid damaging delicate plant parts.
- Sterilize vacuum components weekly. Disassemble and wash with soapy water to remove eggs or larvae. Dry completely before reuse.
- Supplement with other controls for larvae. Adult removal alone doesn't address existing soil populations. Use biological drenches concurrently.
Light Traps
- Install UV light traps near plant groupings at night. The ultraviolet spectrum attracts flying insects into containment chambers. Position 1-3 feet (0.3-0.9m) from plants.
- Use non-zapping models to preserve beneficial insects and ensure household safety. Electrocuting grids kill indiscriminately while glue boards target specific pests. Choose designs with collection trays.
- Run traps continuously during peak infestation periods. Fungus gnats are active both day and night requiring constant control. Replace glue boards weekly.
- Position lights away from human activity areas and sleeping spaces. Avoid placing UV lights in bedrooms due to potential eye irritation. Use in utility spaces or greenhouses.
- Clean traps monthly with isopropyl alcohol solutions. Remove insect debris to maintain effectiveness. Check bulbs for replacement annually.
- Combine with yellow sticky cards for comprehensive monitoring. Different attractants capture varying segments of populations. Compare capture rates.
Beneficial Nematodes
- Apply Steinernema feltiae nematodes as soil drench. These microscopic worms parasitize fungus gnat larvae specifically and are harmless to humans and pets. Mix with water according to package rates.
- Apply during cool evening hours for best survival. Nematodes are light-sensitive and require moisture to move through soil. Water thoroughly before application.
- Repeat applications every 7-10 days for heavy infestations. Multiple treatments target newly hatched larvae between cycles. Store unused nematodes refrigerated.
- Combine with reduced watering for maximum effectiveness. Moist but not saturated soil provides ideal movement conditions. Use moisture meters to maintain 50% saturation.
- Avoid chemical pesticides before and after application. Many insecticides kill beneficial nematodes reducing control effectiveness. Read product labels carefully.
- Monitor results with potato wedge tests. Place raw potato slices on soil overnight to attract larvae. Count larvae present before reapplying.
Light and Temperature Tips
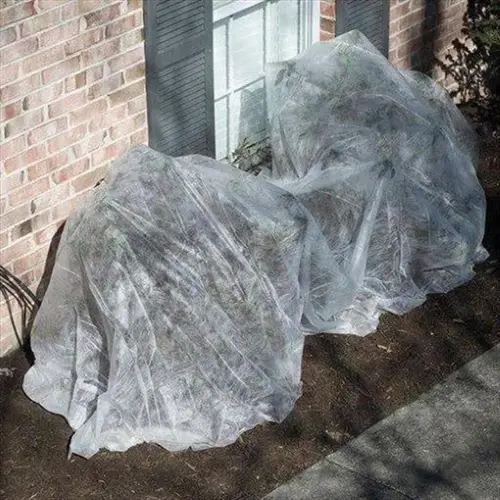
Adequate light and temperature avoid root rot by controlling soil moisture and root condition. Full sunlight allows the soil to dry rapidly between waterings, and warmth stimulates root metabolism. Cooler, dark conditions slow evaporation, creating an ideal environment for rotting. I learned this from keeping ferns in a cold corner.
Plants are particular about their environmental conditions. For example, tropical plants like philodendrons require 65-75 °F (18-24 °C) and bright, indirect light. Succulents grow best at 75-85°F (24-29°C) under direct sunlight. African violets thrive in temperatures of 70 °F (21 °C) and medium light. You must track each plant's response to find its optimal conditions (temperature and light intensity being the most significant variables).
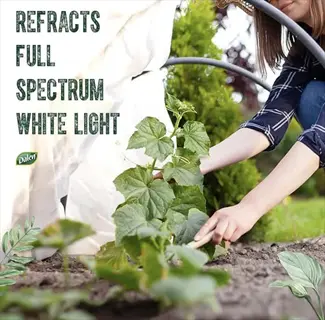
Set your conditions practically. Use sheer curtains to diffuse direct sunlight. Rotate your plants every week for even sun exposure. Use heat mats under pots in the cooler rooms. In low-light spaces, use full spectrum LED bulbs mounted 6-12 inches above the plants. These modifications can dramatically improve the vitality and health of your plants.
Changing seasons require care adjustments. During the winter months, reduce watering when daylight hours are shorter. Keep the plants away from any windows that may create a draft. Summer may need plants to be shaded from intense sun. I typically adjust the positions of my collection once a month and log them in a plant journal to track changes.
Bright Indirect Light
- Position plants near east-facing windows where light intensity ranges between 10,000-20,000 lux. This level supports photosynthesis without causing leaf scorch. Rotate plants weekly to ensure even exposure.
- Supplement with full-spectrum LED grow lights during darker months. Maintain lights 12-18 inches (30-45 cm) above plants for 12-14 hours daily. Use timers for consistent daily cycles.
- Avoid direct afternoon sun through south/west windows which can exceed 100,000 lux. Use sheer curtains to diffuse intense sunlight during summer months. Monitor leaf color for bleaching signs.
Moderate Temperatures
- Maintain daytime temperatures of 65-75°F (18-24°C) for most tropical plants. Nighttime drops to 60-65°F (15-18°C) mimic natural environments. Avoid sudden temperature fluctuations exceeding 10°F (5°C).
- Use digital thermometers to monitor room conditions. Place away from heat vents and drafty windows. Insulate pots during winter if near cold glass surfaces.
- Provide gentle air circulation with oscillating fans. Position to create mild breezes that strengthen stems without drying soil rapidly. Run for 2-4 hours daily to prevent stagnant air pockets.
Seasonal Adjustments
- Reduce watering frequency by 30-50% during winter dormancy. Shorter days and cooler temperatures slow plant metabolism significantly. Allow soil to dry deeper before rehydrating.
- Increase light exposure during low-sun months. Move plants closer to windows or add supplemental lighting. Clean window surfaces monthly to maximize natural light penetration.
- Avoid fertilizing from November to February. Resume feeding at half-strength when new growth appears in spring. Transition gradually to prevent nutrient shock.
Heat Management
- Use seedling heat mats under pots during cold spells. Maintain soil temperatures above 60°F (15°C) for root function. Place mats under moisture trays to prevent overheating.
- Employ humidity trays instead of misting for moisture control. Fill trays with water and pebbles beneath pots. Replenish water as it evaporates to maintain humidity.
- Relocate plants from radiators and heating vents. Hot dry air causes rapid moisture loss from leaves and soil. Create buffer zones with humidity trays filled with pebbles.
Low-Light Solutions
- Select shade-tolerant species like snake plants and ZZ plants. These species survive at light levels as low as 500-2,500 lux. Position within 5-8 feet (1.5-2.4 m) of north-facing windows.
- Use matte white reflectors to maximize available light. Position boards opposite light sources to distribute illumination evenly. Avoid aluminum foil which creates damaging hot spots.
- Clean leaves monthly with damp cloths. Dust accumulation reduces light absorption by up to 35%. Support photosynthesis efficiency in challenging conditions.
Humidity Control
- Maintain 40-60% humidity for most houseplants. Use digital hygrometers to monitor levels. Group plants together to create microclimates through transpiration.
- Employ pebble trays filled with water under pots. Ensure pot bases sit above water lines. Replenish water as it evaporates to sustain humidity.
- Run humidifiers during daytime hours. Choose cool-mist models to avoid raising temperatures. Clean units weekly to prevent mold or bacteria dispersal.
Soil and Pot Essentials
Your soil mix requires components that drain quickly not to suffocate roots. I typically mix 40% potting soil with 40% perlite or pumice for aeration. The last 20% is orchid bark to create air pockets. Avoid garden soil as it compacts and traps water. This mixture saved my snake plant from being overwatered last winter.
Different pot materials affect the speed of soil drying. Terra cotta pots breathe and draw moisture from roots. Plastic pots retain moisture longer, needing watering less often. Glazed ceramic retains more moisture than terracotta, but less than plastic. Choose depending on your plant's needs; for example, terra cotta is suitable for sensitive, moisture-loving succulents. Also, consider your watering habits and the corresponding material.
Choose pots only 1-2 inches (2.5-5 cm) wider than the original root balls. Too much soil and excess watering can create a pool of water around the roots in large containers. I repotted a Monstera into a smaller pot after root rot. Within days, the origins emerged from the soil in snug new soil. Check the spread of roots first if you want to upgrade to a larger pot size.
To eliminate hidden pathogens, sterilize reused containers. You can soak the containers in a 10% bleach solution (1 part bleach to 9 parts water) for 10 minutes. You can also bake your soil at 180°F (82°C) for 30 minutes. I do this with all my plant swaps. Clean containers minimize the risk of disease spreading through your collection.
Soil Composition
- Create well-draining mixes with 40% potting soil, 40% aeration materials (perlite/pumice), and 20% organic matter. This ratio prevents compaction while allowing oxygen flow to roots. Adjust ratios for moisture-loving plants.
- Avoid garden soil which contains pathogens and compacts easily. Sterilized commercial potting mixes ensure consistent texture and nutrition. Check for added fertilizers if repotting recently fed plants.
- Incorporate moisture-wicking components like orchid bark for air plants and orchids. Larger chunks create air pockets that reduce rot risk. Replace decomposed bark every 12-18 months.
Drainage Essentials
- Always use pots with multiple drainage holes at least 0.25 inches (6mm) wide. Insufficient drainage causes water to pool at the bottom. Elevate pots on feet to prevent hole blockage.
- Empty saucers 30 minutes after watering. Standing water creates ideal conditions for root rot fungi. Use absorbent mats under pots in decorative containers without drainage.
- Avoid adding rocks or gravel to pot bottoms. This practice raises the water table instead of improving drainage. Focus on well-draining soil throughout the container.
Pot Material Selection
- Choose terra-cotta for moisture-sensitive plants. The porous clay wicks away excess water efficiently. Water more frequently than plastic equivalents, adjusting based on your environment.
- Select glazed ceramic for humidity-loving plants. The sealed surface slows moisture evaporation. Ensure pots have adequate drainage holes before purchasing.
- Use plastic pots for lightweight solutions. Though less breathable, they retain moisture longer. Ideal for fast-drying environments or busy plant owners.
Pot Sizing Guidelines
- Select containers 1-2 inches (2.5-5cm) wider than root balls. Oversized pots hold excess moisture leading to root rot. Downsize after removing rotted roots.
- Repot when roots circle containers or emerge from holes. Gently tease roots outward during transplanting. Water lightly after repotting to settle soil.
- Avoid deep pots for shallow-rooted plants. Excess soil depth stays wet longer than roots can access. Match pot depth to root structure for optimal health.
Soil Sterilization
- Sterilize reused soil by baking at 180°F (82°C) for 30 minutes. This kills pathogens and pests. Cool completely before use to avoid root damage.
- Disinfect pots with 1:9 bleach solution. Soak for 10 minutes then rinse thoroughly. Alternatively, use hydrogen peroxide for chemical-free sterilization.
- Quarantine new soil for 48 hours before use. This allows potential pests to emerge. Store in sealed containers to prevent contamination.
Soil Refresh Schedule
- Replace soil completely every 12-18 months. Nutrients deplete and salts accumulate over time. Spring is ideal for most repotting activities.
- Refresh top 2 inches (5cm) quarterly for large plants. This removes compacted surface layers without full repotting. Add fresh mix with slow-release fertilizer.
- Monitor for soil collapse or sour odors. These indicate microbial imbalances requiring immediate replacement. Always use fresh mix when treating root rot.
Preventing Root Rot
Preventing root rot is about watering habits before problems arise instead of trying to fix it later. Make sure to check the soil moisture before watering by putting your finger two inches down. If it feels wet, wait another day. Water thoroughly until it drains out the bottom, then discard the runoff. I keep a moisture meter handy to avoid guessing.
Any new plants should be quarantined for a minimum of two weeks. Please keep them in separate rooms from your other plants, and inspect the roots before adding them to your collection. Use separate tools specifically for these new plants. One time, I saved my entire greenhouse by separating an infected orchid.
Always disinfect tools using 70% alcohol before and after use. Make sure to wipe pruning shears and trowels clean and dry. Never reuse drainage water between plants, and monitor water supplies to prevent cross-contamination or contamination. I use a color-coded watering can for my different groups of plants.
To ensure balanced soil moisture, select pots that are suitable for your environment. Terra cotta pots will wick moisture away more quickly, while plastic pots retain moisture for longer. Choose potting containers based on your plants' needs and your environment. Along with the right watering technique, which leads to the best root health. Routine prevention throughout the year helps keep your plant(s) happy.
Watering Discipline
- Water only when the top 2 inches (5 cm) of soil are dry to the touch. Insert your finger or a moisture meter to verify dryness before watering. Adjust frequency based on seasonal temperature and humidity changes.
- Use room-temperature water to avoid shocking plant roots. Cold water stresses plants and slows water absorption. Always water thoroughly until excess drains from the bottom.
- Adopt bottom-watering for sensitive plants. Place pots in water-filled trays for 20-30 minutes, allowing roots to absorb moisture upward. Discard unused water afterward.
Drainage Optimization
- Ensure all pots have at least 3 drainage holes of 0.25 inch (6mm) diameter. Add extra holes using a drill if necessary. Elevate pots on feet to prevent clogging.
- Use well-draining soil mixtures containing perlite, pumice, or orchid bark. These materials create air pockets that prevent compaction. Replace soil every 12-18 months.
- Avoid decorative pots without drainage by using cachepot systems. Place nursery pots inside decorative containers and remove for watering. Empty any collected water immediately.
- Never reuse drained water between plants. Discard runoff water immediately after watering to prevent spreading pathogens. Use separate containers for each plant during watering.
New Plant Quarantine
- Isolate new plants for 14-21 days in separate rooms with no plant contact. This prevents introducing pathogens to existing collections. Use separate tools and watering cans during quarantine.
- Inspect root systems before introducing plants. Gently remove from nursery pots to check for dark or mushy roots. Treat with preventative fungicide if any signs appear.
- Water quarantined plants separately using dedicated equipment. Never share water sources between new and established plants. Clean tools with alcohol after each use.
- Monitor with sticky traps and weekly root checks. Yellow cards detect fungus gnats early. Treat immediately with mosquito bits if insects appear.
Tool Sterilization
- Disinfect tools between plants using 70% isopropyl alcohol. Wipe scissors, trowels, and stakes after each use. Soak tools for 10 minutes weekly for deep cleaning.
- Use separate tools for infected and healthy plants. Color-code handles to avoid confusion. Store sterilized tools in sealed containers.
- Sterilize pots with boiling water or hydrogen peroxide. Soak containers for 15 minutes in 1:4 hydrogen peroxide solution before reuse. Rinse thoroughly.
Environmental Control
- Maintain temperatures between 65-75°F (18-24°C) for optimal root health. Avoid placing plants near cold drafts or heat sources. Use thermometers to monitor conditions.
- Provide indirect light for 6-8 hours daily. Rotate plants weekly for even exposure. Supplement with grow lights during dark seasons.
- Ensure adequate air circulation with oscillating fans. Position to create gentle air movement across soil surfaces. Run fans 4-6 hours daily to prevent stagnation.
Root Monitoring
- Conduct quarterly root inspections for high-risk plants. Gently slide plants from pots to examine root color and texture. Healthy roots should be firm and white.
- Repot immediately if roots circle containers. Tease compacted roots outward before planting in fresh soil. Water sparingly for the first week after repotting.
- Document root health with photos for comparison. Track changes over time to detect early problems. Create a plant health journal.
Fungus Gnat Prevention
- Apply preventative mosquito bits monthly. Sprinkle granules on soil surface and water in. The BTI bacteria target larvae before populations establish.
- Use yellow sticky traps continuously near plants. Replace cards when covered or every 14 days. Count trapped insects to monitor effectiveness.
- Cover soil with sand or GnatNix barriers. Apply 0.5 inch (1.3 cm) layer to block egg-laying. Reapply after heavy watering.
Early and Advanced Signs
Identifying initial signs of root rot takes a discerning eye toward subtle observation. Stunted growth occurs when roots aren't processing nutrients like they should. New leaves indicate an oxygen deficiency caused by waterlogged soil. Slow-drying soil indicates that the roots are not absorbing water efficiently. These indicators show themselves days before you see plant damage.
Advanced symptoms become obvious. Lower leaves are also yellow. Root rot is widespread. Stems at the soil line are mushy and, when pressed, feel rotten like fruit. A rotten egg odor indicates a serious infection. At this point, rot has clearly killed the foundations of the root tissue above.
Relate symptoms to the root problems. Slimy dark roots lead to leaf yellowing. Crumbling roots give that sulfur odor. Brittle roots result in stem collapse. I check out roots by rubbing them between my fingers to find mushiness or breakage.
Take action right away as soon as symptoms emerge. Early-stage symptoms give you about 2-3 days to treat the problem. Advanced cases demand same-day treatment. I saved my monstera from propagation when I treated the symptoms hours after smelling decay. Waiting too long can lead to irreversible plant loss, resulting in permanent damage.
Confirming and Treating Root Rot
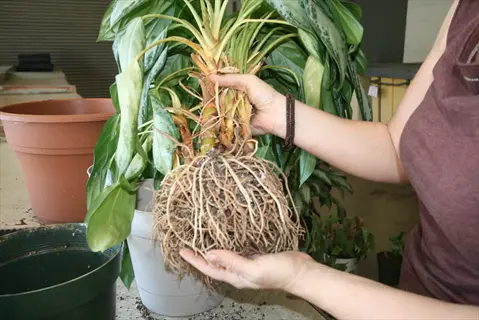
To confirm root rot, gently remove the plant from the pot, then remove the soil and rinse the roots under lukewarm water. Healthy roots will be white and firm. Rotting roots will be dark brown or black and feel slimy. Always wear gloves to prevent the spread of pathogens.
Use 70% alcohol to sterilize scissors before cutting infected roots. Cut half an inch above damaged areas into healthy tissue. Reduce the amount of foliage you remove by anywhere from 30% to 50% to balance it with the root loss. I have dedicated red-handled tools for infected plants only, and sterilize any other scissor-type tool after every cut.
Soak the roots in a hydrogen peroxide solution for ten minutes. Use one part 3% peroxide to four parts water. This disinfects and oxygenates any remaining roots. Dust lightly with cinnamon powder on cut surfaces as a natural antifungal agent. Rinse well before repotting.
Re-pot the plant in fresh sterile soil in a smaller container. Position the plant at the same depth as it was originally. Water lightly initially, and refrain from watering again for a week. Keep in bright indirect light. Most plants will show new growth in 2-4 weeks. Keep a close eye on the recovery.
Root Examination
- Gently remove plant from pot and carefully brush away soil. Rinse roots under lukewarm water to expose root structures clearly. Preserve healthy roots during cleaning.
- Inspect root color and texture systematically. Healthy roots are firm and white/tan. Rotten sections appear dark brown/black and feel slimy or mushy to touch.
- Assess root spread and density. Look for sections where roots detach easily with gentle tugging. Document findings with photos for comparison.
Root Trimming
- Sterilize scissors with 70% isopropyl alcohol before cutting. Cut 0.5 inch (1.3 cm) above visibly affected areas into healthy tissue. Discard all removed root material immediately.
- Remove 30-50% of foliage to balance root loss. Prune leaves and stems proportionally to the root mass removed. Make clean cuts at leaf nodes.
- Disinfect tools between plants and after cutting infected sections. Soak tools in alcohol for 5 minutes after each major cutting session.
Root Treatment Bath
- Prepare hydrogen peroxide solution using 1 part 3% standard peroxide to 4 parts water. Soak roots for 10 minutes to disinfect and oxygenate tissues. Use room-temperature solution.
- For severe infections, use cinnamon powder as natural antifungal. Dust lightly over cut surfaces after peroxide bath. Avoid covering healthy root sections.
- Rinse roots gently after treatment baths. Remove any residual treatment solutions before repotting. Pat roots dry with paper towels.
Repotting Process
- Select new pot 1-2 sizes smaller than previous container. Fill with fresh sterile potting mix. Create center well for root placement.
- Position plant at original soil depth. Gently spread roots outward. Add soil gradually while supporting the plant base.
- Water lightly with plain water to settle soil. Wait 7 days before next watering. Place in bright indirect light during recovery.
Post-Treatment Care
- Monitor for new growth as recovery indicator. First signs appear 2-4 weeks post-treatment. Resume fertilization at quarter-strength after 8 weeks.
- Isolate treated plants for 4 weeks. Check roots monthly for recurrence. Maintain strict watering discipline during recovery.
- Document recovery progress in plant journal. Note leaf color, growth rate, and soil moisture patterns. Compare with pre-treatment baseline.
5 Common Myths
A common assumption among gardeners is that root rot is solely caused by too much water applied to plants.
Although over-watering is a frequent cause of root rot, the disease can arise from an appropriate volume of water, as long as drainage, soil texture, or pathogens are involved. Conditions that allow for derepidation of roots to occur include poor aeration, poor temperatures, and prior root damage to the tissue, irrespective of the amount of water. This disease will often be brought on by a combination of factors, rather than just the sheer volume of water alone.
Adding rocks or gravel at the bottom of pots improves drainage significantly.
This practice actually creates a perched water table that traps moisture above the rock layer, worsening drainage conditions. Water moves downward until it hits the interface between soil and rocks, where surface tension prevents proper drainage. Instead of gravel, use well-draining soil mixtures throughout the entire pot and ensure adequate drainage holes for effective water movement and root health.
It is a common belief that yellowing leaves always signify root rot in plants.
Yellowing leaves can be caused by multiple factors including nutrient deficiencies, normal aging, pest activity, or environmental stress. Root rot can be the cause of yellowing leaves, but it usually damages the lower leaves first and is also accompanied by other symptoms like stunted growth and rancid odors. Proper diagnosis involves determining the health of the roots instead of depending solely on yellow leaves for diagnosis of root rot.
Root rot can be remedied by simply allowing the soil to dry out entirely.
While drying out will limit the spread of the existing rot, the active infection still needs treatment. Pathogens such as Pythium and Phytophthora remain dormant in dried out soil until water is returned to the soil. Treatment of the infection should begin by physically removing the infected roots, applying guard and fungicides, and finally repotting in sterile soil. When severe, root pruning of the healthy and infected roots may be necessary. Roots can be immersed in a hydrogen-peroxide bath to eliminate, expose, or disorient the pathogens before repotting.
All plants can recover from root rot with cut-out root damage.
Recovery from root rot can vary based on the extent of root damage and the species of plant. If more than half of the roots are lost on a plant, there is often insufficient root regeneration needed to support the foliage, especially for woody plants or slow-growing species. For recovery from root rot to be successful, it is important to strike a balance between pruning the roots and pruning the foliage proportionately while establishing ideal conditions after treatment. In general, plants such as succulents tend to have a higher rate of recovery than moisture-sensitive plants such as ferns.
Conclusion
Effective management of root rot involves both prevention and prompt treatment. Emphasis should be placed on proper watering methods and the use of well-draining soil to prevent issues before emergence. Regularly sterilizing tools and keeping new plants in quarantine may be considered preventive strategies. These tools are your first line of protection against root disease.
Early detection is your best defense against significant root damage. Observing yellowing leaves or slow soil drying is highly beneficial. Weekly inspection of plants is essential during moist seasons. Your observation is the line between saving and losing plants.
Establish routines and continue to monitor them to ensure long-term plant health and vitality. Always monitor soil moisture levels to decide if it's time to water. Monitor any root growth quarterly at potting seasons. Maintain a plant journal to help you track changes in your plant's growth. These habits will help you identify potential problems before they become emergencies.
Success recovery rates are very promising when you respond quickly. I've seen species recover wondrously after appropriate care. Your love and care will nurture a thriving, resilient plant. Don't forget that healthy roots, combined with healthy soil, equal beautiful years of growth.
External Sources
Frequently Asked Questions
Can plants recover from root rot?
Plants can recover from root rot if caught early through proper treatment. Recovery involves removing affected roots, applying antifungal treatments like hydrogen peroxide solution, and repotting in sterile soil. Success depends on the plant species and extent of damage. Most plants show new growth within 2-4 weeks with careful aftercare.
What are the earliest signs of root rot?
The earliest detectable signs include:
- Persistent dampness in top soil layers
- Yellowing of lower leaves without pests
- Noticeably slowed plant growth
- Delayed drying after watering
Does hydrogen peroxide effectively treat root rot?
Hydrogen peroxide is effective for disinfecting roots during treatment. A diluted solution oxygenates roots and kills anaerobic pathogens when used correctly. Always use 3% concentration mixed with water, applied as a 10-minute soak during root treatment. It should be combined with pruning infected roots for full effectiveness.
Is overwatering the only cause of root rot?
While overwatering is the primary cause, other factors include:
- Poorly draining soil composition
- Contaminated tools spreading pathogens
- Insufficient pot drainage holes
- Low temperatures slowing evaporation
- Introduction of infected new plants
Can cinnamon help treat root rot?
Cinnamon powder serves as a natural antifungal treatment for root rot. When applied to cut root surfaces after trimming, it creates a protective barrier against fungal infections. However, it should complement rather than replace proper root pruning and hydrogen peroxide treatment for severe cases.
Do fungus gnats always indicate root rot?
Fungus gnats don't always mean root rot is present, but they are strong indicators. These pests thrive in consistently moist soil where root rot pathogens develop. Their presence warrants immediate root inspection and soil moisture control to prevent potential infection establishment.
How frequently should I water to prevent root rot?
Watering frequency depends on:
- Plant species requirements
- Seasonal temperature changes
- Pot size and material
- Indoor humidity levels
- Always check topsoil dryness before watering
What's the fastest way to treat advanced root rot?
Immediate treatment steps include:
- Remove plant and rinse roots thoroughly
- Sterilize scissors and prune all infected tissue
- Soak in hydrogen peroxide solution
- Repot in sterile soil with drainage
- Reduce foliage to match root loss
Does watering at night cause root rot?
Nighttime watering can contribute to root rot risk by extending soil moisture duration. Without daytime evaporation, water lingers around roots longer, creating ideal conditions for pathogens. Morning watering allows excess moisture to evaporate naturally throughout the day, reducing infection opportunities.
How contagious is root rot between plants?
Root rot spreads easily through:
- Shared contaminated watering tools
- Reused infected potting soil
- Drainage water moving between pots
- Unsterilized pruning equipment
- Always quarantine new plants for 2-3 weeks