
Gardeners would prefer not to find heavy clay soil in their landscape. Heavy clay soil requires proper soil amendments to counteract poor drainage and rock-hard compaction. Clay soil retains water for too long, suffocating the plant's roots. It warms slowly, delaying planting in the spring.
Organic amendments completely change this challenging foundation. They provide air pockets, which increase porosity for root growth. Water drains off the surface instead of pooling. Plants obtain nutrients instead of fighting through hard-packed mud.
You will be exposed to effective organic solutions such as composts and cover crops. We will discuss proper application timing and methods for each season. Simple skills to make clay soil beneficial instead of an issue. If it's approached properly, your garden can prosper.
Understanding Clay Soil Basics
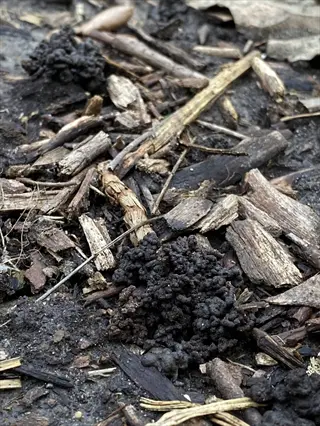
Clay soil is composed of the smallest mineral particles. Particles that are less than 0.002 millimeters in diameter. Immediately, each tiny particle of clay pulls closer together without air space. Water moves slowly through clay, causing ongoing drainage issues. Plant roots have difficulty accessing this dense environment.
You will notice there is a dramatic shift between wet and dry conditions. Saturated clay will turn sticky and rigid, sticking to your tools. In droughts, it will harden, crumbling apart like blocks of concrete. Both extremes damage plants' root systems and reduce the flexibility of gardening.
Clay has an outstanding ability to hold nutrients, especially through cation exchange capacity. This natural electrical charge attracts nutrients for plants, including nitrogen. However, poor structure makes nutrient access by roots impossible. Plants starve, even in the presence of abundant nutrients.
Winter presents unique risks via frost heaving. Water that becomes trapped in clay expands when it freezes. This causes plant roots to grow upwards, where they are more susceptible to cold damage. Downward pressure on the roots occurs with each freezing event, resulting in destructive pressure on the plant's root system.
Squeeze Test
- Procedure: Take moist soil sample, squeeze firmly
- Positive Indicator: Holds shape when poked
- Accuracy: 90% reliable for clay detection
Water Test
- Procedure: Pour water on dry soil surface
- Positive Indicator: Slow absorption with pooling
- Timing: Observe for 10-15 minutes
Cracking Test
- Procedure: Inspect soil during drought conditions
- Positive Indicator: Deep surface cracks form
- Seasonality: Most visible in summer
Ribbon Test
- Procedure: Roll moist soil into thin ribbon
- Positive Indicator: Forms 2+ inch ribbon before breaking
- Measurement: Ribbon length indicates clay percentage
Jar Sedimentation Test
- Procedure: Layer soil/water in jar, shake, settle 24 hours
- Positive Indicator: Distinct clay layer atop silt/sand
- Calculation: Clay layer thickness >40% of total
Top Organic Amendments for Clay
Compost is number one on our list for improving clay soil. Apply 3-4 inches deep, working it into the top 12 inches of soil. Compost is a natural miracle worker that creates air pockets, immediately improving drainage. Compost also feeds beneficial microbes that naturally break down clay particles.
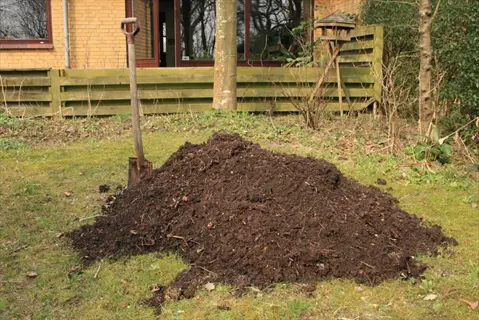
Select aged manure to safely use in your garden. Spread 2-3 inches across your growing area. Composted manure releases nitrogen slowly and will not burn your plants. Do not use fresh manure. It contains harmful pathogens that could infect your growing area.
Leaf mold is great for water retention and dense clay soils. It should be placed on top of surface mulch with a 2-inch layer around plants. It holds up to 50% more moisture than other amendments. Leaf mold retains neutral pH, unlike acidic peat moss, which can otherwise harm plant roots.
Coir provides sustainability advantages vs. peat moss. Mix hydrated coir bricks at 20-50% with native clay soil. This renewable resource comes from coconut waste harvested every three months. It produces a great crumb structure for root penetration and water retention.
Compost
- Application: Till 3-4 inches (7.5-10 cm) into top 12 inches (30 cm) of soil
- Benefits: Improves soil structure and microbial activity within 4 weeks
- Best For: Vegetable gardens and new flower beds needing immediate improvement
- Composition: Use plant-based compost for low salt content
- Timing: Apply in fall or early spring before planting season begins
- Frequency: Reapply annually to maintain organic matter levels
Aged Manure
- Application: Spread 2-3 inches (5-7.5 cm) across planting area
- Benefits: Provides slow-release nitrogen for sustained plant growth
- Warning: Never use fresh manure due to pathogen risks and plant burning
- Source: Prefer cow or horse manure aged 6+ months for safety
- Salt Content: Test for salinity before large-scale application
- Alternative: Poultry manure has higher nitrogen but requires extra composting

Leaf Mold
- Application: Apply 2-inch (5 cm) layer as surface mulch or till lightly
- Benefits: Increases water retention by up to 50% in clay soils
- Creation: Decompose leaves for 12-18 months for optimal texture
- pH: Maintains neutral pH around 7.0 unlike acidic peat moss
- Combination: Mix with compost for enhanced nutrient availability
- Availability: Collect autumn leaves for free abundant supply

Cover Crops
- Application: Sow densely, then till 4 weeks before planting season
- Benefits: Daikon radish roots break compaction down to 24 inches (60 cm)
- Nitrogen Fixers: Legumes like clover add 50-100 lbs N/acre annually
- Timing: Plant in late summer for winter decomposition
- Erosion Control: Protects bare soil from heavy rain impact
- Species: Combine radish (tillage) with rye (organic matter) for best results
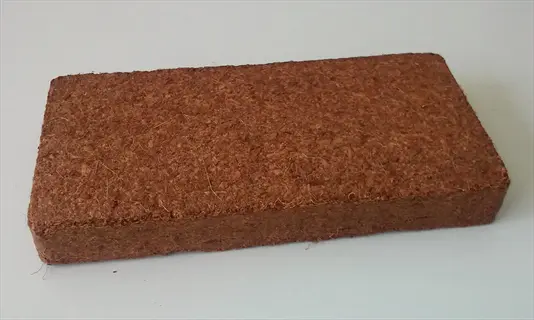
Coir
- Application: Hydrate bricks, mix 20-50% with native clay soil
- Benefits: Sustainable alternative to peat moss with superior water retention
- Renewability: Harvested from coconut industry waste every 3 months
- pH Neutral: Maintains 6.5-7.0 unlike variable peat moss sources
- Texture: Creates ideal crumb structure for root penetration
- Usage: Blend with perlite and compost for potting mixes
Worm Castings
- Application: Mix 10-20% with soil in planting holes or as top dressing
- Benefits: Provides enzymes and beneficial microorganisms for root development
- Nutrients: Slow-release NPK ratio of 5-5-3 over 4-6 months
- Water Retention: Holds 9 times its weight in water for drought resistance
- Disease Resistance: Contains chitinase enzymes that combat root diseases
- Usage Rate: Apply 10 lbs per 100 sq ft every planting season
Straw
- Application: Layer 3-4 inches (7.5-10 cm) as surface mulch without tilling
- Benefits: Prevents crusting and reduces evaporation by 40-60%
- Decomposition: Breaks down in 6-8 months adding organic matter
- Weed Control: Blocks 90% of weed germination when applied thickly
- Winter Protection: Insulates soil against freeze-thaw cycles
- Caution: Use seed-free straw to prevent unwanted grass growth
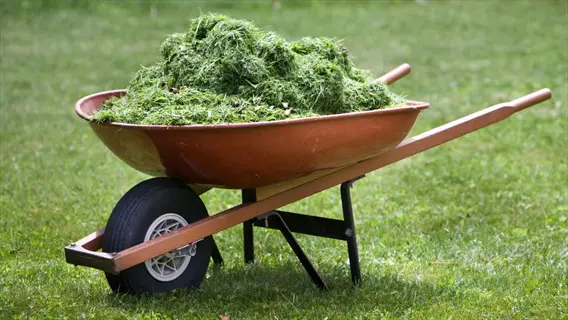
Grass Clippings
- Application: Spread thin 1-inch (2.5 cm) layers to avoid matting
- Benefits: Provides quick nitrogen boost as it decomposes in 2-4 weeks
- Nutrient Content: 4% nitrogen by weight when fresh and green
- Drying Method: Sun-dry before use to prevent anaerobic conditions
- Combination: Mix with brown materials like leaves for balanced composting
- Frequency: Apply monthly during growing season for continuous benefits

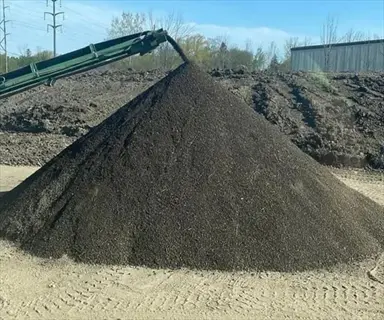
Biochar
- Application: Incorporate 5-10% by volume into top 8 inches (20 cm)
- Benefits: Permanent carbon sequestration improving soil for centuries
- Porosity: Surface area of 200-400 m²/g creates microbe habitats
- Nutrient Holding: Increases cation exchange capacity by 50-100%
- Activation: Charge with compost tea before use for best results
- pH Adjustment: Raises acidic soils by 0.5-1.0 pH points
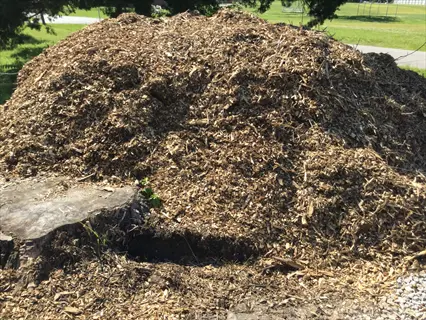
Composted Wood Chips
- Application: Use as 2-3 inch (5-7.5 cm) mulch or till partially decomposed
- Benefits: Lasts 2-3 years improving long-term soil structure
- Decomposition: Requires 6-12 months composting before use
- Nitrogen Balance: Add 1 lb nitrogen per 100 lbs chips during composting
- Fungal Promotion: Encourages mycorrhizal networks in clay soils
- Tree Benefits: Ideal mulch around trees and shrubs preventing compaction
Timing
- Optimal Season: Apply amendments in fall for winter decomposition
- Avoid: Frozen ground or summer drought periods
- Spring Option: Light top-dressing only if missed fall window
- Rain Consideration: Work soil when moist but not saturated
Depth Integration
- New Beds: Till amendments 8-12 inches (20-30 cm) deep
- Existing Plants: Top-dress without disturbing roots
- Trees/Shrubs: Amend entire planting area, not just holes
- Avoid Bathtub Effect: Blend amendments with native soil thoroughly
Quantity Control
- Compost Limit: Maximum 30% by volume to prevent drainage issues
- Manure Caution: Test salinity levels before large applications
- Wood Products: Balance with nitrogen sources to avoid depletion
- Over-Amendment Risk: Can create hydrophobic conditions if excessive
Amendment Combinations
- Synergistic Pairs: Combine compost (nutrients) with coir (structure)
- Cover Crop Timing: Follow manure with nitrogen-fixing cover crops
- Layering: Apply coarse materials like wood chips under finer compost
- Phased Approach: Use fast-decomposing grass clippings before slow biochar
Plant-Specific Adjustments
- Vegetables: Higher compost ratios (20-30%) for annual beds
- Perennials: More wood chips/biochar for long-term structure
- Acid-Lovers: Add peat moss only for blueberries/azaleas needing low pH
- Lawns: Fine compost top-dressing instead of coarse wood chips
How to Amend Clay Soil Step-by-Step
Use the squeeze test to assess your soil moisture. Take a handful of soil and squeeze it. If it holds together and forms a slick ball instead of breaking apart, then wait 2-3 sunny days before attempting to compact. This quick test keeps us from producing blocks of compaction that resemble concrete.
Use precise rates of amendments per square foot. Apply compost at a rate of 1 cubic yard per 100 square feet to a depth of 3 inches. Spread evenly over the surface of your planting area. Work slowly in small sections to keep an even spread throughout the planting site.
Properly amend soils according to the season. If you plan to do major soil amendments, the fall would provide the best timeframe before the winter freeze-thaw cycles. Avoid summer drought periods when the soil becomes powdery. Spring is ideal for light top-dressing if you missed the fall opportunity.
Let the soil rest after modifying it. Wait two days before planting or transplanting seeds. Test drainage by watering the area. If there is standing water, try adding organic matter and lightly raking the soil surface.
Step 1: Soil Preparation
- Timing: Perform when soil is moist but not wet (passes squeeze test)
- Clearing: Remove weeds and debris from a 100 sq ft (9.3 m²) area in 30 minutes
- Testing: Check moisture - soil should crumble slightly when squeezed
- Area Marking: Define beds with stakes and string for precision
- Depth Check: Probe soil to identify compaction depth
Step 2: Amendment Application
- Quantity: Spread 3 inches (7.5 cm) of compost evenly across surface
- Calculation: Use 1 cubic yard per 100 sq ft for 3-inch depth coverage
- Distribution: Work in sections for large areas to ensure uniform coverage
- Material Choice: Select amendments based on soil test results
- Safety: Wear mask when handling dusty materials like biochar
Step 3: Incorporation
- Tool Selection: Use garden fork for small areas (<500 sq ft), tiller for larger
- Depth: Mix amendments into top 8-12 inches (20-30 cm) of soil
- Technique: Work crosswise to prevent creating hardpan layers underneath
- Moisture Control: Stop if soil sticks to tools (too wet) or powders (too dry)
- Time Estimate: 45 minutes per 100 sq ft with manual tools
Step 4: Leveling and Settling
- Smoothing: Rake surface to create slight slope (1-2% grade) for drainage
- Settlement: Wait 48 hours before planting to allow soil structure to stabilize
- Water Test: Apply 1 inch (2.5 cm) water - should absorb within 30 minutes
- Adjustments: Add more amendment if water pools in any area
- Final Check: Soil should crumble easily when squeezed
Step 5: Planting Preparation
- Timing: Plant seeds/seedlings 1 week after amendment for best results
- Depth Adjustment: Dig planting holes 2x root size in amended soil
- Watering: Pre-moisten soil to 6-inch (15 cm) depth before planting
- Mulching: Apply 2-inch (5 cm) straw layer after planting
- Monitoring: Check for improved drainage after first rainfall
Avoiding Common Amendment Mistakes
Tilling wet clay creates significant long-term damage. Soil with over 40% moisture will form unbreakable concrete-like blocks. Instead, take time to do the squeeze test before working on it. Please wait until the soil can be crumbled in your hand, rather than trying to smear it. This will save you years of drainage issues and compaction problems.
Using sand alone results in disastrous cement-like soil. This mistake is widespread and causes permanent drainage issues. Instead, use compost or expanded shale as an alternative. If using sand, always add equal parts organic matter. Use sand in amounts less than 20% of the volume, even in mixed applications.
Changing only the planting holes creates a bathtub effect, drowning the roots; water pools around the isolated amended areas, suffocating plants. Amend the entire bed uniformly, a minimum of 4 feet by 4 feet per plant. Mix amendments thoroughly with the native soil, creating a seamless transition in texture.
Fresh manure brings with it pathogens, and plants will burn immediately after application. Always age manure for at least six months! In edible gardens, wait at least 120 days between application and harvest. Use composted manure or plant-based alternatives for the long-term health of your soil.
Tilling Wet Clay
- Mistake: Working soil when moisture content exceeds 40%
- Consequence: Creates concrete-like compaction blocks
- Prevention: Perform squeeze test - soil should crumble, not smear
- Timing Window: Wait 2-3 sunny days after rain before working
- Recovery: Aerate compacted areas with broadfork before retrying
Using Sand for Drainage
- Mistake: Adding sand without organic matter
- Consequence: Forms cement-like texture worsening permeability
- Alternative: Use expanded shale or compost instead
- Ratio Warning: Sand must be <20% volume even when combined with organics
- Safe Use: Only with equal parts compost in raised beds
Amending Only Planting Holes
- Mistake: Improving soil only in individual plant holes
- Consequence: Creates drainage 'bathtub effect' drowning roots
- Solution: Amend entire planting area uniformly
- Minimum Area: Treat at least 4x4 ft (1.2x1.2 m) around each plant
- Tree Exception: For mature trees, radial amendment to drip line
Applying Fresh Manure
- Mistake: Using uncomposted animal waste
- Consequence: Burns plants with ammonia; introduces pathogens
- Safety Standard: Age manure 6+ months before application
- Vegetable Caution: Wait 120 days between application and harvest
- Alternative: Use composted manure or plant-based fertilizers
Over-Amending with Wood Products
- Mistake: Incorporating fresh sawdust/chips without nitrogen
- Consequence: Nitrogen depletion causing plant yellowing
- Balance Rule: Add 1 lb (0.45 kg) nitrogen per 100 lbs (45 kg) wood
- Composting: Pre-compost wood chips for 12 months before use
- Safe Materials: Use only fully composted wood products
Long-Term Clay Soil Care
Be sure to test your clay soil every autumn without fail. Evaluate pH levels, nutrient values, and organic matter percentage. The ideal pH for optimal nutrient access is between 6.0 and 7.0. Compare the data from year to year and evaluate improvement. I suggest adapting amendments based on these scientifically supported measures.
Move cover crops around seasonally. In the summer, use buckwheat to break up compaction naturally. In the fall/winter, consider switching to winter rye or hairy vetch as a source of nitrogen. Mow cover crops three weeks before planting main garden crops.
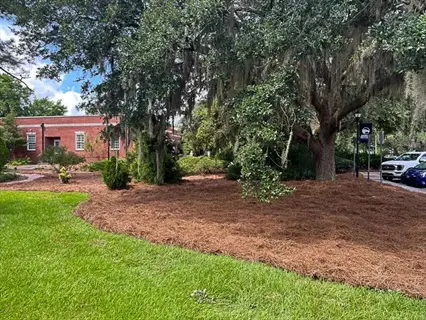
Provide mulch to ensure plant safety at the specified depth levels. For trees and shrubs, maintain a 3" depth layer in all seasons. For vegetable beds, refresh with 1" mulch in spring and fall before planting. Mulch should never come into contact with the plant stems, as this can cause them to rot and create an opportunity for pests.
Monitor the pH level during the growing season. Clay will, over time, acidify and will increase the availability of nutrients. If the pH decreases to below 6, apply lime; if it rises above 7.5, apply sulfur. Remember, a balanced pH optimizes the benefits of soil amendments for your plants.
Annual Soil Testing
- Frequency: Test every fall after harvest
- Parameters: Check pH, NPK, organic matter %, salt levels
- Adjustments: Lime if pH <6.0; sulfur if pH >7.5
- Tracking: Compare yearly results to measure improvement
- Sampling: Take 10+ samples from different bed areas
Continuous Mulching
- Material: Use 2-4 inches (5-10 cm) shredded bark or straw
- Replenishment: Add 1 inch (2.5 cm) every spring and fall
- Benefits: Prevents crusting, moderates temperature, feeds microbes
- Avoid: Don't let mulch contact plant stems directly
- Winter Care: Apply extra 2 inches (5 cm) for frost protection
Cover Crop Rotation
- Summer: Sow buckwheat (60 days growth before tilling)
- Winter: Plant cereal rye or hairy vetch for nitrogen fixation
- Termination: Mow/till 3 weeks before planting main crops
- Biomass Goal: Achieve 2-3 tons/acre organic matter annually
- Legume Ratio: Include 30% clover/vetch for nitrogen boost
Compost Top-Dressing
- Application: Spread 0.5 inch (1.3 cm) finished compost yearly
- Timing: Early spring before planting or late fall after harvest
- Quality: Use compost with 40-60% organic matter content
- Calculation: 1.5 cubic yards per 1,000 sq ft for 0.5 inch depth
- Method: Apply with rake without tilling to protect soil structure
Aeration Management
- Frequency: Core aerate lawns twice yearly (spring/fall)
- Gardens: Use broadfork annually without inverting soil layers
- Depth: Reach 6-8 inches (15-20 cm) in compacted areas
- Aftercare: Fill holes with compost-sand mix after aeration
- Avoid: Never aerate during drought or frozen conditions
5 Common Myths
When sand is incorporated into clay soil, it will improve drainage and provide better conditions for all growing plants.
However, mixing sand into clay soil without organic materials will ultimately provide a dense, cement-like texture that reduces drainage and root penetration. The reason is that fine particles of clay will fill the voids between the sand particles, resulting in a situation similar to concrete. So to improve your soil effectively, use a 50-50 mix of sand and compost, and only in a raised bed, or for in-ground gardens, use only an organic amendment, like compost or expanded shale, to avoid potential permanent compaction.
Repeatedly tilling a clay soil every year will resolve compaction issues permanently while maintaining your soil quality.
Repeated tilling destroys soil structure by breaking apart vital aggregates and microbial networks. Over time, it actually makes it worse. Clay soils require annual organic matter replenishment to maintain the structure's porosity because tilling breaks the beneficial aspects down faster. Use a no-till method after you amend it for the first time; then use broadforks for aeration and add 3-4 inches of mulch to help mitigate soil biology problems (disrupting soil ecosystems is not good).
Fresh manure is a safe and natural fertilizer that yields an immediate benefit when tilled into clay gardens.
Unaged manure contains unsafe pathogens, such as E. coli, and high concentrations of ammonia that can burn plant roots and contaminate vegetables. The National Organic Program requires that 6 months pass after aged manure is applied, and there must be a waiting period of an additional 120 days before harvesting edible crops. You can safely use manure that has been fully composted, as long as the compost has reached a temperature of 140°F (60C) internally to kill pathogens, or just use plant-based compost to eliminate any health risks.
By amending only holes for planting as opposed to the whole bed, a majority of time and effort and resources are conserved while allowing for adequate root zone amelioration.
Where amendments are isolated, they create impervious drainage 'bathtubs' that remain saturated with water where plant roots are, leading to suffocation or root rot. In order for plants to develop a healthy root system, uniformly improved soil is required a minimum of 3 feet beyond their drip line. In counteracting or avoiding the interface effect, though there are exceptions cases, during the integration of amendments in non-native soils, amend the entire area that will become a planting zone to a depth of 12 inches that are thoroughly incorporated to native soil and amendments so that their is no interface, which would interfere with the movement of water and root extends across contrasting soil layers.
Gypsum is an effective and universal solution that activates any type of heavy clay soil without additions.
Though gypsum hydrates and improves sodic clays with a high sodium content, helping to improve the soil structure by replacing sodium ions with calcium, it provides little improvement for non-sodic clays and other soil types. In fact, gypsum can increase aluminum toxicity in acidic soils. Always test your soil before adding amendments to it, and you will have better results if you add amendments like gypsum with organic matter such as compost. When you have typical clay soils, try adding 3-4 inches of compost each year before you solely rely on mineral amendments.
Conclusion
Changing clay soil takes determination, but it is gratifying. Heavy, hard earth transforms into fertile planting beds through continuous organic amendments, applied over time in accordance with seasonal timing. It starts as a small step, one method, and composting is a good first step, before you can gain the confidence for bigger steps.
Keep the basic tenets we discussed in mind as you follow this guide. Organic materials naturally relieve compaction. The time of year relates to the maximum number of freeze-thaw cycles. Continuous care, such as mulching, maintains soil structure development. Use these principles and reap sustainable gardening rewards.
Expect steady progress over the next several growing seasons. You should notice the drainage is improving after the very first amendment to the soil. Changing the soil's structure will take time and will require consistent attention over 2-3 years. You can track progress by testing the soil once a year and then celebrating those tiny gains.
Start your journey to transforming your soil today! Select one amendment strategy from this guide to use in your garden this season and share your experience with other gardeners struggling with clay soil. Your flourishing garden will prove there is value in clay soil!
External Sources
Frequently Asked Questions
What are the best soil amendments for clay?
The most effective amendments include compost, aged manure, leaf mold, and cover crops. Compost improves structure while aged manure adds nutrients without burning plants. Leaf mold enhances water retention, and cover crops like radishes naturally break up compaction layers.
Do coffee grounds help break up clay soil?
Coffee grounds provide minimal improvement alone. They work best when composted with other organic materials for at least six months. Fresh grounds can temporarily tie up nitrogen and should never be used directly in heavy clay without proper composting.
Should I amend clay soil in fall or spring?
Fall is ideal for major amendments as organic materials decompose over winter. Apply compost or manure before frost, allowing winter freeze-thaw cycles to incorporate them. For minor top-dressing, early spring works before planting season begins.
Can you add too much gypsum to clay soil?
Yes, excessive gypsum causes calcium buildup and nutrient imbalances. It only benefits sodic clays with high sodium content. For typical clay, prioritize organic amendments and only use gypsum after professional soil testing confirms sodium issues.
How to improve clay soil without tilling?
Effective no-till methods include:
- Applying thick organic mulch layers annually
- Using broadforks for aeration without soil inversion
- Planting deep-rooted cover crops like daikon radish
- Top-dressing with compost to build soil biology naturally
What plants struggle most in unamended clay?
Plants requiring excellent drainage suffer significantly, including Mediterranean herbs like lavender and rosemary. Root vegetables like carrots develop deformities, while shallow-rooted annuals drown during wet periods. Fruit trees also decline due to oxygen-starved root systems.
Does adding sand improve clay soil drainage?
Sand often worsens drainage by creating concrete-like texture. It only works when combined with equal parts organic matter in raised beds. For in-ground gardens, use expanded shale or compost instead to avoid permanent compaction.
How long until amended clay becomes productive?
Visible improvement occurs within one season, but full transformation takes 2-3 years. Initial applications reduce compaction, while ongoing mulching and cover cropping build lasting structure. Annual soil testing helps track progress and adjust amendment strategies.
Can I use fresh manure in clay gardens?
Avoid fresh manure due to ammonia burns and pathogen risks. Always age manure for at least six months before use. For edible gardens, observe 120-day waiting periods between application and harvest to ensure food safety.
What's the biggest mistake when amending clay?
The critical error is amending only planting holes, which creates drainage 'bathtubs' that drown roots. Always treat entire planting areas uniformly. Other major mistakes include tilling wet soil or using uncomposted wood products that deplete nitrogen.