
Although snake plants are tough and seem to thrive on neglect, good preventative care will turn these survivors into thriving specimens. They require minimal care, and if they are given attention when needed, the result will be rapid growth. I have seen snake plants recover from being root-bound after a thorough repotting and produce gorgeous new leaves in just a few weeks.
Neglecting to report trees can create serious dangers, such as lethal root constriction and starvation due to a lack of nutrients. New Earth adds the necessary minerals that are gradually lost due to Earth's compaction. My biggest plant disaster was a snake plant that cracked its ceramic pot due to root pressure, showing that even hardy plants have their limits.
Proper repotting induces biological rebirth, stimulating new leaf and pup production. I get quite happy seeing the babies come forth after transplanting. This simple act resets the plant's growth cycle, allowing you to enjoy your green friend for many more years to come.
Propagating Snake Plant Pups
One perk of repotting snake plants is propagating the pups, although it isn't necessary. This allows you to increase your collection at no cost. I personally propagate snake plant pups when repotting the adult plants, as it minimizes root disturbance and helps give the pups established roots.
Select only healthy pups that have at least two leaves fully developed as well as visible root structure. Smaller offsets are not capable of surviving separation, as I found out to my sorrow when I lost several tiny pups which had not had enough reserve energy for independent growth.
Before pulling pups, sterilize your cutting instruments with rubbing alcohol. This should help to prevent any risk of bacterial infections at the cut site. I have a pair of scissors for this purpose that I keep dipped in rubbing alcohol at nursery time. Thus, I am assured of clean cuts every time.
Propagations can be made at the ideal time in early spring when the plants are growing actively. Warmer temperatures and increasing sunlight will help the pups establish themselves more readily. I achieved a 90% success rate in spring propagation, compared to the disappointing results from fall propagation.
Identification and Preparation
- Locate pups growing from mother plant's rhizomes (typically 0.5-1 inch thick)
- Ensure pups have at least 2 developed leaves and visible root structures
- Prepare 4-inch pots with drainage holes in advance
- Use identical soil mix as main plant: cactus/succulent blend
- Sterilize cutting tools with 70% rubbing alcohol solution
- Water mother plant 48 hours before propagation process
- Check pup health: firm leaves without discoloration
- Gather materials: pots, soil, knife, rooting hormone
Separation Technique
- Gently expose connecting rhizome between pup and mother plant
- Make clean angled cut through rhizome with sterilized blade
- Preserve root systems on both pup and mother sections
- Avoid damaging main root ball during separation process
- Allow cut surfaces to air-dry for 1-2 hours minimum
- Apply cinnamon powder as natural antifungal treatment
- Use rooting hormone on cuts for faster recovery
- Maintain 60-70% humidity during healing period
Planting and Initial Care
- Plant pups in containers with multiple drainage holes
- Position at original soil depth to prevent rot issues
- Use well-draining mix: 2 parts cactus soil, 1 part perlite
- Water lightly once after planting to settle soil particles
- Place in bright indirect light avoiding direct sun exposure
- Maintain stable temperatures between 65-75°F (18-24°C)
- Use humidity dome for first week if available
- Avoid fertilization during initial 30-day establishment
Long-term Pup Development
- Water only when top 2 inches (5 cm) of soil are completely dry
- Begin diluted fertilization after 90 days of growth
- Monitor for new leaf emergence as success indicator
- Repot when roots fill container after 9-12 months
- Avoid plant disturbance during critical root development
- Gradually increase light exposure over 4-week period
- Check for root growth by gently tipping container
- Maintain consistent care routine for optimal development
Troubleshooting Common Issues
- Address yellowing leaves by reducing watering frequency
- Treat root rot by trimming affected roots and repotting
- Prevent pest infestations with neem oil applications
- Correct leggy growth by increasing light exposure gradually
- Revive wilting pups with humidity tent for 1 week
- Solve slow growth with diluted fertilizer after month 3
- Adjust care if leaf tips brown from low humidity
- Isolate diseased plants immediately to prevent spread
Choosing Pot and Soil Essentials
Choosing the correct pot and soil makes drainage a top priority for snake plant health. I have rescued numerous plants from root rot by simply switching to breathable terra-cotta pots and gritty soil mixes. Good drainage prevents the accumulation of water around the roots, which is abhorrent to these denizens of the desert.
Make an ideal soil mix of 60% cactus mix, 30% perlite, and 10% coarse sand. This mix contains a percentage of ingredients that approximates their natural habitats and has excellent aeration qualities. Avoid moisture-retaining materials such as pure peat moss, which will suffocate the roots. This was a mistake I made early in my gardening career.
Terra-cotta containers excel in moisture because excess moisture is conducted away by the porous walls. Ceramic is better suited for dry climates, where some water retention is beneficial. Terra-cotta is better for pots in the bathroom, while glazed ceramic is suitable for dry rooms.
Avoid problematic materials such as vermiculite and water-retaining crystals. They are traps that retain moisture near the rhizomes, which can lead to rot. Pure garden soil compacts down to something like concrete. Stick with mineral-based materials to keep your snake plants healthy and happy.
Material Properties
- Terra-cotta: Porous clay promotes rapid moisture evaporation
- Ceramic: Glazed options retain more moisture than unglazed
- Plastic: Lightweight but prone to water retention issues
- Concrete: Heavy and stable but requires excellent drainage
- Fabric: Excellent aeration but unsuitable for long-term growth
- Metal: Avoid due to heat conduction and corrosion risks
- Wood: Natural look but deteriorates with constant moisture
- Resin: Durable alternative with moderate breathability
- Always prioritize materials with breathability characteristics
- Test heat retention by touching material in sunlight
Size and Shape Specifications
- Select containers 2 inches (5 cm) wider than current root ball
- Depth should not exceed width to prevent water pooling
- Wider pots accommodate horizontal rhizome spread patterns
- Shallow profiles: 6-8 inches (15-20 cm) ideal for mature plants
- Oversized pots cause soil to stay wet for extended periods
- Narrow pots restrict root development and cause tipping
- Match container size to plant's growth rate and variety
- Ensure proportional weight distribution for stability
- Consider root depth: Snake plants typically reach 12-18 inches (30-45 cm)
- Adjust for dwarf varieties with smaller 4-6 inch (10-15 cm) pots
Drainage Requirements
- Minimum one drainage hole per 6 inches (15 cm) of diameter
- Multiple holes preferred over single center drainage
- Elevated feet or stands to prevent water blockage
- Use pot feet for airflow under container bases
- Add drainage layer of clay pebbles or gravel if needed
- Avoid saucers that trap standing water beneath pots
- Test drainage by pouring water through empty container
- Drainage hole diameter: Minimum 0.5 inches (1.3 cm)
- Use mesh screens to prevent soil loss while allowing drainage
- Consider self-watering pots only with wick systems
Environmental Considerations
- Humid climates: Prioritize terra-cotta for faster drying
- Dry environments: Ceramic helps maintain slight moisture
- Indoor vs. outdoor use impacts material durability
- Light-colored pots reduce heat absorption in sunny areas
- Weight considerations for shelves or hanging installations
- UV-resistant materials for outdoor or sunny window use
- Non-porous materials for high-humidity bathrooms
- Thermal insulation properties for temperature stability
- Recycled and sustainable material options
- Pot stability in high-traffic or pet-accessible areas
Specialty Pot Types
- Azalea pots: Shallow profile ideal for snake plants
- Orchid pots: Extra drainage but may need liner adjustment
- Air pots: Promote air pruning but require frequent watering
- Smart pots: Fabric containers for maximum root aeration
- Cachepots: Decorative outer pots with functional inner liner
- Self-watering systems: Use only with moisture meter
- Wall planters: Ensure adequate depth and drainage
- Terrariums: Generally unsuitable due to humidity
- Hydroponic setups: Possible but require specific adaptation
- Hanging baskets: Only for small, lightweight varieties
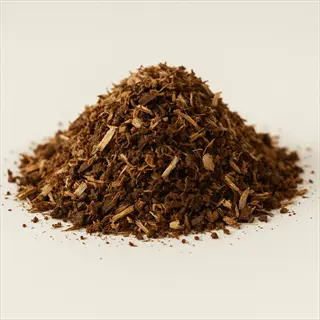
Peat Moss
- Retains excessive moisture leading to root suffocation
- Acidic pH unsuitable for snake plants' preferences
- Compacts over time reducing essential oxygen flow
- Sustainable alternatives like coco coir available
- Requires frequent rewetting once completely dry
- Decomposes rapidly losing structural integrity
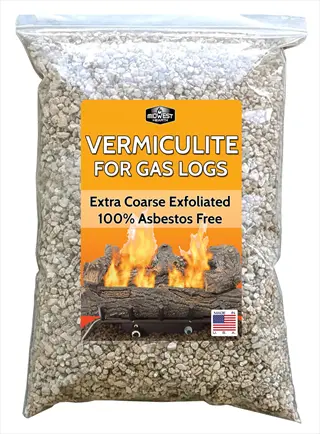
Vermiculite
- Absorbs and holds too much water for snake plants
- Causes soil to remain wet beyond acceptable duration
- Expanded mineral that collapses under pressure
- Traps moisture against rhizomes promoting rot
- Unsuitable for drought-tolerant plant species
- Interferes with natural dry-wet cycle requirements
Pure Garden Soil
- Too dense for container-grown snake plants
- Lacks necessary drainage components for pots
- Often contains pests, weed seeds, or pathogens
- Nutrient composition mismatched to houseplants
- Compacts severely restricting root development
- Never use outdoor soil for indoor containers

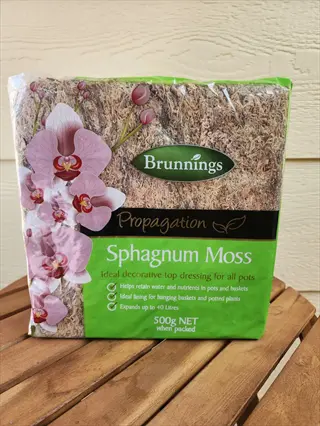
Sphagnum Moss
- Designed for moisture-loving plants like orchids
- Retains 20x its weight in water causing saturation
- Acidic properties lower soil pH detrimentally
- Decomposes quickly requiring frequent replacement
- Creates anaerobic conditions in root zones
- Attracts fungus gnats and other pests
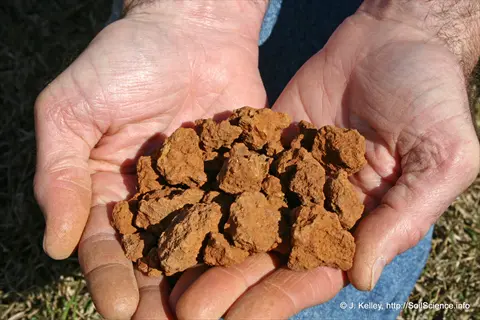
Clay Soil
- Extremely dense and poorly draining composition
- Compacts into hard slabs restricting root growth
- Slow to dry leading to chronic overwatering issues
- Lacks aeration causing oxygen deprivation
- Heavy weight increases risk of pot damage
- Unsuitable even when amended with other materials

Water-Retaining Crystals
- Designed to store and slowly release water
- Causes constant moisture around roots
- May expand and contract damaging root structures
- Potential chemical leaching over time
- Creates unpredictable moisture conditions
- Completely contradicts snake plant needs
Compost-Only Mixes
- Too rich in nutrients causing fertilizer burn
- Lacks necessary drainage components
- Promotes excessive foliage growth at root expense
- High salt content damages sensitive roots
- Attracts pests like fungus gnats and ants
- Requires dilution with gritty materials
Topsoil
- Variable composition with poor quality control
- Often contains clay lumps and debris
- Compacts easily reducing pore space
- May contain herbicides or pesticides
- Lacks sterilization of commercial potting mixes
- Inconsistent drainage characteristics
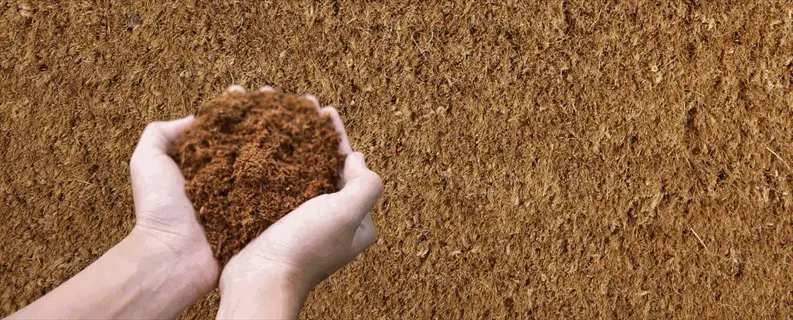
Pure Coconut Coir
- Retains significant moisture despite claims
- Requires buffering to remove natural salts
- Low nutrient content without supplementation
- Compacts over time reducing effectiveness
- High cation exchange capacity traps nutrients
- Best used as peat alternative in blended mixes
Manure-Based Amendments
- Extremely high nitrogen causes root burn
- Potential pathogen risk without proper composting
- Strong odors unsuitable for indoor environments
- Attracts pests like flies and rodents
- Salt buildup damages root systems over time
- Inconsistent nutrient release patterns
Signs and Best Repotting Timing
Note the urgent signs of repotting, such as roots emerging from drainage holes or pots cracking due to root pressure. These require immediate attention to prevent a drop in the plant's general health. Willingly acknowledged signals include diminished growth (after approximately three years) or the earth pulling away from the edges of the container. I repot when I see roots, without delay.
Springtime is prime time. This is the time when plants reach full growth mode. They respond well to the increased natural energy available. I always schedule my re-potting from March to April, when daylight hours start to increase and temperatures stabilize.
During repotting, ensure that the temperature thresholds are maintained above 60°F (15°C). Colder temperatures can shock the roots and slow recovery. I use heating mats in my greenhouse for early spring transplants when overnight temperatures are still chilly.
Timing for regional differences: Gardeners in the South can repot using the month's end in May, while Northerners should be done by mid-April. Other climates like the dry-desert climate should never repot during the summer due to the extreme heat, whereas coastal beaches climates may be able to repot in early summer.
Root-Related Indicators
- Visible roots emerging from drainage holes
- Roots pushing against pot walls causing deformation
- Root ball completely filling container interior
- Water draining instantly due to insufficient soil
- Tangled roots circling bottom of container
- Presence of rotten or foul-smelling roots
Plant Stability Issues
- Plant repeatedly tipping over despite staking
- Soil level sinking significantly below rim
- Pots cracking from root pressure expansion
- Visible gaps between soil and container walls
- Inability to support new vertical growth
- Rhizomes protruding above soil surface
Growth and Development Signals
- No new leaf production for 12+ months
- Leaves smaller than previous growth cycles
- Multiple pups emerging crowding container
- Yellowing lower leaves despite proper care
- Leaf tips browning from nutrient deficiency
- Stunted growth compared to same-age plants
Soil and Water Problems
- Soil drying out within 24 hours of watering
- Water pooling on surface instead of absorbing
- White mineral crust forming on soil surface
- Mold or fungus growth indicating decomposition
- Soil pulling away from container edges
- Persistent musty odor from potting medium
Time-Based Indicators
- Last repotted more than 3 years ago
- Soil compaction visible when probing with finger
- Fertilizer having no visible effect on growth
- Original soil mix no longer retaining structure
- Container size unchanged for over 4 growth seasons
- Plant showing decline despite correct care
Step-by-Step Repotting Process
Gather your basic tools: new pot, fresh soil mix, scissors, trowel and gloves. Water the plant 48 hours prior to repotting in order to reduce stress. Prepare your workspace with newspapers covering the area. I always sterilize cutting tools with rubbing alcohol to prevent infection.
Gently remove the plant by tilting the pot to the side and holding the base. For stuck plants, squeeze the body of plastic containers or run a knife around the edges. Treat the roots as delicately as lace and gently untangle them with your fingers, rather than using tools. I try to keep the root ball floor intact during the removal process.
Place soil strategically by putting in a 2-inch base layer before placing your plant. Fill the spaces around the plant while holding it upright to its original depth. Gently tap the soil with your fingers to break up any air pockets. Leave a 1-inch margin at the rim for watering.
Enact critical aftercare: Hold off on watering for about 3-5 days, ensure bright indirect light exposure, and do not fertilize for 6 weeks. Watch for signs of stress such as drooping leaves. I will stake any plants that are not stable until they put out new roots.
Preparation Phase
- Gather materials: new pot, soil mix, gloves, trowel, scissors
- Water plant 48 hours before repotting to reduce stress
- Prepare workspace with newspaper or plastic sheeting
- Ensure new pot has drainage holes and clean interior
- Pre-moisten soil mix if excessively dry
- Sterilize cutting tools with rubbing alcohol
Plant Removal
- Turn pot sideways while supporting plant base
- Gently wiggle and pull plant from container
- For stuck plants: Squeeze plastic pot or run knife along edges
- Cut plastic pots away if roots are entangled
- Keep root ball intact during extraction process
- Place plant on clean surface for root inspection
Root Preparation
- Shake off loose soil from root ball with hands
- Untangle circling roots using fingers or chopstick
- Trim black/mushy roots with sterilized scissors
- Remove dead or yellowing leaves at soil line
- Divide pups at rhizome if propagating (optional)
- Allow cut roots to air-dry for 1 hour before repotting
Potting Process
- Add 1-2 inches (2.5-5 cm) of soil to pot bottom
- Position plant at original soil depth in center
- Hold plant upright while filling gaps with soil
- Gently tamp soil to eliminate air pockets
- Maintain 1-inch (2.5 cm) space below rim for watering
- Ensure no soil covers leaf bases to prevent rot
Initial Aftercare
- Water lightly only if soil is completely dry
- Place in bright indirect light location
- Avoid fertilization for 6 weeks
- Resume watering when top 3 inches (7.5 cm) are dry
- Monitor for stress signs like drooping leaves
- Stake plant temporarily if unstable
Aftercare and Troubleshooting
Recognize and differentiate signs of normal recovery (a slight droop of leaves) from symptoms of serious conditions (broad yellowing). Minor stress typically resolves within 2-3 weeks, while persistent symptoms may indicate underlying root damage or disease. Final recovery is marked by new growth.
Keep optimal conditions: 65-80°F (18-27°C) temps and plenty of bright indirect light. Use heat mats when temps dip below 60°F (15°C) at night. Position your plants near north-facing windows. Be mindful of direct sunlight burning soft leaves after transplanting.
To determine the water depth, probe the top 3 inches (7.5 cm) of soil with a finger before watering. This prevents overwatering and ensures that roots have access to sufficient water. I use a wooden chopstick as a handy moisture probe in small pots.
Tackle common concerns: Reduce the light exposure by 50% for leaves drooping. For yellowing, extend the times between watering. The brown tips indicate a need for more humidity. I place my plants on pebble trays so that the humidity is increased around the leaves.
Light Management
- Place plant in bright indirect light for first 2 weeks
- Avoid direct sunlight which can scorch stressed plants
- Ideal light intensity: 1,000-2,000 lux minimum
- Use north-facing windows or filtered east exposure
- Gradually increase light after initial recovery period
- Rotate plant weekly for even light distribution
Watering Protocol
- Water only when top 3 inches (7.5 cm) are completely dry
- Use room temperature water to prevent root shock
- Water thoroughly until drainage occurs then stop
- Empty saucers 30 minutes after watering
- Reduce watering frequency by 50% during first month
- Use moisture meter for accuracy in large pots
Temperature Control
- Maintain 65-80°F (18-27°C) for optimal recovery
- Avoid drafts from windows, doors or AC vents
- Protect from temperatures below 60°F (15°C)
- Use heating mats if ambient temperature drops
- Increase humidity to 40-50% using pebble trays
- Monitor leaf temperature with infrared thermometer
Nutrient Management
- Delay fertilization for 6 weeks after repotting
- Begin with 1/4 strength balanced liquid fertilizer
- Apply fertilizer only during active growth periods
- Flush soil every 3 months to prevent salt buildup
- Use organic options like fish emulsion or worm tea
- Discontinue if leaf tips brown from excess salts
Problem Identification
- Monitor daily for first 2 weeks then weekly
- Check both leaf surfaces for pest infestations
- Inspect soil surface for mold or fungus growth
- Gently probe soil to assess moisture distribution
- Photograph plant weekly to track recovery progress
- Keep log of watering dates and plant responses
5 Common Myths
Snake plants grow best when root bound and should not be repotted frequently.
While snake plants do well being root bound there are plants that do better than others but too great a root bind will restrict nutrients and absorption. When the roots completely occupy the container the plant can not avail itself of sufficient nutrients in the soil and lack of growth will result. which invites disease. Repot every 2-3 years to get fresh soil and all the soil nutrients and give space for growing roots when they are in their active growing state without undue stress from being repotted.
Immediate irrigation after repotting provides soil settling and permits less transplant stress.
Irrigation immediately after repotting is harmful because it saturates injured roots before they are healed, causing them to be more subject to rot. Freshly cut roots need time to get a protective callus over the place of rupture and 24 to 48 hours must be a minimum period of time allowed for that callusing process to take place. Irrigate therefore only if the soil was entirely dry previous to the repotting operation, and even then, use a small amount of moisture. In most cases it will answer the purpose better to wait 3 to 5 days, as the roots will recover in this interval of time and the plant will have opportunity to make its customary adjustments to the new environment with less stress.
Using gravel or pieces of pottery in the bottoms of containers significantly increases drainage.
However, research shows that providing a drainage layer leads instead to what is called a perched water table effect, in which water accumulates above the gravely layer rather than being available to drain freely. Thus saturation of the root area is increased rather than improved drainage. Good drainage is obtained from a good well-airated soil mixture in the container and sufficient drainage holes. For best results mix perlite or pumice uniformly in the soil and provide multiple drainage holes in the container with no obstruction at the bottom.
Snake plants require deep pots because their roots grow vertically downwards extensively.
Snake plant roots are mainly rhizomatous and spread out horizontally instead of deeply vertically. Deep pots are moist in the bottom strata of soil where the roots do not penetrate and become anaerobic for rottenness. Shallow, wide containers which conform to their natural tendencies of growth give a greater amount of aeration and better drainage. The ideal pot must not exceed in depth the wideness and the root ball must be placed in the upper half of the container in order to prevent the water logging of the unused deep soil.
Fertilizing right after repotting helps plants recover faster from transplant stress.
Applying fertilizer immediately after repotting burns tender roots and increases stress during recovery. Fresh potting soil contains sufficient nutrients for 4-6 months, and the plant's priority is root regeneration, not foliage growth. Fertilizer salts accumulate around healing roots, causing chemical damage and dehydration. Wait until new growth emerges (typically 6-8 weeks) before applying diluted fertilizer at quarter strength, allowing the plant to first establish in its new environment without chemical stressors.
Conclusion
Repotting your snake plant brings new life and growth possibilities, allowing you to enjoy decades of air-purifying, leafy beauty. By replacing the soil and providing root space, you can stop the decline and stimulate the growth of beautiful new leaves and pups. Instead of just a plant that is surviving, you have a plant that is thriving and makes a natural centerpiece for your living space.
Keep these Key Techniques in mind: use breathable containers like terra cotta, time repotting for early spring, touch roots as little as possible, and delay watering after planting until necessary. These techniques will create the ideal recovery situation for your plant without overpowering its natural hardiness.
Learn the visual language of your plant. Do you notice leaves turning subtle shades of yellow, roots growing out of the bottom holes, and plants growing stagnant without apparent cause? Nature sends you signals to guide you on how to proceed far more dependably than set time frames. Observation is your most important horticultural implement.
You now possess transformative knowledge to successfully improve your snake plant. Let everyone know about its success with #SnakePlantSuccess and share the inspiration with other gardeners! Following the same techniques next spring when repotting, you will be even more confident about the results you will achieve.
External Sources
Frequently Asked Questions
When should I repot my snake plant?
Repot snake plants every 2-3 years during early spring when they enter active growth. Signs requiring immediate repotting include roots emerging from drainage holes, stunted growth, or soil drying within 24 hours of watering. Spring repotting minimizes stress and accelerates recovery.
Do snake plants like crowded pots?
Snake plants tolerate slight crowding but suffer when severely root-bound. Benefits of proper repotting include:
- Prevents nutrient deprivation and water absorption issues
- Reduces risk of pot deformation from root pressure
- Allows space for new pup development
- Maintains healthy growth rates long-term
What pot depth is best for snake plants?
Shallow pots matching the plant's horizontal rhizome spread are ideal. Choose containers where width exceeds depth, maintaining 1-2 inches of root space. Deep pots retain excess moisture in unused soil layers, increasing root rot risk significantly.
How do I repot without harming my snake plant?
Critical steps for safe repotting:
- Water 48 hours pre-repotting to reduce stress
- Use sterile tools to trim damaged roots
- Position at original soil depth in new pot
- Delay watering 3-5 days post-transplant
- Provide bright indirect light during recovery
Should I water immediately after repotting?
Avoid watering for 3-5 days after repotting to allow root calluses to form. Immediate watering saturates fresh root wounds, increasing rot risk. Resume watering only when top 3 inches of soil are completely dry using room-temperature water.
What soil mix works best for snake plants?
Ideal soil composition:
- 60-70% cactus/succulent base mix
- 20-30% perlite or pumice for aeration
- 10-15% coarse horticultural sand
- 5-10% worm castings for slow-release nutrients
- Avoid moisture-retentive amendments like peat moss
How long does repotting shock last?
Mild stress symptoms like drooping leaves typically resolve within 2-3 weeks. Recovery requires:
- Stable 65-80°F temperatures
- 40-50% humidity levels
- No fertilization for 6 weeks
- Gradual light increase after initial 14 days
Are plastic pots suitable for snake plants?
Plastic pots are acceptable if they have multiple drainage holes and you adjust watering frequency. However, terra-cotta pots are preferable for their breathability, which helps soil dry faster and prevents overwatering issues common with plastic containers.
What indicates successful repotting?
Positive recovery signs include:
- New leaf emergence within 4-6 weeks
- Firm, upright leaves without drooping
- Visible root growth at container edges
- No yellowing or browning of existing foliage
- Improved water absorption rates
Can I fertilize after repotting?
Delay fertilization for 6 weeks post-repotting. Fresh soil contains adequate nutrients, and early feeding burns sensitive roots. Begin with quarter-strength balanced fertilizer only after new growth appears, applying during active growing seasons.