Mulching vegetable gardens addresses the major challenges that can be frustrating. The weeds are choking your plants, or the soil is drying up too quickly. This protective layer keeps the earth from the sun and rain while providing food for beneficial microbes. I remember losing entire lettuce crops due to the summer heat before I started mulching properly.
You will learn a range of crop-specific strategies that address regional challenges that are often overlooked by other guides. We discuss organic and synthetic options from straw to plastic for tomatoes, root veggies, and heat-sensitive greens. Proper timing will help you avoid common pitfalls, such as running out of nitrogen or encountering insect pests.
Our method takes into account your local climate, whether you are dealing with desert air or moist coastal air. These strategies transformed my own garden from a pathetic patch to a full-on food producer. Get started today to protect your plants and up your food harvests.
Common Mulching Mistakes to Avoid
A frequent error is using high-carbon mulches, such as fresh wood chips or straw, without any nitrogen sources. After applying, they will siphon nitrogen from the plants as they break down. I experienced this firsthand when my broccoli turned yellow within a couple of weeks. Use some blood meal or compost before mulching; otherwise, you will wake up to find your plants are extracting nitrogen for the decomposition process.
Be careful with grass clippings that may contain herbicide (chemical) residues. Contaminated mulches can kill your plants overnight, as I have experienced firsthand. Before applying grass clippings as mulch for all of my plants, I do a test run with a single plant. Always maintain a 1-2 inch clearance of mulch buildup around the stems to prevent rot and fungal diseases that thrive in moist environments.
Regional soil differences necessitate a more specific response. For example, in sandy soils, skip plastic mulches due to drainage challenges and the potential for disturbing the soil profile. In more humid geographical areas, avoid moisture-trapping materials next to plant crowns. Consider your soil type and local climatic conditions when selecting mulches to create the optimal environment.
Applying mulch too soon or too thickly can suffocate seedlings. Wait until your plants have true leaves. I take an extra precaution by using cardboard sleeves around the young plant before applying mulch. These precautions will help ensure that mulch functions as a protective barrier for your vegetable garden, rather than a barrier to its growth and development.
Types of Mulch for Vegetable Gardens
Grass clippings decompose quickly, providing a rapid nitrogen boost for summer crops, such as corn. However, wood chips are much slower to break down, even after years in pathways, and will eventually starve plants if used in garden beds. Aged wood chips are only suitable for use around fruit trees, and they should never be used around vegetable plants.
The importance of having access to regional supplies cannot be overstated. Gardeners in the southern parts of the country have plentiful access to pine needles, which will help retain moisture and won't acidify the soil when used correctly. Typically, gardeners in the northern areas mainly use straw or shredded leaves. Whatever the case, the better you match your materials to your local climate, the greater the water-holding and weed-control properties of your cover will be.
The capacity for moisture retention amongst different types varies widely. Straw is great for water retention if you have thirsty plants, while plastic mulch acts as a warm barrier that warms the soil for tomatoes. However, you should absolutely never use black walnut mulch. It has natural herbicide properties that can kill vegetable plants within a matter of days.
Consistently source materials that are free from chemicals to reduce the chance of herbicide and other toxic chemical contamination. A mulch I was suspicious of was tested on a single bean plant before being applied to the entire garden, and I am thankful for taking that precaution. My garden was spared after my neighbor's grass clippings arrived contaminated with herbicides!
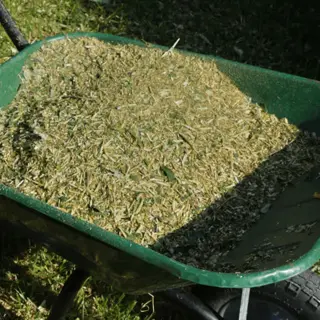
Grass Clippings
- Source: Lawn mowing byproduct requiring chemical-free sourcing
- Application: Apply 1-2 inches after sun-drying for 24 hours
- Benefits: Adds nitrogen to soil and retains moisture effectively
- Limitations: Can mat if applied wet and may contain weed seeds
- Best For: Summer crops needing nitrogen boost like corn and squash
- Decomposition: Breaks down quickly requiring monthly replenishment
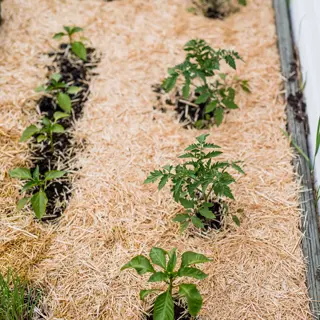
Straw
- Source: Grain harvest residue distinct from seed-filled hay
- Application: Layer 3-4 inches and shake flakes to prevent matting
- Benefits: Excellent insulation and water permeability properties
- Limitations: Potential rodent nesting and possible seed contamination
- Best For: Strawberries and cool-season crops like broccoli and kale
- Decomposition: Medium decomposition rate lasting full season
Shredded Leaves
- Source: Autumn foliage requiring shredding and 9-month aging
- Application: Spread 2-3 inches avoiding walnut family leaves
- Benefits: Free resource that improves soil structure as it breaks
- Limitations: May blow away if not shredded and properly aged
- Best For: Asparagus beds and root vegetables like carrots and beets
- Decomposition: Medium decomposition rate with seasonal renewal
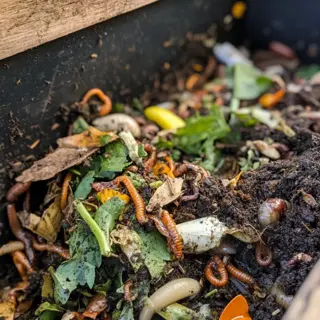
Compost
- Source: Decomposed organic matter requiring complete breakdown
- Application: Apply 2-3 inches as top dressing around plants
- Benefits: Provides immediate nutrients and enhances soil biology
- Limitations: Poor weed suppression and rapid nutrient depletion
- Best For: Quick-growing crops like lettuce and other leafy greens
- Decomposition: Already broken down needing no further decomposition
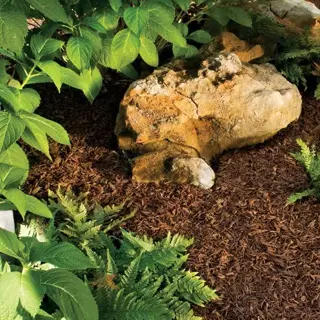
Pine Needles
- Source: Evergreen tree drop with slight natural acidity
- Application: Layer 2-3 inches around acid-loving plants only
- Benefits: Slow decomposition and attractive appearance in gardens
- Limitations: Limited availability in non-forested regions
- Best For: Blueberries and other ericaceous vegetable plants
- Decomposition: Very slow breakdown lasting multiple seasons
Wood Chips
- Source: Arborist waste available free through ChipDrop service
- Application: Use only in pathways never in vegetable beds
- Benefits: Excellent weed suppression and long-lasting coverage
- Limitations: Heavy weight and nitrogen depletion in soil
- Best For: Permanent garden pathways between planting areas
- Decomposition: Very slow process taking several years
Sawdust
- Source: Woodworking byproduct requiring nitrogen balancing
- Application: Mix with blood meal before applying thin layer
- Benefits: Fine texture good for small-seeded plant protection
- Limitations: Severe nitrogen robbery if not properly amended
- Best For: Carrot and onion beds where fine texture helps
- Decomposition: Medium rate but requires careful management
Black Plastic
- Source: Petroleum-based film requiring seasonal removal
- Application: Secure with staples and cut X-shaped planting holes
- Benefits: Warms soil quickly for heat-loving vegetable varieties
- Limitations: Blocks water and creates disposal issues after use
- Best For: Tomatoes, peppers, melons in early spring planting
- Installation: Requires drip irrigation system underneath
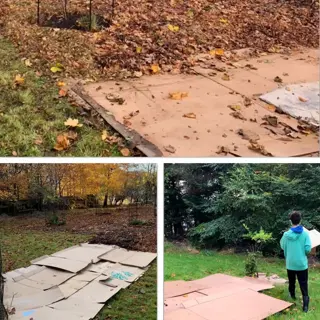
Cardboard
- Source: Recycled packaging with tape and labels removed
- Application: Wet before laying and cover with organic mulch
- Benefits: Biodegradable weed barrier suppressing perennial weeds
- Limitations: Can become slippery and requires anchoring
- Best For: New garden bed preparation and pathway foundation
- Decomposition: Breaks down within one growing season
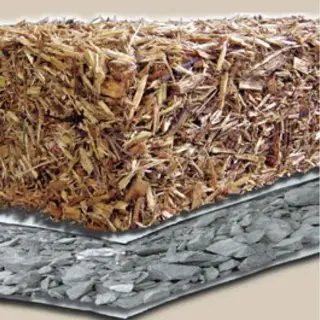
Landscape Fabric
- Source: Woven polypropylene material for long-term use
- Application: Lay flat in pathways and cover with wood chips
- Benefits: Permeable barrier against persistent weed growth
- Limitations: Clogs over time and restricts root development
- Best For: Permanent pathways not vegetable growing areas
- Durability: Lasts 3-5 years before needing replacement
When and How to Apply Mulch
Use mulch differently throughout the regions. When using mulch in cooler climates, it should be applied in the spring after soil temperatures reach 50°F (10°C). In warmer climates, it is recommended to wait until the end of March to apply mulch. For feeding gardens in the fall, northern gardens should be mulched before the first frost, while southern ones should be mulched in November. I use the thermometer reading of the soil to time mine.
To begin, prepare the soil by first removing any weeds and watering thoroughly. Apply organic mulches at a thickness of 2-4 inches, ensuring that the stems of crops are kept clear. If using plastic mulch, lay it down before planting, but make X-shaped holes in the plastic where the plants are to be planted. For container gardens, only one inch of mulch is necessary, as mulch layers can suffocate the plants' roots.
Different gardens require different methods. Straw mulch in a raised bed will break down more rapidly than in an in-ground plot. In-ground plots will benefit from thicker wood chip paths. I always add under-drip irrigation plastic mulch to help keep ideal moisture levels.
Exceptions regarding container plants require special consideration. Use thin mulches, such as cocoa hulls or similar materials, and replace them every month. Avoid using heavy materials that can compact the soil underneath. For seedlings, wait until true leaves appear before applying a thin layer of protection.
Soil Preparation
- Remove existing weeds and debris from garden bed
- Water soil deeply before mulch application
- Apply nitrogen-rich fertilizer to counteract decomposition nitrogen loss
- Rake soil surface smooth for even mulch distribution
Mulch Application
- Spread mulch to recommended depth: 2-4 inches for organic, 1 layer for plastic
- Maintain 1-inch clearance around all plant stems
- For plastic mulch: secure edges with staples and cut X-shaped planting holes
- For pathways: apply thicker layer (4-6 inches) of wood chips or straw
Post-Application Care
- Install soaker hoses under mulch before final placement
- Replenish organic mulch as it thins during growing season
- Check plastic mulch regularly for wind damage or water pooling
- Fluff compacted mulch with garden fork to maintain aeration
Seasonal Transition
- In summer: replace plastic with organic mulch for heat-sensitive plants
- In fall: add extra layer for winter insulation in cold regions
- Remove plastic mulch at season end; compost deteriorated organic mulch
- For permanent mulches: lightly till top layer before replanting
Special Cases
- Container gardens: use 1-inch layer of fine mulch like cocoa shells
- Seed beds: apply very thin mulch after germination
- Sloped areas: use netting to secure mulch against erosion
- Wet soils: delay application until soil moisture decreases
Mulching Strategies for Different Crops
Root vegetables, such as carrots or beets, require fine-textured mulches like compost or grass clippings that won't suppress their growth. Plants that bear fruit, such as tomatoes, do well with black plastic early in the season for warmth, and then switch to straw as the temperature rises. I learned this lesson the hard way after losing a beet crop to compacted wood chips.
Cool-season crops, such as lettuce and broccoli, require careful temperature management. In the summer months, light-colored straw can be used to reflect some heat and keep the soil temperature cooler. Apply more layers of mulch as bedding for fall crops to increase insulation against warm soils and early frosts. When a heat wave occurs, or over several days, check soil temperatures daily.
Vining plants, such as cucumbers, require a deeper layer of mulch, typically about 3 to 4 inches, to be spread over the developing vines. This keeps the fruit from rotting and helps keep the garden produce clean. I personally use biodegradable materials, such as straw, which will break down and decompose along with the plants. Do not use plastic in this situation, as the vining plant will want to spread.
Plants that are heavy feeders, such as corn and squash, definitely benefit from additions to mulch that are rich in nutrients. I generally mix some compost into straw or utilize mulches with legumes that fix nitrogen. I've found that applying side dressings of some sort once a month helps keep plants on track. Always test the soil's nutrients before planting heavy-feeding vegetables.
Heat-Loving Plants
- Use plastic mulch to warm soil 2 weeks before planting
- Switch to organic mulch when daytime temperatures exceed 85°F (29°C)
- Bury drip irrigation lines under plastic for targeted watering
- Leave 6-inch clearance around stems for air circulation
Moisture-Sensitive Crops
- Apply thinner mulch layers (1-2 inches) for Mediterranean herbs
- Use gravel or stone mulch for lavender and rosemary plants
- Avoid organic mulches near crowns to prevent crown rot
- Check soil moisture weekly with moisture meter
Heavy Feeders
- Pre-mix compost into mulch for corn and squash plants
- Replenish nitrogen-rich mulch monthly during peak growth
- Use legume-based mulches like alfalfa hay for natural N-fixation
- Side-dress with balanced fertilizer every 6 weeks
Shallow-Rooted Plants
- Apply fine-textured mulches like compost for lettuce
- Maintain consistent moisture with straw or coconut coir
- Avoid deep cultivation near mulched root zones
- Use floating row covers over mulch for pest protection
Perennial Vegetables
- Apply 4-inch wood chip mulch around asparagus crowns
- Refresh rhubarb mulch annually in early spring
- Use leaf mold for artichokes to maintain acidic soil
- Avoid mulching directly against woody perennial stems
Watering and Nutrient Management
Drip irrigation is significantly more efficient than sprinklers in terms of both efficiency and maintenance, especially when used under mulch. Drip irrigation delivers about 90% of the water directly to the root zone. In comparison, sprinklers lose about 30-40% of the water to evaporation before it reaches the roots. After seeing the difference in health of an experimental set of tomatoes, I converted my entire garden to drip irrigation. You will save water and reduce/avoid the risk of fungal diseases.
Straw and other carbon-rich mulches require nitrogen compensation. You will want to add a fertilizer to the top of the soil before spreading straw on top of it. In a previous summer, I learned this the hard way when my corn plants started to yellow shortly after planting the corn seeds in the soil. For every one bale of straw, add approximately two cups of blood meal to the soil to maintain balanced nutrient ratios.
Nutrient release is influenced by seasons. In the summer's heat, decomposition occurs more rapidly, and you will need to replenish these nutrients on a monthly basis. In cooler months, mulch will break down more slowly, releasing nutrients to the soil and feeding it more gradually than in summer. You will want to adjust your fertilizer application according to the season. I will personally test soil nutrients every three weeks during the peak growing season.
Acidifying mulches, such as pine needles, should be monitored for pH levels. For regular use of any acidic mulch, I recommend testing the soil at least quarterly to ensure optimal results. Alkalizing amendments, such as garden lime, can be used to counteract acidity. In my coastal garden, I mix pine needles with crushed oyster shells to use them for natural pH balancing of the soil, eliminating the need for chemical usage.
Nitrogen Balance Techniques
- Add blood meal (12-0-0) before applying high-carbon mulches
- Use legume-based cover crops as living mulch for natural fixation
- Side-dress with fish emulsion every 4-6 weeks during growth
- Test soil nitrogen levels monthly with home test kit
Moisture Conservation
- Apply 3-inch organic mulch to reduce watering by 30-50%
- Water deeply 1-2 times weekly instead of daily light watering
- Use moisture meters to check at root level under mulch
- Create soil basins around plants to direct water
Seasonal Adjustments
- Increase watering frequency when temperatures exceed 85°F (29°C)
- Reduce irrigation during cool rainy periods to prevent rot
- Add extra compost before summer mulch application
- Remove winter mulch gradually in spring to prevent shock
pH Management
- Counteract pine needle acidity with garden lime application
- Test soil pH quarterly when using acidifying mulches
- Use compost as pH-neutral mulch alternative
- Avoid walnut-based mulches which alter soil chemistry
Organic Matter Integration
- Mix aged manure into compost mulch for slow-release nutrients
- Top-dress with worm castings every 8 weeks
- Chop and drop crop residues under mulch layers
- Rotate mulch types annually to balance nutrient profiles
5 Common Myths
Mulch always robs nitrogen away from vegetable plants
Only high Carolina mulches like wood chips tie up nitrogen long-term when mixed into soil; surface-applied mulch actually conserves nitrogen by reducing leaching and allowing soil microbes to eat slowly decomposing organic matter.
Wood chips make garden soils too acidic for vegetables
Research has documented that when wood chips are used as surface mulch, they almost have no pH impact, and other research documents that most vegetables are tolerant of pH variation down to values of 5.0; significant pH change due to wood chips use only occurs if wood chips are incorporated very deeply into the soil (which is usually not recommended practice).
Mulching draws in damaging pests such as rodent and slugs.
When mulch is applied correctly (with proper clearances from stems), mulch can also prevent pests through physical barriers. The only time you might have issues with your mulch is where it is piled against the stems or if you used a contaminated material (like herbicide treated grass clippings).
Plastic mulch is superior to organic options for all crops
While plastic warms soil effectively for heat-loving tomatoes and peppers, it hinders water penetration and soil biology, making organic mulches better for most vegetables especially in hot climates where soil overheating damages roots.
Mulches should be fully removed and replaced every season
Organic mulches decompose and add nutrients and beneficial organisms to the soil over time- Seasonal, not total removal, is required. Total removal destroys soil systems and wastes nutrients that would help the next growing cycle.
Conclusion
Mulching is still a crucial contributor to water conservation and weed suppression in every vegetable garden. Applying mulch saves the gardener countless hours spent watering and weeding. In my experience, I have seen gardens transform from tortured patches to productive ones in just one year, simply by using the technique of mulching.
Ensure that you always make adjustments for local conditions and crop requirements. A coastal garden will require different strategies compared to a desert plot. Your tomatoes will require a different level of maintenance compared to root crops. It's essential to adjust your choice of mulches based on what performs best in your local climate and soil conditions.
Mulch is a proper way to improve soil health season after season. Earthworms thrive in organic layers, and soil life can enhance the availability of nutrients from these layers. This doesn't just improve soil health for one year; it improves it every consecutive year, which builds richness in the soil that can produce a healthier crop. I have observed average annual increases in organic matter of over 2% in my test beds.
Start implementing these strategies today. Choose one area of your garden to apply mulch this coming weekend, using whatever materials you might have on hand. Measure the area for the change in water retention and weed growth. The effect of your effort will be noticeable in a few weeks.
External Sources
Frequently Asked Questions
Should you use mulch in vegetable gardens?
Absolutely, mulching vegetable gardens is essential for moisture retention, weed suppression, and soil temperature regulation. It also prevents soil compaction from rain and reduces disease spread through soil splash-back. Proper mulching can increase vegetable yields significantly.
What is the biggest disadvantage of mulching?
The primary downside involves nitrogen depletion when high-carbon materials like fresh wood chips decompose in soil. This can temporarily starve plants unless compensated with nitrogen-rich amendments like blood meal or compost before application.
Which mulch works best for tomatoes?
Tomatoes benefit most from plastic mulch early season for soil warming, switching to organic mulch like straw in summer. Key considerations include:
- Black plastic for spring temperature boost
- Straw for summer moisture retention
- Maintain 6-inch stem clearance
- Avoid touching plant stems
Are there plants that shouldn't be mulched?
Certain moisture-sensitive plants like lavender and Mediterranean herbs can develop rot with thick organic mulch. Shallow-rooted seedlings also risk suffocation if mulched too early before establishment.
Is wood chip mulch safe for vegetables?
Wood chips are safe for pathways but problematic in vegetable beds due to nitrogen immobilization. If used, they require:
- Pre-treatment with nitrogen supplements
- Surface application only (no tilling)
- Exclusive use in permanent pathways
- Aged chips instead of fresh material
How does mulching affect pests?
Properly applied mulch deters pests by creating barriers, but can attract slugs or rodents if misused. Prevention methods include:
- Maintaining stem clearance
- Avoiding herbicide-contaminated grass clippings
- Using sharp materials like pine needles
- Applying diatomaceous earth borders
What mulch color is most effective?
Color selection depends on purpose: black plastic warms soil for heat-loving crops, while natural-colored organic mulches like straw or leaves are versatile for most vegetables without overheating risks.
Should you remove old mulch annually?
No, complete removal harms soil ecosystems. Instead, replenish decomposed layers seasonally. Exceptions include moldy mulch or when changing mulch types, where partial removal helps integrate new materials properly.
Can pine needles acidify vegetable soil?
Pine needles have minimal pH impact when used as surface mulch. They're excellent for acid-loving vegetables like blueberries but won't significantly alter soil chemistry for most crops when applied correctly.
How thick should vegetable garden mulch be?
Ideal depth varies by material:
- 2-4 inches for straw/leaves
- 1-2 inches for grass clippings
- Single layer for plastic
- Thinner layers for seedlings
- Adjust seasonally for temperature needs