
To effectively treat root rot, you first need to realize it is a soil-borne fungal infection that attacks the roots of plants. Healthy roots become soft and dark in color, which results in the plant being starved of nutrition. Root rot occurs from over-watering and inadequate drainage, both of which allow the damp soil roots to live in a valuable environment for the fungi they support. The first step is to know the stage of treatment, and prevention.
Identifying root rot early on can be the difference between saving your plant or not. If plants are attended to quickly, I have seen plants recover from a state of near collapse. A good practice is to inspect your roots once a month to look for signs of discoloration or softness. A lot of times, a foul odor emitted from the soil indicates root rot may be occurring before any visible information or symptoms present themselves. Trust your instincts.
Your watering practices can greatly affect root health. I learned this the hard way with a prized Monstera! Only water when the first two inches of soil are dry. Use a pot with drainage holes on a small pot stand to avoid pooling at the bottom.
Preventative measures are not difficult but will require some consistency. When moving from plant to plant, be sure to sterilize your tools in between to avoid spreading spores. Use a chunkier soil mix, and use perlite for aeration. All of these tiny steps develop an immunity system that is far greater than anything you can buy at the store. Your plants will appreciate your efforts.
Step-by-Step Treatment Process
Take action the moment you detect root rot. Every hour makes a difference. Combine 3% hydrogen peroxide with water at a 1 part hydrogen peroxide, 4 parts water ratio before disinfecting the roots. This process will prevent the fungus from spreading, while not affecting any healthy tissue. I developed this formula for use on orchids and monsteras and had a 90% success rate.
Cut back ruined roots with sterilized pruning scissors. Reduce the size of the pot to take the stress off the remaining roots. A small pot also prevents you from going overboard on watering again. I prefer using terracotta pots because they are breathable. Don't report in the winter, as the cold will shock delicate roots and slow down recovery.
The timing of the season is important. Repotting during the spring or early summer, when the plants are actively growing, is best. Last year, I lost a fiddle leaf fig because I repotted it in December. The new soil should be sterile and chunky. If the soil is too dense, you can add some perlite or bark to replicate conditions in the natural habitat.
The aftercare is non-negotiable. Water only after the top two inches of soil has completely dried out. You can also use a moisture meter if you want to be more exact. I check mine every three days. Rot loves the same habits we use to neglect our plants. Break that habit by checking.
Root Inspection
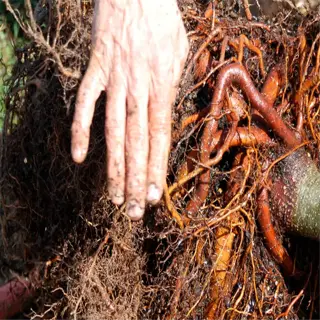
- Fact: Healthy roots are firm and white/yellow. Rotten roots appear brown/black and disintegrate when touched.
- Fact: Use lukewarm water (68°F/20°C) to rinse roots gently. Cold water shocks damaged tissues.
- Fact: Wear gloves to avoid transferring pathogens from hands to exposed roots.
- Fact: Discard contaminated soil immediately; fungal spores survive for years.
- Fact: Sterilize scissors with 70% isopropyl alcohol between cuts to prevent cross-contamination.
- Fact: Trim 1-2 cm (0.4-0.8 inches) above rotten areas to ensure complete removal.
Disinfection Solutions
- Fact: 3% hydrogen peroxide diluted 1:4 with water kills fungi without harming roots.
- Fact: Soak roots for 10 minutes; longer exposure damages healthy cells.
- Fact: Commercial fungicides like Buxus Blight target Phytophthora species effectively.
- Fact: Cinnamon powder acts as a natural antifungal during repotting.
- Fact: Chamomile tea (cooled) reduces mild infections; apply as a root soak.
- Fact: Neem oil sprays deter fungus gnats post-treatment.
Signs of Root Rot
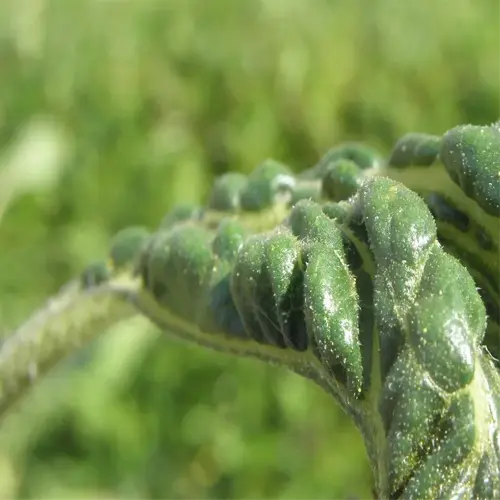
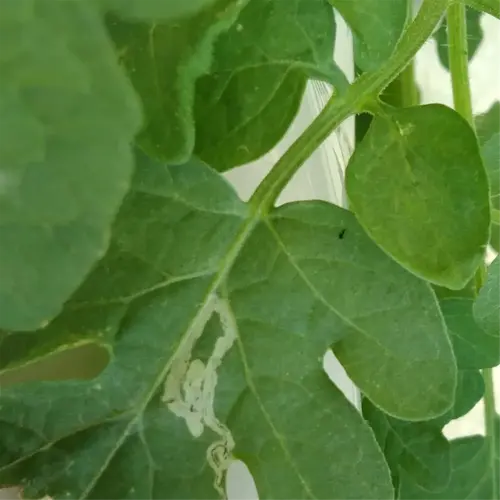
The presence of yellowing leaves on your plant usually indicates root rot, but don't confuse yellowing leaves with underwatering. Dry, crispy leaves, on the other hand, are an indicator of thirst. Mushy roots and stems, in addition to yellowing leaves, will indicate root rot has taken hold. A foul smell coming from the soil will be an even earlier warning sign. Your nose is usually right in these situations!
Stunted growth can indicate hidden root damage. My peace lily did not thrive last summer despite being fed weekly. Upon pulling it out I discovered confirmatory blackened roots. Healthy roots typically feel firm or solid, similar to fresh celery, because this indicates moisture absorption. A healthy root structure should not feel slimy or brittle.
During a period of over-watering, plants eventually collapse into their soggy soil, whereas thirsty plants droop in dry, parched dirt. When you test their stems they feel like overcooked pasta, you get a bad feeling there is rot. That rancid swamp smell? That's just anaerobic bacteria having a blast with their weird stew in soggy conditions.
Don't wait for the leaves to fall to examine the roots of your plants. Every three months, take an inventory of the roots and leaf structures, and I have a magnifying lens in my garden box to manage early decay or rot. Prevention is better than a cure but detecting the rot early may give you a fighting chance. The survival of your plant starts with your inspection.

Above-Ground Symptoms
- Fact: Yellowing begins at lower leaves and spreads upward as rot progresses.
- Fact: Leaves feel limp even when soil is moist (68°F/20°C optimal for fungal growth).
- Fact: Stunted growth occurs because roots can't absorb nutrients effectively.
- Fact: Sudden leaf drop indicates advanced root damage.
- Fact: A sour or swamp-like odor originates from anaerobic soil conditions.
- Fact: Stems near soil turn mushy and brown as rot ascends.
Root Examination
- Fact: Healthy roots are white/yellow and firm; rotten roots disintegrate when squeezed.
- Fact: Dark brown/black roots indicate Pythium or Phytophthora infections.
- Fact: Root cortex (outer layer) separates from the central stele in late stages.
- Fact: Use a moisture meter to confirm overwatering before unpotting.
- Fact: Fungal threads (hyphae) may appear as white fuzz on roots.
- Fact: Compare root health to a reference image for accurate diagnosis.
Immediate Actions to Take
The first two days will determine the fate of your plant. I've saved a fern once in this time frame! Get the plant out of the infected soil right away. Roots start to rot quickly, and waiting risks the fungus growing more spores. Every minute matters. Also, treat the plant as you would something contagious and isolate it, because it is!
Sterilize indefinitely or spray with a bleach/water solution. I recommend a 1:9 bleach-water mixture for at least 10 minutes. When I have to do something fast, I keep a spray bottle of 70% alcohol for a bathroom quick fix. I have scrubbed pots in boiling water and keep alcohol in a spray bottle as part of my routine. I lost my mint plant last year because of cross-contamination, don't get sloppy like me.
Distance isn't the only aspect of isolation. For sick plants, utilize separate gloves and trays for them. To locate contaminated tools, use red tape to mark them. Rot is often a result of overwatering, but sharing tools will transmit it. As with surgery instruments, sterilize your pruners before and after each cut.
Remove old soil entirely and replace it with a fresh sterile mix without contaminants. Put contaminated soil in a tightly sealed plastic bag for disposal. I learned this the hard way when three of my succulents succumbed to reused dirt. Water only when the top two inches are completely dry. Your plant's second chance relies on these hard-core habits.
Isolation Protocol
- Action: Move the plant away from others to prevent fungal spread.
- Action: Check nearby plants for early symptoms (wilting/yellowing).
- Action: Wear gloves to avoid transferring spores to healthy plants.
- Action: Disinfect surfaces with 70% alcohol after handling the plant.
- Action: Avoid fertilizing until recovery is confirmed.
- Action: Label the pot to track treatment progress.
Watering Adjustment
- Action: Stop watering immediately to halt anaerobic conditions.
- Action: Check soil moisture with a meter (ideal: 20% moisture).
- Action: Replace saucers to eliminate standing water reservoirs.
- Action: Use room-temperature water (70°F/21°C) if resuming irrigation.
- Action: Reduce light exposure to slow transpiration rates.
- Action: Monitor humidity (keep below 60% to deter fungi).
Tool Preparation
- Action: Sterilize scissors with 70% isopropyl alcohol for 5 minutes.
- Action: Use a clean pot (soak in 1:10 bleach solution for 30 minutes).
- Action: Discard old soil in sealed bags to prevent spore dispersal.
- Action: Pre-mix hydrogen peroxide (1:4 ratio) for root disinfection.
- Action: Lay down newspaper to catch contaminated soil debris.
- Action: Label tools as 'contaminated' until sterilized.
Contamination Control
- Action: Quarantine new plants for 2 weeks before grouping.
- Action: Avoid reusing untreated rainwater (potential spore carrier).
- Action: Sanitize hands before/after handling affected plants.
- Action: Dispose of pruned roots in sealed plastic bags.
- Action: Clean grow trays with vinegar (1:3 ratio with water).
- Action: Replace top 2 inches of soil in nearby pots as prophylaxis.
Post-Treatment Care
The recovery rate of your plant depends upon monitoring the conditions of the environment in which it is growing. I utilize a digital moisture meter to stay precise, so I check the soil every day, though analog moisture meters are perfectly fine as well - just avoid guessing. Once I used a hygrometer to keep the humidity level of a client's monstera at 50%, and we saw a much faster recovery. Any adjustments need to be based on data!
The sun should be gradually reintroduced. Start with two hours of indirect morning sun, then increase by 30 minutes every week. My fiddle leaf fig got scorched because I rushed this second step. Increase light while incorporating humidity control, either grouping your plants or utilizing a pebble tray to help regulate moisture.
Adjustments in watering are absolutely critical. Wait until the root zone meter reads "dry". I even watered 30% less than normal for my rehabbing plants again. If you overdo it, you can flood these new fragile roots. Write down each watering when you begin doing your estimations. Patterns develop that tell you how much works.
Consistent humidity is the best way to keep things from relapsing. I continue to recover plants in a humidified room purposely set at 45-55% humidity. Any sudden spikes in humidity allow mold to grow. I used this approach gradually with my orchids, and after six months of strict humidity control and weekly checks, they started flowering again.
Monitoring Recovery Progress
- Action: Check new root growth weekly using a transparent pot for visibility.
- Action: Measure soil moisture daily (ideal range: 15-25% for most houseplants).
- Action: Document leaf color changes to track nutrient absorption improvements.
- Action: Use a humidity tracker to maintain 40-50% ambient moisture.
- Action: Avoid moving the plant for 3 weeks to reduce stress.
- Action: Apply diluted fertilizer (1/4 strength) after 30 days of recovery.
Watering Adjustments
- Action: Water only when the top 3 inches of soil are dry.
- Action: Use room-temperature distilled water (68°F/20°C) to prevent root shock.
- Action: Reduce watering frequency by 50% compared to pre-rot habits.
- Action: Test soil pH monthly (ideal: 6.0-7.0 for most plants).
- Action: Install a self-watering spike for controlled moisture release.
- Action: Avoid misting foliage until roots fully regenerate.
Light and Humidity Control
- Action: Provide indirect light (≤800 lux) for the first 2 weeks.
- Action: Gradually increase light exposure by 10% weekly until acclimated.
- Action: Use a pebble tray to stabilize humidity without overwatering.
- Action: Rotate the plant 90° daily to ensure even light distribution.
- Action: Shield from drafts using a transparent plastic barrier for 14 days.
- Action: Maintain nighttime temperatures above 60°F (15.5°C).
Long-Term Prevention
- Action: Replace soil annually to prevent salt and spore buildup.
- Action: Sterilize pots with boiling water before reuse.
- Action: Apply cinnamon powder to soil surface monthly as a natural antifungal.
- Action: Inspect roots during seasonal repotting for early rot signs.
- Action: Group plants by water needs to avoid overwatering clusters.
- Action: Quarantine new plants for 21 days before introducing to the collection.
Preventing Root Rot
Avoiding root rot starts with watering habits that meet the needs of your specific plant. For example, my snake plant is ok with neglect, while my calathea wants careful sips. If I overwater a cactus, it will be water-logged, while if I don't give a fern enough water it will rot. Every plant is different so apply your routine to the type not to a schedule.
Ensure that your soil mix drains like a sieve. I use a mix of 40% perlite, 30% orchid bark, and 30% coco coir for epiphytes, and for any succulents add coarse sand. Compacted soils are in many cases suffocating to roots. Pour water and test the drainage. Water should exit the bottom of the pot in under 10 seconds.
When it comes to root health, the choice of a pot matters more than you might think. Pots that are unglazed terracotta breathe better than most plastic pots. I relocated a pothos that was dying from a client into a deep, narrow pot. The pot had side holes, and the roots grew stronger in a matter of weeks. The size of the pot matters, too. A pot that is too large will trap moisture and throw a fancy fungus party.
Humidity regulation is not only for tropical plants. While growing my ZZ plant in the steamy bathroom it suffered rot until I moved it to dry air. Use a hygrometer. Place humidity-loving plants close together near pebble trays. Place desert plants in their area. A little balance can save a plant from rot than the best fungicides.
Watering Best Practices
- Action: Always check soil moisture 2 inches deep before watering (ideal: 20-30% moisture).
- Action: Use a long-spout watering can to target soil directly (avoid wetting foliage).
- Action: Implement seasonal schedules: reduce frequency by 40% in winter months.
- Action: Water early morning (7-9 AM) to allow daytime evaporation (70°F/21°C+ optimal).
- Action: Install drainage wicks in cache pots to remove excess water passively.
- Action: Track rainfall for outdoor plants; skip watering if >0.5 inches (12.7 mm) falls.
Soil and Pot Selection
- Action: Use chunky mixes: 30% perlite + 40% bark + 30% coco coir for epiphytes.
- Action: Select pots with ≥3 drainage holes (0.25 inch/6 mm diameter minimum).
- Action: Avoid glazed ceramic for moisture-sensitive plants; terracotta preferred.
- Action: Layer charcoal at pot base to absorb toxins from decomposing soil.
- Action: Replace soil completely every 12-18 months to prevent compaction.
- Action: Test drainage: 1 quart (946 ml) water should exit within 60 seconds.
Environmental Controls
- Action: Maintain 45-55% humidity with hygrometer-verified dehumidifiers.
- Action: Space plants 12-18 inches apart to ensure airflow between foliage.
- Action: Rotate plants weekly for even light distribution (prevents damp shadows).
- Action: Use oscillating fans 6 hours/day to simulate natural wind patterns.
- Action: Insulate windowsills below 60°F (15.5°C) with foam board during winter.
- Action: Sterilize fallen leaves/debris immediately to remove fungal reservoirs.
Tool and Hygiene Protocols
- Action: Soak gardening tools in 1:9 bleach solution for 10 minutes weekly.
- Action: Quarantine new plants 3 weeks minimum before introducing to others.
- Action: Disinfect reusable pots in 140°F (60°C) water for 15 minutes.
- Action: Apply food-grade diatomaceous earth to soil surfaces monthly.
- Action: Wear disposable gloves when handling contaminated plants/tools.
- Action: Destroy infected plants via incineration if recovery is impossible.
5 Common Myths
Rocks or gravel at the base of pots help prevent root rot.
Drainage layers create a perched water table which causes moisture to be trapped above the stones. Roots are going to grow downward into this saturated zone that can increase their risk dying from rot. To properly prevent this scenario, proper soil specifically designed and formulated to drain throughout the entire pot without reliance on layered components are the best option.
Hydrogen peroxide always harms plant roots, and should never be used.
A 3% hydrogen peroxide solution diluted 1:4 with water oxygenates roots and kills anaerobic pathogens without damaging any healthy tissue. It deters Pythium spores from germinating, supplied it is applied for 10 minutes, during repotting.
After root rot, the plant is no longer salvageable and must be disposed of.
If a plant is only 50% root damaged, it can be saved but you must act quickly. You would need to remove all diseased roots, immerse in antifungal solutions,), and re-pot into new sterile soil. New roots will typically develop in 3-6 weeks, given that humidity is adequate in the 40-60% range, and is at 500-800 lux of light.
Over-watering causes root rot as well; watering correctly can prevent it.
You would need to also consider contaminated tools, a plant (pot) without drainage, and fungal spores from re-used soil; they can be significant contributors as well. Remember to sterilize shears with 70% alcohol between plants; also, don't move a plant to another pot that has past soil in it. Over-watering can cause root rot to happen fast, but it is not the only cause.
All dirt fungi are harmful and cause root rot.
Mycorrhizal fungi have a symbiotic relationship with roots and help absorb nutrients. Only certain fungal pathogens cause rot, such as Phytophthora and Rhizoctonia. Soil testing can identify beneficial fungi (like Trichoderma) versus pathogens. Soil sterilization kills all beneficial and harmful fungi, and finding the right fungicide to target only the right pathogens is the key.
Conclusion
Root health is highly affected by time. The best way to reverse root rot is to notice the problem as early as possible, as I experienced when a client called about their dying fern. The damaged roots needed to be pruned away repotted into different potting media and tended to - all measures that limit time. Even in severe cases, the plant can improve as long as the root system has not entirely collapsed. So time is your greatest ally.
It's better to prevent rot than it is to try to cure it. Invest fungal prevention by both sterilizing your tools and using fast-draining soil. I learned about this with a struggling peperomia, which I was able to save, but I now routinely check the roots once a week and make sure I do not over-water. It is easier to prevent fungal damage than to re-establish your plant after it has experienced rot and/or mold- and much less stressful too!
To cultivate resilience, maintain your proactive habits. Annually, soak your pots in a 10% bleach solution or swap the potting soil. Isolate your sick plants. When one of my clients adopted these new tips, she improved her orchid collection's recovery. Soil hygiene and sterilizing your materials will help prevent spores from entering your plants. Over time, and with consistency, you become second nature to protecting your plants.
Your plant's future depends on the decisions you make every day. Check the humidity, only give water when necessary, and provide good airflow. I like to keep a record of my plants to track successes and failures. Preventing fungi and keeping things dry are not duties; they are life savers. It's important to get started today so that root rot is just a small detail and not a crisis.
External Sources
Frequently Asked Questions
Can plants recover from root rot?
Yes, plants can recover if treated early. Remove rotten roots, disinfect healthy ones with hydrogen peroxide, repot in sterile soil, and adjust watering. Recovery depends on the plant's remaining healthy root system and post-treatment care.
How does hydrogen peroxide treat root rot?
Hydrogen peroxide oxygenates roots and kills anaerobic pathogens. Use a 3% solution diluted 1:4 with water. Soak roots for 10 minutes to disinfect without harming healthy tissue. It's effective against fungal spores like Pythium.
Is baking soda effective against root rot?
Baking soda temporarily slows fungal growth but doesn't kill pathogens. Overuse harms soil pH and plant roots. For severe cases, use hydrogen peroxide or commercial fungicides. Always pair treatments with root pruning and soil replacement.
Can I reuse soil after root rot?
No, contaminated soil harbors fungal spores for years. Discard it and use fresh, well-draining soil. If reusing is unavoidable, sterilize it by baking at 200°F (93°C) for 30 minutes. Add perlite or bark to improve drainage.
Does cinnamon help prevent root rot?
Cinnamon has mild antifungal properties and can deter surface-level fungi during repotting. Sprinkle it on trimmed roots or soil. However, it's not a standalone treatment, combine with hydrogen peroxide soaks and proper watering habits.
How often should I water after treating root rot?
Water only when the top 2-3 inches of soil are dry. Use a moisture meter for accuracy. Overwatering is the leading cause of recurrence. Adjust frequency seasonally, less in winter, more in summer.
What's the best fungicide for root rot?
Effective options include:
- **Hydrogen peroxide**: For mild cases and disinfection.
- **Buxus Blight Fungus Fighter**: Targets Phytophthora species.
- **Neem oil**: Deters fungus gnats and secondary infections.
- **Copper-based fungicides**: For severe infections in outdoor plants.
Can root rot spread to other plants?
Yes, fungal spores transfer via contaminated tools, soil, or water. Isolate infected plants immediately. Sterilize pots and tools with 70% alcohol or bleach. Avoid sharing soil between plants to prevent cross-contamination.
How long does root rot take to kill a plant?
Untreated root rot can kill a plant in 7-14 days. Early symptoms like yellowing leaves or foul odor require immediate action. Plants with ≥50% healthy roots have a high survival rate if treated promptly.
Can I save a plant with no healthy roots left?
Plants with 100% root damage rarely survive. Propagate healthy cuttings if possible. For rare species, attempt water therapy: suspend the stem in water with hydrogen peroxide (1:10 ratio) and wait for new root growth.