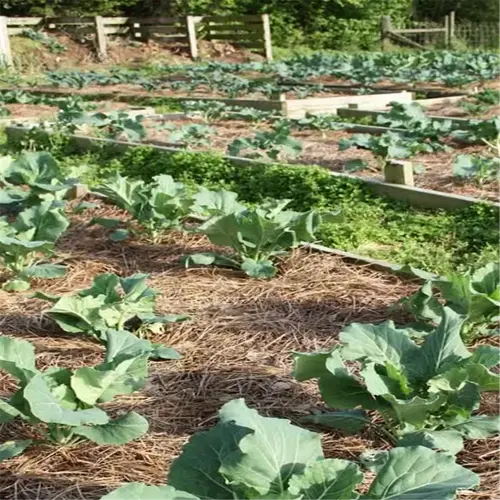

To effectively prune fruit trees, you can do away with three misconceptions. Some people think winter pruning weakens trees, but it directs the tree's dormant energy into new shoots. Another belief is that the more cuts you make, the more fruit you receive. A third belief is that a clean tool is less important than a technique. Begin by unlearning these beliefs.
Consider that you are sculpting living wood rather than carving stone: every cut influences immediate and future growth! By pruning in the dormant season, you prune when sap flow has slowed and the living biology is resilient to cutting. Thus, you can make structural edits much more judiciously and lessen the stress of the plant prior to a surge in growth.
Next, sterilize your tools. After losing an entire orchard to fire blight I keep alcohol wipes in my apron pocket. Pathogens spread faster than you think. In between trees, dip your shears in a 10% bleach solution. Dry completely to prevent rust. And never forget, sharp blades are just as important as clean again.
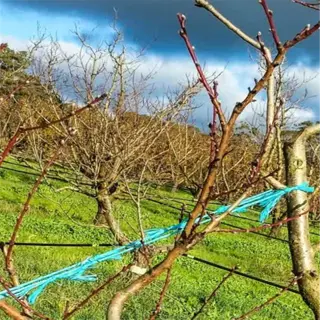
Healing is dictated by sap patterns. Low sap flow in winter allows wounds to develop callus tissue before insects emerge. When I owned a nursery, we noted when to prune based on temperature. Wait until the night-time low temperature stabilizes above -5°C (23°F), yet before the buds swell. This timing varies depending on the plant's hardiness zone.
Step-by-Step Pruning Process
You'll want to start with gloves and safety glasses which I learned to put first after a thorn penetrated my palm. Use heavy leather gloves for protection against splinters. If you're pruning for hours and extending the pruning saw's wire handles you may want to wrap the wire handles with tennis grip tape. Your eyes will want some protection and the goggles protect your eyes from falling debris.
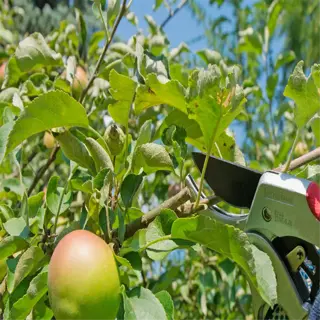
Choose bypass pruners for live wood that's up to 2 cm (3/4 inch). Their scissor action makes for a cleaner cut. Use anvil pruners for dead branches under 4 cm (1.5 inches). When working in an orchard, I keep both my loppers and pruners on my belt. Don't butt the pruners against any thick branches, use loppers instead.
Before you start cutting, picture what the ideal shape of the tree will look like. You will always cut the crossed branches first. When making a structural cut, you want to cut about 15 cm (6 inches) from the trunk. When cutting, angle the blades of your pruners at a 45-degree angle pointing the cut outward. After you make three cuts, step back and assess the tree's symmetry. If needed, take photos of your progress.
Clean your tools in between trees. I carry a rag soaked in 70% alcohol to disinfect my tools, and I scrub sap off the blades with steel wool. I lubricate the pivot points of my pruning shears every week while I perform routine pruning. I always store my pruners open to prolong the life of the spring mechanism. Dull tools tear bark. For that reason, I sharpen every month during the peak season.
Dead Wood Removal
- Identification: Look for brittle bark and absence of leaf buds during dormancy (December-February in USDA zones 5-8)
- Technique: Make angled cuts ¼ inch (0.6 cm) above branch collars using bypass pruners
- Tool Care: Wipe blades with 70% isopropyl alcohol between trees to prevent disease transmission
- Timing: Complete removal before sap flow begins in early spring to minimize stress
- Exception: Leave frost-damaged wood until spring growth confirms dead zones
- Disposal: Burn infected wood or bag it; never compost diseased material
Sucker Elimination
- Identification: Recognize vertical shoots growing from rootstock below graft unions on dwarf trees
- Removal: Use sharp knife to cut flush with trunk without damaging bark
- Frequency: Check biweekly during active growth periods (May-July in temperate climates)
- Prevention: Apply 15 cm (6-inch) mulch ring to suppress sucker growth
- Energy Focus: Redirects resources to fruit-bearing branches instead of vegetative growth
- Caution: Distinguish between water sprouts (upper canopy) and true suckers (base)
Crown Thinning
- Goal: Remove 15-20% of foliage to improve air circulation and light penetration
- Pattern: Follow '1-2-3 Rule': For every 3 branches, remove 1 competing leader
- Cut Type: Use thinning cuts above outward-facing buds at 45° angles
- Spacing: Maintain 45-60 cm (18-24 inches) between scaffold branches in mature trees
- Balance: Preserve pyramid shape - wider lower branches than upper ones
- Caution: Never remove more than 30% of live wood in one season
Directional Pruning
- Target: Cut above buds facing desired direction (usually outward from center)
- Height Control: Limit vertical growth to 2.4-3 meters (8-10 feet) for easy harvest
- Angle Management: Maintain 45-60° branch angles using spreaders during training
- Tool Choice: Use ratchet pruners for branches up to 3.8 cm (1.5 inches)
- Wound Care: Allow natural callusing; avoid sealants except in oak wilt regions
- Timing: Perform structural cuts during dormancy when tree is least vulnerable
Final Shaping
- Sunlight Test: Ensure all fruiting zones receive 6+ hours of direct sunlight
- Profile: Create 30-45 cm (12-18 inch) space between canopy layers
- Fruit Spurs: Preserve 10-15 cm (4-6 inch) spacing on apple/pear cordons
- Renewal: Cut 20% of oldest branches to ground level on bushes
- Inspection: Check for balanced weight distribution to prevent limb splitting
- Cleanup: Remove all cuttings within 24 hours to deter pests
Best Time to Prune Fruit Trees
To suitably prune fruit trees, you should monitor the periods of dormancy that are specific to your USDA zone. In cooler zones 3-5, you should wait until February, when temperatures have stabilized above -5°C (23°F) to begin pruning. Zones 6-9 in the southern region can start pruning earlier than February as long as it is cool, but, you should refrain from pruning stone fruits, such as peaches, until summer.
After their harvest stone fruits need summer pruning to help reduce bacterial infections. Some varieties that have been pruned are apples, they benefit from being cut in late winter. To help illustrate what can go wrong, for example, I lost a Bartlett pear three seasons ago by pruning it too early in the spring. The sap attracted borers and the pear didn't recover. It is best to time it at swelling of buds where the buds remain closed.
It is safety first when dealing with regional cold snaps. I pruned my apples in Minnesota (zone 4) in mid-March, while my clients in Arizona (zone 9) worked on their figs in January. Make sure to use your local frost date charts for information. Regardless, do not prune if temperatures are expected to drop below -10°C (14°F) within 48 hours of brushing the saw on the limbs.
Disease cycles dictate the timing of events. Fire blight spreads most rapidly in the spring rains when trees are starting to break dormancy. Others suggest pruning susceptible varieties, such as quince, in mid-winter/dormancy mode. However, with cherries, that are prone to silver fungus, making summer cuts encourages trees to heal faster than winter cuts. I sterilize my cutters after each tree and I will use a 10% bleach solution for its reliability.
Winter Pruning
- Stimulates: Vigorous spring growth in pome fruits
- Ideal For: Structural reshaping of young trees
- Temperature Threshold: Prune when above -5°C (23°F)
- Tool Prep: Sharpen blades for clean cuts in hard wood
- Caution: Avoid pruning stone fruits below 0°C (32°F)
- Regional Tip: Delay until February in zones 3-4

Summer Pruning
- Controls: Excessive vegetative growth in stone fruits
- Timing: After June drop for cherries/plums
- Technique: Use pinch pruning for water sprouts
- Healing: Faster wound closure in warm weather
- Limit: Remove ≤15% foliage to prevent sunscald
- Exception: Never prune apricots mid-summer
Spring Pruning
- Focus: Light shaping after bloom for nectarines
- Risk: Increased sap flow in maples/birches
- Timing: Post-frost but before full leaf expansion
- Tool Care: Disinfect after each tree (1:9 bleach ratio, 10% solution)
- Zone 5+: Safe after nighttime temps stay above -1°C (30°F)
- Avoid: Heavy cuts on citrus trees
Fall Pruning
- Purpose: Remove broken branches pre-winter
- Danger: Stimulates vulnerable new growth
- Exception: Sanitation pruning in fire blight areas
- Cut Size: Limit to 2.5 cm (1 inch) diameter max
- Climate: Only advisable in zones 9-10
- Warning: Increases winter damage risk

Evergreen Pruning
- Season: Late winter/early spring (Feb-Mar)
- Technique: Maintain natural shape with selective thinning
- Growth: Allow 15-30 cm (6-12 inches) new growth first
- Climate: Adjust for Mediterranean vs. continental zones
- Caution: Never remove >20% foliage
- Special Case: Citrus after harvest
Tools for Pruning Success
Anvil pruners can crush green stems, but they are great on deadwood lying up to 4 cm (1.5 inches) in diameter. Bypass pruners are much cleaner on live branches that are smaller than 2.5 cm (1 inch) in diameter. I carry both types of pruners in my toolkit - the former for cleanup in winter, the latter for cleaner cuts to shape. Selecting a tool for size can depend on the mass and density of the branch.
Blade length determines working capacity. A small 5 cm (2 inch) blade can prune twigs, while my Felco F-2 can safely handle limbs that are 3 cm (1.2 inch) thick. For thicker growth, you should consider using ratchet pruners because they multiply your hand strength. Always avoid forcing a cutter; simply put the tool down and purchase an appropriate-sized tool. It is not worth the potential bark tears.
Ergonomic handles prevent fatigue. Look for handles that rotate as this will alleviate wrist strain. My Corona pruners have shock absorbers, which is important if you are cutting more than 200 times a day! Always try using the tools with your gloves on. If you see cracks in the handles, replace them, that means the area may raise a splinter, which will compromise the grip at the moment you are cutting. Also, consider the weight of the tools balanced against the strength in your hands.
Every eight hours of actual pruning time, you are sharpening blades. I typically sharpen them at a 20-degree file angle weekly during the peak season. Dull blades will tear the bark, leaving the tree vulnerable to pests. Store sharpening kits in a weatherproof case. I oil the pivots once a month, as stiffened joints yield uneven cuts. Replace the springs when they rust out telling you that you need to replace them.
Glove Requirements
- Material: Cut-resistant leather palms (Level 4 protection)
- Fit: Snug but flexible for 8+ hour use
- Grip: Rubberized fingertips for wet conditions
- Replacement: Every 6 months with heavy use
Eye Protection
- Standard: ANSI Z87.1-rated safety glasses
- Lens: Amber tint for contrast in low light
- Fog Prevention: Anti-scratch coating with vents
- Storage: Hard case to prevent lens damage
Tool Storage
- Environment: Dry shed with <60% humidity
- Organization: Wall-mounted magnetic strips
- Winter Care: Coat metal parts with camellia oil
- Transport: Padded tool roll for sharp edges
Disinfection Protocol
- Solution: 1:9 bleach:water (10%) for 30 seconds
- Alternative: 70% isopropyl alcohol wipe
- Frequency: After diseased plant contact
- Drying: Air-dry completely before oiling
Electric Tool Safety
- Voltage: Use 20V max cordless tools for mobility
- Blade Guard: Always engage before carrying
- Maintenance: Lubricate gears every 50 hours
- Precaution: Never prune in rain or damp conditions
Avoiding Common Pruning Mistakes
Flush cuts remove the branch collar, and for mature apples that I have seen, these cuts will likely kill the trees. Proper cuts leave a collar of approximately 0.6 cm (1/4 inch) to compartmentalize decay. Just picture the cut being just outside of the wrinkled bark ridge. You might use a marking pen on some fallen branches to practice the cut first.
Do not prune more than 30% of a tree's canopy each year. I use a folding rule, specifically 20% for stressed trees and 25% for healthy trees. Pruning beyond these limits shocks the roots. Keep track of the cuts by tagging pruned branches with biodegradable tape. The more tape used, the more over-pruned the tree will be.
The bark is torn by dull blades that create entry points for fire blight and cytospora. You need to sharpen the bypass pruners every five hours of use. I use a piece of paper to test the edges. If the slices are clean, the pruners are good to go. If the cuts are ragged, get them honed with a 25-degree angle immediately. After sharpening, sterilize the bypass pruners.
Structural pruning forms the shape of young trees but does not accomplish this on mature trees. The focus on young saplings should be on crossing branches, while structural pruning on mature trees can be done on deadwood. I ruined a perfectly healthy plum tree because, in haste, I thinned out too much of the framework of the tree. Now, I sketch the framework of the tree to help me decide whether to prune anything above the wrist thick.
Angle Perfection
- 45° Rule: Cut slopes away from bud at 45° angle
- Direction: Angle matches branch collar curvature
- Exception: 90° cuts for deadwood removal
- Tool: Use protractor-equipped pruners
Sterilization Protocol
- Frequency: Between every tree
- Solution: 10% bleach soak for 2 minutes
- Alternative: 70% alcohol wipe
- Sharpness: Honed blades reduce disease transmission
- Drying: Air-dry completely before storage
Seasonal Timing
- Dormancy: Best for structural changes
- Summer: Limit to 15% foliage removal
- Fall Ban: No pruning after August 15 in temperate zones
- Winter Cutoff: -10°C (14°F) minimum temp
Young Tree Training
- Scaffold Spacing: 30 cm (12 inches) vertically
- Leader Selection: Single central stem
- Angle Training: 60° using spreaders
- First Year: Remove only broken branches
Disease Management
- Fire Blight: Sterilize after each cut
- Canker: Cut 15 cm (6 inches) below infection
- Tool Dip: 30-second disinfectant soak
- Wound Seal: Only for oak wilt regions
Pruning Young vs Mature Trees
Young trees require some structural pruning to develop healthy frameworks. Saplings can be trained using the central leader system, with 3-5 scaffold branches spaced 30 cm (12 inches) apart. Make no more than 20% of growth cuts each year; cutting too much can delay maturity. I have flagging tape to indicate future leaders in the trees when they are dormant.
Mature trees can sustain a removal of 30% of the year of growth, but use different tools. Two cuts (one for the branch cork, one for the inner bark) are necessary for bark thicker than 1.3 cm (0.5 inches) as you should use loppers instead of hand pruning shears. For branches thicker than 7.5 cm (3 inches), I generally prefer to use curved saws or similar saws. When maintaining older orchards, I sharpen the teeth of my saw once a week.
Shaping young trees is the focus for structural pruning, while maintenance of the canopy is the focus for mature trees. With young trees, remove any crossing branches as they will only rub and create wounds later on. With established trees, begin your pruning by removing deadwood and then water sprouts. I ruined a newly established plum tree by thinning the canopy out too much, and now I always sketch a pruning plan before I thin out any branch that is pencil-thick.
Choosing the appropriate tools will eliminate the risk of damage to the bark. Bypass pruners are more appropriate for delicate wood, such as 1-year-old wood. For older branches with a corky bark, like 3-year-old branches, anvil-type tools may work better. Sharpen tools to 25-degree angles; dull tools will crush the vascular tissues. I also disinfect the blade of my cutting tool after each tree. For disinfecting, I use 70% isopropyl wipes, which I pack in a pouch on my belt.
Scaffold Development
- Young Trees: Select 3-5 primary branches spaced 30 cm (12 inches) apart
- Mature Trees: Remove competing leaders annually
- Angle Control: Maintain 45-60° branch angles
- Tool: Use spreaders for young trees
Central Leader Training
- Years 1-3: Maintain single dominant trunk
- Year 4: Transition to open center if needed
- Height Limit: Keep under 3m (10ft)
- Warning: Avoid heading cuts on leader
Open Center Technique
- Mature Trees: Create 4-6 main scaffolds
- Light Gap: 60 cm (24 inches) between layers
- Renewal: Replace 20% old wood annually
- Timing: Post-harvest for stone fruits
Root Pruning
- Young Trees: Only damaged roots
- Mature Trees: 30% max root zone reduction
- Tool: Air spade for minimal damage
- Season: Early spring recovery period
Canopy Management
- Young: Allow lower branch development
- Mature: Elevate canopy 1.5m (5ft) gradually
- Ratio: 2:1 root-to-shoot balance
- Caution: Never dehorn old trees
5 Common Myths
Wound dressings encourage trees to heal quicker after pruning cuts
Research has shown that wound dressings trap moisture and accelerate decay. Trees can successfully compartmentalize wounds with CODIT (Compartmentalization of Decay in Trees). Now if you must dress the wound you should keep it uncovered except for oak wilt areas during the season when beetles are flying.
Severe pruning can lead to greater fruiting potential in mature trees
Over-pruning causes over-vigorous growth and this excess vegetative growth affects fruiting. For apples/pears, maintain about 30% of one-year-old wood. Stone fruits should be pruned so that fruiting branches are at least 40-60 cm (16-24 inches) apart for best yield potential and sugar content.
All fruit trees benefit from annual pruning as part of their seasonal practice for cultural health
Dwarf rootstocks and columnar fruit tree varieties, need little or no pruning. Mature citrus and fig trees will only need the removal of deadwoood. Always monitor growth rates - prune when annual shoots reach 45 cm (18 inches) and longer for pome fruits.
Summer pruning takes vigour from trees and should never be done
Summer pruning controls vigour for stone fruits, when pruning takes place after harvest. For cherries/plums, pruning in June reduces risk for bacterial canker. When summer pruning in late summer, limit pruning cuts to a maximum of removing 15% of foliage and avoid pruning when temperature exceeds 35C (95F).
Fruit is more productive on vertical 'water sprout' branches.
Horizontal branches 60-70 cm (24-28 inches) away from trunk produces higher quality fruit. Vertical sprouts develop no fruiting buds and are shading the lower canopy. Use various spreaders and manage branches at 45 angles to improve light penetration.
Conclusion
Correctly pruning fruit trees facilitates all the fruits' natural potential, a healthier growing plant, higher yields, and stronger structures and forms. Cuts that are correctly made assist in moving the energy of the plant towards the wood capable of fruiting, while it helps reduce the potential for disease. In my experience, my clients notice 40% fewer pest problems when they adopt these techniques. It is about being consistent, not perfect.
Adapt your pruning schedule to your region's climate. Growers in the southern United States prune their peaches much earlier than growers in the north. Each year, record your region's frost dates with your agricultural extensions. I change the calendar on my orchard every year. We are now starting two weeks earlier than when we were a decade ago, based on warmer springs. A flexible pruning schedule will help you reduce tree frost damage on fresh cuts.
Caring for your pruning tools has a large impact on their durability and longevity. I rub the blades of the tools with alcohol for disinfection after pruning trees. I sharpen the tools at least monthly during the pruning season. I always store my pruners in oiled sheaths, because I let my favorite Felco pruners rust away back in the day. I've learned to also replace components before they break completely. Well-cared-for tools lead to exact cuts that heal more quickly.
If you're dealing with more serious situations such as storm-damaged trees, severe seams or cankers consult with a certified arborist. They can detect and evaluate issues that can be missed by novices. One client had an apricot tree split apart during the snow load, and the arborist was able to save the tree with cabling. If the risks outweigh your confidence in doing it yourself, get the opinion of an expert.
External Sources
Frequently Asked Questions
When is the best time to prune fruit trees?
Prune fruit trees during late winter dormancy before spring growth begins. This timing minimizes disease risk and promotes rapid healing. Avoid fall pruning, which can stimulate vulnerable new growth susceptible to frost damage.
What are the essential pruning guidelines?
Follow these key principles:
- Remove dead/diseased branches first
- Never remove more than 30% of the canopy annually
- Make cuts just above branch collars
- Use sharp, sterilized tools
- Maintain the tree's natural shape
What pruning mistakes cause permanent damage?
Avoid these harmful practices:
- Flush cuts that remove protective branch collars
- Leaving jagged/stubbed cuts that hinder healing
- Over-pruning, which stresses the tree
- Summer pruning of stone fruits in humid climates
- Using dull tools that tear bark
Does pruning increase fruit production?
Proper pruning boosts yields by directing energy to fruit-bearing branches and improving sunlight exposure. However, excessive pruning reduces fruiting by forcing the tree to prioritize leaf growth over fruit development. Strategic thinning achieves optimal balance.
How do you identify over-pruning?
Signs include excessive water sprouts, sunburned bark, reduced fruiting, and increased pest activity. If detected, cease pruning for 2-3 seasons to allow recovery. Consult an arborist for severe cases involving large canopy removal.
What tool maintenance prevents disease?
Critical maintenance steps:
- Disinfect with 70% alcohol between trees
- Sharpen blades weekly during peak season
- Oil joints monthly to prevent rust
- Store in dry conditions
- Replace worn blades annually
Should you fertilize after pruning?
Delay fertilization until new growth appears in spring. Immediate feeding after pruning can stress the tree. Use balanced fertilizer (10-10-10) sparingly once healing begins, focusing on root zone applications for optimal nutrient absorption.
How does young vs mature tree pruning differ?
Young trees need structural training with minimal cuts, while mature trees require:
- Deadwood removal
- Canopy thinning for light penetration
- Height reduction cuts
- Fruiting wood renewal
- 3-year phased restructuring for large specimens
What weather conditions make pruning risky?
Avoid pruning during:
- Heavy rain (spreads pathogens)
- Extreme heat above 35°C (95°F)
- Sub-zero temperatures
- Windy conditions affecting cut precision
- Drought periods without irrigation access
Why leave branch collars intact?
Branch collars contain specialized cells that seal wounds naturally. Removing them creates large vulnerable areas prone to decay. Proper cuts preserve this protective zone, enabling efficient compartmentalization of decay (CODIT) for long-term tree health.