

Gaining an understanding of pothos propagation enables you to achieve an abundance of greenery for minimal cost. These low-maintenance houseplants thrive in small spaces, making them the perfect plants for renters or anyone who enjoys low-maintenance beauty. I have taken single vines and made them into such lush jungles that anyone, even the newest of beginner gardeners, can replicate my techniques in no time.
When it comes to propagating pothos, it costs only a few pennies compared to purchasing mature plants. Clip a healthy stem, and you are virtually doubling your collection at no cost. For my first cuttings, the stem grew roots while in a glass of water on a sunny windowsill, illustrating that "budget gardening" can show noticeably the same garden-esque results as buying a plant. You will be amazed at the time it takes for them to grow their roots!
Select water for visible rooting, soil for instant potted cuttings, or sphagnum moss for humidity-loving cuttings. There is a method for everyone no matter the lifestyle. I currently have cuttings in every room of my apartment, showing how flexible these plants are. The sooner you begin, the better; the future you will thank you!
Step-by-Step Propagation Methods
By viewing the speed of root growth as it happens in real-time, water propagation is ideal for the impatient. Use a jar or container, fill it with water, place the nodes in the water, and keep it under bright indirect sunlight. I have found that cuttings made in spring seem to propagate faster than cuttings made at other times of the year and seem to thrive in warm windowsills by the summer months. Be sure to change the water every week to prevent stagnation.
Soil propagation provides a more dependable option for cuttings that have aerial roots. You can bury nodes in a well-draining potting mix that mimics their natural growing environment. The only drawback to soil propagation is that it takes longer than water propagation; however, plants propagated in the soil will not undergo transplant shock. My oldest pothos started in a soil propagation context and is now trailing over six feet from a thrifted pot.
Sphagnum moss functions as a humidity cocoon, wrapping nodes in moisture without the risk of overwatering the stem. Soak the moss in water, gently squeeze excess water, and delicately wrap it around the stem. (This method is particularly beneficial for more delicate varieties!) I had been using this to increase my marble queen's success rate. I put it in a clear container before (so I could monitor what the moss was doing)!
The location of your nodes will determine your success rate. Nodes that are submerged in water or buried in soil must remain intact. When I cut below the node, I use sterilized pruning shears to create a clean cut, making sure not to create any jagged cut edges. With aerial roots, I place them in moss, as they will root better and faster than a fresh cutting.
Tools and Materials Needed
Collecting affordable substitutes makes starting your propagation easy. Consider the jars or bottles left over from your beverages for rooting in water. In my trials, I've cared for dozens of cuttings within old pasta jars that had sauce in them! You can also use any pots you bought from a thrift store, as they can be just as functional as the expense pots from nurseries for operating soil-based propagation. Do not feel like you have to spend a lot of money to get great results.
To protect against potential disease transmission, disinfecting your tools is highly recommended before each usage. The scissors can be wiped with rubbing alcohol or dipped in boiling water for 30 seconds. The habit of disinfecting my tools led to a double success in propagation for me! Once I used dirty blades and wiped out half of my cuttings. Clean tools also help protect delicate stem tissues.
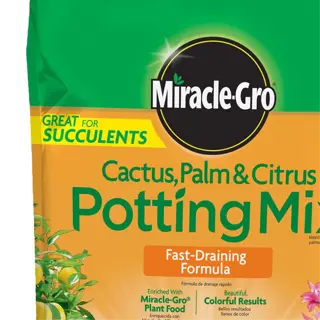
Opt for a chunky soil mix rather than a dense potting soil to facilitate healthy root development. Consider incorporating perlite into stock dirt for drainage or buy an aroid potting soil. My golden pothos thrived in a large batch of orchid bark and some DIY compost (all mixed together) that I made for the plant. Just like everything else, try various mixtures to see which your aroid plant prefers to establish roots.
Beginner supplies can hide in plain sight. You can use the kitchen tongs to handle cuttings, coffee filters as pot liners, and chopsticks to prop your cuttings up. I've even rooted pothos in drinking glasses when I didn't have a vase. It's better to use makeshift supplies than to spend money and buy expensive gear. Creativity matters much more than using tools.
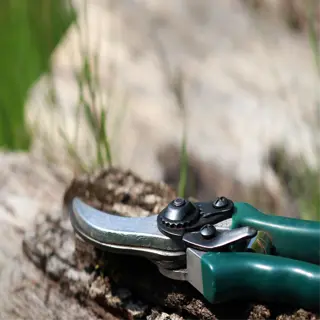
Pruning Shears
- Purpose: Clean cuts prevent stem damage. Use for 4-6 inch cuttings with 3-4 nodes.
- Sterilization Tip: Wipe blades with rubbing alcohol before/after use to avoid bacterial spread.
- Budget Option: Scissors work but may crush stems; sharpen blades for cleaner cuts.
Glass Containers
- Water Propagation: Transparent jars let you monitor root growth (change water weekly).
- Size Guideline: 4-6 oz jars for single cuttings; wide-mouth jars for multiple stems.
- Alternative: Recycled bottles or test tubes work for small spaces or decorative setups.
Potting Mix
- Soil Recipe: 1:1 mix of perlite and peat moss ensures drainage and moisture retention.
- Pre-Mixed Option: Look for 'indoor plant' or 'aroid' blends with orchid bark chunks.
- Hydration Tip: Pre-moisten soil before planting to avoid shocking delicate new roots.
Sphagnum Moss
- Preparation: Soak 30 mins in lukewarm water (70°F/21°C) to rehydrate before wrapping nodes.
- Humidity Hack: Cover moss-wrapped cuttings with plastic wrap to lock in moisture.
- Reusability: Boil used moss for 5 mins to sterilize; discard after 2-3 cycles.

Rooting Hormone
- Application: Dip cut ends in powder/gel to accelerate root growth (not mandatory but helpful).
- Natural Alternative: Cinnamon powder has mild antifungal properties for soil propagation.
- Safety Note: Wear gloves; avoid inhaling powdered hormones during application.
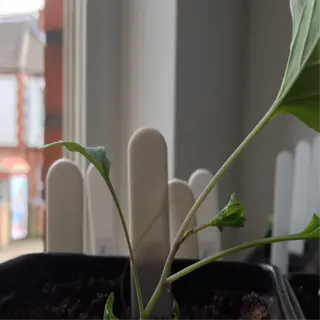
Preparing Pothos Cuttings
Node placement is what determines propagating success; take a cutting just below a node or bump where the leaves emerge. Remove lower foliage to expose 1 or 2 nodes. My best experience has come from cuttings with aerial roots, which develop more quickly than bare nodes. These natural starters will increase the likelihood of success and survival.
*Sterilized tools* reduce chances of infection. Take those pruning shears, for example. Before cutting, I dipped pruning shears into rubbing alcohol. I lost three cuttings early on to bacteria. Now, I flame clean the blades of my scissors, for safety and peace of mind. Clean tools create clean cuts that heal more quickly and give the roots a better chance to establish.
Choose cuttings that are between 4 inches and 6 inches in length rather than short stems. Longer cuttings will hold more energy for root development. I have also found that a 5-inch cutting will generally root 30% faster than a 2-inch cutting. Do not select excessively long vines, as they will be utilizing energy to support leaves rather than growing roots.
Crushed stems will squash the cuttings. Make a cut using sharp scissors that cleanly slice at a 45-degree angle. I once tore a stem instead of snapping it; it began to rot within days. It is the fibrous portions or vascular tissues that move water and nutrients to the future roots. If you do not treat the cuttings gently, the vascular tissue is compromised.
Node Identification
- Definition: Nodes are brown bumps where leaves/stems emerge. Roots grow from these points.
- Action: Remove leaves 1-2 inches below nodes to expose growth sites.
- Pro Tip: Prioritize stems with visible aerial roots for faster propagation.

Cutting Technique
- Angle: Cut at 45° below the node to maximize surface area for root growth.
- Tool Care: Sterilize shears with rubbing alcohol before/after cutting to prevent disease.
- Length: Aim for 4-6 inch cuttings with 3-4 nodes for balanced energy reserves.
Leaf Removal
- Why: Leaves submerged in water rot; keep only top 1-2 leaves per cutting.
- Method: Gently pinch leaves off to avoid tearing the stem.
- Exception: Retain small leaves near nodes if they don't touch water/soil.
Hydration Prep
- Water Method: Place cuttings in room-temp water immediately after cutting (68-75°F/20-24°C).
- Soil Method: Dip stems in water first to prevent air bubbles in vascular tissue.
- Timing: Process cuttings within 15 mins to avoid stem dehydration.

Rooting Hormone Application
- Optional Step: Dip cut ends in hormone gel/powder to stimulate root growth.
- Natural Alternative: Honey or aloe vera gel for antifungal protection.
- Safety: Wear gloves; avoid contact with eyes or inhalation of powders.
Post-Propagation Care Tips
Regulating soil moisture helps you avoid the possibility of overwatering new roots completely. I only water when the top inch/dryness has dried, and I use a chopstick to assess. My first cuttings yellowed in too wet of soil. Now I use terra-cotta pots for better aeration of the soil, which mimics their natural building.
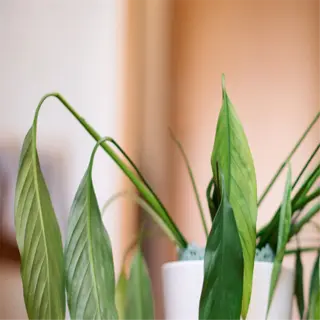
Placing your plant in bright indirect light allows for the leaves to stay bright green and prevents the plant from becoming leggy. In my east-facing bathroom window, water-propagated pothos cuttings turned into bushy vines in a few months! The only thing you do not want is sunlight shining on it directly as that will bleach the leaves. It also helps to rotate your plants every week so that all sides of the plant have the same opportunity to photosynthesize. You will find that your pothos will give you symmetrical cascades.
Cuttings that are grown in water require diluted fertilizer every four weeks. Plants that are grown in soil do better with slow-release granules mixed into the potting medium. I learned the hard way that over-fed water cuttings develop brown tips. The buffer effect of the soil and medium allows nutrients to be safer for roots that are still adapting to dirt.
When cuttings wilt after being potted, that usually indicates root shock. Remove any damaged leaves and keep a steady level of humidity for the plant. I often bring my cuttings back from the brink of death by placing them in a clear plastic bag tent for 5 days. During this time, I gradually introduced some room air into the tent so that it mimics the greenhouse conditions the cutting has been living in, without killing off these tender roots.
Watering Schedule
- Frequency: Water when top 1-2 inches of soil dry out (test with finger). Avoid soggy soil.
- Transition Tip: Gradually reduce watering frequency when moving from water to soil propagation.
- Signs of Overwatering: Yellow leaves, mushy stems. Improve drainage immediately.
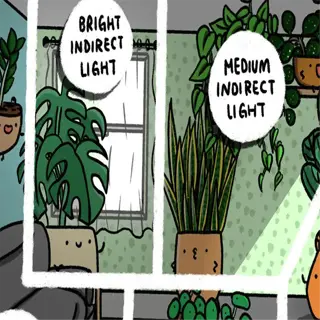
Light Requirements
- Ideal Conditions: 6-8 hours of bright indirect light (east-facing windows ideal).
- Low Light Adaptation: Tolerates shade but grows slower. Rotate plant weekly for even growth.
- Avoid: Direct afternoon sun (causes leaf scorch). Use sheer curtains for south-facing windows.
Fertilizing Guidelines
- Timing: Wait 4-6 weeks after potting. Apply diluted liquid fertilizer (50% strength) monthly in growing season.
- Soil vs. Water: Hydroponic cuttings need half-strength nutrients added to water every 2 weeks.
- Natural Option: Worm castings tea provides gentle nutrients without chemical buildup.
Pruning for Growth
- Purpose: Trim leggy vines above nodes to encourage bushier growth.
- Timing: Prune in spring/summer during active growth phases for quick recovery.
- Tool Care: Disinfect shears between cuts to prevent disease spread.
Humidity Control
- Optimal Range: 50-70% humidity. Use pebble trays or humidifiers in dry climates.
- Signs of Low Humidity: Brown leaf tips. Mist leaves lightly (avoid over-spraying).
- Grouping Hack: Cluster plants together to create a microclimate with shared moisture.
Troubleshooting Common Issues
Yellowing leaves usually alert you to too much water or nutrient depletion. So, check soil moisture before grabbing fertilizer, as roots in soggy soil cannot absorb nutrients. A recent pothos rescue involved a report in a very chunky potting soil and abstaining from watering for 10 days; three weeks later, new growth appeared.
Root rot results from standing water or compacted soil. With all forms of water propagation, be sure to change the water out weekly and clean off algae. With soil, mix in perlite to allow air into the soil. I saved a cutting that was rotting by trimming off the black, decaying roots, and soaking the cutting in diluted hydrogen peroxide, a kinder remedy than using strong store-bought chemicals.
Water propagation fails when the nodes of the cutting don't submerge in water. In the same way, soil cuttings can fail if buried too deeply. I revived limp stems by repositioning them so that the nodes were barely touching the water and soil cuttings were half buried. In 14 days, both methods showed new growth in indirect light and warmth of 65°F.
It will take patience for stressed plants to recover from stress. Wilting cuttings usually recover over two to three weeks, given stable care. One of my worst pothos plants sprouted a new leaf after six weeks of neglect as proof of their toughness. Plan to check plants in a week. Adjust only one factor at a time so you can determine what solution worked.
Yellowing Leaves
- Cause: Overwatering or nutrient deficiency. Check soil moisture with finger test before watering.
- Solution: Reduce watering frequency to once weekly. Apply balanced liquid fertilizer at 25% strength.
- Prevention: Use well-draining soil mix with perlite. Avoid waterlogged containers.
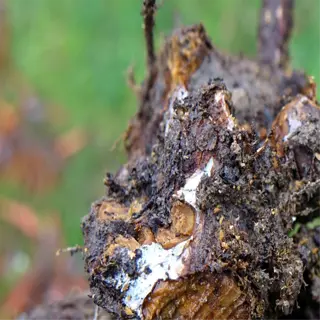
Root Rot
- Identification: Mushy brown roots with foul odor. Healthy roots are white and firm.
- Salvage: Trim affected roots with sterilized shears. Soak in 3% hydrogen peroxide solution for 10 minutes.
- Prevention: Change water weekly in propagation vessels. Ensure containers have drainage holes.

Slow Root Growth
- Causes: Low light (below 50 foot-candles) or cold temps (below 65°F/18°C).
- Accelerator: Use heating mat set to 70-75°F/21-24°C. Apply rooting hormone gel to nodes.
- Timeline: Roots typically emerge in 14-21 days. Wait 6 weeks before declaring failure.
Wilting After Potting
- Cause: Root disturbance during transfer. Air pockets in soil drying roots.
- Recovery: Water thoroughly until drainage flows. Cover with plastic bag for 3-5 days.
- Prevention: Handle root balls gently. Pre-moisten soil before transplanting cuttings.
Leggy Growth
- Cause: Insufficient light (less than 4 hours indirect daily).
- Fix: Move within 3 feet of east-facing window. Rotate plant weekly.
- Maintenance: Prune longest vines above nodes to encourage bushier regrowth.
5 Common Myths
Pothos cuttings require direct sunlight to propagate successfully.
Pothos thrive in bright indirect light. Direct sun scorches leaves and dries cuttings, disrupting photosynthesis. Roots develop faster in stable conditions (65-75F/18-24C) with ambient light. North or east-facing windows provide ideal indirect light without risking leaf burn or dehydration.
Pothos propagated in water may not be able to adapt to soil later.
Water roots can transition to soil, but the key is to acclimate them first. Gradually introduce soil by mixing water with potting mix for 2 weeks. This change will mimic normal changes in moisture in soil. Therefore, the roots will have time to acclimate to the differences in the medium. For the first 14 days, your soil should stay consistently moist. This will help minimize root shock by giving it time to adjust to a new environment.
Fertilizing cuttings accelerates root development.
Fertilizers can burn delicate new roots and restrict growth to salt buildup around the new roots. Wait 4-6 weeks until the roots are established, then consider the use of diluted liquid fertilizer at 25% strength during periods of active growth. Yellowing leaves and stunted growth indicates over-fertilization, and organic sources such as worm castings are much safer alternatives for delicate root systems.
All pothos cuttings will root if placed in water.
Success requires healthy stems with nodes, which contain meristematic cells for root growth. Cuttings from diseased plants or leafless stems often fail. Sterilize tools to prevent bacterial infections. Even with perfect care, 10-15% of cuttings die naturally due to genetic factors or microbe exposure.
Without soil, pothos cannot be kept alive long-term in water.
Pothos can live indefinitely in water, when given hydroponic nutrients monthly. Change the water weekly to prevent algae and bacteria growth. Use half-strength liquid fertilizer only to prevent burning them on the nutrients. Thin water roots are functional for as long as they are watered, and they only need stable pH (6.0 - 7.0) and oxygen levels in the water to be successful.
Conclusion
Learning how to propagate pothos is a testament to how easy and rewarding it is to be a plant parent. You can easily have more plants with just some scissors, water, and a little patience. My first propagation (a single cutting in a mason jar) produced six healthy plants in less than a year.
Try using an equal quantity of water, soil, or sphagnum moss to find out which one you prefer. I alternate methods depending on the time of year, water to see in the summer, and moss to dry out in the winter. Each method provides important learning lessons about root growth and the resiliency of your plants.
If your cuttings appear to be struggling, you might need to refer back to the troubleshooting section. I have had even the most wilted propagations come back after providing better light or cleaning my tools. All plants want to survive, you need to be a guide, not someone trying to control things. With just a small tweak, you could see an outburst of growth in the next 2-4 weeks.
Now take those shears. Every cut feeds your confidence as well as your foliage! Envision your area evolved, plants cascading off the shelf, creating opportunity blooms. Observe your plant family flourish, one node at a time. Your green legacy begins today in its simplest form!
External Sources
Frequently Asked Questions
Where should I cut a pothos vine for propagation?
Cut ¼ inch below a leaf node using sterilized shears. Nodes are small brown bumps where roots grow. Ensure cuttings have 3-4 nodes for higher success. Avoid crushing stems to prevent bacterial infections during propagation.
Is water or soil better for propagating pothos?
Water propagation lets you monitor root growth, while soil reduces transplant shock. Both work, but water has a 90% success rate for beginners. Soil is better for long-term growth without repotting stress.
How long until pothos cuttings root in water?
Roots appear in 1-3 weeks under bright indirect light. Speed depends on temperature (65-75°F ideal) and node submersion. Change water weekly to prevent rot and boost oxygen levels for faster growth.
Do pothos cuttings need sunlight to root?
Yes, bright indirect light speeds root development. Avoid direct sun, which overheats cuttings. Low light slows growth and risks rot. Use east-facing windows or grow lights for 6-8 hours daily.
Why do my pothos cuttings rot in water?
Rot stems from bacteria, overgrown algae, or low oxygen. Fixes include:
- Change water weekly
- Use opaque containers to block algae
- Trim slimy roots with sterilized scissors
- Add 1 tsp hydrogen peroxide per cup of water
Can I use honey instead of rooting hormone?
Yes, honey's antibacterial properties protect cuttings. Dip stems in raw honey before planting. It's less effective than synthetic hormones but works for low-stakes propagation. Results take 2-3 weeks longer than commercial products.
How do I make my pothos bushier?
Prune leggy vines above nodes to force branching. Propagate trimmings and replant them in the same pot. Rotate the plant weekly for even light exposure, and fertilize monthly during growing season.
Are coffee grounds good for pothos plants?
Used sparingly, coffee grounds add nitrogen but acidify soil. Mix 1 tbsp into soil monthly. Overuse causes pH imbalance and fungus gnats. Composted grounds are safer than fresh ones.
When should I repot propagated pothos?
Repot when roots outgrow containers (usually 6-8 months). Choose a pot 2 inches wider with drainage holes. Water thoroughly after repotting, and avoid fertilizing for 4 weeks to prevent root burn.
Can pothos survive in low-light bathrooms?
Yes, but growth slows significantly. Rotate the plant weekly to prevent lopsidedness. Use a well-draining soil mix to offset humidity. Supplement with artificial light if leaves yellow or drop.