Understanding how to grow turnips can provide you with a dual-purpose crop that has been grown for over 4,000 years. These hardy roots flourish in cool seasons, while their greens contribute additional nutrition to meals. Whether you are a novice gardener or a seasoned expert looking to hone in on your gardening skills, you can count on turnips for a dependable and hassle-free crop.
Turnips can grow in all climates, but they perform best in loose, well-draining soil. I have had the best luck mixing compost into my beds which helps prevent stunted roots from forming. Test your soil for pH and aim for a range of 6.0 to 7.5. Avoid planting in heavy clay, as the roots will crack and struggle to escape while also trapping moisture.
Timing is important. In either early spring or late summer, plant seeds. Crops grown in the fall may be better tasting after light frost in late summer. Space seeds 4-6 inches apart. It can help to thin seedlings early and often, as crowded seedlings will have misshapen roots. Harvest greens at young stages and thin root crops when 2-3 inches tall.
Water thoroughly once a week to avoid rotting roots from overwatering and bitterness from underwatering. Mulch can help maintain soil temperatures and moisture levels. In my garden, pests were reduced by roughly 60% once I installed drip irrigation. Turnips will try your patience, but you can always roast, mash, or pickle them.
Soil Preparation and Planting
To begin how to grow turnips, consider soil pH first. You'll want soil that is above 6.0 and below 7.5, which is typical in the native Mediterranean conditions where turnips grow. You can check soil pH with a simple kit. If your soil is acidic, then you may want to add some lime, and if you have alkaline soils, sulfur will help. Maintaining a balanced soil pH will help prevent clubroot and improve nutrient uptake for your turnips.
While both compost and manure act to add fertility to soil, they perform different functions. Compost enhances soil texture and adds some micronutrients to the soil, while aged manure will offer some nitrogen to the soil but could burn roots if fresh. When preparing garden beds, I incorporate 2-3 inches of compost. This approach is less damaging to root development compared to adding manure to garden beds.
Plant seeds in rows that are 12-18 inches apart, planting ¼-½ inch deep. The shallower you plant, the faster the seed will germinate. Wide spacing between rows allows for airflow, which will help with fungal diseases. In my garden, I stagger my spring and fall plantings, which enables more harvests without overcrowding.
Once the seedlings reach a height of 3 inches, thin them out so there are 4-6 inches between each. Crowding them will cause twisted roots and competition for nutrients. You can use scissors to snip them off, as pulling them can disturb the other roots nearby. You can also save the thinned greens for salads - they are generally tender with a peppery flavor.
Soil Testing
- Step: Test pH using a soil kit (target 6.0-7.5).
- Tip: Add lime if pH < 6.0 or sulfur if pH > 7.5.
- Note: Avoid fresh manure to prevent root branching.
Seed Sowing
- Depth: Plant seeds ¼-½ inch deep.
- Spacing: Space rows 12-18 inches apart.
- Timing: Sow 4 weeks before last frost in spring.
Adding Amendments
- Quantity: Apply 2-3 inches of compost or manure.
- Mixing: Work into top 6 inches of soil.
- Caution: Avoid nitrogen-heavy fertilizers.
Thinning Seedlings
- Timing: When plants reach 4 inches tall.
- Spacing: Maintain 4-6 inches between plants.
- Use: Thinned greens can be eaten in salads.
Mulching
- Material: Use straw or grass clippings.
- Depth: Apply 2-3 inch layer around plants.
- Benefit: Reduces weeds and retains moisture.

Garden Trowel
- Use: Digging small holes for seed placement.
- Material: Stainless steel for durability.
- Size: 8-10 inches (20-25 cm) blade length.
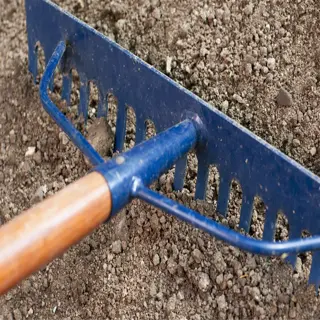
Soil Rake
- Use: Smoothing soil surface before planting.
- Width: 12-16 inches (30-40 cm) head.
- Tip: Avoid deep raking to prevent disturbing seeds.

Soil pH Tester
- Function: Measures soil acidity for optimal pH adjustment.
- Accuracy: Digital models provide precise readings within 0.1 pH.
- Frequency: Test soil every 2-3 growing seasons.
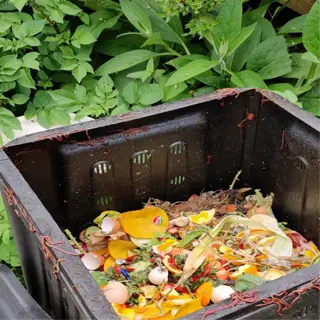
Compost Bin
- Purpose: Converts kitchen scraps into nutrient-rich compost.
- Location: Place in shaded area to retain moisture.
- Layering: Alternate green (nitrogen) and brown (carbon) materials.
Garden Hoe
- Task: Weeding and aerating soil between rows.
- Blade Type: Stirrup hoe for slicing weeds at roots.
- Angle: Hold at 45 degrees for efficient soil turnover.
Best Time to Plant Turnips
Spring planting is best for northern areas with cooler springs. Spring planting time is when the soil warms up to 45°F (7°C) soil temperature which is in the mid-April timeframe. Planting in the fall is better for southern locations. If planting in the fall, begin planting 6-8 weeks before the first frost for roots that are sweetened by cold temperature nights. Do not plant in the heat of the summer as it causes plants to bolt.
Turnips flourish in temperatures between 45-75°F (7-24°C). In my Oregon garden, planting them in April and August does not lead to bitter roots. Use a soil thermometer to check soil temperature before planting your seeds. If the soil temperature is over 80°F (27°C), the plants will go into stress. Frost-tolerant greens may survive light frost, but make sure to harvest the roots before a hard frost.
Align your planting schedule around frost dates. For northern growers, I recommend planting crops 2-4 weeks after the last spring frost. For southern growers, aim for the frosted window in September and into October. I monitor local frost calendars. I am a big believer in staggering my sowing dates every 2-3 weeks to maximize harvest times. This then gives your growing seasons some agility in filling in the gaps between your spring and fall crops.
Successive plantings increase your harvests. After the first harvest in the spring season, replant in July for fall crops. Quick crops can be quite useful in extending your harvest period; try planting ‘Hakurei' radishes, which take approximately 35 days to mature. I usually plant lettuce alongside, which helps shade the soil while maximizing space. Plan to rotate beds annually to reduce pests.
Frost Dates
- Rule: Plant 2-4 weeks before last spring frost.
- Fall Crop: Sow 6-8 weeks before first fall frost.
- Tool: Use USDA Hardiness Zone Map for local dates.
Soil Temperature
- Minimum: 40°F (4°C) for germination.
- Optimal: 60°F (16°C) for fastest growth.
- Test: Use a soil thermometer at 4-inch depth.
Succession Planting
- Interval: Sow every 2-3 weeks in spring/fall.
- Goal: Avoid glut and extend harvest period.
- Tip: Use quick-maturing varieties like 'Tokyo Cross'.
Microclimates
- Sun Exposure: South-facing beds warm faster in spring.
- Shade: Use in hot climates to delay bolting.
- Windbreaks: Protect seedlings from drying winds.
Daylight Hours
- Spring: Longer days accelerate growth.
- Fall: Shorter days reduce pest pressure.
- Adjustment: Northern growers may need row covers.
Soil Thermometer
- Purpose: Measures soil temperature at seed depth.
- Accuracy: ±2°F (1°C) for reliable readings.
- Tip: Test at 8 AM for daily minimum temps.

Frost Blanket
- Use: Protects seedlings from early frosts.
- Material: Lightweight polypropylene fabric.
- Coverage: 6-8°F (3-4°C) frost protection.

Planting Calendar
- Feature: Customizable by ZIP code.
- Source: Local agricultural extensions.
- Tip: Sync with moon phases for tradition.
Mulch Layer
- Role: Regulates soil temperature and moisture.
- Types: Straw, shredded leaves, or grass clippings.
- Depth: 2-3 inches around seedlings.
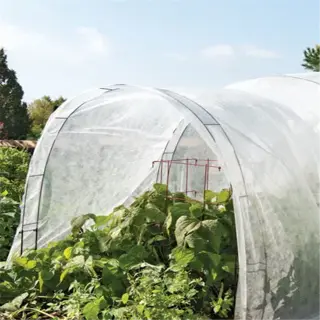
Row Cover Frame
- Design: Hoop houses for seasonal extension.
- Height: 12-18 inches to accommodate growth.
- Ventilation: Lift covers on sunny days.
Watering and Fertilizing Basics
Sandy soil requires two to three waterings each week (0.5 inches each) to avoid drought stress (stress due to lack of moisture). Clay soil holds moisture well when watered once weekly at 1 inch. I use a rain gauge to track how much rain we get. If you are overwatering your turnips, the leaves will turn yellow, and the soil will be mushy when you dig them up. If you underwater, they would wilt and be bitter to the taste.
Compost tea, as an organic fertilizer, nourishes soil microbes and enhances soil structure. Synthetics like 5-10-10 provide immediate root growth benefits but can create a high-salt condition. When I grow seedlings, I use diluted fish emulsion. Then, when seedlings develop roots, I switch to non-leafy heads, often utilizing low-nitrogen casts.
Watering too much can drown your roots; the soil must be damp, but not soggy or wet. Watering too little causes plants to take on a woody texture. Check soil moisture by sticking a finger in the soil approximately 2 inches deep. Drip lines in my garden help with leaf diseases and even wild water uptake. We always mulch, generally with straw, to prevent moisture loss in the soil.
Fertilizer ratios should align with the phases of growth! Near the beginning, a balanced 10-10-10 fertilizer would be best, as it promotes early root development. After three weeks, switch to a 5-10-10 ratio for root development. When you thin, don't fertilize high nitrogen feeds. I use bone meal as a side-dress to promote phosphorus because its organic composition will not burn your plants but will help develop root structures!
Soil Moisture Check
- Method: Insert finger 2 inches deep; dry soil needs water.
- Tool: Use a moisture meter for accuracy.
- Signs: Wilting indicates underwatering; yellow leaves signal overwatering.
Fertilizer Timing
- Stage 1: Apply at planting (root development).
- Stage 2: Side-dress 3 weeks after germination.
- Caution: Stop fertilizing 4 weeks before harvest.
Watering Tools
- Drip Irrigation: Prevents leaf wetness and disease.
- Watering Can: Ideal for seedlings and containers.
- Soaker Hose: Best for deep root penetration.
Organic Options
- Compost: 1-2 inches mixed into soil pre-planting.
- Fish Emulsion: Dilute 1 tbsp per gallon every 2 weeks.
- Bone Meal: High phosphorus for root growth.
Troubleshooting
- Bitter Roots: Caused by inconsistent watering.
- Stunted Growth: Low phosphorus or compacted soil.
- Leaf Burn: Over-fertilization; flush soil with water.
Moisture Meter
- Function: Measures soil dampness at root level.
- Range: 1-10 scale (1 = dry, 10 = waterlogged).
- Calibration: Test in dry/wet soil for accuracy.
Drip Irrigation Kit
- Coverage: Customizable for rows or containers.
- Pressure: Requires 8-15 PSI for optimal flow.
- Efficiency: Reduces water waste by 50-70%.
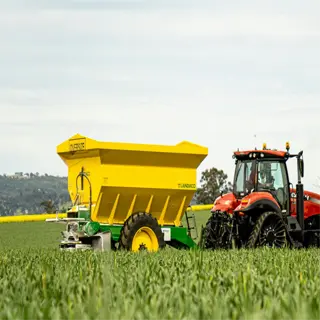
Granular Fertilizer Spreader
- Use: Evenly distributes granular fertilizers.
- Capacity: Holds up to 5 lbs (2.3 kg) of product.
- Setting: Adjustable for precise application rates.
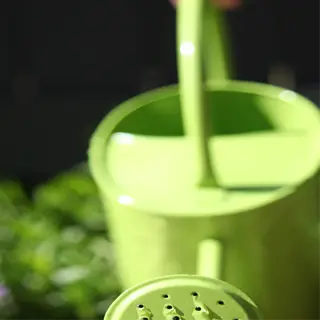
Watering Can
- Capacity: 1-2 gallons (3.8-7.6 liters).
- Rose Nozzle: Gentle flow for seedlings.
- Material: Galvanized steel resists rust.
Compost Tea Brewer
- Process: Steeps compost in aerated water for 24-48 hours.
- Application: Dilute 1:10 with water.
- Benefit: Boosts soil microbiology and nutrient uptake.
Harvesting and Storing Turnips
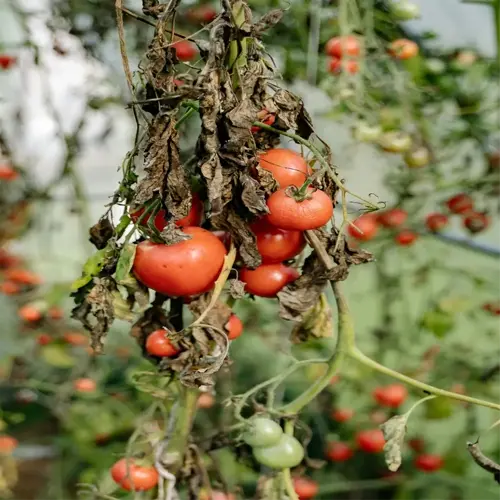
Harvestable turnips will show shoulders that rise 1 to 2 inches above the soil surface. Roots should be firm and measure from 2-3 inches wide. Greens will be at their peak if 6 to 8 inches tall. I first pull one plant, if the root resists, the crop is ready to harvest. Fall crops will sweeten following a light frost.
Keep roots refrigerated for a short time. Wrap them in damp paper towels and put them in a perforated bag, and they will be kept for 2-4 weeks. For winter storage use a root cellar (32-40°F, 95% humidity). If you bury them in sand or sawdust, unwashed roots will not dry out.
Greens will spoil more quickly than roots. Greens should be stored unwashed in an airtight container in the refrigerator where they will last for 5-7 days. To freeze greens for long-term use, blanch the leaves for 2 minutes in boiling water, then cool in ice water before freezing. Roots kept whole will last for many months in storage; greens lose texture after being frozen but still keep the flavor.
To prevent sprouting, trim greens to within ½ inch of the root crown. Do not nick the flesh, this only invites rot. Check the stored turnips once a month. You will want to discard any turnips that have soft spots or show signs of mold. I have a small fan in my root cellar that circulates air, which helps reduce spoilage by about 30%.
Harvest Timing
- Signs: Roots 2-3 inches wide, shoulders visible above soil.
- Fall Crops: Harvest after light frost for sweetness.
- Greens: Pick young leaves (4-6 inches) for tenderness.
Harvest Technique
- Tools: Use garden fork to loosen soil gently.
- Handling: Avoid bruising roots to prevent rot.
- Cleaning: Brush off dirt; do not wash before storage.
Curing Process
- Purpose: Heal minor cuts to extend storage life.
- Method: Leave roots in shade for 2-3 days.
- Condition: 60-65°F (16-18°C) with airflow.
Trimming Greens
- Cut Point: ½ inch above root crown.
- Storage: Wrap greens in damp paper towels.
- Tip: Store greens separately from roots.
Storage Monitoring
- Check Frequency: Inspect monthly for rot/sprouting.
- Remove: Discard softened or moldy roots immediately.
- Humidity: Maintain 90-95% in root cellar.
Garden Fork
- Use: Loosens soil without damaging roots.
- Tines: 4-6 flat prongs reduce piercing risk.
- Grip: Ergonomic handle for leverage.

Root Cellar Rack
- Design: Slatted shelves for airflow.
- Material: Cedar wood resists mold.
- Capacity: Holds 20-30 lbs (9-14 kg) per shelf.

Vacuum Sealer
- Function: Removes air from freezer bags.
- Bags: Use BPA-free, heavy-duty pouches.
- Tip: Blanch turnips before sealing.
Produce Storage Bags
- Ventilation: Prevents condensation buildup.
- Capacity: 1-2 lbs (0.5-1 kg) per bag.
- Reusable: Washable nylon material.
Humidity Gauge
- Range: 0-100% RH with ±3% accuracy.
- Placement: Mount at root level.
- Calibration: Check annually with salt test.
Common Challenges and Fixes
Bolting happens above 75°F (24°C). You can preempt the problem by planting early in the spring or late summer. Also, consider covering them with a shade cloth during a heat wave. I use bolt-resilient varieties like 'Purple Top', as they withstand stress better and tend to put energy into root production.
Turnips are afflicted by both root maggots and flea beetles. To keep pests away from seedlings, use row covers. Around the stems, sprinkle diatomaceous earth. If there is a bad infestation, spray neem oil weekly. I like to interplant with radishes because they distract pests away from turnips.
Root development is stunted by soil compaction. Before planting, use a broad fork to aerate your beds. Add 3 inches of compost on top of the soil to loosen the texture. In my garden, adding perlite significantly increased the drainage of clay soil. Do not walk onto beds so that the soil texture will remain crumbly.
Bitter roots are caused by either irregular watering or too much nitrogen. To avoid this, give your plants 1 inch of water each week, and consider using a soaker hose for a more consistent drying cycle. Test your soil every year, and be sure to aim for a balanced ratio of 5 - 10 - 10 fertilizer. It is best to harvest roots when they are young because older roots become stronger flavored or woody.
Bolting Prevention
- Trigger: Temperatures above 80°F (27°C).
- Fix: Mulch to cool soil; plant bolt-resistant varieties.
- Tip: Harvest roots before flowering.
Pest Control
- Flea Beetles: Apply spinosad spray weekly.
- Root Maggots: Use yellow sticky traps for adults.
- Prevention: Remove plant debris after harvest.
Soil Improvement
- Aeration: Till soil 12 inches deep pre-planting.
- Compost: Mix 3 inches into topsoil annually.
- Drainage: Add sand to clay-heavy beds.
Nutrient Balance
- Deficiency: Yellow leaves = low nitrogen.
- Excess: Forked roots = too much nitrogen.
- Test: Soil kit every 2-3 seasons.
Water Management
- Signs: Cracked soil = underwatering; mold = overwatering.
- Schedule: 1 inch/week; adjust for rainfall.
- Tool: Soaker hose for even distribution.

Neem Oil Spray
- Use: Organic pest control for beetles and aphids.
- Mix: 2 tbsp per gallon of water.
- Frequency: Apply every 7-10 days.

Row Cover Fabric
- Material: Lightweight polypropylene (0.5 oz/sq yd).
- Coverage: Protects up to 28°F (-2°C).
- Install: Secure edges with soil or rocks.

Soil Aerator
- Function: Punch holes to relieve compaction.
- Depth: 3-4 inches for root crops.
- Timing: Aerate before planting and after harvest.
pH Test Kit
- Range: Measures 4-9 pH with color chart.
- Sampling: Test multiple areas of the garden.
- Adjust: Lime for low pH; sulfur for high pH.

Moisture Meter
- Readings: Dry/moist/wet scale for quick checks.
- Depth: Insert 6 inches for root zone data.
- Calibration: Rinse probe after each use.
5 Common Myths
Turnips are only able to be grown successfully in cool climates.
Although turnips prefer cool weather (45-75F / 7-24C), they can be grown in warmer zones with careful planting. Growers in USDA zones 8-10 have success by winter sowing in the fall and using shade cloth to reduce the effects of heat stress.
Turnip greens become toxic or inedible after the plant flowers.
Although flowering (bolting) causes greens to become bitter, they are not toxic. If the greens are mature, prepare them by first blanching to decrease the bitter taste and then you can sauté them with garlic or toss them into soups. Even after the greens have bolted, they are still valuable sources of potassium, vitamin K, calcium, and antioxidants.
The larger the turnip roots, the more flavor and nutrients they contain.
Turnips with a diameter of over 3 inches (7.6 cm) tend to be woody and pungent. Younger (1-2 inches / 2.5-5 cm) roots will be sweeter and work best eaten raw, whereas larger turnips are best included in soups and stews or are best fermented.
Turnips exhaust soil nutrients and ruin gardens for future crops.
As light feeders, turnips use fewer nutrients than heavy feeders like tomatoes. Rotate with legumes (peas/beans) to restore nitrogen. Their deep roots aerate soil, and fallen leaves add organic matter, improving soil structure over time.
Turnips should be watered every day to keep them from becoming bitter.
Consistent moisture or watering is key to preventing bitterness, not daily watering. Plan to provide 1 inch (2.5 cm) of water weekly, and use drip irrigation to get better distribution. Excessive watering leaches nutrients, encourages rot and under watering creates drought stress that increases bitterness.
Conclusion
Turnips are a great crop for a beginner since they produce both edible roots and edible greens. Turnips grow quickly, making them well-suited for small gardens or containers. Enjoy the roots roasted or the greens sautéed, and turnips will continue to grow with just a little maintenance. Plant seeds in spring or fall for best results.
There are three essentials for success: timing, spacing, and moisture. Seeds must be planted once soils have warmed to 45°F (7°C). Plants should be spaced out between 4 to 6 inches to give them room to succeed, while avoiding competition with each other. Water deeply and weekly, accounting for rain and/or snow. Finally, overcrowding or thirst causes turnips or radishes to become bitter and woody.
Do not hesitate to try heirloom varieties such as ‘Golden Ball' or ‘Scarlet Queen'. Their flavor and color will elevate your dishes. I've had success with ‘Tokyo Cross' for the sweet, white roots it produces, which is excellent for pickling. Attempting heirloom varieties can lead to better harvests and a connection to the history of gardening.
Ready to grow? Start your seeds today. Tender greens spring plantings and frost-sweet fall crops can occur. Even if you make mistakes - like late thinning - you still rarely ruin the harvest. Turnips forgive - pitching the greens, and they will thrive. Either share the bounty or store it for later use. Ignore the greens - roots will store in cool, dark places for months.
External Sources
Frequently Asked Questions
What month do you plant turnips?
Plant turnips in early spring (March-April) or late summer (August-September). Avoid summer heat, as temperatures above 75°F (24°C) trigger bolting. Fall crops yield sweeter roots due to cooler temperatures.
Do turnips need full sun?
Turnips thrive in full sun (6-8 hours daily) but tolerate partial shade. In hot climates, afternoon shade prevents bolting. Insufficient light causes slow growth and small roots.
Can turnips survive frost?
Turnips withstand light frosts (28-32°F / -2-0°C). Prolonged freezing temperatures kill roots. Harvest before hard freezes or mulch heavily for winter ground storage.
What should not be planted near turnips?
Avoid planting turnips near:
- Other brassicas (cabbage, broccoli) to prevent pest spread
- Potatoes (compete for nutrients)
- Mustard greens (attract shared pests)
How often should I water turnips?
Water turnips 1 inch weekly. Sandy soil needs 2-3 sessions; clay soil needs 1-2. Drought causes bitter roots, while overwatering promotes rot. Use drip irrigation for consistency.
What fertilizer is best for turnips?
Use low-nitrogen fertilizers (5-10-10 NPK) to prioritize root growth. Excess nitrogen produces leafy tops and small roots. Apply compost tea or balanced granules at planting and 3 weeks later.
Can turnips grow in containers?
Yes. Use pots 12+ inches deep with drainage holes. Fill with potting mix and compost. Space seeds 3 inches apart. Containers reduce pest risks and suit small spaces.
Why are my turnip roots woody?
Woody roots result from:
- Overly mature roots (harvest at 2-3 inches)
- Inconsistent watering
- High soil temperatures
Do deer eat turnip plants?
Deer graze on turnip greens but avoid bitter roots. Protect crops with fencing or repellents. Planting in raised beds or near garlic/onions deters them.
How long do turnips take to grow?
Greens mature in 30-40 days; roots take 50-60 days. Fast-growing varieties like ‘Tokyo Cross' ready in 35 days. Timing depends on soil temperature and variety.