
To learn how to grow tomatoes, you need to first know why homegrown tomatoes are better than store-bought tomatoes, any day of the week. Fresh-picked tomatoes explode with flavor that you cannot find in any version of store-bought tomato. They are firm, and juicy, and the aroma of tomatoes warmed by sun exposure is unforgettable.
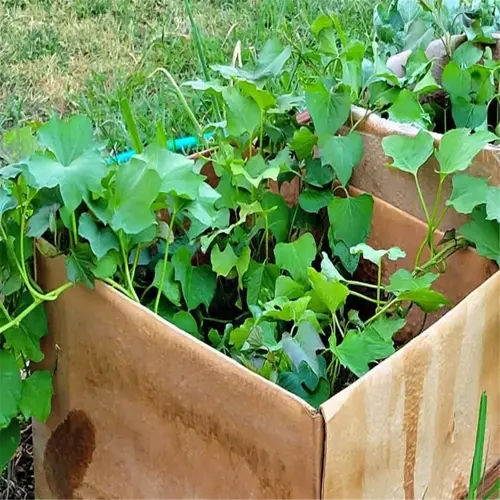
It's possible to grow tomatoes without a backyard. A sunny patio or balcony can work great as well. For years, I've grown my plants in 5-gallon buckets. The original $20 I spent on seeds and soil provided me with pounds of produce throughout the summer.
Gardening isn't only terrific for saving money. But getting dirt under your fingernails is therapeutic, as well. There is a meaning to purpose when you see seedlings stretching up toward the light! When you take a bite of a fresh tomato you have grown yourself, you taste pride and flavor, all of which is good for the soul.
Choosing Tomato Varieties & Planting Times
The foundation for successfully knowing how to grow tomatoes starts by making a smart choice of variety. For first-time growers, choosing disease-resistant hybrids is the right choice. Varieties such as 'Celebrity' or 'Mountain Merit' do not fall victim to common fungal problems that often wipe out heirloom varieties, allowing you to grow instead of dealing with one problem after problem.
The USDA hardiness zone determines each person's success at planting. As someone in Zone 5b, I wait to transplant until June evenings stay above 50°F. Meanwhile, southern gardeners in Zone 9 can plant sooner. Check your zone map twice, and remember that tomatoes hate cold feet more than you hate wasting effort.
Determinate tomatoes possess a growth habit similar to compact shrubs and are suitable for growing in patio pots. The 'Bush Early Girl' is one cultivar that will produce a harvest in 54 days.Indeterminate varieties, such as 'Sungold,' will vine indefinitely; if growing indeterminate plants, install the tall stakes to support them earlier in development. In urban settings, dwarf types such as 'Tiny Tim' can be grown in a 12-inch container.
As a city-dweller, here is your tomato solution: Cherry varieties like 'Sweet Million' produce grape-sized clusters in hanging baskets. I've grown these in the fire escape style for 10 years, and in 5-gallon buckets with drainage holes, my success has outperformed any produce display at a farmers' market.

Last Frost Date
- Critical Threshold: Soil temperature must reach 60°F (15.5°C)
- Regional Variance: Varies by 6-8 weeks across USDA zones
- Tool Recommendation: Use NOAA frost date calculator online
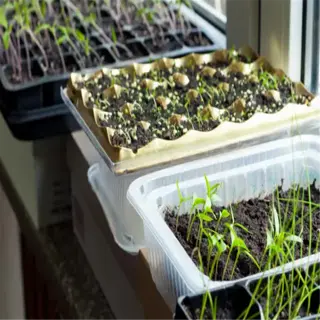
Seed Starting Window
- Indoor Start: 6-8 weeks before last frost date
- Germination Temp: 70-75°F (21-24°C) optimal range
- Transplant Ready: 6-8 inch height with true leaves
Soil Preparation Timing
- Ideal Lead Time: Prepare beds 2 weeks before transplanting
- pH Adjustment: Test soil 6 months before planting if modifying pH
- Compost Integration: Mix organic matter 10 days pre-planting
Transplant Readiness Signs
- Stem Strength: Pencil-thick main stem indicates maturity
- Leaf Development: 4-6 true leaves beyond seed leaves
- Hardening Progress: No wilting after 6 hours outdoors
Season Extension Methods
- Row Covers: Protect plants until nighttime temps reach 50°F (10°C)
- Cold Frames: Use for 2-3 week earlier planting in spring
- Variety Selection: Choose early-maturing types (<70 days)
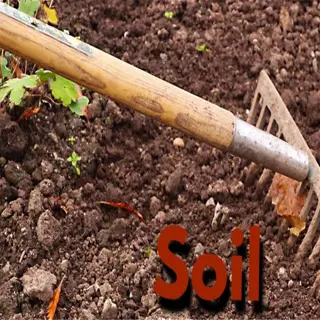
Soil Preparation & Planting
Soil pH will make or break your success with tomato growing, so shoot for 6.2 - 6.8 because slightly acidic soil conditions will release nutrients and reduce aluminum toxicity. You can pick up a soil pH test kit at any garden center for around $15. If your soil pH is 7.0, then adding peat moss would be an excellent amendment. If your soil pH is 5.5 apply some lime.
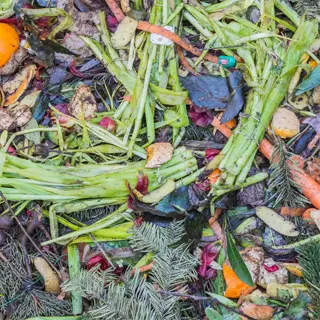
Compost requires rest and establishing a relationship or bond with the existing native soil. I recommended mixing at least 3 inches of finished compost into the beds fourteen days before planting to activate the microbial life and prevent the seedlings from losing nitrogen during germination because of the newly grafted compost. I refreshed clay soil using this method, and now I grow beefsteaks in it like batter.
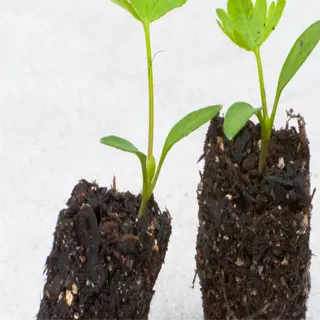
Do you have leggy seedlings? If yes, trench planting is your solution. Simply lay the stems sideways in a 6-inch-deep trench, covering them up to the first leaves. The roots will grow along the covered stem, creating drought-resistant monsters. My record so far is a 9-foot ‘Brandywine' that transformed from a spindly seedling.
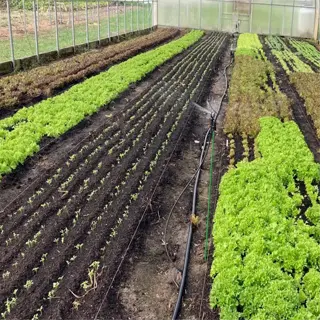
Raised beds tend to drain faster than in-ground plots. This is ideal for rainy areas of the country. However, in my garden in Arizona, the in-ground planting tends to stay moist better. If you are working with clay, layer gravel below the raised Bed; if you are working with sand, do traditional rows, and water deeply.
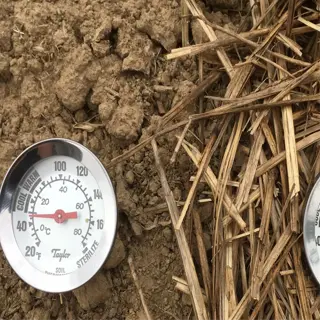
Soil Temperature
- Minimum: 60°F (15.5°C) at 4-inch depth
- Ideal Range: 70-85°F (21-29°C)
- Measurement: Take morning readings for accuracy
Compost Integration
- Mixing Depth: 8-12 inches (20-30 cm)
- C:N Ratio: 25-30:1 for decomposition
- Timing: Incorporate 10-14 days pre-plant

pH Adjustment
- Liming Lead Time: 3-6 months for full effect
- Emergency Fix: Use liquid calcium for quick absorption
- Test Frequency: Every 2-3 years

Mulching Techniques
- Application Timing: Apply 2-3 inches after soil warms to 65°F (18°C)
- Material Choices: Straw, grass clippings, or shredded leaves
- Weed Suppression: Reduces weeds by 70-90% when maintained

Root Depth Considerations
- Mature Depth: Most roots within 12-18 inches (30-45 cm)
- Planting Tip: Bury stems up to first leaves for stronger roots
- Spacing Impact: 24-36 inches (60-90 cm) between plants prevents crowding
Watering, Fertilizing, & Sunlight
When it comes to watering tomatoes, you need to be aware of your soil type. Sandy soils will drain quicker and you should water them every 3 days using 1.5 gallons per plant. Clay soils retain moisture for longer and you can stretch the watering to 5 days in between. Just press your finger down 2 inches to check the moisture. If it is dry, you want to deeply water it at the base of the plant. Do not water the leaves.
Tomatoes are fond of 5-10-10 NPK fertilizers when they want to grow in balance. Phosphorus promotes blooms and potassium strengthens stems. Organic fish emulsion lasts for weeks, but other synthetic options act faster and sometimes may build up salts in the soil. I use a hybrid of organic at the planting time and light synthetics when fruiting starts, which may be several spurts for the various fruits on the plant.
Fruits are leathery from sunscald when temperatures exceed 90°F. Protect your plants during lunch hours with 30% shade cloth. You can keep them in their morning sun. In my garden in the Phoenix area, ‘Solar Fire' tomatoes produced more than other varieties scorched, and their thick, bushy plant can effectively self-shade the remainder of the clusters as they ripen.
Compost tea and other organic fertilizers are slow acting but provide food for microbes. Synthetic fertilizers offer quick nitrogen, which can help plants grow quickly, yet it will degrade the soil quality. For tomatoes in containers, I utilize both types: organic pellets at planting and liquid synthetics every 14 days. If you're planting tomatoes in a ground bed, use only organics for ongoing health.

Drip Irrigation Kit
- Efficiency: Reduces water waste by 30-50%
- Installation: Lay tubing 2-4 inches (5-10 cm) from stems
- Timing: Run 45 mins at dawn for deep absorption
Liquid Fertilizer
- NPK Ratio: 3-4-4 ideal for fruiting stage
- Application: Mix 1 oz per gallon (30ml/3.8L)
- Schedule: Apply every 10-14 days post-flowering
Sunlight Meter
- Optimal Range: 20,000-30,000 lux minimum
- Measurement: Take readings at noon
- Adjustment: Use shade cloth if exceeding 100°F (38°C)

Soil Moisture Sensor
- Accuracy: Measures within ±3% moisture content
- Installation: Insert probe 6 inches (15 cm) deep
- Benefit: Prevents overwatering in clay soils

Adjustable Shade Cloth
- UV Protection: 30-50% shade for heat-sensitive varieties
- Height: Install 2-3 feet (60-90 cm) above plants
- Seasonal Use: Deploy during peak summer heatwaves
Pruning & Pest Control
The method of pruning tomatoes varies fully on their growth habit. Determinate tomatoes grow in dense, compact bushes, so any pruning done will potentially reduce the number of fruiting sites, and ultimately yield. Indeterminate varieties, every week pinch off the suckers that form below the first flower cluster. This redirects the growth energy into fruit production rather than an endless growth of vines.
You can identify aphids by their green, pear-shaped bodies which gather together underneath leaves. Hornworms will be nearly indistinguishable from the tomato stems due to their stripes that enable them to camouflage into the plant. To get rid of either of them organically, simply spray aphids with soapy water and hornworms can just be handpicked early in the morning when they are sluggish. I find it helpful to keep tweezers in my apron to pick hornworms.
Be sure to space plants 3 feet apart to prevent disease transmission. Strip the leaves from the bottom foot or so to allow better airflow. You can also stake plants vertically instead of caging them, so there is less contact with the leaves and a reduced chance of blight during cloudy rainy summers.
For persistent and severe damage or infestations, consider mixing 1 tsp of neem oil with a quart of water. Spray the undersides of the leaves every five days as needed. Also, purchase ladybugs for aphid management. Ladybugs eat about fifty aphids a day. Do not apply more synthetic pesticides; they kill nature's balance, and beneficial insects in the garden.
Bypass Pruners
- Blade Type: Sharp curved edge for clean cuts
- Sanitization: Wipe with 70% isopropyl alcohol between plants
- Use Case: Remove suckers up to 1/4 inch (6 mm)
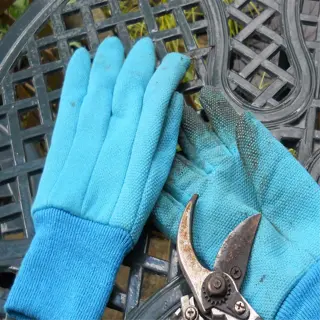
Sturdy Garden Gloves
- Material: Nitrile-coated for thorn protection
- Fit: Snug to handle small stems
- Care: Machine washable after use
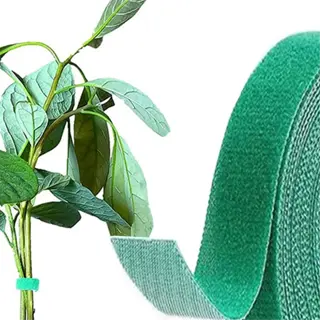
Plant Ties
- Material: Soft rubber-coated wire
- Application: Secure stems to stakes every 8-12 inches (20-30 cm)
- Adjustability: Reusable for seasonal growth

Disposable Trap Cards
- Placement: Hang 6 inches (15 cm) above plants
- Coverage: 1 trap per 10 sq ft (0.9 m²)
- Replacement: Change weekly during infestations
Pressure Sprayer
- Capacity: 1-2 gallon (3.8-7.6 L) tank
- Nozzle: Adjustable stream to mist/fan settings
- Maintenance: Rinse after oil-based sprays
Harvesting & Storage
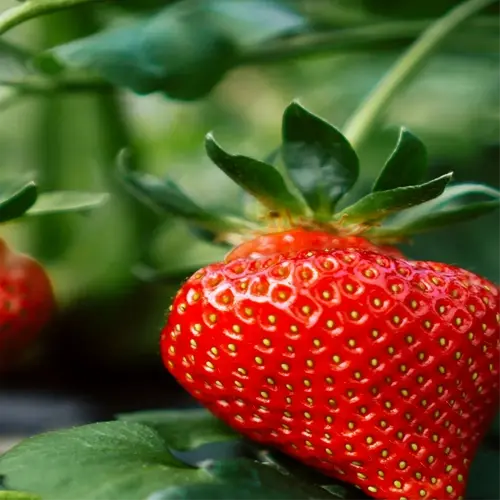
Harvesting tomatoes at the right stage of ripeness entails more than just checking the color. If you gently squeeze the fruits, they should yield slightly under pressure, similar to how avocados feel when they are ripe. Smell the stem end. A sweet smell with earthy notes indicates the fruit is ready to be picked. Finally, a shiny skin often indicates that the fruit is not yet fully ripe.
Storing tomatoes on the countertop retains their flavor. A temperature of 55-75°F and stem side up is ideal for 2-3 days. The refrigerator detracts from the flavor and makes tomatoes mealy. However, if a fruit has a split, the refrigerator will be better for one day to use immediately in preparations. I've used the refrigerator for damaged fruit and they end up saved for sauce the same day.
You can freeze tomatoes without the blanching process. Simply wash and dry the tomatoes, and then place them whole into sealable, airtight bags. Once thawed, the skins should slip off easily. In my freezer supply, I put semi-roasted tomato halves packed in olive oil, which is great for soups in the winter. The texture may change when thawed, but the flavor will remain summer.
The shelf life can vary widely. Fresh country tomatoes last only 3 days, while frozen can last up to 2 months. Canned goods stay fresh for approximately 1 year, while sun-dried will last up to 6 months when packed in oil. For quick use I layer the fresh tomato slices between parchment paper wraps for day use, being sure to keep them refrigerated to last 5 days.

Countertop Display
- Temperature: 55-70°F (13-21°C)
- Duration: 2-5 days peak flavor
- Layout: Single layer with stem up

Paper Bag Method
- Ethylene Control: Add banana peel for faster ripening
- Ventilation: Punch 5-7 holes in bag
- Check Daily: Remove ripe fruits promptly
Freezing Whole
- Prep: Wash/dry; no blanching
- Texture Change: Becomes mushy when thawed
- Use: Ideal for cooked dishes only
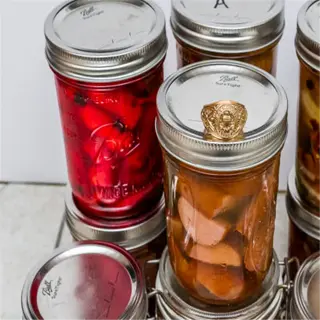
Canning Basics
- Acidification: Add 2 tbsp lemon juice per quart (946ml)
- Processing Time: 85 mins boiling water bath
- Shelf Life: 12-18 months unopened

Sun-Drying Setup
- Cutting: Halve roma varieties
- Protection: Cheesecloth against insects
- Duration: 4-7 days at 85°F+ (29°C+)
5 Common Myths
If tomatoes are refrigerated immediately after picking them they will lose their natural flavor development and texture.
Refrigeration at low temperatures below 50°F (10C) can temporarily attenuate volatile flavor compounds; proper tomato storage at 55°F (13C), on the other hand, retains flavor. When eaten after ripening, the flavor returns when the tomato is at room temperature for upt to 2 hours!
By putting crushed eggshells right into the planting holes, you can directly prevent any calcium related blossom end rot
Egg shells take around 6-12 months to break down and release usable calcium. For instant prevention of blossom end rot, you can use water soluble calcium nitrate (1 tbsp/gallon) every 3 weeks. Blossom end rot is also caused primarily by inconsistency of watering because it interrupts calcium uptake.
Water at a faster rate each day instead of every other day and yields larger tomatoes and more of them
Deep watering once a week (1-2 inches/2.5-5 cm) develops deep roots. Too much water will dilute the nutrients and sugars, causing tasteless tomatoes with split skins. As an alternative, use a drip irrigation system to keep moisture levels consistent and not flood the soil.
Cracks in tomato skins are always a sign of overripeness and deterioration on the inside
Concentric cracking happens naturally as new growth occurs during rain. Radial cracks, from inconsistent watering, are shallow. If you have cracked tomatoes you should pick them and put them in the fridge; the flesh will still be edible as long as there's no mold.
Removing all suckers from tomato plants results in the best production of fruit and fruit size
Over-pruning puts plants under stress and can reduce yields. For indeterminate type tomatoes, remove suckers that are below the first cluster of flowers. Determinate type tomatoes should not be pruned at all - the bush habit of the plant will allow for normal fruit set to take place.
Conclusion
Understanding about *growing tomatoes* involves appreciating development throughout each stage. Starting seeds under grow lights onto hardening off seedlings, and looking forward to harvesting that first tomato; gradually all the parts come together towards that first bite of juicy tomato. I had very leggy plants when I started, but now I manipulate a transfer to the garden based on soil temperature and growth rate, not the frost date.
Tomatoes are adaptable to nearly any location. Urban gardeners can reap success by even planting container-friendly varieties like 'Tiny Tim' or 'Patio Princess'. I have even grown a few vines inside 8-inch pots on a fire escape. The harvests remained small but plentiful. In rural settings, the hammock-type heirloom varieties can sprawl wherever they want, their roots digging deeply into well-watered garden beds.
Don't hesitate to conduct heirloom experiments. "Cherokee Purple" presents smoky richness, while "Green Zebra" bursts with tangy zest. Note the results and which varieties do well in your climate. I keep a notebook with a list of 32 varieties I've experimented with, both successful and unsuccessful, and I usually learned more from the failures than any successful hybrid.
There is nothing that can compete with the victory of a homegrown tomato. That very first slice of sun-warmed fruit, still dirty from the garden, redefines your concept of taste. You will find that the flavor of a grocery store tomato is dull in comparison to the bright colors and varied shapes and textures of the tomatoes you grew yourself. Start with just one plant; remain curious, and imagine every seed as a potential masterpiece.
External Sources
Frequently Asked Questions
What are the key factors for successful tomato growth?
Tomatoes thrive with full sun (6+ hours daily), well-draining soil (pH 6.2-6.8), consistent watering (1-2 inches weekly), and balanced fertilizer. Use stakes/cages for support and prune indeterminate varieties to focus energy on fruit production.
How often should I water tomato plants?
Water deeply 2-3 times weekly instead of daily. Check soil moisture by inserting a finger 2 inches deep, water only if dry. Container plants need more frequent watering, especially in heat. Avoid wetting leaves to prevent disease.
Do tomatoes grow better in pots or gardens?
Both work with proper care:
- Pots: Ideal for small spaces; use 5-gallon containers for determinate varieties
- Gardens: Better for indeterminate types; allows deeper root systems and higher yields
Are eggshells effective for tomato plants?
Eggshells take months to break down and provide little immediate calcium. For blossom end rot prevention, use water-soluble calcium supplements like calcium nitrate. Crushed shells work better as a long-term soil amendment when composted first.
What's the best way to prune tomatoes?
Pruning depends on the type:
- Indeterminate: Remove suckers below first flower cluster weekly
- Determinate: Avoid pruning, bush varieties set fruit all at once
How do I protect tomatoes from pests?
Use organic methods:
- Aphids: Spray neem oil at dawn
- Hornworms: Handpick daily; apply Bacillus thuringiensis (Bt)
- Whiteflies: Hang yellow sticky traps
- Prevention: Plant basil/marigolds nearby
What's the ideal soil mix for containers?
Mix 50% potting soil, 30% compost, and 20% perlite. Add 1/4 cup bone meal per 5-gallon container for phosphorus. Avoid garden soil, it compacts in pots, restricting roots and drainage.
Why are my tomato leaves turning yellow?
Common causes include:
- Overwatering: Let soil dry between waterings
- Nutrient deficiency: Apply balanced fertilizer
- Disease: Remove affected leaves; improve airflow
- Root-bound plants: Repot container tomatoes
Can I grow tomatoes from grocery store fruits?
Yes, but hybrid varieties may not produce true to type. Scoop seeds from ripe tomatoes, ferment them in water for 3 days, dry thoroughly, and plant indoors 6-8 weeks before last frost. Heirloom tomatoes offer more reliable results.
How do I know when tomatoes are ripe?
Look for:
- Full color development (red, yellow, etc.)
- Slight softness when gently squeezed
- Earthy fragrance at the stem
- Harvest before cracks/bruises form