
Learning how to grow thyme is a bridge to the time-honored Mediterranean practices from ancient times. Their hardiness, the herb, naturally inhabits a rocky, dry soil, where other plants seem to survive barely. Thyme grows well in poor soil, so beginners can do well propagating thyme with minimum commitment and monitoring.
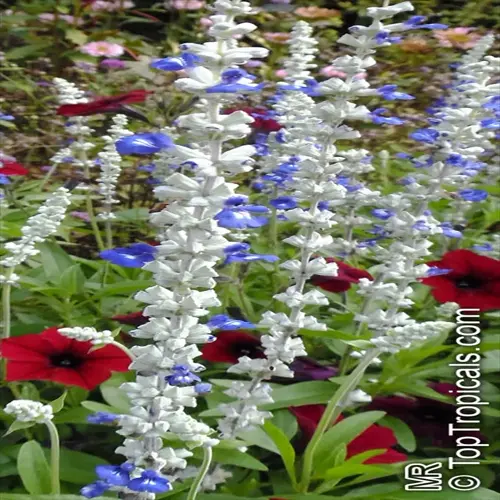
You'll appreciate thyme's versatility in your garden. In addition to smelling wonderful, its edible leaves are a tasty addition to your cooking. At the same time, its low-growing habit provides lovely ground cover. The little blooms entice the needed pollinators, bees, throughout the summer months. I always say butterflies visit my herb bed more after adding thyme.
New gardeners appreciate how easy thyme is to grow. It needs very little water and thrives in poor soil. Forget complicated fertilizer schedules. Just give it some sun and decent drainage. My first thyme survived for weeks when I didn't water it while I was on vacation.
Beyond your kitchen, thyme provides more ecological benefits. As flowers fade, they support local ecosystems by providing food for pollinators. You can plant it next to your vegetable beds, which contributes to the health of the whole garden. You provide habitats and harvest fresh seasonings!
Propagating Thyme
To propagate thyme with 90% success rates, use stem cuttings instead of seeds. Seed germination fails most often at about 30% due to thyme's slow growth type. I suggest taking 4-inch stem cuttings from healthy plants during their active growth in the spring for the best success every time.
Immerse the cuttings in a soil blend at a depth of 1 inch (2.5 cm), using an equal volume of potting soil and coarse sand for optimal drainage. Keep the medium moist, and never soggy. Roots can grow more rapidly in this manner than with deeper planting.
Expect to see visible roots in about 4 weeks with cuttings, compared to 8 weeks with seeds. This time difference is crucial if you are trying to establish plants before the summer heat arrives. Similarly, water propagation is a beginner-friendly alternative. Just place the stems in clear containers so you can watch the roots develop.
The water method allows you to see root growth visibly. Change water every three days to avoid rot. Transfer to soil when the roots are 1 inch (2.5 cm) long. I think a visible approach helps new gardeners gain confidence in their thyme journey.
Stem Cuttings
- Procedure: Take 3-inch (7.6 cm) stem tips in early morning hours when stems are firm
- Preparation: Remove lower leaves and apply rooting hormone powder to exposed nodes
- Medium: Plant in sterile sand or vermiculite mixture at 1 inch (2.5 cm) depth
- Environment: Maintain 70°F (21°C) soil temperature under indirect sunlight
- Timeline: Roots develop within 4-6 weeks with 90% success rate
- Transplant: Move to final location when root ball fills starter pot
Soil Layering
- Selection: Choose flexible stems longer than 6 inches (15 cm) from parent plant
- Preparation: Bend stem to soil surface without detaching from main plant
- Securing: Use U-shaped wire to pin node areas to moist soil
- Coverage: Lightly bury pinned sections under 0.5 inch (1.3 cm) soil layer
- Timeline: New roots form at nodes within 3-4 weeks consistently
- Separation: Cut new plant free after root establishment visible
Seed Germination
- Timing: Start indoors 8-10 weeks before last frost date
- Sowing: Press seeds lightly into moist seed-starting mix at 0.25 inch (0.6 cm) depth
- Conditions: Maintain steady 70°F (21°C) temperature for germination
- Light: Provide 14-16 hours daily under grow lights after sprouting
- Success Rate: Approximately 30% germination under optimal conditions
- Transplant: Move seedlings outdoors when 3 inches (7.6 cm) tall after hardening
Plant Division
- Timing: Perform in early spring when new growth appears
- Preparation: Water plant thoroughly 24 hours before division
- Separation: Use sharp knife to divide root ball into sections
- Requirements: Each division must have 3+ stems and healthy roots
- Planting: Replant immediately at same depth as parent plant
- Aftercare: Water deeply and provide shade for 1 week
Water Propagation
- Preparation: Take 4-inch (10 cm) cuttings and remove lower leaves
- Setup: Place stems in clear water container on sunny windowsill
- Water Care: Change water completely every 2-3 days
- Timeline: Roots appear in 10-14 days at 70°F (21°C)
- Transplanting: Move to soil when roots reach 2 inches (5 cm) long
- Success Rate: 85% with regular water changes and light
Container and Hydroponic Growth
Use volume measurements to make the ideal growing media: Mix 2 parts potting soil to 1 part perlite, and 1 part coarse sand. This mixture satisfies the sharp drainage needs of thyme. I discovered this ratio could prevent container herbs from experiencing root rot in humid summers in the Midwest.
Combine thyme with rosemary to share watering needs or strawberries to avoid pests. Both rosemary and thyme tolerate drought. Strawberry plants benefit from thyme's oils boiling off in the sunlight, which repels insects. Keep moisture-loving plants (like mint) away, as they will require a separate care regimen on top of your container.
The Thrive hydroponic system runs submersible pumps to circulate nutrient solution every 30 minutes continuously. This steady flow enables greater oxygenation of the roots and provides mineral nutrition. I have noticed that the results produce more bushy plants than traditional growing methods in a mere eight weeks of growth cycles.
To provide adequate levels of light intensity, place containers no more than 6 inches (15 cm) away from south-facing windows. Thyme requires a minimum of 2000-3000 lux for healthy growth. Rotate pots weekly for even light exposure. In winter, use LED grow lights as a supplemental light source to be consistent in growth.
Pot Selection
- Material Choice: Use porous terracotta or fabric pots for optimal air circulation around roots
- Size Requirements: Select containers minimum 8 inches (20 cm) deep and 10 inches (25 cm) wide
- Drainage: Ensure 3-5 drainage holes at bottom to prevent waterlogging and root rot
- Mobility: Choose lightweight pots with saucers if moving between indoor and outdoor locations
- Spacing: Maintain 12-18 inches (30-45 cm) between multiple containers for air flow
Soil Mix Preparation
- Base Components: Combine 2 parts potting soil, 1 part perlite, 1 part coarse sand
- pH Balance: Maintain alkaline mix between pH 6.0-8.0 using limestone gravel topping
- Nutrition: Add 1/4 cup (60 ml) compost per gallon (3.8 L) of soil mix for slow-release nutrients
- Moisture Control: Incorporate water-retaining crystals for hot climates exceeding 90°F (32°C)
- Sterilization: Bake soil at 180°F (82°C) for 30 minutes to eliminate pathogens
Companion Planting
- Rosemary Pairing: Plant thyme with rosemary in shared containers matching water needs
- Strawberry Benefits: Intersperse with strawberries to repel pests while maximizing space
- Avoidance List: Never pair with moisture-loving plants like mint or basil
- Spacing Ratio: Maintain 1 thyme plant per 8-inch (20 cm) diameter container space
- Aesthetic Combos: Combine with silver-leaved santolina for visual contrast and pest deterrence
Light Requirements
- Indoor Placement: Position within 6 inches (15 cm) of south-facing windows
- Daily Duration: Provide minimum 6 hours direct sunlight or equivalent grow lights
- Light Intensity: Maintain 2000-3000 lux for healthy growth in indoor setups
- Seasonal Adjustment: Rotate pots quarterly for even light distribution year-round
- Supplemental Lighting: Use 40W LED grow lights during winter months below zone 7
Watering Techniques
- Frequency Check: Water only when top 2 inches (5 cm) of soil feel completely dry
- Method: Soak soil until water drains from holes then discard excess
- Seasonal Variation: Reduce watering to bi-weekly during winter dormancy periods
- Humidity Control: Place containers on gravel trays to increase ambient humidity
- Quality: Use room-temperature rainwater or filtered water to prevent salt buildup
Thrive Method Fundamentals
- Equipment: Use clear containers with air stone and submersible water pump
- Nutrient Solution: Mix 1 tsp (5 ml) hydroponic fertilizer per gallon (3.8 L) of water
- Root Support: Secure cuttings in neoprene collars suspended above water line
- Light Cycle: Provide 14 hours daily under 6500K LED grow lights
- Water Temperature: Maintain 65-70°F (18-21°C) using aquarium heater if needed
Maintenance Routine
- Water Changes: Replace solution completely every 7 days to prevent algae
- pH Monitoring: Test daily and maintain 5.5-6.5 range using pH up/down solutions
- Root Inspection: Trim brown roots weekly with sterilized scissors to prevent rot
- Nutrient Adjustment: Increase potassium levels when flowering begins
- Harvesting: Snip leaves just before water change for maximum flavor retention
Troubleshooting Guide
- Algae Prevention: Cover reservoirs with opaque materials to block light exposure
- Root Rot Solution: Add 1 ml hydrogen peroxide per liter of water during infections
- Nutrient Deficiency: Identify yellow leaves as nitrogen deficiency sign requiring solution change
- Pump Failures: Clean impellers monthly to maintain proper oxygenation levels
- Temperature Fluctuations: Use aquarium chillers during summer above 75°F (24°C)
Harvesting Optimization
- Timing: Collect leaves during morning hours for peak essential oil concentration
- Method: Cut stems above growth nodes using sterilized micro-tip snips
- Frequency: Harvest up to 1/3 of plant biomass monthly for continuous growth
- Post-Harvest Care: Immediately refresh nutrient solution after harvesting
- Storage: Place cuttings in water-filled containers refrigerated at 40°F (4°C)
System Scaling
- Expansion: Add parallel containers connected to main reservoir with siphon tubes
- Capacity: Support up to 12 thyme plants per 5-gallon (19 L) reservoir
- Automation: Install timers for lights and nutrient dosing pumps
- Vertical Growth: Implement tower systems for space-efficient cultivation
- Monitoring: Use EC meters to maintain 1.2-1.8 mS/cm nutrient concentration
Seasonal Care Adjustments
Thyme will go dormant below 50°F (10°C), which is when you should significantly reduce watering. Keep it moderately moist for the duration above 50° F. For humid conditions, I recommend once every 14 days in the cool season, while in dry areas, I recommend 10-day cycles. That's the temperature that I have seen shift the plant's metabolism for years.
Use frost protection according to your hardiness zone. Zones 5-6 should be heavily mulched with pine needles after the soil cools down. Zones 7-9 do great with a light straw cover during an unexpected cold spell. If the temperature drops to below 30°F (-1°C) overnight, cover the plants with breathable fabric.
Watering frequency varies widely between climates. Humid coastal gardens will need half the irrigation as desert areas. I discovered this the hard way, watching my plants quickly succumb to root rot in Florida. At the same time, I over-watered my Arizona thyme with the kitchen sink faucet turned on.
Use seasonal pest prevention products wisely. Neem oil sprays help control aphids in the spring, while releasing ladybugs can be beneficial in the summer. Remove fallen debris in the fall to disrupt overwintering locations. Pests will lose continuity of the season.
Spring Care (50-70°F/10-21°C)
- Timing: Begin when soil reaches 50°F (10°C) and new growth emerges
- Pruning: Trim woody stems by one-third before new growth hardens
- Fertilizing: Apply 1/4 cup (60 ml) compost per plant after last frost
- Planting: Transplant seedlings when nighttime temperatures exceed 45°F (7°C)
- Pest Prevention: Spray neem oil weekly to deter early-season aphids
Summer Care (70-90°F/21-32°C)
- Watering: Soak deeply every 7-10 days when top 3 inches (7.5 cm) soil dry
- Heat Protection: Install 40% shade cloth above plants during temperatures above 90°F (32°C)
- Harvesting: Collect leaves in early morning before essential oils evaporate
- Disease Control: Improve air circulation with 12-inch (30 cm) plant spacing
- Growth Management: Pinch flower buds to redirect energy to leaf production
Fall Care (50-70°F/10-21°C)
- Preparation: Stop pruning 4 weeks before first expected frost date
- Water Reduction: Decrease watering frequency to every 14 days as growth slows
- Mulching: Apply 2-inch (5 cm) pine needle layer around base after soil cools
- Propagation: Take cuttings for overwintering before temperatures drop below 55°F (13°C)
- Last Harvest: Cut mature stems leaving 5 inches (12.5 cm) for winter protection
Winter Care (Below 50°F/10°C)
- Dormancy Management: Withhold water when soil temperatures drop below 40°F (4°C)
- Frost Protection: Cover plants with frost cloth during temperatures below 30°F (-1°C)
- Container Care: Move pots to sheltered areas with indirect sunlight
- Snow Insulation: Allow 4-inch (10 cm) snow layer to insulate in-ground plants
- Monitoring: Check for rodent damage monthly around plant bases
Year-Round Adjustments
- Zone Variations: Zones 5-6: Extend winter protection by 4 weeks
- Humidity Control: Increase spacing to 18 inches (45 cm) in subtropical zones
- Drought Response: Water established plants only during 14-day dry spells
- Revival Protocol: Apply seaweed extract after extreme weather events
- Microclimate Use: Plant near south-facing walls for 5°F (3°C) temperature boost
Troubleshooting Common Issues
Recognizing leaf discoloration problems can help you identify the issues from the types of discolorations. Yellow leaves typically mean overwatering, and browning edges are a sign of salt buildup in the potting medium. A white coating indicates powdery mildew, which requires treatment by spraying with milk-water spray solutions. Silver speckling suggests the presence of spider mites, which can be treated with neem oil. Black spots are usually fungal problems.
When addressing pest issues, use organic first solutions. "Rather than spraying chemical pesticides on aphids, blast them daily with jet sprays of water. "Use ladybugs for managing pests naturally. "For spider mites, increase humidity with pebble trays. Insecticidal soap can be used every 5 days as a safe option."
To measure the treatment steps accurately, use metric and imperial units, drench 1 gallon (3.8L) of rainwater to flush salt buildup per plant. Apply diatomaceous earth barriers, 2 inches (5cm) wide, to slug-susceptible plants. Space plants 12 inches (30 cm) apart for airflow.
Differentiate between temporary stress and permanent damage. Heating can cause wilting, which can be alleviated by providing shade in the afternoon. In contrast, plants suffering from root rot must be repotted into fresh soil. Frost-burned leaves will regrow in spring; however, stems that have completely turned black indicate permanent loss and will need replacement plants.
Leaf Discoloration
- Yellow Leaves: Sign of overwatering or nitrogen deficiency; reduce watering frequency to every 14 days and apply fish emulsion fertilizer
- Brown Edges: Caused by salt buildup or drought stress; flush soil with rainwater and maintain consistent moisture
- White Coating: Powdery mildew infection; spray with 1:9 milk-water solution every 3 days until resolved
- Silver Speckling: Spider mite damage; rinse leaves with strong water spray and apply neem oil weekly
- Black Spots: Fungal infection; remove affected leaves and improve air circulation around plants
Growth Abnormalities
- Leggy Stems: Insufficient sunlight; relocate to area with minimum 6 hours direct sun or supplement with grow lights
- Stunted Growth: Root-bound in containers or compacted soil; repot in 12-inch (30 cm) diameter container with fresh mix
- No New Shoots: Winter dormancy or nutrient lockout; wait until spring or test soil pH and adjust to 7.0
- Excessive Flowering: Redirects energy from leaves; pinch off buds and apply phosphorus-rich fertilizer
- Wilting in Heat: Transplant shock or root rot; provide afternoon shade and check drainage holes
Pest Infestations
- Aphids Clusters: Blast with water jet daily and introduce ladybugs as natural predators
- Spider Mites: Increase humidity with pebble trays and spray with insecticidal soap every 5 days
- Whiteflies: Hang yellow sticky traps and spray undersides with neem oil solution
- Thrips Damage: Apply spinosad-based organic insecticide at dusk to protect pollinators
- Slug Holes: Surround plants with diatomaceous earth barrier and set beer traps overnight
Environmental Stress
- Frost Damage: Cover with frost blanket when temperatures drop below 30°F (-1°C) and avoid pruning until spring
- Heat Stress: Install 30% shade cloth during temperatures above 95°F (35°C) and water deeply at dawn
- Waterlogged Soil: Amend with perlite and elevate containers on pot feet for drainage
- Wind Scorch: Create windbreak with burlap screen when sustained winds exceed 15 mph (24 km/h)
- Transplant Shock: Water with seaweed solution and protect from direct sun for 1 week
Soil and Root Issues
- Root Rot Smell: Remove plant, trim black roots, and replant in fresh sterile mix
- Nutrient Deficiency: Conduct soil test and amend with specific minerals (e.g., iron for yellow veins)
- Compacted Soil: Aerate with garden fork and incorporate 2 inches (5 cm) compost
- Alkaline Imbalance: Lower pH with elemental sulfur at 1 lb per 100 sq ft (0.5 kg per 9 sq meters)
- Drainage Failure: Create raised beds or mix in 30% coarse sand to clay soils
Harvesting and Preservation
Harvest thyme for its peak potency just before flowering, when leaves are bright green and pliable. The best late spring mornings are after the dew has evaporated, when essential oil contents are at their highest. I always ensure stems are at 6-8 inches (15-20 cm) with dense leaves before cutting back the first batch each season.
Preserving flavor, via these temperature-controlled methods: Air dry bundles in darkness for 1-2 weeks at 60-70°F (15-21°C). Dehydrate leaves for 4-6 hours at 95°F (35°C). Freeze chopped herbs into oil cubes at 0°F (-18°C). Each method will preserve different flavor profiles.
Take careful note of storage duration limits. Refrigerated fresh thyme lasts for 10-14 days; dried leaves can be stored 6-12 months in airtight jars; frozen herb cubes will stay fresh for 8-10 months; infused oils will need to be refrigerated and last for only about 3 months; vinegar infusions will last about 6 months.
Use fresh thyme when you want sauces or other finishing touches to taste aromatic and fresh. Dry thyme will deepen the flavor in stews and braises when cooked for a long time. Frozen, portioned cubes are great in soups. Infused oils make dressings fantastic. After 4 decades of testing all these forms, I've found each form has its benefits in the kitchen.
Optimal Harvest Timing
- Seasonal Peak: Collect leaves just before flowering in late spring for maximum essential oil concentration
- Daily Timing: Harvest during early morning hours after dew evaporates but before heat intensifies
- Plant Maturity: Wait until stems are 6-8 inches (15-20 cm) tall with dense foliage
- Growth Stage: Cut when new growth appears vibrant green and supple before stems turn woody
- Frequency: Harvest up to 1/3 of plant biomass every 4-6 weeks during growing season
Proper Harvesting Techniques
- Tool Selection: Use sterilized micro-tip pruners or sharp scissors for clean cuts
- Cutting Method: Snip stems 1/4 inch (0.6 cm) above leaf nodes at 45-degree angle
- Quantity Control: Never remove more than 1/3 of total plant growth in single session
- Post-Harvest Care: Immediately place stems in water-filled container out of direct sunlight
- Sanitation: Wipe tools with 70% isopropyl alcohol between plants to prevent disease spread
Fresh Storage Methods
- Refrigeration: Wrap sprigs in damp paper towels and store in airtight containers at 40°F (4°C)
- Water Method: Stand stems in 1 inch (2.5 cm) water like cut flowers; change daily
- Duration: Maintain freshness for 10-14 days with proper humidity control
- Preparation: Rinse only before use to preserve protective essential oils
- Revival Technique: Soak wilted sprigs in ice water for 15 minutes before use
Drying Techniques
- Air Drying: Bundle 5-6 stems and hang upside-down in dark, well-ventilated area at 60-70°F (15-21°C)
- Dehydrator Method: Spread leaves on trays at 95°F (35°C) for 4-6 hours until crisp
- Oven Drying: Bake on parchment-lined sheets at 180°F (82°C) for 1-2 hours with door ajar
- Storage: Place dried leaves in airtight glass jars away from light for 6-12 months
- Quality Check: Crush leaves before use; discard if aroma diminishes significantly
Freezing and Infusing
- Ice Cube Method: Chop leaves and freeze in water or olive oil trays at 0°F (-18°C)
- Whole Sprigs: Freeze on baking sheets then transfer to freezer bags for 8-10 months
- Herb Butter: Blend 1 cup (227g) softened butter with 1/4 cup (4g) chopped thyme
- Vinegar Infusion: Steep sprigs in white wine vinegar for 2 weeks at room temperature
- Oil Preservation: Submerge leaves in olive oil and refrigerate for up to 3 months
5 Common Myths
Many gardeners mistakenly believe that thyme requires weekly fertilizing applications to develop strong flavors in its leaves
Thyme actually thrives in nutrient-poor soils due to its Mediterranean origins. Over-fertilizing reduces essential oil concentration in leaves by up to 40% and causes weak, leggy growth. Apply only 1/4 cup (60 ml) of compost annually in spring for optimal flavor development in well-drained soil conditions.
A common misconception suggests that thyme flowers completely ruin the herb's taste profile and should be immediately removed upon appearance
While flowering does slightly reduce leaf oil concentration, thyme blossoms remain edible with a milder flavor and attract essential pollinators. Pinch off only 50% of flower buds to balance culinary quality with ecological benefits. The temporary flavor reduction reverses within two weeks after blooming completes naturally.
Many gardening sources erroneously suggest that thyme will never succeed in a container or balcony-style layout
Container growing is perfect for thyme -- it provides the well-drained soil this Mediterranean herb requires. Use pots at least 8 inches (20 cm) deep, filled with a gritty soil mix, and place them in full sunlight for 6+ hours. Because you can ensure better drainage from the pot than in the ground, potted thyme will tend to perform better than thyme in the garden in climates with high humidity, as they will avoid stem rot.
Many plant care resources argue that consistent hydration is imperative for keeping thyme plant healthy all year round
Thyme's Mediterranean heritage makes it easy on the drought side, requiring water only when the top 2 inches (5 cm) of soil dries out completely. Over-watering can kill the thyme plant by root rot, which can happen in poorly draining soils in as little as 72 hours. For established plants, deep watering can occur weekly during active growth intervals, or monthly in winter dormancy periods.
Popular gardening advice often states that thyme plants grown from seeds develop superior strength compared to propagated cuttings
Seed propagation has low success rates (30%) compared to cuttings (90%) due to thyme's slow germination. Cuttings from mature plants develop robust root systems 50% faster and inherit disease resistance. For reliable results, take 4-inch (10 cm) stem cuttings in spring rather than sowing seeds.
Conclusion
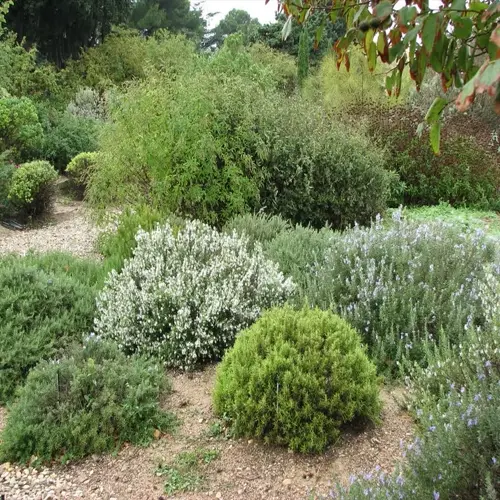
Thyme is a reliable cooking staple and a lovely mat of foliage in the garden. Its plasticky, silvery foliage forms a textured carpet between the stone and reveals its fragrance when brushed. You can see thyme increases culinary and landscaping value simultaneously.
This herb exhibits incredible resiliency through drought tolerance and pest management through natural pest resistance. With a Mediterranean genetic background, it can survive on conservation-level irrigation. It has essential oils that deter all common insects. This, combined with its unique growth habit, makes it incredibly low-maintenance for the busy gardener.
The healthy low-maintenance feel comes through every iteration of growth. From simple cuttings to easy seasonal management, you can quickly understand why this is the best option for a first-time herb grower. You will build self-assurance as you see it rebound from a bit of neglect here and there.
Take pleasure in experimenting with conventional soil gardening versus contemporary hydroponic systems. You may compare the flavor development for both methods. You can also try companion planting with rosemary or strawberries. I know that each technique yields distinct rewards that help expand your gardening abilities.
External Sources
Frequently Asked Questions
What is the secret to growing thyme successfully?
The key is replicating thyme's native Mediterranean conditions: use extremely well-draining gritty soil, provide 6+ hours of direct sunlight daily, and water only when the top 2 inches of soil are completely dry to prevent root rot.
Is thyme better grown in containers or directly in garden soil?
Both methods work, but containers offer advantages in humid climates. Use 8-inch deep pots with a mix of potting soil, perlite, and coarse sand for optimal drainage control that prevents root rot.
Does thyme survive winter and regrow annually?
Thyme is perennial in zones 5-9. Protect plants in winter by mulching with pine needles after soil cools. In colder zones, move containers indoors near south-facing windows during freezing months.
What plants should never be planted near thyme?
Avoid moisture-loving herbs and vegetables that require frequent watering. The worst companions include:
- Mint - competes aggressively and requires wet soil
- Basil - needs constant moisture and shade
- Cilantro - prefers cool, damp conditions
How should thyme be pruned to encourage bushy growth?
Regularly pinch stem tips just above leaf nodes using sterilized pruners. Focus on:
- Removing no more than 1/3 of growth per harvest
- Cutting at 45-degree angles to promote new shoots
- Trimming woody stems in spring before new growth hardens
Can thyme be propagated from cuttings?
Yes, stem cuttings yield 90% success rates. Take 4-inch cuttings in spring, remove lower leaves, apply rooting hormone, and plant in sterile sand. Roots develop in 4-6 weeks at 70°F soil temperatures.
Why do thyme plants develop yellow leaves?
Yellowing indicates overwatering or nitrogen deficiency. Reduce watering frequency to every 14 days and apply fish emulsion fertilizer. Improve drainage by amending soil with perlite if problem persists.
How often should thyme be harvested?
Harvest every 4-6 weeks during growing season, collecting just before flowering when essential oils peak. Cut stems in early morning, leaving 5 inches of growth for winter protection in colder zones.
What are the best methods to preserve thyme?
Preserve flavor through:
- Air drying - hang bundles upside-down in ventilated darkness
- Freezing - chop leaves into ice cube trays with olive oil
- Infusing - steep sprigs in vinegar for 2 weeks at room temperature
Does thyme attract beneficial insects to gardens?
Yes, its flowers attract pollinators like bees and butterflies while repelling harmful pests. The essential oils naturally deter cabbage moths and tomato hornworms, making it excellent companion planting.