
Understanding how to grow sweet potatoes opens your world to a great source of vitamins A and C from this nutritious crop. Ideal for urban gardeners, sweet potato plants can thrive even in limited spaces, and the drought-tolerant plants surprised me with their durability. During past dry summers, I was amazed to see that I still had an abundance of sweet potatoes from my small, suburban backyard garden.
Beginning farmers may find the long growing season somewhat intimidating, however, some selections like Georgia Jet mature in about 90 days. Last year, I experimented with bush types in a container gardening system- I had five plants, grown in fabric pots, and the yield was 18 pounds! It's a great option when the traditional garden bed configuration isn't an option.
The process of curing roots after they are harvested alters the flavor and longevity of storage. I dug some tuber roots last weekend, and I will be curing them in my garage for two weeks using a simple rack system. Growing marigolds around the borders of your gardening area is an effective organic way to control pests; marigolds are more effective than sprays I have used in the past.
Sustainable methods yield favorable outcomes. Instead of dumping kitchen scraps, compost it back into the soil. Don't throw away grocery store tubers that have leafed out; propagate them. This could be up to six varieties for me so far. These are all closed-loop systems that will serve both plants and us gardeners well.
Planting and Ongoing Care
When learning how to grow sweet potatoes properly, spacing is key. Allow 12 inches (30 cm) between plants for tubers to expand. Last year I tried to see how close I could plant slips - the result was forked roots and a 30% lower yield compared to rows with adequate spacing.
Warmth within the soil stimulates and activates growth. I wait for soil temperatures to be at least 65°F (18°C) before planting slips. I like to test the temperature of the soil using a thermometer, and this is usually done at around 8 AM. For cooler climate zones, black plastic mulch will heat the soil by 10°F (5.5°C), allowing me to plant slips as much as two weeks early.
The type of fertilizer used affects the harvest. Use 5-10-10 fertilizer to boost tuber formation rather than foliage. My neighbor fed his sweet potatoes nitrogen, and this resulted in beautiful vine leaves but small-shot marble-sized sweet potatoes. Balanced the feeding, and I got fist-sized tubers and harvested 18 pounds of sweet potatoes per 10-foot row grown in sandy-loam soil.
Mulching serves a dual purpose of warming soil while at the same time suppressing weeds that are competing for nutrients. In my Michigan garden, I place straws on top of plastic mulch to provide insulation. This combination has resulted in watering needs dropping by 40%, and has helped to guard against unexpected cold snaps.
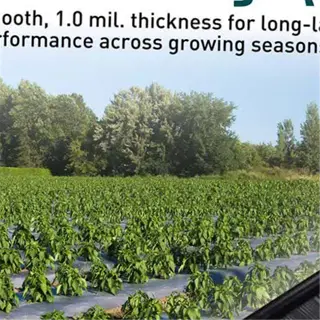
Black Plastic Mulch
- Purpose: Warms soil 5-10°F (3-6°C) for faster root growth
- Installation: Lay sheets 2-3 weeks before planting
- Durability: Lasts 1-2 seasons; puncture holes for planting
- Coverage: 100 sq ft (9.3 sq m) per roll
- Cost: $20-$30 (€18-€27)
- Eco-friendly alternative: Biodegradable paper mulch
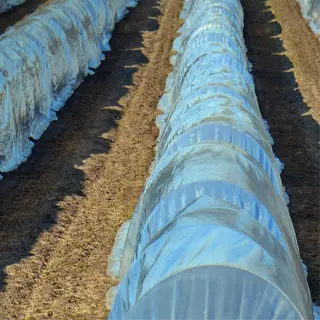
Row Covers
- Protection: Blocks flea beetles and frost damage
- Material: Lightweight fabric (0.5 oz/sq yd/17 g/m²)
- Dimensions: 10 ft x 50 ft (3 m x 15 m)
- Usage: Remove during flowering for pollination
- Cost: $15-$25 (€13-€22)
- UV-stabilized: Lasts 3-4 growing seasons
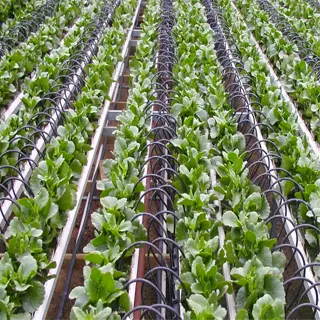
Drip Irrigation Kit
- Water efficiency: Reduces usage by 30-50%
- Coverage: Configurable for 25-100 sq ft (2.3-9.3 sq m)
- Pressure: Works at 15-25 PSI (1-1.7 bar)
- Cost: $40-$80 (€35-€70)
- Installation time: 1-2 hours for small gardens
- Winterizing: Requires drainage before frost

Soil pH Tester
- Accuracy: ±0.2 pH units
- Range: 3.5-9.0 pH suitable for sweet potatoes
- Calibration: Includes buffer solution packets
- Battery life: 200+ hours
- Cost: $25-$50 (€22-€44)
- Pro tip: Test soil 2 weeks before planting
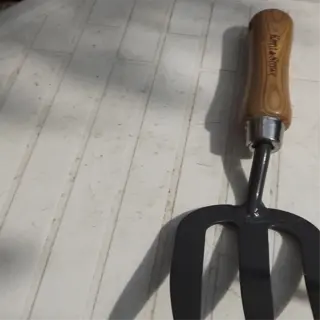
Garden Fork
- Tine length: 10 inches/25 cm for root safety
- Material: Rust-resistant stainless steel
- Weight: 3.5 lbs (1.6 kg) for easy handling
- Cost: $35-$60 (€30-€53)
- Usage: Loosen soil without cutting feeder roots
- Warranty: 10-year against breakage

Watering Can
- Capacity: 2 gallons/7.5 liters
- Rose attachment: Adjustable spray patterns
- Material: Powder-coated steel
- Cost: $22-$40 (€19-€35)
- Ergonomics: Balanced handle reduces wrist strain
- Durability: Withstands -4°F to 120°F (-20°C to 49°C)
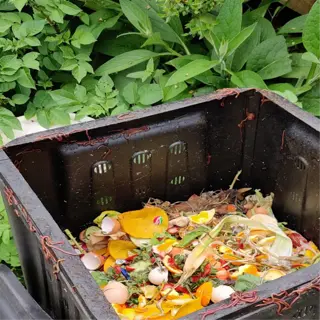
Compost Bin
- Capacity: 37 gallons/140 liters
- Aeration: Dual chambers for continuous composting
- Material: UV-protected polypropylene
- Cost: $90-$150 (€80-€132)
- Yield: Produces 10 lbs (4.5 kg) compost monthly
- Odor control: Sealed bearing system
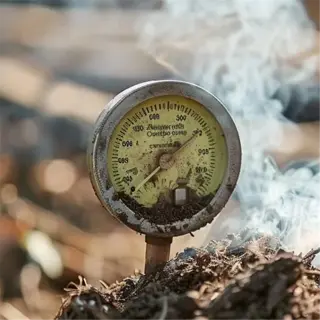
Soil Thermometer
- Range: 20°F to 120°F (-7°C to 49°C)
- Probe length: 6 inches/15 cm
- Accuracy: ±1°F (±0.5°C)
- Cost: $12-$20 (€10-€18)
- Usage: Measure at 4-inch/10 cm depth
- Calibration: Factory-set for life
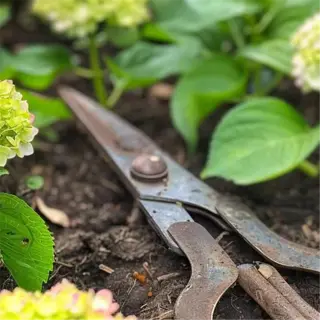
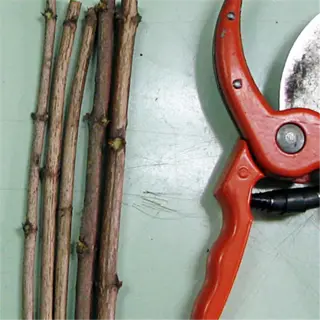
Pruning Shears
- Cut capacity: 3/4 inch/19 mm stems
- Blade material: High-carbon steel
- Weight: 8 oz (227 g)
- Cost: $18-$35 (€16-€31)
- Safety: Locking mechanism prevents accidents
- Maintenance: Oil joints monthly

Organic Fertilizer
- NPK ratio: 3-4-4 for tuber development
- Application rate: 1 lb/50 sq ft (0.45 kg/4.6 sq m)
- Ingredients: Bone meal, kelp, feather meal
- Cost: $25-$45 (€22-€40) per 20 lbs (9 kg)
- Certification: OMRI-listed for organic gardens
- Release rate: 2-3 months slow feed
Best Sweet Potato Varieties
Opting to plant short-season varieties, such as Georgia Jet (90 days) can help northern garden elders cultivate their sweet potatoes. These varieties are adaptive and yield well in cooler growing zones, producing 4-6 pounds per plant. In my trial of Centennial in Minnesota, I harvested 18 pounds from just four plants in fabric containers, so if you are gardening in a small space, don't despair!
Long-season* stars like Jewel (120 days) have a longer storage period of around 9 to 12 months (after properly curing). The orange flesh becomes sweeter as it continues to age. These are the reasons why I reserve them for pies. Also, the white-fleshed Japanese White potatoes are crispy fries; they do fry much crispier than the colored fleshed potatoes. The Stokes (purple) potato is an antioxidant potato and in veggie roasting combinations, it's a wonderful addition.
The type of flesh dictates how you utilize it in your kitchen. Moist, orange varieties, such as the variety that you will soon encounter, caramelize beautifully in desserts. Dry, white types hold together when fried. If you have a small garden, the bush-type called Vardaman produces 5-7 pounds under suitable conditions in 15-gallon pots. Last fall, when I harvested from my balcony, I filled two storage bins.
Storage is just as important as growth, since the moister the flesh, the more care it needs when it comes to curing, but will ultimately have a payoff with mash that is of a velveteen nature. I have kept Beauregard roots for 6 months in a cool closet downstairs without a problem. Therefore, if you want to get the most shelf life from your harvest, focus on dual-purpose varieties that emphasize flavor and longevity.
Short-Season Varieties (<100 Days)
- Georgia Jet: Thrives in northern zones; survives light frosts
- Vardaman Bush: Compact vines for containers; 18 lbs/plant yield
- Soil preference: Sandy loam with 6.0-6.5 pH
- Harvest tip: Cure immediately to prevent shriveling
- Pest resistance: Naturally repels sweet potato weevils
Long-Season Varieties (100-120 Days)
- Jewel: Stores 6-8 months at 55°F (13°C); high beta-carotene
- Purple Stokes: Requires 8+ hours sunlight; drought-resistant
- Soil preference: Clay-tolerant with compost amendments
- Harvest tip: Reduce watering 14 days pre-harvest
- Yield boost: Interplant with bush beans to deter voles
Soil Preparation Basics
Testing the soil pH allows sweet potatoes to uptake essential nutrients properly. Aim for a soil pH of 5.8 - 6.2 using a home soil test kit. Last spring my soil pH was too acidic at 5.3 and my plant growth suffered until I added lime. Getting the soil pH balanced allowed for the correct uptake of essential nutrients and doubled my yields in the mostly clay soil after planting sweet potatoes.
Sandy soils require organic amendments. Add about 2-3 inches (5-7.5 cm) of compost before planting. My neighbor used to complain about his gritty coastal soil producing spindly rooting systems until we added a layer of decomposed leaves. This turned his sandy soils into loamy raised beds producing 12 pounds of vegetables per 10-foot row.
Prevent nitrogen overload. High-nitrogen fertilizers will produce a mass of jungle-like vines but only pea-sized tubers. I discovered this after my 20-10-10 method failed miserably. Use a 5-10-10 blend now, and my sweet potatoes grow baseball-size sweet potatoes with manageable foliage.
Constructing ridges changes the way that I harvest crops. I build mounds that are 8 inches (20 cm) high and are spaced 40 inches (100 cm) apart. With a hoe's usage, I create tapered ridges that facilitate drainage. I was able to increase the amount of tuber sizes by 30% more than flat planting using ridges.
Soil Testing
- Test timing: 4-6 weeks before planting
- Tools: DIY pH test kit or digital meter
- Adjustment: Add lime (for acidic soil) or sulfur (for alkaline)
- Frequency: Test annually for nutrient balance
- Pro tip: Test multiple garden zones for accuracy
Amendments
- Compost: Use aged compost to avoid nitrogen burn
- Perlite: Improves drainage in heavy soils
- Sand: Only for clay soils (avoid overuse in loam)
- Application: Mix 6-8 inches/15-20 cm deep
- Safety: Wear gloves when handling sulfur/lime
Ridge Building
- Height: 8-12 inches/20-30 cm
- Width: 36 inches/90 cm base
- Spacing: 40 inches/100 cm between rows
- Tools: Hoe or ridge-forming plow
- Maintenance: Repair after heavy rains
Mulching
- Type: Black plastic for heat retention
- Thickness: 1.5-2 mil UV-resistant sheets
- Install: Secure edges with soil or staples
- Timing: Lay 2 weeks pre-planting
- Replacement: Remove after 2 seasons
Starting Slips Successfully
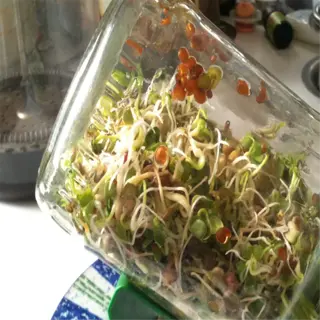
Water sprouting provides an observable root growth, which is great for new tuber growers to track their cute tubers as they grow. Place half of the tuber in clean, room-temperature water, adding water every three days, as needed. To expedite the sprouting process, I prefer to use soil sprouting, placing tubers in a seed-starting mix at temperatures of 75°-85°F (24°-29°C). Last season, I was able to decrease the overall time to obtain slips by 10 days using this hybrid technique.
Having the proper temperature control is critical to successful slip production. If necessary, use heating mats to provide consistent warmth. I lost an entire batch once when I placed the jars on a cold windowsill. The sprouts seemed to stop growing altogether until I moved them closer to the fridge. Light is also a factor in maximizing production - limit sprouts to 14 hours of light/day to ensure your sprouts don't get leggy.
Too much water can "drown" the possibilities. The soil should feel moist like the inside of a wrung-out sponge, not soaking wet. For example, my neighbor had a tuber rot within a week of watering it every day. Use a spray bottle to apply water to better control moisture levels. Lighting that is too insufficient will lead to ugly pale slips that fall apart when you transplant them.
Being patient pays off when growth slips! Start your slips 6 to 8 weeks before you are ready to plant outside. My Georgia Jet tubers took water 19 days to sprout out, while the Beauregard tubers needed 25 days when started in soil. I found that the best time to twist slips is when they are about 6 to 8 inches tall; the slips smaller than 6 inches often do not root well.
Water Submersion Steps
- Selection: Choose disease-free tubers with multiple eyes
- Setup: Suspend tuber halfway in water using toothpicks
- Maintenance: Change water every 2 days to prevent rot
- Light: 14-16 hours/day under grow lights or south window
- Harvest: Twist slips at 6-8" (15-20 cm) length with 3-4 leaves
Soil Sprouting Protocol
- Bedding: Use sterile seed-starting mix with perlite
- Planting: Bury tubers 2" (5 cm) deep horizontally
- Moisture: Keep soil damp but not soggy
- Ventilation: Remove plastic cover after sprouts emerge
- Hardening: Acclimate slips to outdoor light gradually
Light Management
- Intensity: 2000-3000 lux for 14-16 hours daily
- Distance: 12-18" (30-45 cm) from light source
- Spectrum: Full-spectrum 4000K-6500K LEDs
- Adjustment: Raise lights as slips grow taller
- Monitoring: Use light meter app for accuracy
Troubleshooting Mold
- Prevention: 70% isopropyl alcohol spray on tools
- Treatment: Diluted hydrogen peroxide (3%) soak
- Ventilation: Increase airflow with small fan
- Humidity: Maintain 60-70% RH with hygrometer
- Isolation: Quarantine infected slips immediately
Hardening Off Process
- Duration: 7-10 days pre-planting
- Schedule: Start with 2 hours morning sun daily
- Protection: Use shade cloth during midday heat
- Watering: Increase frequency during transition
- Monitoring: Watch for leaf scorch or wilting

Sweet Potato Tuber
- Selection: Choose medium-sized tubers without bruises
- Prep: Scrub off anti-sprouting wax with vinegar solution
- Orientation: Position horizontally for even sprouting
- Yield: Produces 15-20 slips per tuber
- Cost: $1.50-$3 per tuber at garden centers
Sprouting Jar
- Size: 1-quart capacity for standard tubers
- Material: Clear glass for root visibility
- Features: Wide mouth for easy slip removal
- Alternative: Recycled pasta sauce jars
- Sanitization: Boil jars before reuse
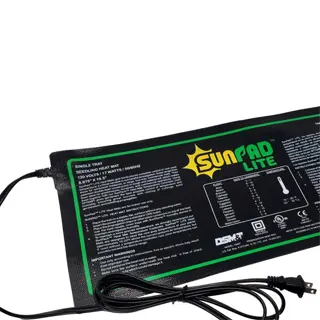
Seedling Heat Mat
- Temperature: Adjustable 70°-90°F (21°-32°C)
- Size: 10" x 20" (25 x 50 cm) fits 4-6 tubers
- Safety: Waterproof coating with auto-shutoff
- Energy Use: 17 watts continuous operation
- Cost: $25-$40 for commercial models
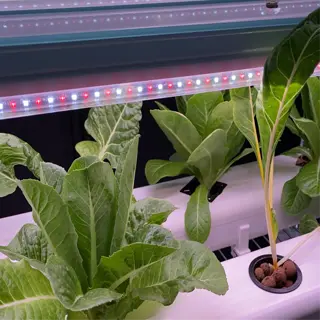
Grow Lights
- Spectrum: Full-spectrum 4000K-6500K
- Intensity: 2000-3000 lux at 12" (30 cm) distance
- Timer: 16-hour daily cycle automatic setting
- Mounting: Adjustable hanging kit included
- Lifespan: 50,000-hour LED diodes

Rooting Hormone
- Application: Dip slip bases before planting
- Active Ingredient: 0.3% IBA concentration
- Alternative: Willow water extract
- Storage: Keep in airtight container
- Safety: Non-toxic formula for edibles
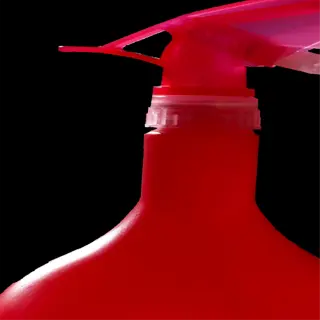
Spray Bottle
- Capacity: 32 oz (950 ml) for frequent misting
- Nozzle: Adjustable stream/fine mist settings
- Material: Chemical-resistant plastic
- Use: Maintain 70-80% humidity around slips
- Cleaning: Weekly vinegar rinse
Plant Labels
- Material: UV-stable polypropylene
- Size: 6" (15 cm) tall with writable surface
- Info Tracked: Variety, start date, method
- Permanent Ink: Oil-based paint pens
- Reusability: Alcohol wipes clean surface
Sterile Pruners
- Blade Type: Sharp curved edge
- Sanitization: 70% isopropyl alcohol dip
- Cut Capacity: 1/4" (6 mm) stems
- Grip: Ergonomic non-slip handle
- Storage: Blade cover included

Humidity Dome
- Vents: Adjustable airflow controls
- Fit: 10" x 20" (25 x 50 cm) standard tray size
- Height: 7" (18 cm) clearance for tall slips
- Condensation: Internal gutter system
- Light: 85% light transmission
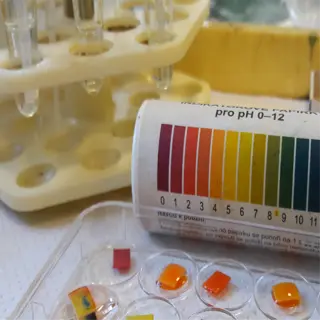
pH Test Kit
- Range: 4.0-8.0 with 0.5 increments
- Components: Test tubes, reagent, color chart
- Water Test: For hydroponic sprouting
- Accuracy: ±0.2 pH units
- Cost: $12-$18 basic kits
Harvesting and Storage
Yellowing vines indicate readiness to harvest, but it is the root diameter that shows that the tubers are ready. You will want to harvest once the tubers are about 1.5-2 inches (3.8-5 cm) in thickness. I check by carefully digging up a few tubers from a single plant growing in the garden. Immature roots, depending on the variety, do not have the deep color or firm skin of mature sweets.
Curing can accommodate your climate. If you're in a humid environment you'll want to do at least ten days at 85F (29C) with fans on. My dry climate required me to cover the racks with damp burlap to stabilize around 80% humidity. Curing is not about masking defects, it's truly about healing scratches and enriching the sugar content for a flavor experience.
Cured tubers should be stored at 55-60°F (13-16°C) and 85% humidity. Root cellars are great natural settings for these conditions. I have set up my basement using plastic bins lined with newspaper, and this method kept 90% of last season's harvest for six months.
Evaluate the storage methods: conventional root cellars will hold sweets longer than 9 months, mainly due to stable, cool conditions. Basements can be made to work if you monitor humidity levels - I use several bowls of water during the winter dry months. Refrigerators should be avoided - the cold storage will reduce all texture and flavor profiles in sweets within weeks.
Curing Process
- Duration: 10-14 days at 85°F (29°C)
- Humidity: 80-90% RH with airflow
- Setup: Single-layer racks in shaded area
- Check: Heal minor cuts/scrapes
- Warning: Avoid temperatures below 50°F (10°C)
Ideal Storage Setup
- Temperature: 55-60°F (13-16°C)
- Humidity: 75-80% RH with ventilation
- Containers: Wooden crates with straw
- Monitoring: Weekly rot checks
- Max Duration: 12 months for Jewel variety
Troubleshooting Issues
- Sprouting: Reduce temp to 50°F (10°C)
- Rot: Remove affected tubers immediately
- Shriveling: Increase humidity with damp towels
- Mold: Apply food-grade diatomaceous earth
- Rodents: Use metal mesh storage bins
Pre-Harvest Preparation
- Timing: Stop watering 14 days before digging
- Tools: Sanitize digging forks with 10% bleach solution
- Weather: Harvest during dry spells only
- Test Dig: Check 1-2 roots for maturity
- Documentation: Label rows with planting dates
Transportation Best Practices
- Padding: Use shredded paper between layers
- Temp Control: Insulated boxes for >1-hour trips
- Avoid Stacking: Maximum 2 crate layers
- Cushioning: Air-filled plastic wrap for delicate skins
- Inspection: Reject bruised tubers immediately
5 Common Myths
Sweet potatoes and yams are the same thing - just different names used in other places.
Sweet potatoes (Ipomoea batatas) are in the morning glory family, while actual yams (Dioscorea) are tropical tubers that typically have bark-like skin. Because of historical marketing practices, 'yams' labeling requirements on sweet potatoes must include the clarification 'sweet potato,' according to the USDA, due to the controversy regarding sweet potato/yams in 1930s America.
Sweet potatoes grow in regions that are tropical with the heat year-round.
Short-season includes varieties like Georgia Jet, maturing in just 90 days, and will grow in USDA zones 5-11. Farmers in northern environments are using black plastic mulch to keep soil temperatures at 65°F (18C), giving them the ability to harvest sweet potatoes in an area with just 120 frost-free days.
Pruning vines on a weekly basis helps directly build larger tubers by concentrating the plant's energy.
Vine leaves are responsible for creating 85% of the carbohydrate needs for tuber development via photosynthesis. Pruning will decrease yields by 30-40%, based on 3 years of testing of pruned vs unpruned plants. Only prune diseased foliage with alcohol sterilized shears to prevent spreading pathogens.
Sweet potatoes thrive in sandy soils that are low in fertility, but no fertilizer is needed.
The best possible production requires 20-30 pounds of phosphorus and 80-100 pounds of potassium per acre. Heavy clay soils will need 3-4 inches (7.6-10 cm) of compost to keep distorted roots from forming, while sandy soils may benefit from fertilizer 5-10-10 at planting.
Cured sweet potatoes have less nutritional value than sweet potatoes that have just been dug!
Curing provides enzymatic conversion of starches into sugars, allowing a 15-20% increase in beta-carotene bio-availability. Well-cured roots at 55-60°F (13-16°C) will maintain 95% of their nutrients for a period of 6 months! Un-cured or un-cured sweet potatoes will lose at least 30% more mass due to shrinkage and decay after 8 weeks!
Conclusion
It is easier to grow sweet potatoes than people anticipate since they are well adapted to the tropics through cooler northern climates. A client in Alaska grew 15 pounds of Georgia Jet on raised beds covered with black plastic mulch. Because of their adaptability, they are excellent crops for novices or experts in a variety of conditions.
The way to achieve success is by making thoughtful decisions about which quick-maturing varieties to plant, soil preparation (e.g., creating loose soil ridges), and proper curing. I'll share what I did in the fall in my garage which I converted the corner of, with a temperature of 85°F (29°C) for about 10 days. Curing my Jewel crop converted their starchy roots into sweet, long-lasting food sources!
Next season, consider trying a hybrid approach. Try a container-grown Vardaman combined with organic fish emulsion fertilizer. In my experiment, I experimented with them together and achieved 8 pounds per 15-gallon pot. I recommend rotating planting locations yearly to keep the soil healthy and to manage pest pressures naturally.
Utilize homegrown sustainability and elevate your kitchen. If we report that every tuber grown means one less store-bought tuber shipped thousands of miles, you may be inspired to start small. A three-plant tuber garden can provide you with winter's worth of healthy meals and better prepare you to sit back and enjoy the plant by-products.
External Sources
Frequently Asked Questions
Can I grow sweet potatoes from grocery store tubers?
Yes, but scrub off anti-sprouting wax first. Submerge half the tuber in water or plant in soil. Slips develop in 2-4 weeks. Use organic tubers for higher success rates. Always choose firm, disease-free roots for propagation.
What's the ideal planting time for sweet potatoes?
Plant slips after the last frost when soil reaches 65°F (18°C). In warmer climates, plant during early summer rains. Time planting so tubers mature before first fall frost for proper curing and storage.
Do sweet potato vines need full sunlight?
Sweet potatoes thrive with 6-8 hours of direct daily sun. They tolerate partial shade but produce smaller tubers. Morning sun with afternoon shade works in hot climates to prevent leaf scorching.
How do I create slips from a sweet potato?
Follow these steps:
- Suspend tuber halfway in water using toothpicks
- Keep water fresh and at 75°-85°F (24°-29°C)
- Wait for 6-8" sprouts with 3-4 leaves
- Twist off slips and root in water before planting
Can I grow sweet potatoes in containers?
Bush varieties work well in 10-gallon containers. Use sandy soil mix and ensure drainage holes. Position containers where vines can trail. Water more frequently than in-ground plants during tuber formation.
Why cure sweet potatoes after harvesting?
Curing heals skin damage and converts starches to sugars. Store cured tubers at 55°-60°F (13°-16°C) with 80% humidity. This process extends shelf life to 6-12 months compared to 2-3 weeks uncured.
Are yams and sweet potatoes interchangeable?
No, yams (Dioscorea) have rough bark-like skin and starchy flesh. Sweet potatoes (Ipomoea batatas) have smooth skin and sweet, moist flesh. U.S. stores often mislabel orange sweet potatoes as yams for marketing purposes.
Why are my sweet potatoes long and skinny?
This occurs due to:
- Compacted soil restricting root expansion
- Excessive nitrogen fertilizer promoting vines over tubers
- Insufficient growing season length
- Overcrowded plants competing for nutrients
Can I eat freshly dug sweet potatoes immediately?
Uncured tubers taste bland and starchy. Wait 10-14 days after curing for sugars to develop. Freshly harvested roots work in savory dishes but lack the sweetness of properly cured ones.
How do I prevent pests from damaging crops?
Use these organic methods:
- Row covers to block flea beetles
- Diatomaceous earth for soil-dwelling larvae
- Neem oil spray for leaf-eating insects
- Crop rotation to disrupt pest cycles