
Discovering the art of growing sage means unlocking a world of flavor! This hardy herb can truly change your dishes, especially in classic recipes like stuffing for your Thanksgiving turkey. Its fragrant foliage adds a delicious touch to festive food. You'll also come to appreciate the reliability of growing it in your kitchen garden.
Once established, sage is happy with very little water. The drought-tolerant nature of sage makes it an ideal choice for eco-friendly gardens. Sage also attracts bees and butterflies, which helps to support the ecosystem of your garden organically. Pollinators will visit regularly throughout the summer.
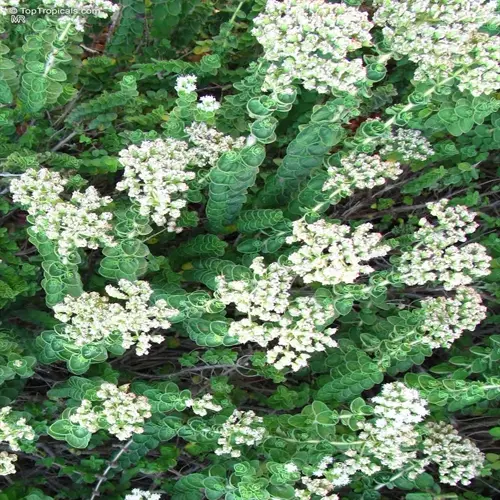
Even small spaces can work to grow sage. Container gardening adds adaptability for urban environments. Use Common sage for recipes Grandma used to make. Use Purple sage for color. Use Pineapple sage for fruity flavors. Each sage variety has a unique culinary use.
Companion Planting Strategies
Companion planting with sage gives you natural pest control in your garden! The strong odor from the herb will repel cabbage moths and carrot flies. I have firsthand experience that planting sage near your brassicas tends to limit caterpillar damage. This is a form of organic pest control that can help protect your vegetables without the need for chemicals.
To optimize the use of your garden area, think about pairing plants wisely. Sage does well paired with tomatoes, rosemary, and beans. These plants work to create garden synergy, sharing nutrients without waste. Avoid planting near cucumbers or onions, as they compete for the same nutrients. When designed thoughtfully, overall harvest yields can be maximized.
Sage can deter pests from attacking tomatoes. Cabbage is protected from undesirable insects. Rosemary has soils similar to those of the other plants. Carrots are less susceptible to root fly damage. Strawberries are tastier. Always keep 18 inches between plants.
Plants that are incompatible create problems. Onions inhibit the root development of sage, cucumbers can cause excess moisture issues, and rue can inhibit growth patterns. I learned all of this through trial and error. Keeping these plants away from each other resulted in healthier plants and better outcomes.
Storing and Preserving Sage
Herb preservation can stretch out your sage harvest throughout the year. Air-dried sage can keep for a year, while frozen sage will stay good for around 6 months. Any herb-infused oil needs to be kept in the refrigerator and used within a month. There's no right or wrong herb preservation method; it's purely a matter of your cooking habits and storage space.
Dried sage emphasizes flavors very well for rubs and seasoning blends. Hang in a dark, ventilated place for 1-2 weeks. The leaves should be crispy when ready. Store whole in epoxy-sealed jars to retain essential oils. Crush before using.
Freezing captures fresh flavor better in soups and sauces. You can freeze whole leaves in freezer bags or make herb ice cubes. Frozen herbs maintain that flavor as if just-picked. Blanching the leaves helps preserve their bright green color during storage.
Creating infused oils can be challenging. As mentioned before, it's best to use dried sage to avoid botulism. Use oils immediately after straining or refrigerate them right away. Also, discard any infused oil that looks cloudy or bubbly. After an unfortunate batch spoiled quickly, I'm now more aware. Safety first! No one wants a foodborne illness.
Air Drying
- Process: Gather 6-8 inch stems into small bundles and hang upside-down in a dark, dry location with good airflow to prevent mold formation during the dehydration process
- Duration: Leave undisturbed for 1-2 weeks until leaves become brittle and crumble easily between your fingers when tested
- Storage: Remove fully dried leaves from stems and store in airtight glass containers away from direct sunlight or heat sources to preserve essential oils
- Shelf Life: Maintains optimal flavor for cooking purposes up to one year when stored in proper conditions
- Best Uses: Ideal for creating seasoning blends and dry rubs where concentrated flavor is desired
- Quality Check: Crush a leaf; if it releases a strong aroma without mustiness, it's properly preserved
Freezing
- Method: Place whole undamaged leaves in single layers inside freezer bags removing as much air as possible before sealing tightly
- Blanching: Briefly dip leaves in boiling water then ice bath to preserve vibrant green color before freezing for later culinary use
- Ice Cubes: Chop fresh leaves and pack into ice cube trays covered with water or olive oil for convenient portioning
- Usage: Add frozen herb cubes directly to soups, stews, and sauces during the cooking process without thawing
- Shelf Life: Retains best quality for six months though remains safe indefinitely when kept frozen solid
- Thawing Tip: Use immediately after removal from freezer to prevent texture deterioration and flavor loss
Refrigeration (Fresh)
- Short-term Storage: Stand stem ends in a small water-filled container like fresh flowers and cover loosely with plastic
- Location: Place in refrigerator door where temperature fluctuates less than main compartment shelves
- Maintenance: Refresh water completely every 2-3 days and trim stem ends to maintain hydration and freshness
- Duration: Stays crisp and usable for 10-14 days using this simple water-based preservation method
- Humidity Control: Add a dry paper towel inside plastic covering to absorb excess moisture and prevent rot
- Preparation: Wash leaves only immediately before use to avoid premature wilting during storage period
Dried Herb Storage
- Grinding: Crush completely dehydrated leaves using mortar and pestle or electric grinder to create fine powder
- Containers: Select small dark glass jars with tight-sealing lids to block light exposure and air infiltration
- Labeling: Clearly mark containers with harvest date and variety name for proper rotation and usage tracking
- Usage: Perfect for seasoning blends, marinades, and dishes requiring evenly distributed herb flavor
- Moisture Prevention: Add silica gel packet under jar lid to absorb ambient humidity that causes clumping
- Flavor Preservation: Store away from heat sources like stoves which accelerate essential oil evaporation
Infused Oils
- Preparation: Completely submerge dried sage leaves in high-quality olive oil and steep for 2-3 weeks before straining
- Safety: Refrigerate immediately after preparation and discard if cloudiness, bubbles, or off-odors develop
- Applications: Excellent for salad dressings, bread dipping, and marinades where herbal oil enhances dishes
- Caution: Never leave at room temperature longer than two hours due to botulism risk in oil infusions
- Shelf Life: Consume within one month for best flavor and safety when stored under constant refrigeration
- Herb Removal: Strain thoroughly through cheesecloth to eliminate plant particles that accelerate spoilage
Troubleshooting Common Issues
Powdery mildew is one of the most severe plant diseases. You can actually see the white powder covering the leaves during humid weather. This fungal disease can spread very quickly. It must be treated immediately with an organic baking soda spray. Use one tablespoon per gallon of water, which is very effective in stopping the spread.
Root rot is a serious threat to plants growing in waterlogged soil! You'll know you have root rot if your plants are wilting, even though the soil is wet, and you notice dark, mushy roots. You can address this dire garden issue by fixing the drainage right away! Amend the soil with sand and reduce watering frequency. Carefully prune the damaged roots to preserve your plants!
You can see aphid infestations by the clusters of visible insects found on new growth. Water sprays that are vigorous enough for removal manage pests. Introduce ladybugs to control them naturally. For deterrence purposes, I keep nasturtiums close to my vegetables. For extra insurance, using neem oil application helps protect without the use of pesticides.
Spider mites cause the yellow stippling of the leaves. Increase the humidity around your plants to repel them. Spray rosemary oil weekly. Cut back any unproductive woody growth as hard as possible in the spring. This will encourage new shoots and prolong the plant's life.
Powdery Mildew
- Symptoms: White powdery coating on leaves that spreads rapidly in humid conditions
- Causes: Poor air circulation combined with high humidity around plant foliage
- Organic Solution: Spray affected plants with baking soda solution (1 tbsp per gallon of water)
- Prevention: Space plants 24+ inches apart and avoid overhead watering methods
- Environmental Control: Morning sun exposure helps dry dew quickly reducing infection risk
- Treatment: Remove severely infected leaves and improve surrounding airflow immediately
Root Rot
- Symptoms: Wilting leaves despite moist soil and dark, mushy roots when examined
- Causes: Overwatering or poorly draining soil creating oxygen-deprived conditions
- Rescue Attempt: Carefully remove plant and trim affected roots with sterilized shears
- Soil Correction: Amend planting area with sand/perlite to increase drainage capacity
- Prevention: Water only when top 1-2 inches of soil are completely dry to touch
- Container Solution: Use pots with drainage holes and well-draining potting mix
Aphid Infestation
- Symptoms: Clusters of small green/black insects on new growth and sticky honeydew residue
- Natural Removal: Spray plants with strong water jet or apply insecticidal soap spray
- Beneficial Insects: Introduce ladybugs or lacewings that feed on aphid populations
- Companion Planting: Grow nearby nasturtiums or garlic to deter future infestations
- Severe Cases: Apply neem oil solution weekly until pests are fully controlled
- Prevention: Regularly inspect undersides of leaves where aphids commonly gather
Spider Mites
- Symptoms: Fine webbing on leaves with stippled yellow spots on foliage surface
- Identification: Tiny red/brown mites visible when shaking leaves over white paper
- Treatment: Spray plants thoroughly with water daily for one week to disrupt colonies
- Organic Control: Apply rosemary oil solution which suffocates mites effectively
- Environmental: Increase humidity around plants as mites thrive in dry conditions
- Prevention: Keep plants properly watered and avoid excessive nitrogen fertilization
Woody, Unproductive Growth
- Symptoms: Thick, woody stems with sparse leaf production after 3-4 years
- Rejuvenation: Cut back hard in early spring leaving only 2-3 inches of growth
- Timing: Perform major pruning before new growth emerges each spring season
- Propagation: Take cuttings from healthy stems to establish replacement plants
- Preventive Care: Regular light harvesting encourages bushier new growth patterns
- Replacement: Plan to replace plants every 4-5 years for optimal productivity
Planting Sage Step-by-Step
For successful sage planting, you need to plant at the right time. Plant sage after the last frost in spring, when the soil is between 60 and 70 degrees Fahrenheit. If you are in warmer zones 7 and above, fall planting is an option. Be diligent about checking your local frost dates to ensure that the plant has a strong root system.
Select either an in-ground garden or a container garden, depending on the available space. For in-ground planting, choose sunny locations with good drainage. For container gardening, it is simple for patios with messy or wet areas. Use pots that are 12 inches deep with drainage holes. Both methods yield a substantial harvest.
Correctly preparing the soil is critical for sage growth. Amend clay soil with compost and sand to provide better texture. If testing pH, aim for a range of 6.0-7.0. Mix potting soil with perlite for containers. Water moderately before planting so it can settle in.
I am going to transplant the plants at 18-24 inch spacing. Roots should be planted level with the soil surface and not so deep that they cover the stems. Water the well immediately after planting. Use gravel mulch to retain moisture. Consider providing light shade initially if transplanting in hot weather.
Timing and Season
- Optimal Period: Plant 1-2 weeks after last spring frost when soil reaches 60-70°F (15-21°C)
- Fall Alternative: In zones 7+ only, plant 6-8 weeks before first frost for root establishment
- Seed Starting: Begin indoors 6-8 weeks before last frost using seed trays with grow lights
- Temperature Watch: Protect young plants if unexpected late frost occurs with cloches or row covers
- Soil Test: Ensure ground temperature with soil thermometer before transplanting seedlings
- Regional Adaptation: Coastal areas can plant year-round; desert regions avoid summer planting
Site Selection
- Sun Exposure: Choose locations with 6-8 hours direct sunlight daily for best growth
- Drainage Check: Avoid low-lying areas where water pools after rainfall events
- Wind Protection: Select sites sheltered from strong winds that damage tender stems
- Container Option: Use 12-inch deep pots with drainage holes for patio/balcony growing
- Companion Planning: Position near tomatoes or cabbage but away from cucumbers/onions
- Accessibility: Ensure easy access for regular harvesting in kitchen gardens
Soil Preparation
- Soil Type: Amend clay soils with 3-4 inches of compost and coarse sand for drainage
- pH Adjustment: Test soil pH; add lime if below 6.0 or sulfur if above 7.0 for ideal 6.0-7.0 range
- Nutrient Boost: Mix 2-3 inches of aged compost or well-rotted manure into topsoil
- Raised Beds: Create 8-12 inch high beds in poorly draining areas using sandy loam mix
- Container Mix: Blend potting soil with 30% perlite or coarse sand for optimal drainage
- Final Prep: Rake soil smooth and water lightly 24 hours before planting to settle
Planting Process
- Spacing: Position plants 18-24 inches apart in all directions for air circulation
- Depth: Set root ball level with soil surface; avoid burying plant stems
- Watering In: Saturate soil immediately after planting to eliminate air pockets
- Mulching: Apply 1-2 inch layer of gravel or pine straw to retain moisture and deter weeds
- Initial Care: Provide light shade for 2-3 days if transplanting during hot weather
- Success Tip: Water with seaweed extract solution to reduce transplant shock
Post-Planting Care
- Water Schedule: Maintain moist (not soggy) soil for first 2 weeks while establishing
- First Feeding: Apply half-strength balanced fertilizer after 3-4 new leaves appear
- Pest Monitoring: Check daily for slugs, snails, or aphids during establishment phase
- Growth Tracking: Measure new growth weekly to ensure proper development
- Pruning Start: Pinch tips after 6 inches of growth to encourage bushy formation
- Weather Protection: Have frost cloth ready for unexpected cold snaps in early season
Caring for Your Sage Plant
When plants are properly cared for seasonally, they will bloom and grow throughout the year. In the spring, remove the winter mulch and apply a slow-release fertilizer. In the summer, watch for pests and provide afternoon shade on the hottest days. In the fall, cut back watering as the plants enter dormancy. In the winter months, frost protection is achieved through mulching in the colder zones.
Watering adheres to sage's nature of drought tolerance. Before watering outdoor plants, check the soil to determine its dryness. Keep container plants well-moisturized by monitoring them daily for moisture. Yellowing leaves and/or root rot occur with overwatering. Indoor plants tend to require less frequent watering than outdoor plants. Remember to always water at the soil level.
Correct herb pruning keeps plants healthy and shaped. Cut stems above leaf nodes at 45 degrees in the spring. Remove one-third of old wood each year. Pinch tips for a bushier plant. Outdoor plants need more aggressive pruning than indoor plants. Don't fertilize immediately after.
Employ a light fertilizing schedule for optimal results. Apply a balanced fertilizer at a rate of once in early spring. Container plants require monthly applications of half-strength solutions throughout the growing season. Choose not to apply high nitrogen formulations, as they will dilute the flavor. Instead of chemical feeds, use compost as a top dressing each year.
Watering Routine
- Frequency: Water deeply only when top 1-2 inches of soil are completely dry to the touch
- Signs of Need: Slight wilting indicates thirst but quick recovery after watering confirms health
- Seasonal Adjustment: Increase to weekly in extreme summer heat; reduce to monthly in winter dormancy
- Container Care: Check moisture daily in pots using finger test before watering thoroughly
- Overwatering Risk: Yellow leaves and root rot develop in consistently soggy soil conditions
- Technique: Water at soil level to keep foliage dry and prevent fungal diseases
Feeding and Nutrition
- Fertilizer Type: Use balanced organic fertilizer (5-5-5 NPK) or compost tea for gentle nutrition
- Schedule: Apply once in early spring and again after summer pruning for established plants
- Container Feeding: Monthly half-strength liquid fertilizer during active growing season only
- Avoid Excess: Never use high-nitrogen formulas that promote foliage over flavor development
- Soil Amendment: Top-dress with 1 inch of compost annually to replenish nutrients naturally
- Indoor Plants: Reduce feeding frequency by half compared to outdoor plants
Pruning Techniques
- Seasonal Timing: Major pruning in early spring; light shaping throughout growing season
- Method: Cut stems just above leaf nodes using sterilized shears at 45-degree angle
- Rejuvenation: Remove one-third of oldest woody stems annually to stimulate new growth
- Flower Management: Pinch buds for culinary plants; leave blooms for pollinators if desired
- Shape Control: Trim leggy growth to maintain compact, bushy form ideal for harvesting
- Aftercare: Water deeply post-pruning and avoid fertilizer for two weeks
Seasonal Maintenance
- Spring: Remove winter mulch and apply slow-release fertilizer as new growth emerges
- Summer: Monitor for pests and provide afternoon shade in temperatures above 90°F (32°C)
- Fall: Reduce watering and stop fertilizing to prepare plants for winter dormancy
- Winter Protection: Mulch with straw in zones 5-6; move containers indoors below 20°F (-7°C)
- Dormancy Care: Water potted plants monthly just enough to prevent complete soil dryness
- Winter Survival Check: Scratch bark in late winter; green tissue indicates plant survival
Troubleshooting Growth Issues
- Leggy Growth: Indicates insufficient light - relocate to sunnier spot or add grow lights
- Yellow Leaves: Sign of overwatering - allow soil to dry completely before next watering
- Sparse Foliage: Needs fertilization or rejuvenation pruning to stimulate branching
- Winter Dieback: Protect roots with mulch and trim dead stems to ground level in spring
- Pest Prevention: Spray neem oil monthly during warm months as preventive measure
- Container Rotation: Turn pots quarterly for even sun exposure on all plant sides
5 Common Myths
In garden conditions, sage plants should be watered daily to thrive.
Sage is extremely drought-tolerant and actually suffers from over-watering. As a Mediterranean plant, sage prefers dry conditions and only needs to be watered when the top 1-2 inches of soil have completely dried out. Watering daily leads to root rot, yellowing leaves, and plant death. Additionally, once established, plants can go without water for weeks. Sage is well suited to low-maintenance gardens and home to gardeners who may forget to water regularly.
Growing sage in containers is impossible because it needs deep ground roots.
Sage thrives exceptionally well in containers when provided with adequate depth (minimum 12 inches) and well-draining soil. Container growing offers advantages like better control over soil conditions, easier movement for sun exposure, and protection from ground pests. Many gardeners actually prefer container cultivation as it prevents the plant's natural spreading habit and allows for year-round indoor cultivation in cold climates.
Sage leaves taste bitter and are not edible after flowering starts.
While flowering may alter the intensity of leaf flavor, the leaves are still quite edible during or after flowering. The flavor may change slightly, but the difference is quite minimal and often unnoticeable when cooked. Many chefs value flowering sage for its appearance as a garnish. If you would prefer, you could simply pinch the flower buds to refocus the energy put into leaf production. This does not alter flavor quality.
Sage can only be grown as an annual plant in colder climate zones.
With proper care, sage is a tough and reliable perennial that will survive the winters reliably in USDA least zone 5-8. Zone 5 benefits from cropping around the base using heavily mulch. Generally, sage will regrow from roots even if tops die back. A container-grown sage plant can always be brought indoors during extreme cold spells, indirect climate means sage can be perennial in any winter by a couple of basic winter protection strategies.
Frequent, heavy fertilization is necessary for productive sage plants.
Sage does well in relatively poor soil and will require minimal fertilization. Too much fertilization, particularly for high-nitrogen formulations, encourages excessive growth of foliage and leads to less flavor, particularly the essential oil detection. Feeding lightly once early in spring and using a good balanced organic fertilizer will be good enough for sage to be productive. Fertilized plants do become leggy, do not provide much aroma, and become pest and disease-ridden more easily then under-fertilized plants.
Conclusion
Sage has incredible versatility as a kitchen herb. It is a great option for busy gardeners, as it requires almost no effort to maintain. You won't be able to believe how easy sage is to grow! This tough plant will outlast dry periods better than most other herbs. Sage is useful not only for your kitchen but also for the health of your garden.
Recall three essential care guidelines for success: Take advantage of drought tolerance by watering only when soil dries out; Know the annual applied pruning herbs to avoid them getting woody; Take advantage of companion benefits alongside tomatoes, and away from cucumbers. These straight forward steps will give you strong plants year after year!
Begin your journey of growing sage this season. Even novice growers can have success quickly! I remember my original plant thriving on neglect. Your kitchen garden deserves this culinary delight. Fresh leaves will elevate average food to a special meal.
Collect some leaves today to enjoy right away. Crush the leaves between your fingers to release the fragrance. Sprinkle them over roasted meats or vegetable dishes. You'll easily recognize the difference fresh herbs make. Your food takes on an entirely different flavor immediately.
External Sources
Frequently Asked Questions
Is sage easy to grow for beginners?
Sage is exceptionally beginner-friendly due to its drought resistance and minimal care requirements. Plant in well-draining soil with 6+ hours of sunlight, water only when soil dries completely, and avoid over-fertilizing. Established plants thrive with little intervention.
What plants should never be planted near sage?
Avoid planting sage near moisture-loving plants like cucumbers or alliums such as onions. These create incompatible growing conditions:
- Cucumbers stunt sage growth through soil competition
- Onions inhibit root development and nutrient uptake
- Both increase humidity, promoting fungal diseases
Can sage survive winter outdoors?
Sage survives winters in zones 5-8 with proper protection. In colder zones, use these strategies:
- Mulch heavily with straw before first frost
- Move container plants indoors below 20°F
- Prune only in spring to avoid winter damage
- Ensure soil drainage to prevent root rot
Should I allow sage plants to flower?
Flowering doesn't ruin sage leaves but offers trade-offs. Blooms attract pollinators and add visual interest, while pinching buds redirects energy to foliage. Leaves remain edible during flowering with minimal flavor change noticeable in cooked dishes.
Why might my sage plant keep dying?
Common causes include overwatering, poor drainage, or incorrect siting. Symptoms and solutions:
- Yellow leaves: Reduce watering frequency significantly
- Root rot: Amend soil with sand for drainage
- Leggy growth: Relocate to sunnier location
- Pest issues: Apply neem oil preventatively
Is container gardening suitable for sage?
Containers work excellently for sage when using 12-inch deep pots with drainage holes. Benefits include better soil control, mobility for sun exposure, and overwintering flexibility. Use gritty potting mix and water only when topsoil dries completely.
How often should sage be watered?
Water deeply only when the top 1-2 inches of soil become completely dry. Established plants need:
- Weekly watering in extreme summer heat
- Monthly watering during winter dormancy
- Daily checks for container plants
- Soil-level watering to prevent fungal issues
Can pets safely be around sage plants?
Sage is non-toxic to dogs and cats when consumed in small quantities. However, monitor pets for gastrointestinal discomfort if large amounts are ingested. Always consult a veterinarian for concerns about plant toxicity.
What's the best way to preserve fresh sage?
Preserve sage through air-drying or freezing:
- Hang bundles in dark, ventilated areas for 1-2 weeks
- Freeze whole leaves in airtight bags
- Create herb cubes with water or oil
- Store dried leaves in dark glass jars
How long does sage take to mature?
Sage reaches harvestable size in 75-90 days from planting. For optimal growth:
- Start seeds indoors 6-8 weeks before last frost
- Transplant when seedlings have 4-6 true leaves
- Expect light harvesting in first season
- Full maturity occurs by second growing season