

To start learning about growing rutabagas, it's important to know about their hybrid nature. These delicious roots are cold-hardy and fall somewhere between a turnip and a cabbage, neither very close to either plant. They have wonderful earthy sweetness and leaves/fans that are highly nutritious (and also very tasty). I have found them to be the most frost tolerant - they flourish while other crops are struggling (or dead). They are perfect crops for erratic weather.
You'll appreciate how rutabagas are USDA hardy from zone 3 to 9. These veggies are hardier than more delicate veggies; they change frost into flavor! My first successful rutabaga harvest came the year we had our first snow in early October,the roots developed sweet caramelized flavors from the frost that will forever be unmatched by the grocery store.
The unique thing about rutabagas is that they are usable for two things. It's true, the bulbous roots can be cooked up for a robust winter meal, while the greens are wonderful in the kitchen too. I find myself sautéing them on a fairly regular basis with garlic for a healthful vitamin-packed side. What I have found is every single part of this vegetable is useful for something on the table.
Soil Preparation & Planting
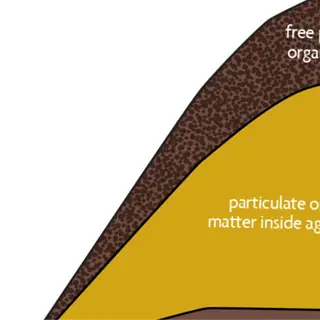
Soil preparation is the basis for growing successful rutabagas. These roots need boron-rich soil to avoid hollow hearts, something I have seen devastate whole crops. Adding one teaspoon of borax to the planting bed per 10 square feet will provide an excellent defense, producing dense, creamy flesh.
The kind of soil that you have will determine an amendment approach. For sandy soils, you want composted manure for moisture retention. For clay soil, you will want to incorporate coarse sand for drainage. I once amended heavy clay beds with a blend of equal parts sand and leaf mold and witnessed the roots grow straight and strong.
Your USDA zone determines the timing. Northern growers (designated zones 3-5) should be planting flowers in early summer for fall harvests. Southern gardeners (designated zones 6-9) will do their best to plant later in the summer. When I moved from Minnesota to Tennessee, my planting calendar changed quite a bit, so how you approach these changes does matter by zone.
Thinning will determine how you focus your harvest. If your priority is root development and size, thin and space your plants at 8 inches apart after the second leaves unfold. If your priority is on greens, go ahead and cluster your plants at about 4 inches apart and harvest the outer leaves every week. I found growing this way resulted in twice the amount of usable yield compared to my first round of tests where I had not been mindful of how I spaced my plants.
Northern Zones (3-5)
- Window: May 15-June 10 after soil reaches 50°F (10°C)
- Spacing: Thin to 8 inches (20 cm) for full roots
- Frost Protection: Use row covers if temps drop below 28°F (-2°C)
- Seed Depth: 0.5 inches (1.3 cm) in loamy soil
- Companion Plants: Peas for nitrogen fixation
- Mulching: Apply straw after first true leaves emerge
Southern Zones (6-9)
- Window: August 1-September 15 for winter harvest
- Heat Mitigation: Shade cloth until seedlings establish
- Moisture: Maintain 1 inch (2.5 cm) weekly rainfall equivalent
- Varieties: 'American Purple Top' for heat tolerance
- Pest Control: Diatomaceous earth around seedlings
- Succession Planting: Sow every 3 weeks in coastal areas

Container Planting
- Pot Size: Minimum 12-inch (30 cm) depth
- Soil Mix: 50% compost, 30% coconut coir, 20% perlite
- Drainage: 2-inch (5 cm) gravel layer at base
- Fertilizer: Liquid seaweed every 14 days
- Spacing: 10-inch (25 cm) between plants
- Harvest: Ready 10 days earlier than ground-grown

Raised Bed Planting
- Bed Height: 12-18 inches (30-45 cm)
- Soil Temp: Warms 2 weeks faster than ground
- Winterizing: Add 6-inch (15 cm) leaf mulch
- Pest Barrier: Hardware cloth under bed frame
- Watering: Drip system with 12-inch (30 cm) spacing
- Yield: 20% higher than traditional rows

Succession Planting
- First Crop: Radishes harvested at 30 days
- Second Crop: Sow rutabagas after radish removal
- Spacing: Alternate rows 8 inches (20 cm) apart
- Fertilizer: Side-dress when roots swell
- Light: Ensure 6+ hours after canopy thins
- Fall Protection: Low tunnels for late crops
Symptoms
- Brown internal spots in roots
- Cracked root surfaces
- Stunted leaf growth
- Yellowing between leaf veins
- Delayed maturity by 3+ weeks
Prevention
- Soil test every 2 years
- Mix borax evenly to avoid toxicity
- Combine with compost for slow release
- Apply during cool morning hours
- Avoid concurrent limestone applications
Soil Testing
- Ideal boron range: 0.5-2.0 ppm
- Sample depth: 6 inches (15 cm)
- Test 6 months before planting
- Retest after heavy rainfall seasons
- Compare multiple garden zones
Organic Alternatives
- Kelp meal: 1 cup/10 sq ft (240ml/0.9 m²)
- Beet juice spray: 1:10 dilution weekly
- Composted broccoli: 5 lbs/100 sq ft (2.3 kg/9.3 m²)
- Wood ash: 0.5 lbs/100 sq ft (0.23 kg/9.3 m²)
- Banana peel tea: Soak 3 days before applying
Emergency Treatment
- Foliar spray: 1 tsp borax/gallon (5ml/3.8L)
- Apply at first true leaf stage
- Repeat every 10 days maximum 3x
- Rinse leaves after application
- Stop 30 days before harvest
Ideal Growing Conditions
Rutabagas are far superior to turnips in terms of cold tolerance; they thrive in a soil temperature range of about 45-75°F, while turnips go downhill if the temperature is below 50°F. I have harvested rutabagas after many early frosts in Vermont, and the other roots have sweetened while the adjacent turnips have become bitter. Due to their extreme cold hardiness, rutabagas are the secret in a northern gardener's toolbox.
The pH level of the soil acts like a chemical gatekeeper, determining the specific nutrients rutabagas can use. A soil pH level of 6.0-7.0 allows roots to take up boron, which helps prevent the formation of hollow centers. A pH test kit resides permanently in my toolbox as I learned the hard way after losing a crop due to the invisible depletion of nutrients in acidic soil.
Humidity is a balancing act with rutabagas. While 50-60% is good for keeping fungal pests like black spots away, I still fight powdery mildew by spacing rutabagas 18 inches apart. Dew dries out well in the morning sun, and commercial growers taught me that trick, which saved my backyard harvests.
The marker of time does directly correlate to roots expanding.With days of 12 to 14 hours, you will see bulking.Many people, including myself, have had rutabagas sown in the summer outperform spring-sown rutabagas for this reason.If you are not already keeping track of your latitude's photoperiods, I would encourage you to begin.These annual rhythms will dictate if you will be harvesting roots the size of marbles or the size of fists.
Temperature Management
- Use row covers below 45°F (7°C)
- Apply white mulch above 75°F (24°C)
- Plant near stone walls for thermal mass
- Avoid south-facing slopes in zones 7+
Light Requirements
- Morning sun critical for dew evaporation
- Use 30% shade cloth in afternoon heat
- Reflective mulch boosts PAR levels
- Trim overshadowing plants weekly
Soil Composition
- Loam texture: 40% sand, 40% silt, 20% clay
- Cation exchange capacity >10 meq/100g
- Organic matter minimum 4%
- Avoid fresh sawdust (nitrogen depletion)
Humidity Control
- Space plants 12-18 inches (30-45 cm) apart
- Water at soil level with drip irrigation
- Install windbreaks for airflow management
- Apply copper fungicide at 65%+ humidity
Drainage Solutions
- Raise beds 6 inches (15 cm) minimum
- Mix 2-inch (5 cm) gravel sublayer
- Create French drains for heavy soils
- Add perlite at 25% volume in clay soils

Coastal Climates
- Challenge: Salt spray deposition
- Solution: Erect 4-foot (1.2 m) burlap screens
- Variety: 'Laurentian' salt-tolerant strain
- Watering: Leach soil monthly with fresh water

Mountain Zones
- Challenge: Early fall frosts
- Solution: Use black plastic mulch
- Variety: 'Helenor' early-maturing type
- Harvest: 2 weeks before first frost date
Desert Climates
- Challenge: Extreme daytime heat
- Solution: Shade netting with 50% UV block
- Irrigation: Subsurface drip lines at 12-inch (30 cm) depth
- Mulching: 4-inch (10 cm) volcanic rock layer

Urban Areas
- Challenge: Air pollution particulates
- Solution: Rinse leaves every 3 days
- Soil: Activated charcoal amendment at 5% volume
- Pollination: Hand-pollinate flowers weekly

Alpine Zones
- Challenge: Short growing season
- Solution: Pre-sprout seeds indoors 4 weeks early
- Protection: Mini greenhouses until July
- Fertilizer: High-phosphorus mix for cold soils

pH Testing
- Ideal Range: 6.0-7.0 pH
- Frequency: Test every 6 months
- Tools: Digital meter or litmus strips
- Adjustment: Add lime if below 6.0
Drainage Solutions
- Sign of Poor Drainage: Standing water >1 hour
- Grading: 2% slope away from plants
- Materials: Crushed granite for heavy clay
- Maintenance: Clear debris from ditches monthly

Soil Texture Analysis
- Ribbon Test: Forms 2-inch (5 cm) ribbon = clay dominance
- Sandy Soil Fix: Add 3 inches (7.5 cm) compost annually
- Clay Soil Fix: Incorporate gypsum at 5 lbs/100 sq ft (2.3 kg/9.3 m²)
- Ideal Texture: Loam with visible organic matter
Organic Matter Content
- Testing Method: Loss-on-ignition lab analysis
- Amendment Rate: 2-3 inches (5-7.5 cm) compost yearly
- Benefits: Increases water retention by 30%
- Warning: Avoid uncomposted manure near harvest
Mulching Techniques
- Material Choices: Straw, grass clippings, shredded leaves
- Thickness: 3-4 inches (7.5-10 cm) layer
- Timing: Apply after second true leaf stage
- Avoid: Plastic mulch in humid climates
Watering & Nutrient Management
Watering rutabagas follows a stage-specific guideline. Younger seedlings prefer consistent moisture, about one inch per week, to set roots. Mature rutabagas can endure a couple of dry days before they need watering again. I start watering seedlings every day for two weeks, then I switch to watering deeply twice a week. When I overwater them, the leaves turn yellow, and if they are underwatered, they start cracking their roots.
Ratios of the nutrients will change greatly based on the growth phase of the plant. Early growth should have a high nitrogen (10-5-5) blend for leafy greens. Once flowering or bulking occurs, you will switch to low nitrogen (5-10-10) to focus on root production. My fertilizer schedule essentially follows this same process, fish emulsion to start and then a bone meal blended fertilizer product 6 weeks after transplant.
Look for watering issues via the language of the leaves. Brittle, curled leaves are thirsting for water. Mushy stems are a sign of overwatering. I inspect the moisture of the soil by testing how deep it is until my knuckle reaches the dry soil, two inches is time to drink. Having a gauge of rain can help take the guesswork out of watering - this can be very useful in spring when the weather is volatile.
Synthetic fertilizers provide quick-soluble nourishment but can create salt deposits. Organic Nutrient sources, such as compost tea, provide slow-soluble nourishment, which resembles natural cycles of available nutrients. I lost several plants to chemical burns, and now I incorporate aged manure with a kelp meal for prolonged, balanced nourishment.
Drip Irrigation
- Flow Rate: 0.5 gallons/hour (1.9L/h) per emitter
- Spacing: 12-inch (30 cm) between emitters
- Timing: 2 hours morning, 1 hour evening
- Pressure: 15-30 psi (1-2 bar)
Frequency Adjustments
- Seedlings: Daily 0.25 inches (0.6 cm)
- Bulking Phase: 1 inch (2.5 cm) weekly
- Pre-Harvest: Reduce by 50% 3 weeks prior
Drought Management
- Apply kaolin clay spray
- Mulch 4 inches (10 cm) straw
- Use water-retention crystals at planting
Container Watering
- 5-gallon (19L) pots: 1 quart (0.9L) daily
- Self-watering reservoirs: Refill weekly
- Avoid saucer stagnation
Seasonal Shifts
- Spring: Morning watering only
- Summer: 5-7 AM & 6-8 PM cycles
- Fall: Reduce frequency after frost

Nitrogen Deficiency
- Signs: Pale yellow older leaves
- Fix: Fish emulsion 5-1-1
- Application: 1 cup/plant (240ml) weekly

Phosphorus Deficiency
- Signs: Purple-tinged foliage
- Fix: Bone meal 3-15-0
- Application: 2 tbsp/sq ft (30ml/0.09m²)
Potassium Deficiency
- Signs: Scorched leaf margins
- Fix: Wood ash tea
- Application: 1 gal/plant (3.8L) biweekly
Boron Deficiency
- Signs: Cracked root cavities
- Fix: Borax solution
- Application: 1 tsp/gal (5ml/3.8L) spray
Calcium Deficiency
- Signs: Leathery root patches
- Fix: Calcium nitrate
- Application: 2 tbsp/gal (30ml/3.8L) drench
Pest & Disease Control
Prevention is the foundation of successful pest management for rutabagas. Begin by using floating row covers at the time of planting to block flea beetles - which I can personally attest, completely saved me that year when there was a severe flea beetle infestation. But, in addition to seasonal prevention methods, general practices to build soil health, like crop rotation, help limit the carryover of diseases, thus relieving the need for treatments and cultural practices over time.
Flea beetles create shotgun-like holes in the foliage, while slugs have rustic irregular edges and leave behind silvery trails. When I have difficulty identifying the culprit, I inspect the foliage at the crack of dawn because slugs tend to hide under debris whereas flea beetles will jump when disturbed. This helps determine if I use diatomaceous earth or spinosad sprays.
Copper fungicide is most effective when applied at the first signs of a disease. Ideally, it should be applied in the morning when dry and before dew returns to the plants. I mix a tablespoon of copper fungicide with a gallon of water and spray every 10 days if it has been cool and wet. Once during a rainy spring, I had not applied copper fungicide properly to my Cornelian cherry, and it ended up with a leaf spot.
Neem oil remains active for 7-10 days and so will gradually disrupt the pest's life cycles. Pyrethrin will quickly knock down pests, however the effects will dissipate after roughly 48 hours. I like to use both, neem oil for a preventative process, and pyrethrin for an emergency. I tackle an aphid population that emerged late in the growing season in my garden by using both neem oil and pyrethrin.
Cultural Controls
- Rotate crops every 3 years
- Remove plant debris post-harvest
- Use disease-free certified seeds
- Space plants 18 inches (45 cm) apart
Physical Barriers
- Floating row covers until flowering
- Copper tape slug deterrent
- Yellow sticky traps for flying pests
- Hardware cloth root barriers
Biological Controls
- Release ladybugs for aphid control
- Apply Bt (Bacillus thuringiensis) at dusk
- Introduce predatory nematodes
- Encourage lacewings with nectar plants
Soil Management
- Solarize soil 6 weeks pre-planting
- Maintain pH 6.5-7.0
- Add chitin-rich crab shell meal
- Avoid fresh manure applications
Monitoring
- Inspect undersides of leaves weekly
- Use pheromone traps for moths
- Check roots during thinning
- Record outbreaks for crop rotation

Neem Oil Spray
- Target: Soft-bodied insects
- Mix: 2 tbsp/gal (30ml/3.8L) + soap
- Frequency: Every 7-10 days
- Caution: Avoid midday application

Diatomaceous Earth
- Target: Crawling insects
- Apply: Dry foliage & soil surface
- Reapply: After rain
- Safety: Use respirator during application

Garlic Pepper Spray
- Recipe: 10 cloves + 2 peppers steeped in 1qt (1L)
- Strain: Cheesecloth filtration
- Apply: Test on single leaf first
- Storage: Refrigerate 7 days max
Baking Soda Fungicide
- Formula: 1 tbsp/gal (15ml/3.8L) + horticultural oil
- Effective Against: Powdery mildew
- Timing: Apply at first sign of spores
- Limit: 3 applications per season
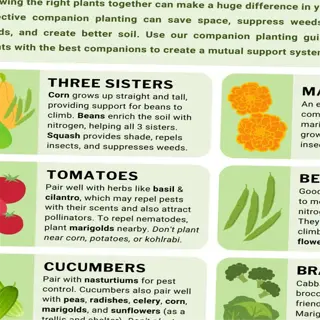
Companion Planting
- Repellent Plants: Marigolds deter nematodes
- Trap Crops: Radishes lure flea beetles
- Spacing: 12-inch (30 cm) perimeter
- Rotation: Alternate with alliums yearly
Harvesting & Storage
Frosting your light frosts timing the harvest to those first light frosts will improve the flavor of the rutabagas but you must be careful. A few light frosts will increase the sugar content of the rutabagas, however, if the temperature dips below 20F (-6C) cellular damage will occur. I harvest half of the crop after the first frost and leave the remaining half for about a month in the soil to allow it to sweeten until the soil temperature starts to approach freezing.
To ensure good short-term storage, place them with damp paper towels in 32-40°F refrigerators. For a little longer in the winter months, place undamaged roots packed with damp sand into a root cellar. I have my basement, for example, using a perforated bin for the roots to keep it at 95% humidity when it isn't below freezing outside. The difference is astonishing! The roots will be crisp for five months or more, rather than for three weeks in refrigerators built in the last 5 years or so.
During the harvest and storage of polyploid bridges. Once harvested, lay the roots single-layer in a shaded location at about 60°F (15°C) for 10 days. This increases the thickness of the skin and seals up minor nicks. I learned this lesson after I lost a batch of roots to rot. Now a properly cured rutabaga will last me three times longer.
Rutabagas develop an unpleasant bitterness when they are stored next to ethylene-producing fruits including apples. Therefore, it may be best to store them separately or perhaps even use ethylene absorbers. My mesh bags hung from rafters in my cellar keep them optimally aired out while not allowing the gas to build up to the point of ruining an entire winter's supply of them, like in the past.
Root Cellar
- Temp: 32-40°F (0-4°C)
- Humidity: 90-95%
- Duration: 4-6 months
- Ethylene: Store away from apples/bananas
Refrigerator
- Temp: 38°F (3°C)
- Humidity: Wrap in damp paper towels
- Duration: 2-3 weeks
- Caution: Isolate from ethylene-producing fruits
Outdoor Pit
- Depth: 24 inches (60 cm)
- Insulation: Straw layers
- Duration: 3-4 months
- Risk: Rodent protection needed
Wax Coating
- Melt Point: 130°F (54°C)
- Application: Brush on cooled roots
- Duration: 6-8 weeks
- Limitation: Not for long-term storage
Freezing
- Prep: Blanch 3 minutes
- Storage: Vacuum-sealed bags
- Duration: 10-12 months
- Texture Change: Softens when thawed

Digging Fork
- Angle: Insert 6 inches (15 cm) from plant
- Leverage: Rock gently to loosen soil
- Blade Type: Rounded tines prevent cuts
- Aftercare: Clean soil after use

Root Brush
- Bristle Type: Natural fibers
- Technique: Brush in root growth direction
- Drying: Air-dry before storage
- Storage: Hang bristles-down

Curing Rack
- Spacing: 2 inches (5 cm) between roots
- Duration: 10-14 days at 60°F (15°C)
- Airflow: Use fan on low setting
- Inspection: Discard weeping roots
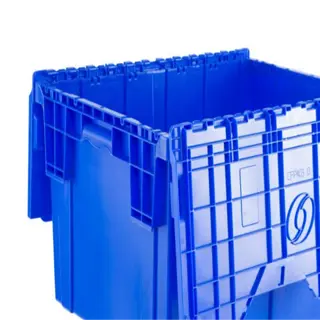
Storage Bins
- Material: Food-grade plastic
- Ventilation: Drill ¼-inch (0.6 cm) holes
- Layering: Separate with damp sand
- Monitoring: Check weekly for rot

Thermal Blankets
- Material: Woven polypropylene
- Use: Cover plants pre-harvest
- Rating: Protects to 24°F (-4°C)
- Storage: Dry completely before folding

Ethylene Absorbers
- Placement: 1 packet per 5 cu ft (0.14 m³)
- Replacement: Every 3 months
- Effectiveness: Reduces spoilage by 40%
- Caution: Keep away from children
5 Common Myths
Rutabagas need continuous frost protection in the winter months.
Rutabagas will produce a sweeter flavor after exposure to light frosts (28-32F/-2-0C) and can tolerate temperatures as low as 20F/-6C. Heavy mulching is only necessary for longer durations of sustained sub-20F/-7C to keep the roots from freezing entirely.
Fresh manure is the best fertilizer for rutabagas.
Fresh manure is a source of pathogenic bacteria that can cause forked roots, while aged compost, or 10-10-10 fertilizer applied 3 weeks before planting, provides an equalized nutrition application without the potential for nitrogen burn or pathogens.
Rutabaga greens are toxic and should be thrown away.
The greens have more vitamin C and calcium than the roots. Young leaves can be consumed raw in salads, but mature leaves can be consumed cooked like collard greens.
Wax coating ruins rutabagas' nutritional value.
Food-grade paraffin wax preserves moisture without affecting nutrients. The wax melts at 130F/54C during cooking and doesn't interfere with vitamin A, C, or potassium content.
Rutabagas need to be harvested ahead of the first frost.
Rutabagas continue their growth until the ground freezes solid. If roots are left to mature through 2-3 light frosts, the sugar content is greater. You can only use the rutabaga removes from the ground when the soil temperature has consistently decreased below 25F/-4C.
Conclusion
The mastery of rutabagas is serviced by the three-phase rhythm of work: soil preparation prepares for it, pest management protects it, and planning for frosts wraps it all up. A neighbouring farmer successfully brought in their first crop of rutabagas during this season with this sequence to planting, demonstrating that a method of structured care is better than simply planting randomly.
Each rutabaga plant provides a twofold reward; the roots have an earthy sweet flavor that can be used in stews, while the greens provide nutritious powerhouses. I roast the roots with herbs and add greens to my pesto; the versatility of these vegetables is why I choose to dedicate space in my garden to these often overlooked vegetables.
Monitoring progress in your garden journal shows you patterns that you might have missed day to day. Do you write down the date you cleared an area for planting, saw pests, or the scenario you faced frost? After ten years of recording this data with notes, I learned to move my sowing dates forward just two weeks and increased my harvests by 30 percent. It is something that only analyzing data taught me to adjust to each season!
Regardless of whether it's your first time starting seeds, or you are practicing advanced methods, rutabagas have something for everyone to learn from. They are forgiving, which is good for novice gardeners, and they offer layers of complexity that will challenge the most experienced. This crop improved my gardening philosophy, and it can do the same for you.
External Sources
Frequently Asked Questions
What are the essential soil requirements for how to grow rutabagas?
Rutabagas thrive in slightly acidic to neutral soil (pH 6.0-7.0) with excellent drainage. Amend heavy clay soils with compost and ensure consistent boron levels to prevent hollow heart disorder.
Can rutabagas handle frost during their growth cycle?
Rutabagas are frost-tolerant and actually develop sweeter flavors after light frosts. They survive temperatures as low as 20°F (-6°C) but require mulch protection during extreme cold snaps below this threshold.
What companion plants benefit rutabaga growth?
Ideal companions include:
- Peas/beans (nitrogen fixation)
- Marigolds (nematode deterrence)
- Onions (pest repellent)
- Avoid planting near other brassicas to prevent disease spread
How does sunlight exposure affect rutabaga development?
Rutabagas require 6+ hours of daily sunlight for optimal root formation. In hot climates, provide afternoon shade to prevent woody texture and bitter taste in roots.
What indicates rutabagas are ready for harvest?
Harvest when roots reach 3-5 inches diameter and show purple-to-yellow shoulder color transition. Leaves yellowing at the base signal maturity - dig carefully to avoid root damage.
Is synthetic fertilizer safe for rutabagas?
Use balanced 10-10-10 fertilizer sparingly. Over-fertilization causes leafy growth over roots. Organic alternatives like fish emulsion or compost tea are preferred for steady nutrient release.
Can I grow rutabagas in containers successfully?
Yes, with these key considerations:
- Minimum 12-inch deep pots
- Well-draining soil mix with perlite
- Consistent moisture monitoring
- Space plants 8 inches apart
What pests commonly attack rutabaga plants?
Primary threats include:
- Flea beetles (create leaf holes)
- Cabbage root maggots (tunnel roots)
- Aphids (cluster under leaves)
- Prevent with row covers and diatomaceous earth barriers
How should I rotate rutabagas in crop cycles?
Wait 4 years before replanting brassicas in the same bed. Ideal predecessors are legumes or corn. This prevents soil-borne diseases and nutrient depletion.
Are rutabaga greens edible and nutritious?
Yes, young leaves contain more calcium and vitamin C than roots. Use raw in salads or cooked like kale. Avoid yellowed leaves, which develop bitter compounds as plants mature.

