
To learn how to grow peppers, start by evaluating your climate. Refer to the USDA growing zone map and select the cultivars best suited for your zone. Peppers like sunny, hot summers; the more of a summer you have, the more you'll enjoy growing peppers. Balancing sun and shade can also reward a gardener for growing peppers.
Contemporary eating habits such as keto and plant-based meals celebrate peppers for their crunchiness and nutrients. In my garden, I make them a priority when choosing colorful hybrids, purple bells for salads, and spicy habaneros for use in sauces. Their diversity, flavor, and nutrition make peppers a favorite for health-minded cooks and weekend grill masters alike.
Success with peppers takes patience. Germination can be a challenge to your patience, yet as you care for the seedlings day after day, you will see them develop glossy jewel-like fruits. I had to learn that lesson the hard way, after losing my first crop to impatience. Water your plants deeply and infrequently, then protect young plants from insect pests by spraying with neem oil (as a non-toxic approach I learned from organic growers).
Using organic pest control methods isn't just a fad; it's a necessity for survival. My jalapeños were once annihilated by aphids until I brought in ladybugs for some natural pest control. Everyday companion planting with basil or marigolds can create a natural barrier or trap. Healthy soil with plenty of worms may do half the work before you even see the beginning of a bud.
Choosing the Right Pepper Varieties
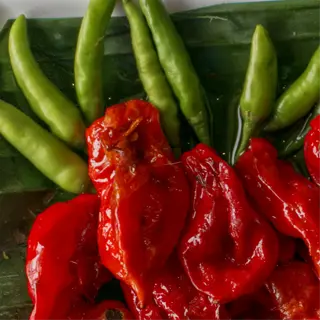
To know about growing peppers will start with deciding which varieties meet your heat toleration and garden space for them. The Scoville scale measures the heat level from zero for sweet bells to over a million for ghost peppers! Mild varieties such as poblanos will make a nice addition to a family garden, and superhot peppers will get adventurous cooks excited!
Containers provide options when you lack space, such as Thai peppers on your patio in 5-gallon buckets. Planting in the ground accommodates sprawling varieties, such as Anaheims. Drainage is key for both planting methods. I lost a batch of cayenne when the roots were sitting in water because I had not transitioned to perlite-based soil.
The color signals nutrition. Red and yellow peppers contain three times more vitamin C than green peppers. Purple peppers add anthocyanins, a bonus for the health-advanced grower. At markets, I select peppers for my customers and guide them toward a rainbow mix that displays colorful visual appeal as well as nutrient density for beneficial nutrition.
Hybrid seeds offer the promise of disease resistance and heirlooms like 'California Wonder' offer original, classic flavors. Hybrid and heirloom seeds! Check out your local nurseries for seeds well-suited to your area. My favorite heirloom supplier, for instance, tests its seeds for germination rates; this is a small but important detail that almost saved my crop after a colder spring.
Ghost Pepper
- Heat Level: 1,000,000+ SHU
- Climate Needs: Requires 80°F+ (27°C+) daytime temperatures
- Harvest Tip: Wear gloves when handling ripe pods
- Preservation: Ideal for drying or powdering
Shishito
- Heat Level: 50-200 SHU (mild)
- Culinary Use: Perfect for blistered appetizers
- Yield: Produces 30-40 peppers per plant
- Growth: Compact size suits containers

Padrón
- Heat Level: 500-2,500 SHU (mild, occasional hot)
- Cooking Method: Pan-fried whole with sea salt
- Harvest: Pick when 1-2 inches long
- Yield: 20-30 peppers per plant
Cubanelle
- Heat Level: 0 SHU (sweet)
- Best Use: Stuffed peppers or fajitas
- Growth Habit: Tall plants need staking
- Storage: Lasts 2 weeks refrigerated
Banana Pepper
- Heat Level: 0-500 SHU (sweet to mild)
- Preservation: Ideal for pickling
- Yield: 25-35 peppers per plant
- Disease Resistance: Tolerates common fungal issues
Starting Pepper Seeds Indoors
To truly master how to grow peppers starts with the quality of your seeds. The fact is, freshly harvested seeds germinate 80 - 90% faster than seeds that have been in long-term storage. I did a germination test with expired five-year-old jalapeño seeds with only 30% of them sprouting. So for reliability, you can: buy your seeds annually or store your seeds in an airtight container with silica gel that locks in viability.
Heat mats, which are inexpensive ($25), reduce germination time by half. I soak seeds overnight and then place the trays at 80 - 85 degrees Fahrenheit, (27 -29 degrees Celsius) to germinate. My bell peppers took 21 days to germinate without bottom heat. This time, using a heat mat, they germinated in 9 days. I monitored the soil temperature using a probe thermometer.
Airflow can help prevent the pathogen that causes damping-off. I use a small oscillating fan at low speed to mimic breezes associated with outdoor conditions, and it helps strengthen stems. Last season, I lost a tray of habaneros to mold. I learned my lesson and now run the fans four hours daily, and place my seedlings approximately two inches apart to improve airflow.
Sow seeds no deeper than ¼ inch (0.6 cm). Sow deeper than this and you risk rot. I use a pencil to create uniform holes in my seed-starting mix. As an easy method to mark the proper depth, I use tape on my dibbers. Mist the soil daily with a spray bottle, and never drench the soil.
Optimal Germination Temperature
- Ideal Range: 75-85°F (24-29°C)
- Cold Impact: Below 60°F (16°C) delays germination
- Heat Mat Tip: Use thermostat-controlled mats
Soil Mix Formula
- Base: 40% coco coir
- Drainage: 30% perlite
- Nutrition: 30% compost
Timing Guide
- Cold Climates: Start 10-12 weeks before last frost
- Warm Climates: Start 6-8 weeks before transplanting
- Sign of Readiness: 4-6 true leaves
Common Mistakes
- Overwatering soggy soil causes root rot
- Insufficient light creates leggy seedlings
- Skipping hardening off shocks plants
Troubleshooting
- Slow germination: Check soil temperature
- Mold growth: Improve air circulation
- Yellow leaves: Reduce fertilizer strength
Transplanting Pepper Seedlings
When you plan your *hardening-off period*, you locally want to consider your frost dates. If you are in an area with longer springs, you'll wait around 7-10 days after the last frost date. I had previously rushed my shishitos in Michigan, which is still zone 5. My plants didn't grow during the year for having them out earlier in the cold temps. , shade cloth is great for easing them slowly into receiving intense sun exposure.
Soil temperature supersedes air temperature--wait until the soil is at least 60°F (16°C) before an opening, even if the air temperature feels nice. I once used a probe thermometer and saw air temperatures of 70°F; however, the soil temperature was still just 55°F. All the transplants sulked for three weeks. If needed, you can also warm the soil by covering the beds with black plastic--that is a well-known trick of commercial plant growers.
Seedlings with roots that have become root-bound will have coiled roots and slow to moderate growth. The roots should branch out freely, as my 'Sweet Banana' starts did last June. Before planting, gently tease out any tangled roots. When I have stressed plants, I've saved them by making four, shallow, vertical cuts into the root ball, which stimulates new growth.
If you make sure to space your peppers 18-24 inches apart, you'll be ahead of the game against fungal nightmares. I had powdery mildew on a very crowded plant in my garden in 2022, so I have learned my lesson. More spacing means better airflow - which helps dry out leaves faster after rain. Alternatively, you can try extra insurance by pruning lower leaves, I was able to keep my overwintered habaneros healthy despite humid summers by doing this.
Soil Preparation
- Amendments: Mix 1" compost into top 6" of soil
- pH Balance: Test and adjust to 6.2-6.8 range
- Drainage: Create raised mounds in clay soils
Root Care
- Teasing Roots: Gently loosen root-bound plants
- Depth: Plant up to first true leaves
- Watering: Apply fish emulsion solution post-transplant
Weather Management
- Wind Protection: Stake plants immediately
- Heat Waves: Use 40% shade cloth >85°F (29°C)
- Cold Snaps: Water soil before frost events
Troubleshooting
- Wilting: Temporary shade for 48 hours
- Sunscald: Avoid midday transplanting
- Pest Deterrence: Apply organic pest deterrent
Long-Term Care
- Mulching: Apply straw after soil warms
- Fertilizing: Side-dress with 5-10-10 at 3 weeks
- Pruning: Remove early flowers on slow starters
Soil Preparation and Ongoing Care
Soil pH levels dictate growing peppers. While most varieties like the bell and cayenne do best between a 6.2-6.8 pH, superhots like a ghost pepper prefer slightly acidic soil. Test kits will indicate soil imbalances; for example, I grew some bitter bell peppers in clay at 7.5 pH. After three applications of sulfur in as many weeks, the peppers returned to their sweet flavor and normal yield.
Organic amendments, such as compost, typically improve soil structure over a longer time frame, while synthetic amendments make up the difference rapidly. A trial resulted in fish emulsion that increased leaves but offered lifeless soil support. I now layer worm castings in the soil ahead of planting, leaving the slow-release granular fertilizer for nutrient boosts mid-season during fruiting.
Timing mulch is determined by your latitude. Growers in northern locations should wait until soil temperatures are 65°F (18°C) to apply mulch, while southern locations can apply straw early to retain soil moisture. I learned this the hard way when I lost plants that overheated roots in Texas; I now use reflective mulch in zone 8 and above.
Peppers demand nitrogen in the early stages, phosphorus at blooming time, and potassium when they are ripening. Swap fish meal for blood meal as the buds begin to form. Last July, my cayennes stood still until I side-dressed with kelp, and potassium boost doubled fruit size in two weeks.
Spring Prep
- Soil Testing: Adjust pH 4 weeks before planting
- Bed Aeration: Till to 12" depth for root penetration
- Pre-Fertilize: Mix 1" compost into topsoil
Summer Care
- Water Retention: Apply straw mulch in drought
- Nutrient Boost: Side-dress with 5-10-10 every 3 weeks
- Weed Control: Hand-pull to avoid root disturbance
Fall Recovery
- Post-Harvest: Incorporate chopped leaves into soil
- Cover Crops: Plant clover for nitrogen fixation
- Drainage Check: Add sand to compacted areas
Winter Prep
- Frost Protection: Mound soil around plant bases
- Mulch Layer: Apply 4" straw before first frost
- Tool Maintenance: Sanitize equipment with vinegar solution
Troubleshooting
- Yellow Leaves: Test for nitrogen deficiency
- Stunted Growth: Check compaction with soil probe
- Blossom Drop: Verify calcium levels above 200 parts per million
Harvesting and Storing Peppers
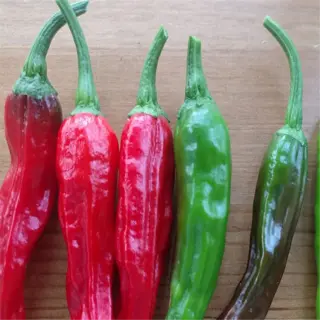
The color change that occurs in peppers indicates sugar content development. Fully sweet red bells will be at full maturity. Green jalapeños will be hot earlier than red bells. I picked a poblano too early, and the bitter flavor taught me to wait until it turned a deep reddish-brown color. Also, check the stem for slight looseness for ripeness indication.
Refrigeration increases the shelf life of varieties with thick walls, such as bell peppers, and the refrigerator's temperature should be around 45°F (7°C). For thin-skinned varieties, like serranos, refrigeration causes them to wilt quickly. Thin-skinned varieties are best stored in a pantry that is cool at room temperature. I kept habaneros on my counter for 10 days and they were firm when I cooked them, while habaneros stored in the refrigerator softened after 3 days.
You can freeze peppers whole now to stuff them later or slice them into pieces to cook up quickly. Sweet peppers should be blanched to stop the enzyme action. Simply dip the sweet peppers in boiling water for 90 seconds before freezing them. For super hots, like a ghost, force opens of previously frozen ghost peppers that I vacuum-sealed in 2022, my chili remains on fire today. Don't blanch the stinking peppers; it will reduce their heat.
Eliminate pantry moths and grain beetles by freezing dried chili peppers for 48 hours before storing them. Also, use glass jars with silicone seals to store them, plastic bags are useless against bugs! I lost a batch to weevils before learning that. You can also add bay leaves to the jar; they repel insects with the oils they generate without affecting the flavor of the chili peppers.
Refrigeration
- Temperature: 45-50°F (7-10°C)
- Humidity: 85-90% with damp paper towel
- Avoid: Storing near ethylene-producing fruits
Freezing
- Prep: Blanch 3 minutes before freezing
- Method: Flash-freeze on parchment-lined tray
- Container: Vacuum-sealed bags prevent freezer burn
Drying
- Sun-Drying: 5-7 days at 90°F+ (32°C+)
- Dehydrator: 125-135°F (52-57°C) for 8-12 hours
- Storage: Glass jars with oxygen absorbers
Pickling
- Brine Ratio: 1:1 water/vinegar + 2 tbsp salt per quart
- Additions: Garlic/dill for flavor enhancement
- Processing: Water bath can 10 minutes
Pest Prevention
- Freezer Defense: Double-bag hot varieties
- Pantry Storage: Bay leaves repel flour beetles
- Dried Peppers: Freeze 48 hours to kill larvae
5 Common Myths
Peppers need 12 hours of direct sunlight each day in order to produce fruit.
Peppers do well between 6-8 hours of sunlight. Longer exposure in hot climates will lead to sunscald. In temperatures greater than 90°F (32C) apply 30% shade cloth to protect fruits; at the same time you can reserve the photosynthesis efficiency for continual vegetative growth.
The hotter the pepper, the more difficult it is to grow.
Heat level (capsaicin content) does not have an impact on how difficult the peppers are to grow. All Capsicum species require similar care. The habaneros just take 10-14 more maturation days than bell peppers. The most important factors are spacing your plants and watering consistently.
Peppers require watering every day for proper growth.
Whether watering by hand or with. a system, over-watering causes root rot. Water deep either once or twice a week, letting the soil dry out 1-2 inches deep, between watering. In temperate zones, using drip irrigation, will supply about 1 inch (2.5cm) per week providing you account for natural rain.
Green peppers are unripe and therefore have less nutrition than colored peppers.
Some varieties, such as 'Green Bell,' stay green when they ripen. All peppers double their vitamin C content when they become fully colored. Green peppers still provide 120% DV of vitamin C per 100g and provide just as much vitamin C as an orange.
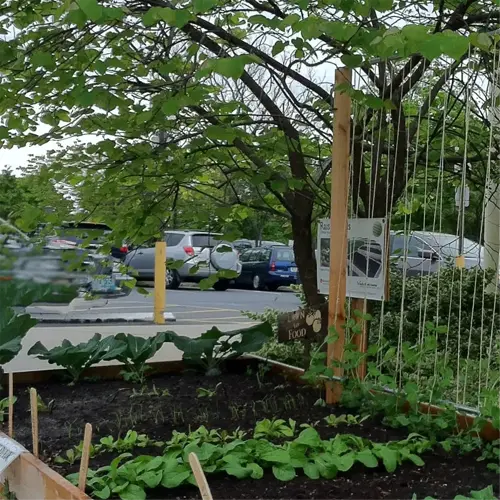
Peppers are unable to grow in a container or small area.
There are compact version like 'Lunchbox Hybrid' that can produce 20-30 peppers in a 5-gallon pot. Just make sure that you have good draining soil with Perlite, fertilize every other week with a 5-10-10 NPK, and make sure your peppers have well over 14 hours of grow light access when growing inside.
Conclusion
Learning how to grow peppers shows that the magic of gardening is all about simplicity. All one needs is a pot, quality soil, and their seeds. The first peppers I grew came from recycled yogurt containers, proof that insufficient space or tools won't diminish the pleasure of picking peppers grown at home.
Try growing some unusual varieties to wake up the joy of growing. Purple UFO or tiny "lunchbox" hybrids can add a neat element to your cooking. For instance, last winter I grew a chocolate-colored habanero, which had a smoky sweetness that made my winter chili sing! Variety can keep gardening new for all experience levels, from beginner to veteran.
Review those selections again if you want to help ensure that next week continues to be an easy process for you. Then just take those principles and apply them to the dwarf varieties for patio pots, or the mega bells for homesteads. Every pepper type offers you a chance to sharpen your green thumb.
Indoor setups allow peppers to ignore the seasons. I had peppers, specifically ‘Padrón' plants, which produced fruit while under grow lights from mid-summer until well into December. You can overwinter mature plants by simply pruning back the stems and then repotting them. This saves time on replanting, while also enabling another season of harvests that breaks the limits of the frost.
External Sources
Frequently Asked Questions
What is the trick to growing peppers?
The trick lies in consistent soil warmth, proper spacing for airflow, and balanced fertilization. Peppers thrive with 6-8 hours of sunlight, well-draining soil amended with compost, and avoiding overwatering to prevent root diseases.
How do peppers grow for beginners?
Start with easy varieties like bell or banana peppers. Use seedlings indoors for early growth, transplant after frost, and maintain steady moisture. Mulch to suppress weeds and protect roots from temperature swings.
What does Epsom salt do for pepper plants?
Epsom salt provides magnesium, which aids chlorophyll production and nutrient absorption. Apply a diluted solution monthly during flowering. Overuse can harm soil pH, so test soil first to confirm magnesium deficiency.
Is it better to grow peppers in pots or ground?
Pots work well for small spaces and controlled soil conditions, while ground planting suits larger yields. Both require:
- Well-draining soil
- Full sunlight
- Regular feeding with low-nitrogen fertilizer
What makes peppers grow better?
Optimal growth requires warm soil, consistent watering without saturation, and nutrient-rich amendments like compost. Avoid overcrowding and use row covers early to protect seedlings. Prune lower leaves to improve airflow and reduce pests.
Do you pinch out the tops of pepper plants?
Pinching tops encourages bushier growth and higher yields in compact varieties. For larger plants like bell peppers, focus on removing suckers instead. Always use sterilized tools to prevent disease spread.
How many peppers will one plant produce?
A healthy plant yields 15-30 peppers, depending on the variety. Smaller hot peppers like Thai or habanero produce more fruits, while larger sweet peppers focus energy on fewer, bigger pods.
Do coffee grounds help peppers grow?
Coffee grounds add organic matter and mild acidity to soil. Mix sparingly into compost to avoid nitrogen imbalance. They deter slugs but shouldn't replace balanced fertilizers for fruit development.
Should I bury the stem when transplanting peppers?
Bury stems up to the first set of leaves to strengthen roots. This stabilizes leggy seedlings and improves drought resistance. Avoid burying grafted plants or those in cold, wet soils.
How often should I water pepper plants?
Water deeply 1-2 times weekly, adjusting for heat and soil type. Let the top inch dry between sessions. Overwatering causes yellow leaves, while uneven moisture leads to blossom-end rot.