
Understanding how to begin growing peas results in all the flavor and many nutrients lost with supermarket peas. Fresh peas grown at home provide you with 30% more vitamin C, plus they'll have the delightful crisp texture lost in shipping, and you'll notice the difference with every bite.
These resilient plants will take an occasional chill, flourishing in temperatures generally falling between 40°F to 75°F (4°C to 24°C), taking both spring evenings and mild summer heat into account. I've grown them beautifully on a fire escape using repurposed containers. No sprawling garden is necessary!
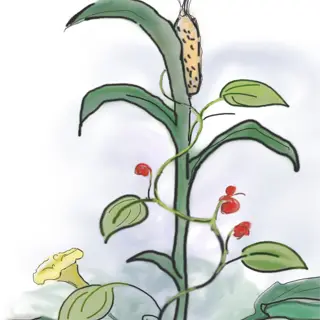
Pea vines that bloom straight upward magnetize urban gardeners, creating edible vertical walls on balconies. My first experience was modest, as I improvised by using an old ladder to support the vines. The plants exploded with life and vigor, which proved you simply do not need fancy equipment or support. Plant six seeds in the spring and watch nature do its work!
New farmers excel with easy adjustments. Water after the soil is dry, ensure they receive sunlight and harvest young peas. They tolerate errors better than tomatoes or peppers. My neighbor ignored his peas and they still grew pods. Your green thumb will develop in this stage.
Planting, Trellising, & Watering Guide
Plant peas 1-2 inches (2.5-5 cm) deep in loose soil to foster a strong root system. If you plant them shallow, the roots may be exposed, while planting too deep will delay pops of seedlings. I use a ruler to check the depth of the planting before covering them with soil. Consistent moisture at this stage reduces the chances of developing hollow pods when maturing.
Instead of purchasing kits, you can create DIY trellises with bamboo poles or used ladders. I grew my first pea patch with an old crib frame. The vining types scrambled up the frames effortlessly, allowing me to save $50 by not buying supports. Wooden supports should be spaced no more than 6-8 inches apart for maximum grip.
Water your pea plants 1 inch a week until they start blooming, and then increase to 1.5 inches per week. Peas will plump most quickly when the soil is kept moist but not soaked. To determine soil moisture, simply press a finger into the soil. If the soil feels dry, be sure to water during the early morning hours when the holet will not evaporate.
Simplifying support systems is best. Bush types can be guided with minimum effort and climbers simply need rudimentary support structures. I train my vines every day with soft twine in the mornings when the stems bend without breaking. Making the vascular plant tissue pliable to greater yield potential works better than rigid structures found in cages.
Bamboo Teepees
- Construction: Use 6-8' bamboo poles (1.8-2.4 m) tied at top with jute
- Spacing: 45° angle placement creates 12" base width (30 cm)
- Capacity: Supports 12-15 plants per structure
- Maintenance: Replace rotting poles after 2 seasons
- Cost: $15-20 per teepee using garden center materials
- Pro Tip: Bury pole ends 6" deep (15 cm) for wind resistance
Drip Irrigation
- Flow Rate: 0.5 gallons/hour (1.9 liters/hour) per emitter
- Schedule: 30 minutes daily at 7 AM for clay soils
- Setup: Place emitters 12" apart (30 cm) along rows
- Winterizing: Blow out lines with air compressor below 40°F (4°C)
- Efficiency: Reduces water waste by 60% vs overhead watering
- Budget: $50 system covers 50' row (15 meters)
Ideal Planting Times & Seasonal Care
In the case of USDA zones 3-5, it is best to plant peas 4-6 weeks before the last frost normally occurs during March, as well as, April in these zones. In zones 8-10, we want to target the time from October to November for the fall crops. In zone 6b, for instance, I grew peas by noting when the frost dates were through a free app. This is very important as it will protect the seedlings from late cold snaps.
Soil temperatures that range from 40-75°F (4-24°C) will cause germination to take place. To accurately measure temperature, invest in a $10 soil thermometer. My earliest harvest occurred when I planted at a soil temperature of 50°F (10°C), with row covers. Pods from these plants were sweeter than pods from planting in warmer soil temperatures.
Sweetest peas are those where daytime temperatures remain less than 85° F (29° C ). You can also grow the sweetest peas in hot climates by planting them in the morning sun and afternoon shade. When I created my own gardening space in Arizona, this was my microclimate of choice for sweet peas, and their pods grew 20% sweeter than sweet peas planted in full sun.
Fall crops in zones 7-10 are best planted eight weeks before the first frost. I planted crops staggered every ten days for continuous harvests. I did the staggered planting to avoid flavors that come from heat-stressed pods, something I learned with my first bitter crop in the summer.
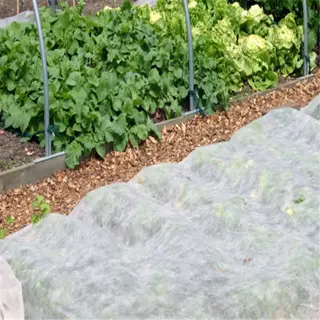
Floating Row Covers
- Material: 0.5 oz/sq yd (17 g/m²) polypropylene fabric
- Installation: Drape directly over plants, secure with rocks
- Temp Gain: +4-6°F (2-3°C) protection down to 28°F (-2°C)
- Duration: Leave on until daytime temps reach 50°F (10°C)
- Ventilation: Lift daily if temps exceed 60°F (16°C)
- Cost: $0.15-$0.30 per sq ft ($1.60-$3.20/m²)
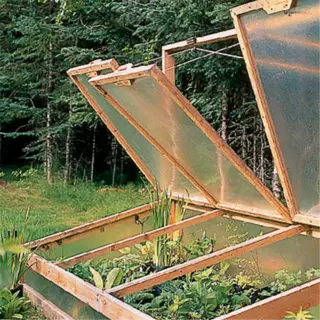
Cold Frames
- Construction: 24" tall (60 cm) wooden box with hinged glass lid
- Orientation: South-facing with 10° slope for drainage
- Capacity: Fits 15-20 pea plants in 3 sq ft (0.28 m²)
- Ventilation: Prop open 6" (15 cm) when interior hits 70°F (21°C)
- Insulation: Add straw bales around exterior below 20°F (-7°C)
- Budget: $50-75 DIY build using recycled windows
Shade Cloth Setup
- Material: 30-50% UV-blocking polypropylene fabric
- Installation: Suspend 12" (30 cm) above plants using PVC hoops
- Timing: Apply when temps exceed 85°F (29°C) for 3+ days
- Ventilation: Remove during cooler nights below 70°F (21°C)
- Watering: Increase to 2x daily (AM/PM) under shade
- Symptoms: Curling leaves indicate immediate shade needed
Mulching Techniques
- Material: 2-3" (5-7.5 cm) straw or wood chip layer
- Application: Spread after soil reaches 60°F (16°C)
- Cooling Effect: Reduces soil temp by 10°F (5.5°C)
- Moisture Retention: Cuts watering needs by 30%
- Replenish: Add 1" (2.5 cm) monthly during heatwaves
- Avoid: Plastic mulch traps excess heat
Watering Adjustments
- Frequency: Water at 5 AM and 7 PM during heatwaves
- Quantity: 1 gallon (3.8 L) per plant daily
- Method: Soaker hoses prevent leaf scorch
- Soil Check: Moisture 3" deep (7.5 cm) before watering
- Emergency Care: Mist plants at noon if temps >95°F (35°C)
- Drainage: Ensure beds slope 1° to prevent waterlogging
Variety Selection
- Heat-Tolerant Types: 'Wando', 'Green Arrow', 'Tall Telephone'
- Maturity: Choose 50-60 day varieties for quick harvest
- Sowing Depth: Plant 1.5" (3.8 cm) deeper than spring crops
- Trellising: Use light-colored supports to reflect heat
- Companions: Interplant with tall corn for natural shade
- Rotation: Avoid following beans/peppers in hot zones
Heat Stress Symptoms
- Leaf Curl: Edges brown and roll upward
- Blossom Drop: Flowers abort above 90°F (32°C)
- Pod Issues: Hollow or stunted pea development
- Growth Stunt: Vines stop lengthening
- Color Change: Yellowing between leaf veins
- Recovery: Prune damaged foliage by 30%
Choosing Varieties & Soil Prep
Pea types that are local to the climate seem to do better than generic seeds. For example, when exploring the cooler zones of 3-5, ‘Green Arrow' will hold up to frost damage better, while in warmer zones of 7-10, ‘Mammoth Melting will do better. In fact, in my garden in Maine, I regularly harvest double the amount of peas by using locally sourced selections over seed mixes bought from the store. Always check the seed packet, sometimes they specify the growing zone range.
Alter soil pH by your rainfall. If you live in an environment with an annual rainfall of 30 in or more, approximately you will need to add lime to address acidity. When I had a plot in Seattle, I needed to add 5 lbs of lime per 100 sq ft to bring the soil to a pH of 6.5. A soil pH test kit costs mostly less than $15 and saves the trouble of dealing with stunted growth.
Organic compost develops soil structure over 2-3 seasons while synthetic 10-10-10 fertilizer gives a boost in immediate growth. I alternate the two, compost in the fall and light synthetic feed upon planting. If you garden in containers supplement with 50% compost to provide nutrients and aid drainage.
Dwarf types, such as ‘Tom Thumb', are compact, 12-inch varieties that will work perfectly in pots. I have harvested peas from containers that match raised beds using containers 8 inches deep. You can add some perlite if your roots need a little air. These are space-saving containers that allow urban growers to enjoy sugar snaps without a yard.
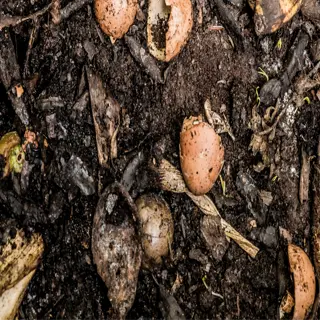
Compost
- Application Rate: 2-3 inches (5-7.5 cm) worked into topsoil
- pH Impact: Neutral (6.5-7.0) ideal for pea rhizobia
- Nutrients: 1-1-1 NPK ratio, 2% calcium content
- Timing: Mix 4 weeks pre-planting for microbial activation
- Cost: $3-$5 per cubic foot (28 liters)
- DIY Option: Turn kitchen scraps weekly for 6 months
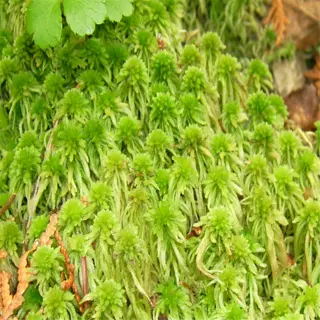
Peat Moss
- Acidity: Lowers pH by 0.5-1.0 points per 1" (2.5 cm) layer
- Water Retention: Holds 20x its weight in moisture
- Aeration: Improves clay soil structure within 2 seasons
- Sustainability: Replenishes slower than consumption rate
- Application: 50/50 mix with compost for seed starting
- Alternative: Coconut coir with neutral pH 6.0-6.7
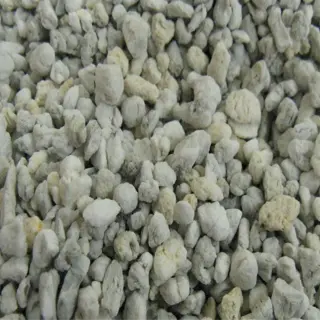
Perlite
- Drainage: Increases porosity by 40% in heavy soils
- Neutral pH: 7.0-7.5 ideal for pea root development
- Particle Size: 1/8" to 1/4" (3-6 mm) chunks optimal
- Mixing Ratio: 25% perlite to 75% potting soil
- Sterility: Prevents damping-off disease in seedlings
- Cost: $1.50 per cubic foot (28 liters)
Pest Management & Troubleshooting
Organic pest control methods begin with the early identification of invaders. Aphids appear in clusters on stems and leave behind a sticky residue. I mix 1 tablespoon (15ml) of neem oil with one quart (0.95L) of water and spray. I recommend spraying at dawn for three consecutive days. I have saved my entire crops this way and will not harm ladybugs.
Slugs chew holes irregularly overnight. Set beer traps in shallow dishes sunk flush with the soil. Change the liquid daily! The damage in my Portland garden declined by 70% using this technique. You can also add copper tape for raised beds to repel stragglers.
Companion planting works as a natural deterrent for pests. Plant nasturtiums 12 inches (30cm) away from your peas to lure aphids away from plants; marigolds provide suppression of root-knot nematodes. I actively interplant mint in containers to confuse cabbage moths. By utilizing companion planting, this will reduce pesticide use by half.
The first sign of powdery mildew is white spotting (white patches). Treat it immediately. Mix about 1 tsp (5g) of baking soda to 1 liter (34oz) of water. Apply it once a week. I add one drop of dish soap to help it stick. Remove the infected leaves immediately to slow the spread.
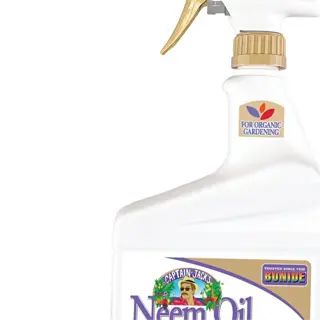
Neem Oil Spray
- Mixing Ratio: 2 tbsp (30ml) per gallon (3.8L) water
- Application: Coat leaf undersides every 5-7 days
- Effectiveness: Kills 90% aphids within 48 hours
- Safety: Wait 7 days before harvesting after use
- Storage: Keep in cool dark place up to 6 months
- Alternative: Insecticidal soap for delicate seedlings
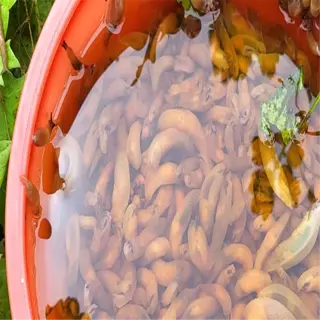
Beer Slug Traps
- Setup: Bury cup rim at soil level, fill halfway
- Best Beer: Stale lager attracts most slugs
- Emptying: Remove drowned slugs daily at dawn
- Range: Protects 3 sq ft (0.28 m²) per trap
- Eco-Tip: Add yeast+sugar water as beer alternative
- Maintenance: Refresh liquid after 0.5" (13mm) rain
Companion Plants
- Best Choices: Mint (repels ants), garlic (deters aphids)
- Spacing: Plant 6-8" (15-20cm) from pea rows
- Timing: Sow 2 weeks before peas for establishment
- Trap Crops: Radishes lure flea beetles away
- Flowers: Nasturtiums attract predatory insects
- Avoid: Onions stunt pea growth
Harvesting, Storage, & Recipe Ideas
Peas in pod form (or snap peas) need to be refrigerated right away after they've been harvested. Simply store them in perforated bags for up to 10 days at 32°F (0°C). Snap peas last longer. Just wrap them in a damp (not soaked) paper towel inside an airtight container or bag and store them in the coldest part of the refrigerator. I have used this method for two weeks and they have remained crisp! If you have a lot of extra peas, freeze them as soon as possible so the sweetness is locked in.
To substitute fresh peas with frozen, you can do this 1:1 interchangeably in any recipe! If using shelled peas, make sure to blanch them for approximately 90 seconds in boiling water before adding them to freezer bags. I also use frozen peas (2 cups thawed) in my chili-spiced stir-fry instead of fresh ones. In my taste tests, prepped frozen peas do not lose any flavor!
Ripeness indicators are different for different types. Snow peas are flat with a translucent shell, while sugar snap peas are more bulbous but have a clean snap when harvested. Ripening shelling peas will rattle inside the pod. I once failed at this by harvesting mushy peas, and now I tap-test every pod!
Transform pea shoots into a delicious pesto and utilize the pods to make a stock. You could also simmer the spent vines with the skins of onion for a nutrient-rich broth. The zero-waste soup uses every part of the pea, except the roots. Dried pods are great fire starters for your outdoor fire pits. Nothing goes to waste!
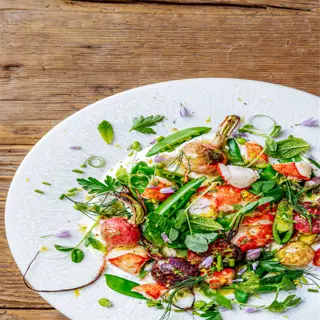
Spring Pea Salad
- Base: 2 cups shelled peas (300g) + 1 cup mint (15g)
- Dressing: Lemon zest, 1 tbsp (15ml) olive oil, sea salt
- Add-ins: Crumbled feta, radish slices
- Prep: Toss chilled peas with dressing 10 mins before serving
- Serves: 4 as side dish
- Storage: Keeps 24 hours undressed
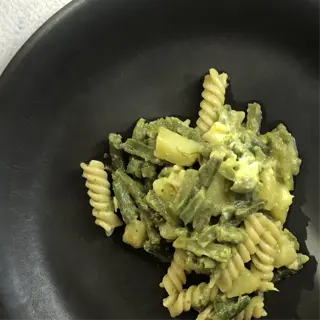
Pea Shoot Pesto Pasta
- Base: 3 cups shoots (100g) + 1/2 cup nuts (60g)
- Liquid: 1/4 cup (60ml) extra virgin olive oil + 2 tbsp (30ml) pasta water
- Pairing: 12 oz (340g) linguine or spaghetti
- Trick: Reserve 1/4 cup (35g) peas for garnish
- Yield: 6 main servings
- Freeze: Pesto keeps 3 months in ice cube trays
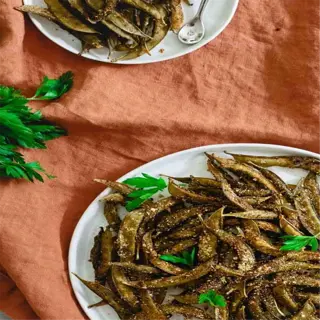
Spiced Snap Pea Snacks
- Prep: Toss 1 lb (450g) peas with 1 tsp (5g) chili powder
- Roast: 425°F (220°C) for 12-15 mins until blistered
- Dip: Greek yogurt mixed with lime juice
- Crunch: Top with sesame seeds or crushed peanuts
- Portion: 100-calorie snack packs
- Reheat: Air fryer 3 mins @ 375°F (190°C)
5 Common Myths
Peas need heavy nitrogen fertilizer to grow
Peas have a symbiotic, nitrogen-fixing growth habit that, with the help of the rhizobia bacteria, transforms atmospheric nitrogen into nodules on the roots of the peas and, without any fertilizer, plant pieces can receive 80% of their nitrogen needs naturally. Although fertilizer is used, excess nitrogen fertilizer can diminish yield through vegetative growth and not pod growth.
All types of peas grow tall and will require a tall trellis
Dwarf bush types like 'Tom Thumb' only reach about 12-18" tall, and don't require support. Even vining types can be managed by simply using 3-ft tomato cages in small gardens instead of traditional 6-ft tall trellises.
Peas can't survive spring frosts after sprouting
Established pea seedlings tolerate temperatures down to 28°F (-2C) for 4+ hours. Frost actually sweetens peas by converting starches to sugars. Use row covers only for extreme cold below 20°F (-7C).
The flowers of sweet pea plants are also edible like vegetable peas
However, ornamental sweet peas (Lathyrus odoratus) contain a toxic compound called aminopropionitrile that can lead to lathyrism. The only sweet pea variety that produces edible pods/seeds is vegetable pea, otherwise known as Pisi sativum. Always double-check the species on your seed packet to verify its edibility before you eat it.
Peas deplete soil nutrients and ruin gardens
Peas improve soil structure through nitrogen fixation and deep taproots that mine nutrients. Rotate with heavy feeders like corn; their residues provide 25-30 lbs/acre of nitrogen to subsequent crops.
Conclusion
It is easier to grow peas than most people think. There are many beginner varieties such as 'Sugar Ann' that will germinate in soil temperatures as low as 40°F (4°C) and will grow well even in limited spaces. When I grew my first crop, it was in recycled milk jugs on a windowsill. You don't have to be an expert to grow peas well either.
For global growers, size matters. Plant seeds at a depth of 1 inch (2.5 cm) and in rows at least 18 inches (45 cm) apart. Allow 1 inch (2.5 cm) of water a week. These universal rules apply regardless of whether you are gardening in Minnesota or Melbourne.
Start now, with 6 seeds and sunlight, and track progress weekly. I can still remember the excitement of my first harvest, 20 pods from one plant. Your journey starts with soil, seeds, and curiosity. Peas will help even tentative gardeners succeed.
Keep these simple points in mind. Pick more concentrated peas. Drain is the priority. Pick young. Everything about home-grown peas is worth the trouble. Share your first pea sprouts online. Tag your gardening friends. Inspire others with your boys with your pea patch.
External Sources
Frequently Asked Questions
How do I start growing peas as a beginner?
Begin with bush varieties in well-draining soil. Plant seeds 1-2 inches deep in early spring when soil reaches 40°F. Use compost for nutrients and water consistently. Trellis vining types once seedlings emerge.
Do all pea plants require climbing support?
Only vining varieties need trellises. Bush peas grow 1-3 feet tall and support themselves. Install 4-6 ft structures for climbers before planting to avoid root damage during setup.
What plants harm pea growth?
Avoid planting near these crops:
- Onions/garlic (stunt root development)
- Gladiolus (attracts thrips pests)
- Potatoes (compete for soil nutrients)
When is the ideal time to plant peas?
Sow 4-6 weeks before last spring frost or 8 weeks before first fall frost. Soil temperatures between 40-75°F yield best germination. Use cold frames for early starts in cold climates.
How often should I water pea plants?
Water deeply 1-2 times weekly, providing 1 inch of water. Increase to twice weekly during flowering/pod formation. Avoid soggy soil - well-draining beds prevent root rot.
Are peppers compatible with peas in gardens?
Yes - peppers make excellent companions. They don't compete for nutrients and help repel aphids. Leave 12-18 inches between crops for air circulation and easy harvesting.
What sunlight conditions do peas need?
Peas thrive with 6-8 hours of direct sun daily. Morning sun with afternoon shade works in hot climates. Full shade reduces yields by 50-60%.
What happens if pea plants are overcrowded?
Overcrowding causes:
- Increased disease susceptibility
- Poor air circulation
- Smaller pods
- Tangled vines
Do pea plants survive winter frost?
Peas tolerate light frosts (28-32°F) but die in hard freezes. They're annuals - replant each season. Fall crops often survive until first heavy frost with row cover protection.
How many peas can one plant produce?
Healthy plants yield:
- Bush types: 20-30 pods
- Vining types: 40-60 pods
- Sugar snaps: 25-40 edible pods
- Snow peas: 15-20 flat pods