
Understanding how to grow oregano yields a super adaptable herb that works in three ways in your backyard. Originating from the Mediterranean, oregano adds flavor to any meal, boasts centuries-old health benefits, and brings a pop of color with its beautiful, delicate flowers and lively green leaves. Additionally, when it's dry and hot, oregano is extremely drought-tolerant, making it an ideal herb for beginners.
This guide provides comprehensive instructions for growing oregano well. You'll learn everything you need, from selecting the proper variety of oregano to the overall necessary growth conditions. We'll discuss all the steps involved in planting, seasonal care, and clever preservation. Numerous practical tips and strategies to help you avoid common mistakes!
Look for detailed sections on variety selection for your climate and kitchen needs. We cover soil preparation, watering schedules, and pruning techniques. Later chapters dispel myths around this hardy herb. You will feel empowered to grow oregano successfully year after year.
Overwintering Strategies
Your USDA hardiness zone will influence the method you use to protect oregano for the winter. Gardeners in zones 5 and above can typically leave the plants outdoors (with a little mulch protection) without special efforts for winter. Those in colder zones below 5 need to make special considerations. You are adding six inches of straw mulch after the first frost. That is about fifteen centimeters of insulation for your roots.
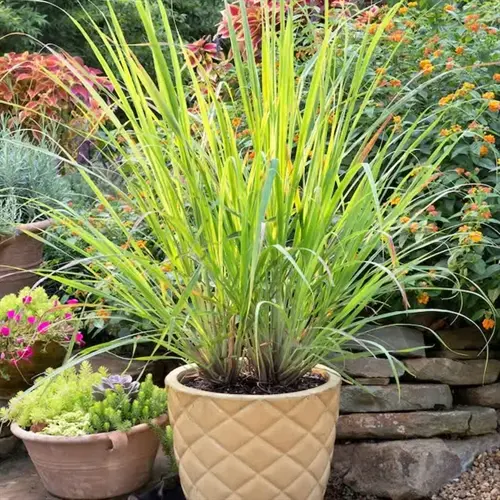
Container plants have various methods of overwintering. If you want to protect pots completely indoors, move them to a cool, bright place, such as a garage or basement. Water much less frequently to maintain plant health. I choose to bring my potted oregano to a south-facing window. Again, I also water only when the top inch of soil feels completely dry.
Timing is important for spring pruning. Prune dead stems in early spring, before new growth appears. Never prune your plant when it is dormant for winter. This will promote strong bushy regrowth after pruning. I prune around March, when a few nights with temperatures above freezing have occurred. Use clean, sharp shears and make precise cuts.
Be diligent about checking the temperatures during the overwintering phase. Oregano can handle a short dip as low as 20°F or -7°C. Oregano will die from freezing temperatures (below 10°F (-12°C)) for a longer period of time or with protection. Check the mulch if heavy snow or large rainfall occurs. Lay down more insulating materials, if needed, on particularly bitterly cold waves.
Culinary Uses Explored
Use oregano wisely in cooking, as the fresh and dried forms require different amounts for optimal use. Substitute one tablespoon of fresh leaves with one teaspoon of dried leaves because drying reduces the moisture content and intensifies the flavor. This is approximately 15 milliliters of fresh or 5 milliliters of dried. Dried oregano should be added to the dish in the early stage of cooking to build flavor. Dried implementations are sensitive to high temperatures and retain more delicate essential oils if cooked below 300 degrees Fahrenheit or 150 degrees Celsius.
Oregano not only imparts flavor, but it also provides some nourishing power! One tablespoon of fresh oregano leaves offers significant levels of vitamins A, C, and K. You will receive around fifteen percent of your daily requirements for vitamin K. A serving has iron, supporting blood health with three percent of daily iron needs. Oregano offers more than just flavor; it is packed with health-promoting properties.
Variations of oregano create different flavors in your dishes. Greek oregano provides the earthy pine notes necessary for Mediterranean fare. Hot and Spicy provides a tangy heat that's perfect for Mexican foods. Finally, Italian variants offer just the right amount of balanced mildness for your everyday sauces. So use Greek on pizza and Hot and Spicy on chili.
Unlock the full flavor potential of oregano by using it appropriately with other food ingredients. For well-known Mediterranean flavors, pair oregano with tomatoes and olive oil. Use it with cumin and chilies for an assertive Mexican flavor. Avoid hot applications, which destroy most of the flavor volatiles. Store dried leaves in dark, airtight containers.

Mediterranean Dishes
- Flavor Impact: Oregano's earthy notes intensify tomato-based sauces, requiring just 1 tsp (5ml) dried per 4 servings for authentic Greek flavor.
- Heat Tolerance: Add dried leaves early in cooking; fresh oregano loses 40% flavor when exposed to heat above 300°F (149°C).
- Pairing Science: Combines with basil and thyme in 2:1:1 ratios to create balanced herb profiles without bitterness.
- Nutrition: One tablespoon (15ml) provides 15% DV vitamin K and 3% DV iron, enhancing meal nutrient density.
- Storage Tip: Preserve freshness by freezing whole sprigs in olive oil cubes, retaining flavor for 6 months.
- Variety Choice: Greek oregano dominates Mediterranean cooking due to its robust, non-bitter flavor after drying.

Herbal Infusions
- Preparation: Steep 2 tsp (10ml) dried leaves in 8 oz (237ml) boiling water (212°F/100°C) for 5 minutes to extract antioxidants.
- Health Compounds: Contains carvacrol and thymol, potent antimicrobials effective against common pathogens at 50mg concentrations.
- Serving Tip: Add honey and lemon to mask bitterness; optimal serving temperature is 160°F (71°C).
- Drying Method: Air-dry stems upside down for 14 days to concentrate essential oils by 30%.
- Dosage: Limit to 3 cups (710ml) daily; high thymol content may cause digestive discomfort in sensitive individuals.
- Storage: Keep dried leaves in opaque containers; light degrades active compounds within 6 months.

Meat Rubs
- Marinade Chemistry: Oregano's enzymes break down proteins; use 1 tbsp (15ml) per pound (454g) of meat with olive oil.
- Grilling Technique: Apply rub 2 hours pre-cooking; high-heat searing caramelizes sugars without burning leaves.
- Flavor Pairing: Combine with paprika and garlic in 3:2:1 ratios for balanced seasoning on poultry and lamb.
- Preservation: Salt-cured oregano retains flavor for 18 months; mix 1 cup (237ml) leaves with ¼ cup (59ml) kosher salt.
- Regional Variants: Mexican dishes use Hot & Spicy oregano with cumin for complex, smoky notes.
- Nutrition: Each tablespoon (15ml) adds 5% DV calcium and 2% DV magnesium to meat dishes.
Vegetable Roasting
- Application Rate: Toss vegetables with 2 tsp (10ml) dried oregano per baking sheet before roasting at 425°F (218°C).
- Oil Binding: Mix with 3 tbsp (44ml) olive oil to evenly coat root vegetables like potatoes and carrots.
- Caramelization: Natural sugars in oregano create golden crusts after 25 minutes of roasting.
- Fresh vs. Dried: Use fresh leaves for zucchini and eggplant; dried works better with dense vegetables like beets.
- Acid Balance: Finish with lemon juice after roasting to brighten earthy flavors without bitterness.
- Shelf Life: Store roasted veggies with oregano for up to 4 days; flavor improves over time.
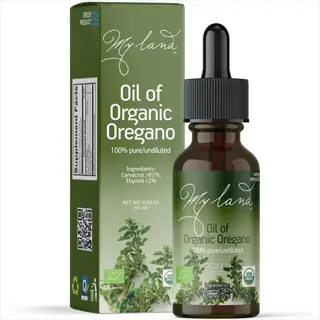
Infused Oils
- Extraction Method: Heat 1 cup (237ml) olive oil with ½ cup (118ml) fresh leaves at 180°F (82°C) for 15 minutes.
- Preservative Action: Carvacrol content extends oil shelf life by inhibiting bacterial growth for 3 months.
- Usage Ratio: Add 1 tsp (5ml) infused oil per 2 servings in dressings or marinades for pronounced flavor.
- Safety: Refrigerate after infusion; botulism risk increases when storing at room temperature.
- Medicinal Application: Apply topically for minor cuts; oregano oil shows antimicrobial effects within 5 minutes.
- Varietal Difference: Italian oregano yields milder oil; Greek varieties produce stronger, peppery infusions.
Propagating Oregano
Propagating oregano is easy with simple techniques. Make cuttings in the spring when the plant is showing vigorous growth. Meticulously disinfect your shears with seventy percent isopropyl alcohol before each cut to avoid spreading disease. This way, you will have both parents and the new plants protected.
Select the ideal soil mix for successful propagation. Mix three parts potting mix and one part coarse sand for good drainage. Root cuttings in this mix will show roots within fourteen to twenty-eight days. Even with water propagation, you can expect the same turnaround time, which is approximately three days, when you change out the water.
Evaluate methods of vegetative propagation by percentage of rooting success and speed of development. Stem cuttings produce new plants in just weeks, with a 90% rooting success rate. Division is most effective for mature plants, with a 95 percent success rate. Seed propagation takes more time to make a new plant, but has a lower cost with a 70 percent germination rate.
Ensure that all work tools are sterilized between each plant to prevent disease from spreading from one plant to another. For instance, I always wipe my pruning shears with alcohol wipes after each cut. This one step of good hygiene/spreading fungal diseases will save your oregano. Overall, if your tools are cleaned, you will have a good start to your new herb plants.
Water Propagation
- Step 1: Cut 6-inch (15 cm) stems from healthy plants using sterilized shears; remove lower leaves.
- Step 2: Place stems in glass with 3 inches (7.6 cm) of water; submerge leaf nodes.
- Step 3: Change water every 3 days; position near sunny window (68-77°F/20-25°C).
- Step 4: Roots emerge in 14-28 days; transplant when roots reach ½ inch (1.3 cm).
- Success Rate: 90% under optimal conditions; avoid direct sunlight during rooting.
- Tip: Use amber glass to inhibit algae growth without harming roots.
Soil Propagation
- Step 1: Fill 4-inch (10 cm) pots with mix of 70% potting soil + 30% coarse sand.
- Step 2: Dip stem ends in rooting hormone; insert 2 inches (5 cm) deep into moist soil.
- Step 3: Cover with plastic dome; maintain 60% humidity and 70°F (21°C) temperature.
- Step 4: Mist soil daily; roots establish in 21-35 days; tug test confirms rooting.
- Success Rate: 80%; reduce watering frequency after week 3 to prevent rot.
- Tip: Bottom heat mats accelerate rooting by 40% in cooler environments.
Seed Propagation
- Step 1: Surface-sow seeds in trays 8-10 weeks before last frost; do not cover (light aids germination).
- Step 2: Maintain 70°F (21°C) soil temperature; mist surface 2x daily to keep moist.
- Step 3: Thin seedlings to 2-inch (5 cm) spacing when 2 sets of true leaves emerge.
- Step 4: Harden off over 7 days; transplant outdoors after frost risk passes.
- Germination Rate: 70% at optimal conditions; use fresh seeds for best results.
- Timeline: 75 days from sowing to first harvest; pinch tops at 4 inches (10 cm) height.
Division Technique
- Step 1: Dig up mature plants (2+ years old) in early spring before new growth.
- Step 2: Separate rootball into sections using sharp knife; ensure each has 3+ stems and roots.
- Step 3: Replant divisions immediately at original depth; space 12 inches (30 cm) apart.
- Step 4: Water deeply; apply diluted seaweed extract to reduce transplant shock.
- Success Rate: 95%; divisions yield harvestable leaves in 30 days.
- Caution: Avoid dividing during flowering; stress reduces survival rate by 50%.
Layering Method
- Step 1: Bend low-growing stem to soil; wound node with sterilized knife.
- Step 2: Bury wounded section 2 inches (5 cm) deep; secure with landscape pin.
- Step 3: Keep soil moist; roots develop at wounded node in 45-60 days.
- Step 4: Sever from mother plant; transplant with 4-inch (10 cm) root system.
- Success Rate: 85%; ideal for ground-cover varieties like Greek oregano.
- Seasonality: Start in late spring; avoid high-summer heat above 85°F (29°C).
Planting Essentials
When the soil has reached a temperature of 50°F (10°C), you can plant oregano. This temperature is required for adequate root development. Soil thermometers can determine soil temperatures, waiting for two weeks after the last frost date. Cold soils delay plant growth and make them prone to root diseases. I tend to wait until daytime air temperatures stay above 60°F (16°C) if in a cooler region.
For healthy growth, space plants adequately.In garden beds, space plants 12-18 inches (30-45 cm) apart. In containers, use pots at least 8 inches (20 cm) wide for each plant. Crowding plants can lead to fungal problems, and adequate airflow helps prevent disease.
A drainable soil is amended with coarse sand. Mix 3 parts of native soil with one part of coarse sand. This will prevent waterlogging in heavy clay native soil. You may also add one part of nutrients to the compost. Beneficial to the oregano growing in this drainable soil.
Modify sun exposure considering your climate zone. Give full sun (6+ hours) in cooler climate zones (3-7). In warm climate zones (8-10), provide afternoon shade when the temperature exceeds 90°F (32°C). Gardeners south of zone 8 use 30% shade cloth during the summer heatwaves.
Timing
- Optimal Period: Plant 2 weeks after last frost when soil reaches 50°F (10°C); use soil thermometer for accuracy.
- Zone Adjustment: In zones 3-5, delay planting until daytime temperatures consistently exceed 60°F (16°C).
- Fall Planting: For perennial growth in zones 6-9, plant in early autumn 8 weeks before first frost.
- Container Flexibility: Potted oregano can be planted anytime except during freezing temperatures.
- Signs of Readiness: New growth appears at nursery plants' bases; avoid plants with woody stems.
Soil Preparation
- Ideal Composition: Blend 3 parts native soil with 1 part coarse sand and 1 part compost for drainage.
- pH Requirements: Maintain 6.0-7.0 pH; add lime if below 6.0 or sulfur if above 7.5.
- Amending Clay Soil: Incorporate 3 inches (7.6 cm) of horticultural grit to prevent waterlogging.
- Raised Bed Setup: Layer 4 inches (10 cm) gravel base + 8 inches (20 cm) soil mix for optimal root development.
- Nutrient Boost: Mix 1/4 cup (60ml) bone meal per plant hole for phosphorus enrichment.
Sun Exposure
- Minimum Light: 6 hours direct sun daily; in zones 7-10, provide afternoon shade above 90°F (32°C).
- Indoor Alternative: South-facing windows or 14-hour LED grow lights at 6-inch (15 cm) distance.
- Signs of Insufficiency: Leggy stems and pale leaves indicate light deprivation; relocate plants immediately.
- Seasonal Adjustment: Rotate containers weekly for even exposure; use reflectors to maximize winter light.
- Heat Management: In desert climates, use 30% shade cloth during peak summer months.
Planting Depth & Technique
- Root Ball Placement: Set transplants at original soil level; burying stems invites rot disease.
- Seed Sowing Depth: Surface-sow seeds; press gently into soil without covering (light-dependent germination).
- Watering Protocol: Soak planting hole before insertion; water thoroughly after planting to settle soil.
- Mulching Guidelines: Apply 2-inch (5 cm) straw layer after planting; keep 3-inch (7.6 cm) clearance from stems.
- Transplant Shock Prevention: Water with seaweed extract solution (1 tbsp/15ml per gallon/3.8L).
Container Considerations
- Minimum Size: 8-inch (20 cm) depth pots; 12-inch (30 cm) diameter for mature plants.
- Drainage Necessity: 3+ drainage holes per pot; add 1-inch (2.5 cm) gravel layer beneath soil.
- Soil Refresh: Replace top 3 inches (7.6 cm) annually; full repotting every 3 years.
- Material Choice: Terra cotta for breathability; glaze ceramic for moisture retention in dry climates.
- Mobility Tip: Use wheeled plant caddies for heavy containers; rotate weekly for even growth.
Care & Maintenance
Water orégano in each season for best health. In the summer, water straight down and deeply in a scheduled time, twice a week, when the top 2 inches of soil are dry. In winter, reduce watering and water the garden plants once a month. Meanwhile, potted plants should be watered every 10 to 14 days. Water the soil level unless there are other concerns, to prevent the leaves from becoming dry.
Make weekly, selective cuts to plants when they are growing actively to keep them bushy. Use sterilized scissors to take off stems just above a leaf node. This encourages it to branch and keeps the stems from becoming woody. In early spring, before new growth starts, remove the oldest, woody growth.
Once a month during the growing season, fertilize with a balanced 10-10-10 NPK formula. If planting in containers, use half the amount to prevent nutrient burn. Stop feeding six weeks before the first frost. Pale green leaves indicate a nitrogen deficiency that needs to be addressed.
Avoiding pests can be done naturally as part of your gardening plans. Ensure there is sufficient space in the bed for adequate airflow. Dispose of trash weekly, companion plant with basil to repel thrips. Apply a neem oil solution bi-weekly and during infestations. Inspect the underside of the leaves, and regularly check for infestations.
Watering Schedule
- Summer Protocol: Water deeply twice weekly when top 2 inches (5 cm) of soil are dry; avoid wetting foliage.
- Winter Adjustment: Reduce to monthly watering for outdoor plants; indoor pots need water every 10-14 days.
- Container Specific: Use finger test - water only when top 1 inch (2.5 cm) feels dry to prevent root rot.
- Signs of Stress: Crispy brown leaves indicate underwatering; yellow leaves signal overwatering.
- Tool Tip: Install drip irrigation with timer for gardens; use watering cans with long spouts for pots.
Pruning Techniques
- Regular Maintenance: Trim stems weekly during growth season; cut just above leaf nodes to encourage branching.
- Rejuvenation Pruning: Cut back one-third of plant in early spring; focus on oldest woody stems.
- Flower Management: Pinch buds in summer to prolong leaf production; allow autumn flowering for pollinators.
- Tool Care: Disinfect shears with 70% isopropyl alcohol between plants to prevent disease spread.
- Harvest Pruning: Cut stems 4 inches (10 cm) long; never remove more than 30% of foliage at once.
Fertilizing Practices
- Balanced Formula: Apply 10-10-10 NPK fertilizer monthly during growing season; halve dosage for containers.
- Organic Options: Top-dress with 1/2 inch (1.3 cm) compost quarterly; use worm tea every 6 weeks.
- Timing: Fertilize after watering to prevent root burn; avoid feeding 6 weeks before first frost.
- Deficiency Signs: Pale leaves indicate nitrogen shortage; purplish tint signals phosphorus need.
- Container Specific: Use slow-release pellets mixed into topsoil for consistent nutrient release.
Pest Management
- Prevention: Space plants 12-18 inches (30-45 cm) apart for airflow; remove fallen debris weekly.
- Common Pests: Spray aphids with strong water jet; wipe spider mites with alcohol-dipped cotton swabs.
- Companion Planting: Grow basil nearby to repel thrips; chives deter Japanese beetles.
- Natural Solutions: Apply neem oil solution (2 tbsp/30ml per gallon/3.8L water) biweekly during infestations.
- Monitoring: Inspect leaf undersides weekly; quarantine new plants for 14 days before introducing.
Seasonal Adjustments
- Spring Prep: Remove winter mulch gradually; apply balanced fertilizer when new growth emerges.
- Summer Care: Provide afternoon shade above 90°F (32°C); water early morning to reduce evaporation.
- Autumn Tasks: Stop fertilizing in September; harvest heavily before first frost in cold zones.
- Winter Protection: Mulch with 6 inches (15 cm) straw in zones 4-7; move containers to unheated garages.
- Indoor Transition: Gradually acclimate plants over 7 days; provide supplemental lighting for 12 hours daily.
5 Common Myths
Oregano will benefit from daily watering while growing in warm climates where it originally comes from, the Mediterranean.
Oregano is drought tolerant, preferring infrequent deep watering. If you water oregano daily this will lead to root rot; over-watering can lead to root rot especially in heavy soils. Established oregano will typically need only 1 inch (2.5 cm) of water a week, even with temperatures approaching 90° F(32C). The most important part of watering for oregano is well-drained soil - you should only water oregano when the top two inches (5 cm) of soil is completely dry and your oregano will thrive as it does in its native arid environment.
All types of oregano grow the same way, so it doesn't matter which type you choose, when you are purchasing a plant from a nursery.
Greek oregano (Origanum vulgare hirtum) is a frost tolerant of down to zone 5 and grows well in full sun. The Italian variety require zones 7+ and provide it partial shade in hot climates. 'Hot & Spicy' oregano is best in 8+ hours of direct sun for flavor, while there are also ornamental types of oregano, such as Kent Beauty, but those types will die below 40°F (4C). Just make sure you always check the tag specific to the variety of oregano for sunlight and zone tolerances.
Hydroponics produce a better flavor oregano than plants grown in soil.
Growing oregano in soil increases the concentration of essential oils compared to growing in hydroponics. Terpenes and terpenoids, like carvacrol, reach their maximum concentration when the roots interact with soil microbes. While hydroponics can grow oregano faster than soil, it often reduces the flavor compounds and increases the potential for root disease. Gardeners will consistently report a stronger aroma and taste for soil-grown plants.
Allowing oregano to flower makes the leaves taste bitter and must be trimmed within a few hours.
The flowers will not change the flavor of the leaves; the leaves are at their best flavor just before the plant flowers, when oil characteristics peak. Though the oregano flower is edible, it has a much milder flavor than the leaves. Summer blooming flowers also invite pollinators that prey on aphids; so it is only necessary to remove the spent summer flowers to encourage the plant to become bushy. Oregano and basil are sometimes confused; basil does become bitter when it flowers.
A single frost kills oregano permanently, making it unsuitable for cold climates.
Oregano survives temperatures as low as 20°F (-7C) by dying back to its roots and regenerating in spring. In USDA zones 4-7, apply 6-inch (15 cm) straw mulch after first frost. The plant's woody base insulates roots, with new growth emerging when soil reaches 50°F (10C). Only prolonged -10°F (-23C) without snow cover causes permanent loss.
Conclusion
Oregano is truly a triple threat in the garden. It adds strong flavors to your cooking, healing properties to your closet, and lovely ornamental features to your landscape. This popular herb is a welcome addition to any garden, and its drought tolerance makes it easy to care for, even for beginner gardeners.
Keep in mind the basic care principles for flourishing oregano. With its Mediterranean origins, it prefers full sun and well-draining soil. Watering should be deep and infrequent. Pruning should be consistent to avoid woodiness. Application of these practices will provide a constant supply of oregano. Even new gardeners find success using these simple methods.
Embrace the simplicity of oregano as you transition to your gardening. Start with one plant and increase the amount as you feel comfortable. Use different varieties for cooking. Try Greek oregano in tomato-based sauces and Hot and Spicy Dishes, such as chili. Find your favorite combinations.
Grab your garden tools and plant some oregano today. You'll enjoy fresh flavors, and you'll take pride in having grown your own herb. If you have extra harvest, you can share it with your neighbors. You can freeze some leaves for winter consumption. Let this herb thrive and become the superstar of your garden.
External Sources
Frequently Asked Questions
Does oregano grow back every year?
Oregano is a hardy perennial that regrows annually in USDA zones 5-10. In colder zones (4 and below), protect roots with 6 inches of mulch or overwinter containers indoors. Established plants develop woody bases that survive winter dormancy.
What is the best way to grow oregano?
The optimal method involves:
- Plant in well-draining soil with full sun exposure
- Space plants 12-18 inches apart for airflow
- Water deeply only when top soil dries out
- Prune weekly during growing season
- Apply balanced fertilizer monthly in summer
Does oregano need full sun or shade?
Oregano thrives with at least 6 hours of direct sunlight daily. In hot climates (zones 8+), provide afternoon shade above 90°F. Insufficient light causes leggy growth and reduced flavor. Indoor plants require south-facing windows or grow lights.
How do you harvest oregano without killing the plant?
Use sterilized shears to cut stems 4 inches long, taking no more than 30% of foliage. Cut just above leaf nodes to encourage branching. Avoid harvesting during flowering. For continuous growth, harvest in morning when oils peak.
Should oregano be grown in pots or ground?
Both methods work:
- Ground planting suits warmer climates with well-draining soil
- Containers (minimum 8-inch depth) allow overwintering indoors
- Pots prevent invasive spreading in garden beds
- Ground plants develop deeper flavor profiles
- Containers need more frequent watering
How do you winterize oregano plants?
Winter protection involves:
- Apply 6-inch straw mulch after first frost
- Stop fertilizing 6 weeks before frost
- Reduce watering frequency gradually
- Move containers to cool, bright indoor spaces
- Prune dead stems only in early spring
What should not be planted near oregano?
Avoid planting near:
- Water-loving plants like cucumbers that cause root rot
- Large vegetables that create excessive shade
- Mint varieties that compete aggressively
- Basil (shares common pests)
- Plants requiring acidic soil conditions
Can you eat fresh oregano from the plant?
Yes, freshly picked leaves are safe and flavorful. Rinse under cool water before use. Young leaves have milder taste. Harvest before flowering for peak flavor. Use fresh in salads, marinades, or as garnish. Avoid plants treated with pesticides.
What insects does oregano repel?
Oregano deters:
- Cabbage moths through companion planting
- Spider mites when used as oil spray
- Aphids when grown near vegetables
- Cucumber beetles through intercropping
- Mosquitoes when planted in patio areas
How often should oregano be watered?
Water established plants only when top 2 inches of soil dry out. Frequency varies:
- Containers: Every 3-5 days in summer
- Ground plants: Weekly deep watering
- Winter: Monthly for outdoor plants
- Indoor pots: Every 10-14 days
- Always avoid wetting foliage