
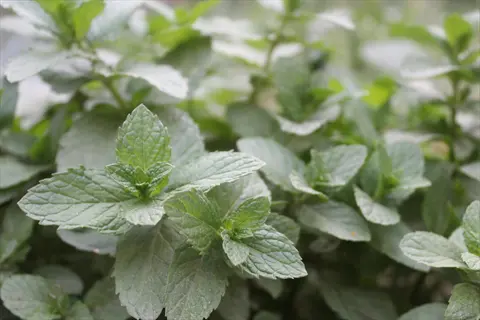
Learning how to grow mint is reminiscent of spending time in my grandmother's kitchen garden as a child. It was always spearmint in pots by the window, the smell of which meant summertime and fresh lemonade to me. Mint connects us back to tiny joys. It elevates mundane experiences into something special.
You will be shocked at how useful mint is. You can use it for teas, salad, or homemade remedies! It's also a natural breath freshener. Additionally, mint can help settle upset stomachs. It's really the perfect culinary and medicinal herb blend. Every gardener should see how beautifully it will flourish in their lives!
Mint is an ideal choice to kick-start your mint journey that feels inviting. Mint is forgiving of rookie mistakes, such as watering inconsistently. Mint acclimatizes well to varying environments. Propagation techniques will be revealed down the road. You will learn about types, necessities of care, and harvesting methods. Following these steps will bring you success.
Choosing Mint Varieties
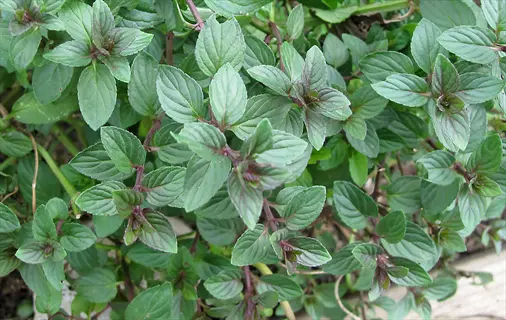
Choosing mint varieties is a matter of your taste and your needs. For teas and desserts, spearmint provides sweet notes. Peppermint offers a particularly strong menthol flavor and is well-suited for medicinal applications. Chocolate mint surprises you with a cocoa flavor that enhances baked goods. Pineapple mint combines tropical citrus accents in refreshing summer beverages.
Think about how each will be utilized. For example, spearmint is used in culinary recipes such as tabbouleh. Peppermint can be used in herbal medicine to soothe headaches. Apple mint has a mild flavor and can be used in raw salads. Moroccan mint is typically used to make teas and is refreshing to drink. Lemon balm calms anxiety. Match the varieties that best suit your needs, based on your primary use, whether for cooking or medicinal purposes.
The growth habits of the species dictate your needed space. For robust, spreading plants like peppermint, you will probably need containment strategies. Containers work well enough on balconies. Compact Corsican mint is well-suited for tight spaces. Consult the hardiness zones when making your plans. Peppermint is suitable for zones 3 to 7; pineapple mint thrives in warmer areas of zones 5 to 9. Plan accordingly for your climate.
Spearmint
- Classic variety with refreshing, slightly sweet flavor perfect for teas and Mediterranean dishes
- Known for aiding digestion and relieving nausea; ideal for medicinal herbal preparations
- Vigorous grower reaching 12-24 inches tall; thrives in USDA zones 5-9 with moderate care
- Prefers moist, well-draining soil and partial sun exposure for optimal leaf production
- Harvest before flowering for peak flavor intensity in culinary applications
- Companion plant for tomatoes and cabbage to naturally repel common garden pests
Peppermint
- Hybrid variety with high menthol content delivering intense cooling sensation in beverages
- Commonly used in desserts, candies, and aromatherapy for headache relief properties
- Grows 12-36 inches tall; suitable for containers to control spreading in small spaces
- Requires consistently moist soil and benefits from afternoon shade in hot climates
- Flowers attract beneficial pollinators like bees and hoverflies to vegetable gardens
- Essential oil extraction requires large leaf volumes; ideal for larger plantings
Chocolate Mint
- Unique variety with cocoa-like aroma and flavor enhancing desserts and hot drinks
- Dark-veined leaves provide ornamental value while retaining mint's digestive health benefits
- Moderate spreader reaching 12-18 inches; performs best in USDA zones 4-9
- Needs regular pruning to maintain compact shape and intensify chocolate fragrance
- Leaves darken when exposed to full sunlight but retain distinctive flavor profile
- Perfect for edible landscaping with its attractive foliage and culinary versatility
Orange Mint
- Citrus-scented variety with bright flavor for fruit salads, cocktails, and potpourri
- Also called bergamot mint; leaves release zesty aroma when brushed against
- Grows 18-24 inches tall with fuzzy leaves; attracts pollinators to gardens
- Prefers slightly acidic soil and protection from intense midday sun exposure
- Dries well for long-term storage while maintaining distinctive orange fragrance
- Pairs beautifully with fish dishes and citrus-based desserts for flavor enhancement
Apple Mint
- Mild variety with subtle fruity notes complementing salads and cold beverages
- Fuzzy, rounded leaves distinguish it from other mint varieties visually
- Spreads moderately; contains natural pest-repelling properties for companion planting
- Thrives in partial shade with consistent moisture and occasional organic feeding
- Leaves have soft texture making them perfect for fresh culinary applications
- Excellent choice for herb butters and infused simple syrup preparations
Pineapple Mint
- Variegated variety with cream-edged leaves offering tropical pineapple fragrance
- Decorative plant for containers and borders; less invasive than standard mints
- Reaches 12-18 inches tall; ideal for garnishing desserts and infusing water
- Requires protection from direct hot sun to prevent leaf scorching damage
- Slower growth habit makes it suitable for mixed container arrangements
- Leaves maintain variegation best when grown in bright indirect sunlight conditions
Corsican Mint
- Miniature variety forming dense mats with tiny leaves releasing strong aroma
- Perfect ground cover between stepping stones; withstands light foot traffic
- Grows just 1-2 inches tall; excellent for fairy gardens and rockeries
- Needs constant moisture and shade; not frost-tolerant like larger mint types
- Releases intense mint fragrance when walked upon in garden pathways
- Requires winter protection in zones below 7; ideal for container growing

Ginger Mint
- Spicy-scented hybrid with warm ginger notes complementing Asian cuisine
- Variegated green-and-yellow foliage adds ornamental value to herb gardens
- Moderate growth to 18 inches; suitable for container cultivation indoors
- Prefers rich organic soil and consistent moisture without waterlogging
- Essential for Thai and Vietnamese dishes requiring fresh herb garnishes
- Hardy in zones 5-9 when provided with winter mulch protection
Pennyroyal
- Traditional medicinal variety historically used for insect repellent properties
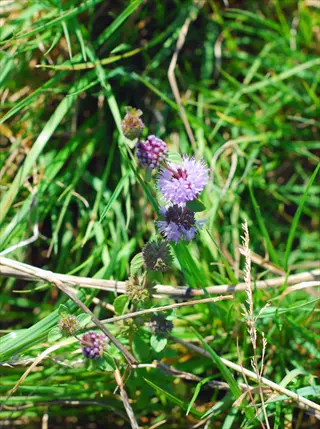
- Small purple flowers attract pollinators; grows 6-12 inches tall
- Requires damp soil conditions near water features or pond edges
- Caution needed: Not for culinary use due to potent essential oils
- Effective natural flea repellent when leaves are rubbed on pet bedding
- Spreads slowly compared to other mints; suitable for border edging

Moroccan Mint
- Classic variety essential for traditional North African mint tea preparations
- Smooth leaves with refreshing flavor and lower menthol content than peppermint
- Grows vigorously to 24 inches; thrives in hot dry climates with irrigation
- Prefers full sun exposure and well-draining sandy soil conditions
- Regular harvesting encourages new growth and prevents flowering in season
- Hardy in zones 6-10; requires winter protection in colder regions
Propagating Mint: Seeds vs. Cuttings
Mint propagation offers choices between seeds and cuttings with varying time commitments. Seeds require patience as germination takes 7-15 days. Cuttings root more quickly and may exhibit growth within 5 to 7 days. Seeds require precise temperature conditions, around 65-70°F. Cuttings acclimate to regular home conditions rapidly.
Success rates vary significantly for beginners. Even with care, seed germination typically remains between 60% and 70%. For cuttings, success rates are generally higher, offering a better chance of 85-95%, even with the simplest propagation methods, such as water propagation. I suggest starting with propagation through cuttings. Cuttings are less frustrating while offering quicker success. This pays back in confidence.
Soil preparation diffusion method to method. Seeds require a fine seed-starting mix, with or without perlite. Keep the soil consistently moist, but avoid overwatering. Cuttings can be propagated using a propagation mix or just plain water. Change the water every 2 days to prevent bacteria. Using rooting hormone will lead to faster results.
Troubleshoot any failures immediately. If your seeds fail to germinate, check the soil temperature using a thermometer and locate your trays in a warmer location. For cuttings that wilt, cut the stem again, below a node, and make sure the node is submerged. Be sure to disinfect your tools each time to prevent the spread of diseases.
Preparation Phase
- Start indoors 8 weeks before last frost using seed trays with drainage holes
- Fill containers with seed-starting mix containing perlite for optimal drainage
- Maintain soil temperature of 65-70°F (18-21°C) with heat mats if necessary
- Moisten soil thoroughly before sowing to create ideal germination conditions
Sowing Technique
- Place seeds ¼ inch deep in soil with spacing to prevent overcrowding later
- Cover trays with plastic domes to maintain 70-80% humidity levels consistently
- Position near south-facing windows or under grow lights for 14 hour daily exposure
- Mist soil surface daily to prevent drying without disturbing delicate seeds
Germination Period
- Expect sprouts in 7-15 days while maintaining constant moisture in topsoil layer
- Remove covers after germination to improve airflow and prevent fungal issues
- Provide 6 hours of direct light daily using adjustable LED grow lights if needed
- Monitor for damping-off disease by ensuring soil isn't waterlogged
Seedling Care
- Thin seedlings after true leaves emerge keeping strongest plants per cell
- Apply diluted liquid seaweed fertilizer (¼ strength) every 14 days for nutrition
- Rotate trays daily to prevent leaning toward light sources for even growth
- Maintain consistent moisture letting top ½ inch dry slightly between waterings
Hardening Off
- Begin 7-10 days before transplanting placing plants outdoors in shaded areas
- Gradually increase sun exposure 1-2 hours daily over 7 day adaptation period
- Protect from strong winds and temperatures below 50°F (10°C) during transition
- Water seedlings in early morning to prevent midday heat stress on roots
Transplanting
- Plant when soil reaches 55°F (13°C) spacing seedlings 12-18 inches apart
- Dig holes twice as wide as root balls adding compost to native soil
- Water immediately after transplanting using tepid water to reduce shock
- Apply organic mulch layer maintaining 2-inch clearance around stems
Soil Method
- Select 4-6 inch non-flowering stems cutting below leaf nodes at 45° angles
- Remove lower leaves dipping cut ends in rooting hormone powder for faster results
- Plant in small pots with moistened perlite-vermiculite mix covering with plastic
- Place in bright indirect light maintaining 75°F (24°C) for 2-3 weeks
- Check root development by gentle tugging after 14 days showing resistance
- Transplant to permanent containers when roots reach 1 inch in length
Water Method
- Place cuttings in clear jars filled with 2 inches of room-temperature water
- Position on east-facing windowsills avoiding direct sunlight exposure completely
- Change water every 48 hours to prevent bacterial growth and oxygen depletion
- Expect visible roots within 7-10 days reaching transplant-ready length at 14 days
- Transition to soil when roots develop secondary branching for better survival
- Plant in moist potting mix keeping soil consistently damp for initial 2 weeks
Cutting Selection
- Choose healthy 4-6 inch stems from non-flowering mint branches
- Identify leaf nodes where roots will develop best for propagation
- Select morning cuttings when plants are most hydrated for best results
- Avoid stems with signs of disease, pests, or yellowing foliage
Preparation Process
- Make 45° angle cuts just below leaf nodes using sterilized pruners
- Remove lower leaves leaving only top 2-4 leaves on each cutting
- Optional: Dip cut ends in rooting hormone powder to accelerate rooting
- Prepare containers with drainage holes filled with propagation mix
Soil Propagation
- Plant cuttings in moistened perlite-vermiculite mix covering with plastic
- Position in bright indirect light maintaining 75°F (24°C) temperature
- Maintain humidity by misting daily without saturating the soil medium
- Check root development through drainage holes after 10-14 days
Water Propagation
- Place cuttings in clear jars filled with 2 inches of room-temperature water
- Position on east-facing windowsills avoiding direct sunlight exposure
- Change water every 48 hours to prevent bacterial growth issues
- Expect visible roots within 7-10 days reaching transplant length at 14 days
Transplanting & Aftercare
- Move to soil when roots develop secondary branching for better survival
- Plant in moist potting mix keeping soil consistently damp for 2 weeks
- Gradually acclimate to normal conditions reducing humidity cover
- Begin light fertilization with diluted solution after new growth appears
Planting and Location Essentials
Transplant mint when soil temperatures are at 55°F. This will prevent any cold shock to the plant's roots. Use a soil thermometer to determine the soil temperature accurately. In colder zones, transplant after the last frost date. Warm soil will lead to quicker root establishment. Cool soil will slow down growth greatly.
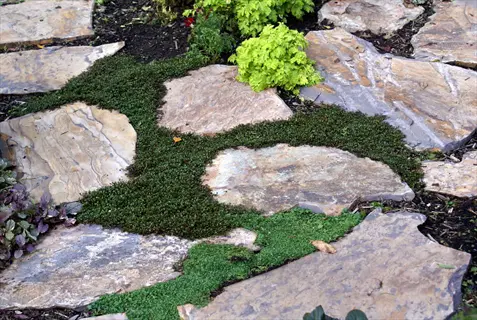
The risk of aggressive spreading with ground planting is due to runners. Containers provide control and dry out much quicker. I use containers for patios and balconies. Ground planting is better for open gardens with barriers. For in-ground planting, always use root control bags. No takeover!
Sunlight has a direct impact on flavor strength. Four to six hours of March sun produces the best oil levels. Afternoon shade saves flavor during heat. Peppermint prefers more sun than spearmint. Too little light causes weak flavor, too much sun burns the leaves.
Spacing depends on different varieties. For compact corsican mint it's 6 inches between plants. At the same time, planting peppermint requires 24 inches of space between plants. For containers, use 1 plant in a 12-inch pot. Vigorous varieties need room. Adequate airflow helps avoid fungal diseases.
Timing
- Transplant seedlings outdoors after last frost when soil reaches 55°F (13°C)
- In frost-free zones, plant during cooler fall months to establish roots before summer
- Avoid planting during peak summer heat above 85°F (29°C) to prevent stress
- Monitor local frost dates using agricultural extension resources for precision
Soil Preparation
- Test soil pH maintaining 6.0-7.0 range with lime or sulfur amendments
- Mix 3 inches (7.6 cm) of compost into topsoil improving drainage and nutrients
- Avoid heavy clay soils without organic matter amendments to prevent root rot
- Conduct percolation test: Dig 12-inch (30 cm) hole, fill with water, drain time should be 1-6 hours
Sunlight Requirements
- Provide 4-6 hours morning sun with afternoon shade in hot climates
- In cooler regions, allow full sun exposure up to 8 hours daily
- Monitor for leaf scorch reducing sun exposure if edges turn brown
- Use sun tracking apps to measure actual light exposure in planting areas
Spacing Guidelines
- Space plants 18-24 inches (45-60 cm) apart in ground allowing airflow
- For container planting, use 12-inch (30 cm) pots limiting to one plant
- Increase spacing to 36 inches (90 cm) for vigorous varieties like peppermint
- Adjust spacing based on variety growth habits documented in seed catalogs
Microclimate Considerations
- Plant near walls or structures for wind protection in exposed areas
- Use reflective mulches in cool climates to increase soil warmth
- Avoid low-lying frost pockets where cold air accumulates overnight
- Create thermal mass with rocks to moderate temperature fluctuations
Container Planting
- Use 12-14 inch (30-35 cm) pots with drainage holes filled with potting mix
- Place containers on paved surfaces to prevent root escape through drainage holes
- Rotate pots weekly to disrupt root growth attempting to penetrate surfaces
- Add saucers under pots to catch water while blocking root exit points
In-Ground Barriers
- Dig 18-inch (45 cm) deep trenches lining sides with plastic sheeting
- Use metal edging extending 6 inches (15 cm) above ground to contain runners
- Inspect barriers monthly during growing season for root breaches
- Overlap barrier materials by 4 inches (10 cm) at joints to prevent gaps
Sunk Pot Method
- Bury nursery pots leaving 2 inches (5 cm) above soil level around plants
- Trim escaping roots every 2 weeks during active growth periods
- Replace pots every 2 years to prevent root circling issues
- Use fabric grow bags instead of plastic for better root air-pruning
Landscape Integration
- Plant between pavement cracks where foot traffic naturally prunes growth
- Use as ground cover on slopes where spreading aids erosion control
- Border vegetable gardens where mint repels pests from crops
- Install root barrier fabrics beneath walkways before planting
Maintenance Routine
- Prune runners back to main plant every 3 weeks during growing season
- Harvest frequently to control size and encourage bushier growth
- Divide plants every 2-3 years to manage root density and vigor
- Apply 2-inch (5 cm) gravel mulch around plants to suppress stray runners
Mint Care and Maintenance
Understanding mint's water requirements will help prevent stress. You can spot drought stress as drooping leaves and dry curled edges. Overwatering will produce yellow lower leaves and wet, soggy soil. Check the soil's moisture level before watering. Insert your finger about 1 inch into the soil. Water only if it's dry.
Be selective with fertilizers regarding the quality of flavor. Organic materials - such as fish emulsion - develop essential oils naturally. Synthetic fertilizers develop foliage quickly, yet dilute flavor characteristics. I used compost or compost tea every month during the growing season. It maintains the richness of flavor.
To achieve various goals, prune purposefully. Pinch stem tips for woody growth. Sever runners at the soil for confinement. Clean shears at all times. Prune every three weeks in the summer. Remove flower buds to direct energy to the leaves.
Pest infestations indicate problems with the growing environment. Spider mites thrive in low-humidity air. Humidity can be raised with pebble trays. Aphids infest plants in nitrogen-rich soil. Cut back on fertilization. Rust fungus develops in crowded, damp environmental conditions. Improve air flow and the distance between plants as soon as possible.
Spring Watering
- Water when top 1 inch (2.5 cm) of soil dries out
- Provide 1 inch (2.5 cm) weekly via slow soaker hoses
- Avoid wetting leaves to prevent fungal diseases
- Mulch with 2 inches (5 cm) straw to retain moisture
Summer Watering
- Increase to 1.5 inches (3.8 cm) weekly during heat waves
- Water early morning to reduce evaporation loss
- Use finger test daily checking top 2 inches (5 cm)
- Add water-absorbing polymers to containers in hot climates
Fall Watering
- Reduce to 0.5 inches (1.3 cm) weekly as growth slows
- Allow soil to dry completely between waterings
- Prepare for dormancy by tapering irrigation gradually
- Discontinue watering after first hard frost occurs
Winter Watering
- Water potted mint monthly if kept indoors
- Maintain slight moisture in topsoil for dormant plants
- Avoid watering outdoor mint when temperatures drop below freezing
- Use room-temperature water to prevent root shock
Container-Specific
- Check moisture daily using soil probes or weight tests
- Ensure pots have drainage holes preventing waterlogging
- Water until 10% runoff appears in saucers then discard excess
- Use self-watering pots for consistent moisture during vacations
Spring Pruning
- Pinch 1 inch (2.5 cm) from stem tips to encourage branching
- Remove dead foliage from winter dormancy period
- Divide overcrowded plants every 2-3 years
- Apply slow-release fertilizer after new growth appears
Summer Maintenance
- Harvest up to ⅔ of plant mass weekly for continuous growth
- Trim flower buds before opening to preserve flavor intensity
- Stake tall varieties in windy locations to prevent breakage
- Provide afternoon shade in temperatures above 85°F (29°C)
Fall Preparation
- Stop harvesting 6 weeks before first expected frost
- Cut plants back to 4 inches (10 cm) above soil level
- Apply 6 inches (15 cm) mulch around outdoor plants
- Move potted mint indoors before nighttime temps drop below 45°F (7°C)
Winter Protection
- Cover in-ground plants with row covers in zones below 5
- Water sparingly once monthly during dormancy
- Monitor indoor plants for spider mites under low humidity
- Maintain temperatures between 40-50°F (4-10°C) for dormancy
Renewal Pruning
- Cut woody stems back to 2 inches (5 cm) in early spring
- Rejuvenate leggy plants with 75% reduction in height
- Discard center crowns when plants exceed 4 years of age
- Take cuttings before severe pruning as propagation backup
Harvesting and Using Mint
Harvest timing has a significant impact on the concentration of evident oil. Morning harvesting, following dew drying, captures peak essential oils. Evening harvesting or waiting too long or too late when the heat dissipates, much of the oils result in a bland flavor. Harvesting in cool temperatures also retains volatile compounds. For best practice, harvest before temperatures exceed 75°F.
Cut stems correctly to prevent damage to the plant. Use sharp scissors and cut at a 45-degree angle above a leaf-node. This will spur new shoots. Never tear stems, as this can increase the incidence of disease. Only take one-third of the stems per harvest. Make sure you leave enough foliage for recovery.
Match herb varieties to dishes for optimal results. Spearmint pairs well with lamb and is a great addition to tabbouleh. Peppermint works well in baking, particularly in desserts and chocolates. Pineapple mint is great in drinks or sorbets. Chocolate mint is well-suited for use in baked goods. Moroccan mint is ideal for tea.
There are various methods of preservation, with differing levels of effectiveness. Refrigeration preserves mint for 7-10 days. Freezing keeps flavors in cubes or pesto for up to 6 months. Drying works well for tea, but it loses some of its aromatic properties. Infused oils and vinegars preserve flavors over time.
Optimal Timing
- Harvest in early morning after dew evaporates for peak oil content
- Avoid midday when heat reduces flavor intensity and moisture content
- Stop harvesting 6 weeks before first frost to allow plant hardening
- Never harvest more than ⅔ of plant mass at once to avoid stress
Cutting Methods
- Use sterilized scissors or pruners for clean cuts above leaf nodes
- Cut stems 4-6 inches (10-15 cm) long just above branching points
- For continuous harvest, take outer leaves first allowing center growth
- Avoid tearing stems which invites disease and slows recovery
Frequency
- Harvest spearmint/peppermint every 7-10 days during peak season
- Harvest slow-growing varieties (corsican) every 14-21 days
- Increase frequency for vigorous growers to prevent flowering
- Pause harvesting after 3 major harvests per season for recovery
Post-Harvest Handling
- Rinse immediately in cold water to remove dirt and insects
- Pat dry with paper towels or use salad spinner to remove moisture
- Store unwashed in damp paper towels if not using immediately
- Avoid crushing leaves to preserve essential oil integrity
Flowering Management
- Pinch off flower buds to redirect energy to leaf production
- Allow limited flowering if attracting pollinators is desired
- Harvest entire plant just before flowering for maximum flavor
- Cut flower stems at base after blooming to encourage bushiness
Refrigeration
- Wrap stems in damp paper towels placing in sealed containers
- Store at 40°F (4°C) with 90% humidity for 7-10 day freshness
- Avoid storing near ethylene-producing fruits like apples
- Revive wilted mint by submerging stems in ice water for 15 minutes
Freezing
- Freeze whole leaves on trays before transferring to bags
- Make ice cubes with chopped mint and water for beverages
- Blend with oil into pesto freezing in 1 oz (30 ml) portions
- Label with dates; use within 6 months for best flavor
Drying
- Hang bundles upside down in dark, well-ventilated areas
- Use dehydrators at 95°F (35°C) for 4-6 hours until crumbly
- Store dried leaves whole in airtight jars away from light
- Crush just before use to preserve volatile oils
Infusions
- Steep in vinegar for 2 weeks creating salad dressings
- Make simple syrup with 1:1 sugar:water ratio by volume for cocktails
- Infuse honey by layering leaves in jars for 4-6 weeks
- Create mint butter by blending into softened unsalted butter
Long-Term Storage
- Vacuum-seal dried mint with oxygen absorbers for 1+ year shelf life
- Store frozen mint in moisture-proof bags preventing freezer burn
- Check preserved mint every 3 months for flavor degradation
- Discard if mold develops or aroma becomes musty
5 Common Myths
For optimal flavor and growth conditions in the garden, mint performs best in full sun.
Mint needs 4-6 hours of sunlight, but in hot climates, excessive exposure to sunlight will scorch the leaves and reduce leaf oil content; in most cases, ample sunlight is not needed at all. Most mint varieties prefer morning sun with afternoon shade, especially peppermint and chocolate mint, which can develop a better flavor profile despite receiving partial shade. In USDA zones 7-10, providing afternoon shade during high temperatures helps the plant to maintain moisture, which prevents wilting, and to produce a higher concentration of leaf menthol content.
The best and most effective method of propagating mint is to grow it from seeds because it is the most reliable way to have true-to-type plants with reliable growth compared to other methods.
Seed propagation is likely to produce hybrids and germination rates are not as consistent, generally only around 60-70% versus vegetative methods. Propagation by cuttings always produces genetically identical plants, with higher than 85% - 95% success rates, that can reach harvest maturity in 4-6 weeks, while seedlings may take 10-12 weeks. When you have a known cultivar that you wish to preserve such as chocolate mint with cocoa notes, or pineapple mint with variegation on the leaves, then stem cuttings or root divisions are the most reliable propagation route.
Mint deters any pest in the garden, including aphids, spider mites, and whiteflies, without gardeners needing to do anything extra.
Mint has a strong smell that will discourage some pests from being on the plant (ants and cabbage moths) but, ultimately mint will only be as strong as its tender new growth which gives a meal to sap-sucking insects such as aphids and spider mites. Gardeners should check regularly for pests along the underside of mint's leaves and bring in helpers like ladybugs to combat any aphids found. Mint can also suffer from various fungal diseases (like rust) in wet conditions that can require copper fungicide in order to manage effectively.
All mint varieties possess the same flavor profiles and can in almost every case be used interchangeably in recipes with no effect on food products or beverages.
All varieties of mint show the potential for major flavor differences based on different concentrations of menthol or even their own volatile oils. For example, peppermint can contain 40% menthol, making it a great choice for desert items with strong cooling effects, while spearmint is a milder choice and only has around 0.5% menthol that is sweeter and makes it suitable for teas, infusions, or drinks. Chocolate mint is also recognized for having piperitone oxide to produce cocoa-like undertones, pineapple mint has fruity notes, and spearmint works normally for savory dishes, but they would not work well in the same applications. Additionally, using Moroccan mint in a mojito instead of spearmint can change the flavor outcome of the drink altogether.
Growing mint indoors will not work because home settings will not provide the light levels or humidity levels needed for indoor growth.
Mint can thrive indoors with a few situations: 6-8 hours of direct light from a south-facing window, or by using full-spectrum grow lights placed 6-12 inches above the plants. Adequate humidity (40-60%) will be important to prevent spider mites; the humidity can be maintained through pebble trays or a humidifier. Mint can thrive successfully indoors, without problems, by using a well-draining soil in containers with drainage holes, while fertilizing once monthly with diluted fish emulsion. You will be able to harvest leaves, throughout the year. Regular pruning will help maintain the plant compact while preventing the plants from becoming leggy, during low light in the winter months.
Conclusion
Mint demonstrates its versatility each day in my kitchen and my garden. It flavors foods, freshens drinks, and treats disturbances. Its ornamental feature, adorning pots, can trail over the edge. This useful herb deserves a place in your home.
Keep in mind three critical aspects of care for thriving plants. Contain aggressive roots with pots or physical barriers. Provide balanced sunlight (morning sun is ideal). Prune for seasonality, bushiness, and containment. All of these simple practices will provide you with years of healthy plants.
Mint continues to be one of the easiest herbs to grow because it can tolerate less-than-perfect conditions better than basil or rosemary. It forgives you when you forget to water it, then springs back quickly from being badly cut back. This is a perfect herb for anyone beginning to garden.
Feel free to explore propagation and preservation without any limitations. Try rooting cuttings in various types of media, experiment with freezing and drying methods to see which one retains the flavor. Make infused vinegars or honeys. Each experiment brings you into a deeper relationship with this amazing plant.
External Sources
Frequently Asked Questions
Can mint be grown from store-bought cuttings?
Yes, you can propagate mint from fresh stems purchased at grocery stores. Select healthy stems with leaf nodes, remove lower leaves, and place them in water or moist soil. Roots typically develop within 7-14 days under proper humidity and indirect light conditions.
What sunlight conditions are ideal for mint plants?
Mint thrives best under specific light exposure:
- Provide 4-6 hours of morning sunlight with afternoon shade in hot climates
- In cooler regions, allow up to 8 hours of full sun daily
- Avoid intense midday sun to prevent leaf scorch and flavor loss
Is container gardening suitable for mint cultivation?
Absolutely, containers are highly recommended for growing mint. Use pots with drainage holes filled with well-draining soil. This method prevents invasive spreading while allowing easy movement to optimize sunlight and temperature conditions throughout the seasons.
Do mint plants repel common garden pests effectively?
Mint deters certain insects like ants and cabbage moths through its strong aroma. However, it remains vulnerable to aphids and spider mites. Regular inspection of leaves and natural interventions like introducing ladybugs are necessary for comprehensive pest control.
What are critical mistakes to avoid when planting mint?
Key errors include inadequate containment measures and improper watering. Always use barriers or pots to restrict roots, and avoid overwatering which causes root rot. Never plant mint near vegetables it might overpower through aggressive spreading.
How long does a mint plant typically survive?
With proper care, mint plants live 3-5 years. Regular division every 2-3 years maintains vigor. In colder zones, provide winter mulch or bring pots indoors to extend their lifespan through frost periods.
What preservation methods work best for mint leaves?
Effective techniques include:
- Freezing whole leaves or making ice cubes for long-term flavor retention
- Drying bundles in dark, ventilated areas for teas and seasonings
- Creating infused oils or vinegars to capture aromatic qualities
Are coffee grounds beneficial for mint growth?
Yes, used coffee grounds enrich soil acidity and nitrogen levels when mixed into potting soil. Apply sparingly, once monthly during growing season, to boost leaf production without overwhelming the plants with excessive nutrients.
How often should mint be harvested for optimal growth?
Harvest every 7-21 days depending on variety and season. Cut stems 4-6 inches long above leaf nodes in early morning for peak oil concentration. Never remove more than two-thirds of the plant at once to ensure recovery.
Can mint grow successfully indoors year-round?
Definitely. Provide 6-8 hours of direct light via south-facing windows or grow lights. Maintain 40-60% humidity with pebble trays and water when the top inch of soil dries. Regular pruning encourages bushy growth indoors.