
My adventure began by chance at a bustling farmers' market. I saw lemongrass - the fragrant stalks - and chatted with the grower about the growing process. She offered her best advice, which made me realize that growing lemongrass is actually easy. With a few simple things right, anyone can be successful.
You will appreciate lemongrass' culinary versatility far beyond Asian cuisine. Sauté pieces of fresh stalks in stir-fry for bright flavor. Steep stalks in hot water to make tea. Use the leaves as a natural pest repellent in your garden beds. This herb is a remarkably versatile multitasker.
This guide provides simple steps for successful ingredients year-round. Regardless of whether you are a beginner in your own home herb garden or simply expanding your current herb collection, lemongrass is unbelievably beginner-friendly. I will demonstrate how to grow in any climate! Imagine harvesting fresh culinary herbs from your own home; it will make your kitchen feel magical.
Using Lemongrass in Your Kitchen
Lemongrass is a flavor enhancer that provides a flavor upgrade to many dishes from various cuisines. The citrusy brightness it provides elevates Thai curry and Vietnamese pho flawlessly. I like to add beaten stalks to marinades for grilled chicken. Even fusion tacos get a depth of flavor from this exceptional culinary herb. Make broths or simple flavored oils by using just a few flavor infusion methods.
To peel to get to the juicy center. I usually place the stalks firmly on a cutting board and then remove the thick skin with a sharp knife, working my way down to the pale yellow interior. Be sure, as always, to cut away from yourself to ensure knife safety. Bruise the end, like crushing it with a pestle, before adding to foods to maximize flavor released.
Preserve harvests with clever food preservation techniques. Freeze whole stalks in airtight bags for up to six months. Cut the pieces and dehydrate them at low temperatures to create spice mixes. I make lemongrass ice cubes to quickly turn into soup. These methods ensure the availability of your homegrown herb in the kitchen at all times of the year.
Peeling Technique
- Method: Carefully remove tough fibrous outer layers using sharp paring knife to reveal pale yellow tender core beneath protective covering
- Safety: Always position knife blade away from your body while maintaining secure grip on stalk during peeling process
- Tip: Firmly crush stalk base with flat side of knife blade before slicing to break internal fibrous structure effectively
- Storage: Wrap intact unpeeled stalks in damp paper towels then refrigerate in crisper drawer preserving freshness for two weeks maximum duration
Freezing Methods
- Whole Stalks: Place complete intact stalks inside airtight freezer bags removing excess air pockets thoroughly to prevent damaging freezer burn formation
- Sliced: Chop tender cores into uniform rings then freeze single layers on parchment-lined baking trays before final storage
- Puree: Blend peeled tender cores with neutral oil like grapeseed creating smooth mixture ideal for portioned freezing in trays
- Thawing: Incorporate directly from frozen state into soups stews or stir-fries where extended cooking times ensure complete integration
Drying Process
- Leaves: Bundle fresh leaves securely with natural twine then hang upside down avoiding direct sunlight exposure completely
- Stalks: Slice peeled stalks into thin crosswise sections then dehydrate continuously at 95°F (35°C) until brittle texture achieved
- Storage: Preserve dried material inside airtight glass containers stored within cool dark pantry locations maintaining optimal quality
- Usage: Steep dried pieces gently within simmering liquids allowing complete infusion without requiring additional straining steps before serving
Infusion Techniques
- Teas: Combine tablespoon crushed dried leaves with boiling water then steep covered allowing full extraction over five minutes minimum
- Broths: Simmer bruised whole stalks alongside bones or vegetables extracting maximum flavor over extended thirty minute periods
- Oils: Heat gently bruised stalks submerged completely within oil maintaining precise 180°F (82°C) temperature throughout infusion
- Vinegars: Submerge dried pieces completely within white wine vinegar ensuring weekly agitation throughout two month infusion period
Cooking Applications
- Stir-fries: Finely slice tender cores then sauté alongside garlic during initial cooking phase building aromatic flavor foundation
- Curries: Bruise whole stalks lengthwise thoroughly then simmer within coconut milk based sauces throughout entire cooking process
- Marinades: Blend peeled cores vigorously with fresh garlic ginger root and soy sauce creating protein tenderizing mixtures
- Desserts: Infuse cream or milk bases gently with bruised stalks creating subtle citrus notes within custard preparations
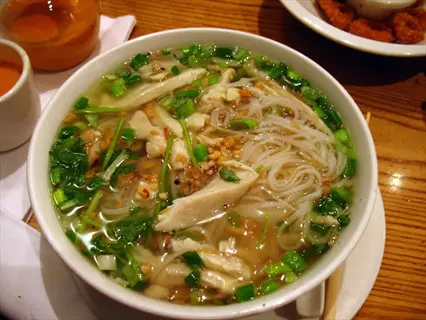
Vietnamese Pho
- Broth Base: Simmer three bruised stalks continuously alongside beef bones and traditional spices extracting deep complex flavors
- Flavor Profile: Citrus notes complement star anise and cinnamon creating signature aromatic balance within authentic recipes
- Serving Tip: Remove softened stalks completely before final serving preventing accidental consumption of fibrous material
- Vegetarian Option: Substitute hearty mushroom broth instead of meat-based stocks maintaining rich umami characteristics
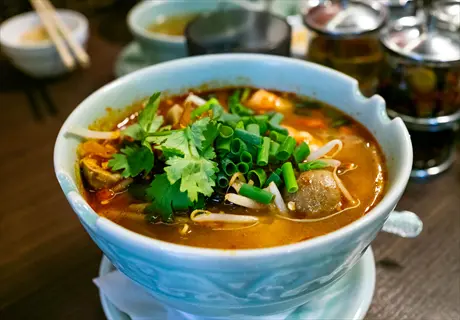
Thai Tom Yum
- Essential Ingredient: Incorporate four whole stalks per four servings ensuring authentic flavor intensity throughout preparation
- Preparation: Bruise stalks thoroughly then bend sharply releasing aromatic essential oils before introducing to soup
- Balance: Bright citrus notes counterbalance spicy bird's eye chilies creating harmonious flavor equilibrium within bowl
- Protein Pairing: Functions beautifully alongside various proteins including shrimp chicken or plant-based tofu alternatives

Grilled Meats
- Marinade: Blend peeled cores vigorously with fish sauce garlic cloves and palm sugar creating glossy caramelizing glaze
- Skewers: Thread whole intact stalks strategically through meat chunks infusing flavor internally during grilling process
- Basting: Apply lemongrass-infused oil regularly using silicone brush maintaining moisture and flavor during open-flame cooking
- Serving: Garnish finished dishes attractively with finely sliced raw cores adding refreshing textural contrast visually
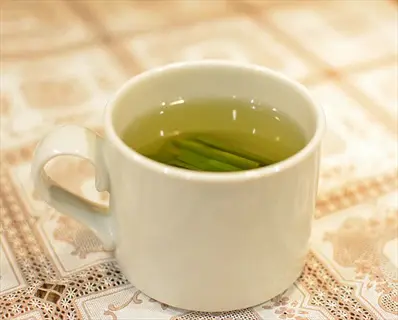
Herbal Teas
- Health Benefits: Traditional remedies utilize lemongrass for aiding digestion processes and reducing inflammation symptoms naturally
- Brewing: Steep generous ounce fresh leaves per quart boiling water allowing full extraction over extended period
- Combinations: Pair harmoniously with fresh ginger root slices or mint leaves creating complex layered flavor profiles
- Iced Version: Chill brewed tea thoroughly then serve over ice with citrus slice garnish providing summer refreshment
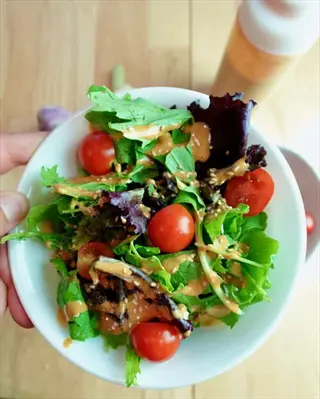
Salad Dressings
- Emulsifier: Puree tender cores completely with lime juice and neutral oil achieving stable homogeneous emulsion consistency
- Flavor Boost: Enhances vibrant green papaya salads or rice noodle preparations with distinctive citrus aromatic notes
- Texture: Strain mixture carefully through cheesecloth achieving crystal clear vinaigrette appearance aesthetically pleasing visually
- Vegan Option: Substitute conventional honey completely with agave nectar creating plant-based dressing alternatives ethically
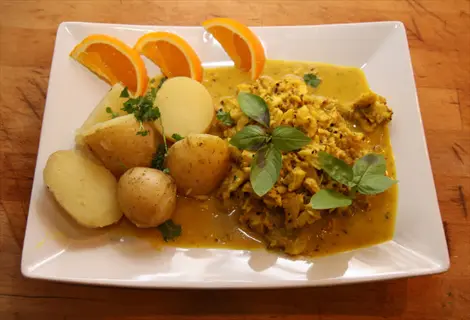
Seafood Curries
- Base Flavor: Simmer bruised stalks gently within coconut milk building foundational flavor before introducing seafood elements
- Timing: Add delicate fish or shellfish during final five minutes preventing overcooking while ensuring flavor absorption
- Complement: Harmonizes exquisitely with kaffir lime leaves and Thai basil creating authentic Southeast Asian flavor profiles
- Regional Variations: Adjust chili intensity levels appropriately distinguishing between Malaysian or Cambodian culinary traditions
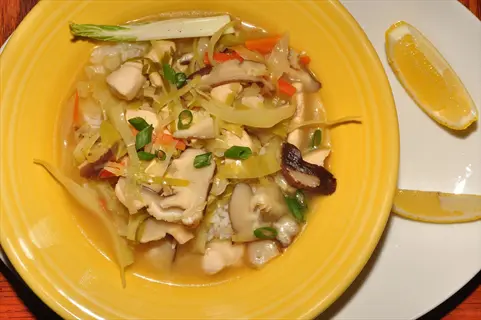
Vegetable Stir-fry
- Aromatic Base: Sauté sliced cores initially alongside minced garlic and shallots creating foundational flavor platform
- Quick Cooking: Introduce colorful vegetables like bell peppers and snap peas maintaining crisp texture throughout process
- Sauce Integration: Toss cooked components thoroughly with soy-tamarind sauce coating evenly just before final plating
- Texture Contrast: Preserve vegetable crispness strategically avoiding excessive cooking times ensuring satisfying crunch
Infused Syrups
- Simple Syrup: Simmer sliced cores continuously within equal water sugar solution extracting maximum flavor efficiently
- Cocktail Use: Combine syrup creatively with premium vodka or gin crafting Southeast Asian inspired mixed drinks
- Dessert Application: Drizzle artistic patterns over fresh fruit salads or vanilla ice cream enhancing presentations
- Shelf Life: Preserve refrigerated within sterilized glass jars maintaining quality safely for three months

Rice Dishes
- Cooking Method: Position whole bruised stalks strategically within rice cooker alongside grains and cooking liquid
- Fragrance: Imparts delicate citrus aroma subtly permeating jasmine or basmati rice varieties distinctively
- Removal: Extract softened stalks completely before fluffing and serving ensuring pleasant dining experience consistently
- Enhancement: Toast rice grains initially with sliced cores building deeper flavor complexity foundationally
Pickled Vegetables
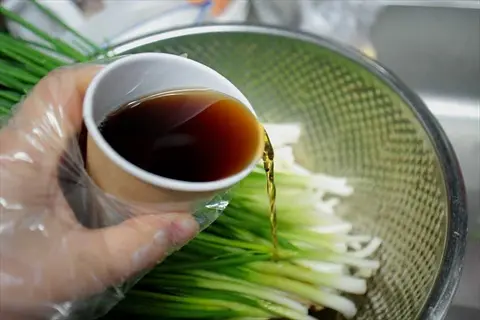
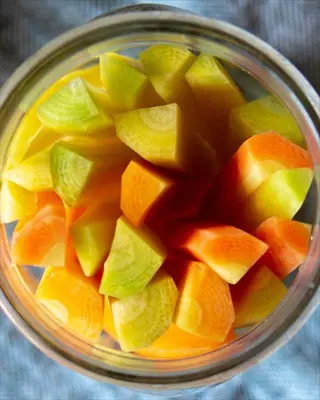
- Brine Base: Incorporate sliced cores directly within vinegar-sugar pickling solutions enhancing aromatic complexity distinctively
- Vegetables: Ideal companions include crunchy carrots daikon radish or green beans absorbing flavors effectively
- Fermentation: Employ quick-pickle methodology requiring minimal twenty-four to forty-eight hour maturation period practically
- Serving Suggestion: Present as vibrant condiment alongside banh mi sandwiches complementing meats harmoniously
Harvesting and Storing
The ideal time to harvest lemongrass is when the stalks are 12 inches tall, have thick bases, and are at peak flavor. The highest oil concentration occurs late summer, just before the first frost. I try to plan my fresh harvest every 6-8 weeks while the plant is in full growth mode. An indication that it is ready to harvest is when the stalks are a deep shade of green and feel firm to the touch.
Utilize sharp bypass pruners to make clean, angled cuts. You will want to cut stalks at a 45-degree angle 1 inch above the soil line. Always harvest outer stalks first to encourage inner regeneration. Never take off more than ⅓ of the plant. This method will promote harvests throughout the season.
Your herb preservation choices should also be based on your culinary needs. Fresh stalks can be stored refrigerated in a damp towel for up to two weeks and sliced for stir-fries, or frozen for months. They can also be dried for teas by slicing them thinly and allowing them to dry, or used to infuse oils for salad dressings. Choose your herb storage based on your food preparation plans.
Timing Indicators
- Maturity Signs: Harvest when stalks reach minimum 12 inches (30cm) height with base thickness exceeding 0.5 inches (1.3cm)
- Seasonal Peak: Maximum flavor concentration occurs during late summer months before first frost in temperate zones
- Growth Cycle: Mature plants produce harvestable stalks every 6-8 weeks during active growing season
- Visual Cues: Look for deep green coloration and firm texture indicating full nutrient development
Cutting Methods
- Tool Selection: Use sharp bypass pruners or serrated harvesting knife ensuring clean cuts without crushing
- Angle Technique: Cut stalks at 45-degree angle approximately 1 inch (2.5cm) above soil surface level
- Selective Harvest: Remove outermost stalks first allowing younger inner stalks continuous development space
- Regrowth Strategy: Never harvest more than one-third of total plant mass during single session
Post-Harvest Handling
- Immediate Processing: Rinse stalks under cool running water removing soil particles immediately after cutting
- Trimming Protocol: Cut off leafy tops leaving approximately 6 inches (15cm) of usable stalk portion
- Root Preservation: Retain minimal root fragments when harvesting entire stalks for propagation purposes
- Quality Check: Discard stalks showing insect damage, discoloration or soft mushy texture immediately
Field Preservation
- Sun Protection: Place harvested stalks in shaded containers preventing direct sunlight exposure degradation
- Moisture Retention: Wrap bases in damp cloth maintaining hydration during transport from garden
- Temperature Control: Store temporarily in coolers maintaining 50-55°F (10-13°C) if processing delayed
- Time Limit: Process all harvested material within four hours preventing flavor and texture deterioration
Continuous Harvest System
- Rotation Schedule: Implement bi-weekly harvesting intervals during peak growing season maintaining supply
- Stimulating Growth: Regular cutting encourages new shoot production increasing overall plant productivity
- Annual Cycle: In temperate zones, complete final harvest 2 weeks before expected first frost date
- Perennial Care: Mulch heavily after final harvest insulating roots against winter temperatures
Growing from Seeds
Begin your seed propagation process with a steady 70-75°F soil temperature using heat mats. Mist the seed-starting mix to suppress moisture. Cover trays with humidity domes until sprouts appear. These circumstances increase your germination rate dramatically compared to random sowing methods.
Observe the transition of seedlings through their unique growth stages. Roots will develop below the soil surface within a week. Cotyledons will begin to close to light by day 14. True leaves will appear and have a genuine nutritional need around week three. Mature roots will populate the cells in preparation for transplant to responsible seedling care.
Transition plants to outdoor life by gradually hardening off. Start by putting seedlings outside for just two hours. Gradually increase their time each day over the course of 7-10 days. For the first few days, please protect it from the harsh midday sun. This will avoid shock and will give your plants a sturdy start in your garden beds.
Optimal Conditions
- Temperature: Maintain consistent 70-75°F (21-24°C) soil temperature using heat mats
- Moisture: Keep seed-starting mix damp but not waterlogged using spray bottle
- Light: Provide 14-16 hours daily under grow lights positioned 2 inches (5cm) above soil
- Cover: Use humidity domes until sprouts emerge maintaining 80% humidity
Planting Technique
- Depth: Sow seeds 0.25 inches (0.6cm) deep in seed-starting cells
- Spacing: Place 2-3 seeds per cell thinning to strongest seedling after emergence
- Medium: Use sterile seed-starting mix with perlite for optimal drainage
- Watering: Bottom-water trays to prevent soil disturbance and fungal issues
Germination Timeline
- Stage 1 (Days 1-7): Seeds swell and root emergence occurs beneath soil
- Stage 2 (Days 7-14): Cotyledons emerge requiring immediate light exposure
- Stage 3 (Days 14-21): True leaves develop indicating nutrient requirement
- Stage 4 (Days 21-28): Roots fill cells signaling transplant readiness
Troubleshooting
- Poor Germination: Check seed viability with float test discard floaters
- Damping Off: Improve air circulation and reduce watering frequency
- Leggy Seedlings: Increase light intensity or lower light source position
- Discoloration: Apply diluted balanced fertilizer at quarter strength
Success Tips
- Fresh Seeds: Use seeds less than 6 months old for 90%+ germination rates
- Pre-soaking: Soak seeds 24 hours in warm water before planting
- Labeling: Mark varieties and planting dates with waterproof markers
- Record Keeping: Track germination rates for future planting adjustments
Essential Growing Conditions
Lemongrass requires full sun throughout the entire growth cycle. Young plants require a minimum of 6 hours of sunlight, while mature plants thrive with 8-10 hours of sunlight daily. For very hot climates with temperatures over 95°F (36°C), afternoon shade is helpful in many cases. I also watch leaf color; deep green is the ideal indicator of good light balance.
To achieve perfect well-drained soil, you can create a blend of 2 parts garden soil, 1 part compost, and 1 part perlite. This provides both nutrition and moisture retention. Soil pH should be between 6.5 and 7.0 to enable optimal nutrient uptake. Test your soil annually and amend it as necessary.
Watering needs vary significantly for container vs ground plantings. Lemongrass in containers requires daily watering in hot weather, as the soil dries out much quicker. Ground-planted lemongrass requires deep soaking every 2-3 days. I usually check for moisture by lightly touching the top inch of soil to see if it is dry before watering.
Sunlight Exposure
- Minimum Requirement: 6+ hours direct sunlight daily for vigorous growth
- Ideal Conditions: 8-10 hours full sun exposure during summer months
- Partial Shade Tolerance: Acceptable in zones with intense afternoon heat above 95°F (35°C)
- Indoor Supplement: South-facing windows or full-spectrum grow lights 12 inches above plants
Soil Composition
- Texture: Sandy loam amended with 30% organic matter for drainage
- pH Range: Maintain 6.5-7.0 using lime to raise or sulfur to lower pH
- Nutrient Mix: Blend 2 parts garden soil, 1 part compost, 1 part perlite
- Container Formula: Premium potting mix with slow-release fertilizer granules
Water Management
- Frequency: Water when top 1-2 inches (2.5-5cm) of soil becomes dry
- Container Needs: Daily watering in temperatures above 85°F (29°C)
- Ground Planting: Deep watering 2-3 times weekly encouraging root depth
- Humidity Control: Mist leaves in arid climates below 40% humidity
Temperature Ranges
- Optimal Growth: 75-90°F (24-32°C) daytime temperatures
- Night Tolerance: Minimum 50°F (10°C) for sustained growth
- Frost Response: Immediate damage below 32°F (0°C) requiring protection
- Heat Stress: Shade required when temperatures exceed 100°F (38°C)
Nutrient Requirements
- Nitrogen Focus: High-nitrogen fertilizer every 2 weeks during growth season
- Container Feeding: Liquid fertilizer at half-strength weekly
- Organic Options: Compost tea or worm castings monthly
- Deficiency Signs: Yellowing leaves indicate nitrogen shortage
Starting from Store-Bought Stalks
Select your stalks wisely for successful propagation from stalks (cuttings). Stalks should be firm with no blemishes, with growth nodes visible near the end, and the base still intact. Avoid stalks with dry ends or soft spots. I typically take 5-6 stalks to begin with, knowing that some may not work out.
Start root development by placing stalks in clear jars and filling them with 1-2 inches of water. Leave them sitting on a bright windowsill, out of direct sunlight. Be sure to change the water every two days. The stalks should be kept at temperatures between 70°F and 80°F. For optimal success, use heat mats for the jars if the room temperature is below 70°F.
Rooting times can vary significantly by season. Summer roots can appear within 2-3 weeks, whereas in winter, it may be 6-8 weeks. If the photoperiod goes below 6 hours, use grow lights. Knowing seasonality is important preparation for effective transplant preparation in the future.
Stalk Selection
- Quality Indicators: Choose firm, unblemished stalks with intact base and visible growth nodes
- Avoid: Stalks with dried ends, mold spots, or soft/mushy texture
- Quantity: Start with 5-6 stalks to account for potential failures
- Preparation: Trim top leaves to 6 inches (15cm) reducing moisture loss
Water Rooting Setup
- Container: Use clear glass jars allowing light penetration and root observation
- Water Depth: Submerge 1-2 inches (2.5-5cm) of stalk base changing water every 48 hours
- Location: South-facing windowsill with 6+ hours indirect sunlight
- Temperature: Maintain 70-80°F (21-27°C) using heat mats if needed
Root Development
- Initial Signs: Small white root nubs appear at nodes within 7-10 days
- Growth Target: Wait for 3-inch (7.6cm) roots with secondary branching
- Problem Solving: Cloudy water indicates bacterial growth requiring immediate change
- Stalled Growth: Move to warmer location or add grow light supplementation
Seasonal Variations
- Summer: Roots develop in 2-3 weeks with optimal 14-hour daylight
- Winter: Expect 6-8 week timeline requiring supplemental heating
- Low-Light: Add full-spectrum LED grow lights 6 inches (15cm) above jars
- Humidity: Maintain 60-70% humidity with pebble trays or occasional misting
Transplant Preparation
- Soil Mix: Prepare 3:1 ratio potting soil to perlite for drainage
- Pot Size: Use 6-inch (15cm) diameter containers with drainage holes
- Planting Depth: Set crowns 0.5 inches (1.3cm) below soil surface
- Acclimation: Keep in partial shade 3-5 days before full sun exposure
5 Common Myths
Lemongrass definitely needs consistent tropical humidity levels to grow well and survive in home garden conditions.
Lemongrass originated in tropical climates but can do well in a number of climates using the right container gardening practices and misting in dry conditions. Keeping the soil moisture consistent and getting adequate sunlight is more important than humidity percentages to the healthy growth of the plant.
Propagating lemongrass from stalks is difficult and unreliable for beginner gardeners
Water propagation from fresh grocery store stalks demonstrates over 90% success rates when following basic guidelines: selecting stalks with intact bases, changing water regularly, and providing sufficient warmth. This method remains one of the most accessible plant propagation techniques requiring minimal equipment or expertise.
While lemongrass may only be thought of as an ingredient found in Asian dishes with narrow food application
Lemongrass can improve a variety of food applications beyond traditional Asian dishes inclusive of grilled meats, herbal teas, syrup-infusions, and salad dressings. Its fresh citrus flavors work well in Mediterranean, Latin American, or fusion dishes. Dried lemongrass leaves can be added to homemade potpourri mixtures or made into a natural insect repellent!
Lemongrass requires advanced gardening skills and constant vigil
Lemongrass is considered one of the easiest herbs and only requires checking on its water requirements and fertilizing it two to four times throughout the growing season. It is naturally pest resistant which helps, and it grows rapidly making it an ideal herb for beginners. Established plants will survive a brief lack of attention far better than other common herbs.
Collecting lemongrass destroys the plant and must be fully replanted every season
Proper harvesting methods actually promote new growth when removing outer stalks just above the crown. Established plants will regenerate from harvested areas in 8 weeks or less. In USDA Hardiness Zones 8-11, lemongrass is a perennial crop, and in colder areas, it will return vigorously from the roots if properly overwintered.
Conclusion
Lemongrass shows its worth as a genuinely versatile low-maintenance herb suitable for any garden. Its low care needs make it favorable for sustainable gardening practices, as you will come to see that minimal effort equals an abundance of harvest. This hardy plant will flourish with basic care and reward you with a generous amount.
Keep in mind the basics we learned from propagation to harvest. Whether starting from seeds or store-bought stalks, and using basic water rooting, plant your starts, provide them with full sun, and well-drained soil. Harvest when stalks are mature for year-round harvest opportunities.
I urge you to discover lemongrass's full culinary versatility beyond your imagination. Use some fresh stalks in teas, or simply freeze them for later dishes. Experiment with various drying methods for spice blends. See how this herb can take daily cooking to an exceptional level.
External Sources
Frequently Asked Questions
Is lemongrass easy to grow?
Lemongrass is remarkably beginner-friendly with minimal requirements. It thrives when given adequate sunlight and well-draining soil. Watering only when the topsoil dries prevents root rot. This resilient herb grows quickly without demanding constant attention or specialized gardening skills.
Does lemongrass come back every year?
In warm climates, lemongrass behaves as a perennial plant regrowing annually from its roots. For colder regions, overwintering strategies like container gardening allow preservation. Proper mulching protects roots during frost ensuring vigorous spring regrowth.
Can lemongrass grow from cuttings?
Yes, propagation from cuttings is highly effective using fresh stalks. Submerge the base in water until substantial roots develop before transplanting. This method yields new plants efficiently without needing seeds or nursery purchases.
What pests does lemongrass repel naturally?
Lemongrass effectively deters common garden nuisances through its strong citrus compounds. The essential oils naturally discourage various insects from inhabiting nearby areas. Key pests it helps control include:
- Mosquitoes avoid areas with concentrated lemongrass plantings
- Flies are repelled by the potent citrus fragrance
- Ants typically steer clear of the aromatic zones
Should lemongrass be in pots or ground?
Containers offer advantages like mobility for temperature control and space management. Ground planting suits warmer climates where plants can establish extensive root systems. Both methods succeed with proper sunlight exposure and drainage considerations.
What temperature is too cold for lemongrass?
Frost conditions below freezing cause immediate damage to lemongrass plants. Sustained growth requires temperatures consistently above a critical minimum threshold. Protection becomes essential when cold fronts threaten to drop below this danger zone.
How long until lemongrass roots develop?
Root establishment follows a predictable timeline influenced by environmental conditions. Visible root nubs typically emerge within the initial propagation phase under ideal circumstances. Full rooting sufficient for transplanting requires additional development time.
Can store-bought stalks become full plants?
Grocery stalks transform into thriving plants through proper propagation techniques. Select fresh specimens with intact bases for optimal regeneration success. With appropriate water rooting methods followed by soil transplantation, they establish vigorously.
How to preserve lemongrass for year-round use?
Multiple preservation methods maintain flavor and usability long-term. Effective approaches include:
- Freezing whole stalks or sliced pieces in airtight containers
- Dehydrating thoroughly for storage in sealed jars
- Infusing oils or vinegars to capture essential flavors
What are lemongrass's culinary uses beyond Asian dishes?
Lemongrass enhances diverse global cuisines with its citrus notes. It complements proteins beautifully in marinades and grilling applications. The herb also shines in beverages, baked goods, and fusion recipes adding bright aromatic dimensions.