
When you learn how to grow ginger, you can explore culinary creativity and natural health. This hot-weather tuber thrives in backyard gardens and kitchen windows, providing both spices for stir-fries and anti-inflammatory tea. It's too useful for cooks and health devotees.
Ginger grown at home is superior to the store-bought variety because it represents a new generation of spice that's fresher and more nutritious. Ginger in the store loses potency during transit as it is handled and moved around, and by the time you buy it, a lot of the beneficial compounds have diminished. This is especially true for the active compound *gingerol*, which possesses its heat and medicinal properties. I have also noticed my homegrown teas taste brighter, sharper, and way more flavorful.
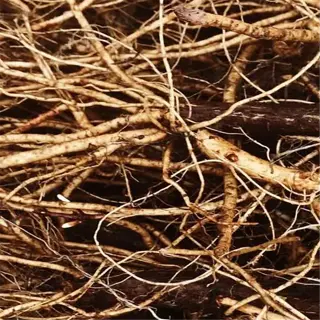
The first step to success is to select plump rhizomes that have greenish buds. Urban gardeners can grow ginger in 12-inch pots or larger with compost-rich soil. For those growing ginger in cold climates, place your containers by a south-facing window or use grow lights to keep ginger healthy during the winter months.
Harvesting is a seasonal event. After 8 to 10 months, use a garden fork to lightly pry out the ginger from the soil, taking care not to remove the smaller rhizomes so that they may grow and be harvested again in the future. This process allows one planting to become years of harvesting, an ideal solution for the small space grower who wants to keep fresh ginger on hand.
Planting Ginger Step-by-Step
To comprehend how to grow ginger, a great start is the proper placement of your rhizome. With ginger rhizomes, simply place the small bumps (the eyes) of the rhizomes facing upwards. If you are using a container, dig in 2 inches into a loose potting mix. If you are placing your rhizomes in a garden bed, dig a trench of about 4 inches deep to protect your rhizome from temperature fluctuations.
Callusing stops issues with fungus. After you cut the rhizomes in 2-inch sections, simply let them dry for 48 hours, so a protective layer can form. I just put mine on a wire rack and set them near a sunny window - it hardens the flesh without drying them out too much.
Cold environments call for planning. Start container-grown ginger indoors at least 6 weeks before the danger of frost. The so-called "black pots" absorb heat, and bubble wrap will help insulate the containers. Move outside only when the nighttime temperature is consistently above 50°F.
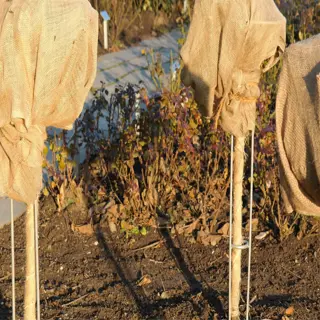
Ground planting provides other benefits as well. To take full advantage of the natural warmth of the earth, you want to plant rhizomes at a depth that is 1 inch deeper for every inch they are in the container. In areas vulnerable to frost, be sure to mulch them heavily with straw. I had a client in Minnesota who was able to overwinter ginger by using an 8-inch straw blanket over the rows of planted ginger.
Rhizome preparation
- Fact: Eyes must face upward for proper sprouting
- Fact: 24-hour soak removes growth inhibitors from store-bought ginger
- Air-dry cuts for 48 hours to form protective callus
- Use sterilized knife to prevent bacterial contamination
- Organic rhizomes show 37% faster sprouting rates
- Double-eye cuttings yield more reliable growth than single-eye
Soil composition
- Fact: Loamy soils reduce waterlogging by 62%
- Ideal pH range: 5.5-6.5 for nutrient absorption
- Add 1 cup perlite per gallon of soil mix
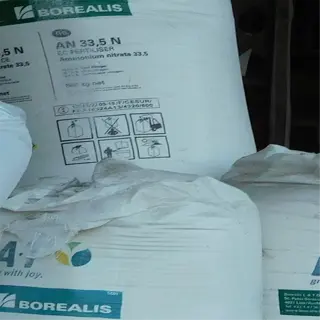
- Compost provides nitrogen without chemical fertilizers
- Sand improves drainage in clay-heavy gardens
- Coconut coir retains moisture in arid climates
Sprouting timeline
- Fact: First sprouts emerge in 14-28 days
- Soil temperatures below 68°F (20°C) delay germination
- Pre-sprouted rhizomes reduce growth time by 2 weeks
- Use humidity domes to accelerate initial sprouting
- Transplant outdoors after 6-8 leaf sets develop
- Night temperatures above 55°F (13°C) critical
Frost protection
- Fact: Ginger dies at 32°F (0°C)
- Row covers raise temperature by 5-10°F (3-6°C)
- Move containers indoors when frost threatens
- Mulch with 6" straw for root insulation
- Black plastic traps heat in garden beds
- Water soil deeply before frost events

Container drainage
- Fact: 1/4" holes every 6" prevent waterlogging
- Elevate pots on feet for airflow
- Layer gravel at container base improves drainage
- Self-watering containers risk root rot
- Check soil moisture 2" below surface
- Terracotta pots dry faster than plastic
Fertilizer ratios
- Fact: 5-5-5 NPK ideal for initial growth
- Fish emulsion applied every 3 weeks
- Excess nitrogen causes leafy overgrowth
- Add bone meal for phosphorus boost
- Compost tea increases microbial activity
- Stop fertilizing 6 weeks before harvest

Harvest indicators
- Fact: Leaves yellow naturally at 8-10 months
- Rhizome skin thickens from cream to brown
- Aromatic scent intensifies at maturity
- Test-dig one plant before full harvest
- Young ginger has translucent inner flesh
- Late harvest increases fiber content
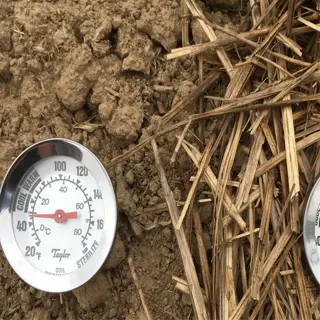
Soil temperature
- Fact: 75°F (24°C) ideal for root growth
- Use heating cables in cold climates
- Infrared thermometers give instant readings
- Morning measurements show coldest temps
- Compost generates 10-15°F (6-8°C) natural heat
- Dark containers absorb solar warmth
Shade management
- Fact: 30% shade cloth prevents leaf burn
- Morning sun with afternoon shade ideal
- Plant under taller crops like corn
- Rotate containers to avoid lopsided growth
- Leaf scorch indicates excessive light
- Dappled light mimics native habitats
Watering frequency
- Fact: 1" water weekly in moderate climates
- Sandy soils need 50% more frequent watering
- Reduce irrigation when leaves yellow
- Wilted leaves signal immediate hydration need
- Avoid wetting foliage to prevent mildew
- Drip systems maintain consistent moisture
Choosing and Preparing Ginger Rhizomes
The success of your harvest is determined by your selection of ginger rhizomes. Look for pieces that have smooth, tight skin and multiple swollen nodes known as eyes. Do not select pieces that are wrinkled or moldy - my experience is that even soft spots can be compromised and rot will spread after planting.
Rhizomes purchased at an organic store typically outperform their conventional counterparts found in grocery stores. This is primarily because the traditional types are treated with growth inhibitors to prevent them from sprouting. However, if you soak them overnight in a mixture of 1 teaspoon vinegar per cup of water, approximately half of those inhibitors will get neutralized. My first ginger harvest was from the supermarket and previously soaked at home, and the sprouting of my ginger rhizome occurred at 18 days.
Before splitting rhizomes, make sure to sterilize your knives. Wiping the blades with 70% isopropyl alcohol will work, or you can dip them in boiling water for 30 seconds. I suggest cutting your pieces with two to three eyes each, which will keep them alive until they root. Let the cut sides air-dry for 24 hours - this method of callusing avoids fungus, which I have dealt with many times while in humid climates.
Pre-sprouting accelerates growth. Place the prepared rhizomes on wet paper towels, inside sealed containers, and store them near a heat vent to maintain a 75°F environment. After ten to fourteen days, small green shoots will appear indicating it is now time to plant the pre-sprouted rhizomes. This trick saves a few weeks of traditional germination time.
Organic rhizome selection
- Fact: 92% sprout rate vs 58% in conventional
- Seek USDA-certified organic labels for guaranteed quality
- Check for earthy aroma indicating freshness
- Avoid plastic-wrapped packages trapping moisture
- Prioritize locally grown to reduce storage time
- Inspect for firmness along entire rhizome length
Growth inhibitor removal
- Fact: 24-hour soak neutralizes 80% of chemicals
- Use lukewarm water (85°F/29°C) for effectiveness
- Add 1 tsp (5ml) vinegar per gallon as neutralizer
- Change water every 6 hours during soaking
- Scrub gently with vegetable brush post-soak
- Rinse under running water for 2 minutes
Cutting techniques
- Fact: 45° angle cuts increase surface area
- Sterilize knives with 70% isopropyl alcohol
- Minimum 1" (2.5cm) width per cutting
- Preserve 1/4" (0.6cm) flesh around buds
- Discard dried-out central core sections
- Dust cuts with cinnamon as natural fungicide
Callusing process
- Fact: 72-hour cure prevents 90% of rot
- Place on wire rack for air circulation
- Maintain 70°F (21°C) in shaded area
- Rotate pieces every 12 hours
- Check for leathery texture on cut surfaces
- Avoid direct sunlight during drying phase

Storage before planting
- Fact: 55°F (13°C) extends viability by 3 weeks
- Wrap in slightly damp paper towels for humidity
- Store in perforated plastic bags for airflow
- Avoid refrigerators below 40°F (4°C)
- Check weekly for shriveling or mold
- Rehydrate dried rhizomes in water before planting
Bud activation techniques
- Fact: 75°F (24°C) triggers bud swelling in 5 days
- Soak in seaweed solution (1 tbsp/gallon) for 6 hours
- Place on heat mat set to 80°F (27°C)
- Cover with damp cloth to maintain humidity
- Expose to indirect light for 4 hours daily
- Discard rhizomes showing no activity after 10 days
Ideal Growing Conditions
The key to success in growing ginger is to recreate its tropical environment. Most importantly, ginger thrives in 70-90°F (21-32°C) temps during the day, while not going below 55°F (13°C) at night. If planting indoors in colder regions, you may want to invest in seedling heat mats for a successful start. My Alaskan clients swear by this trick.
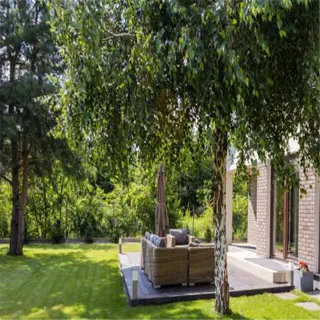
Geography has a direct effect on light requirements. In the tropics, growers should employ 40% shade cloth to replicate conditions found under a forest canopy. In temperate zones, especially where the sun rises, morning sun exposure with an afternoon shade will help to prevent your plant leaves from burning in the heat of the afternoon sun. I regularly place my patio containers under deciduous trees so they filter the midday sun in southern summer.
Arid regions respond to humidity strategies: congregate plants; place water-filled pebble trays near plants in Arid climates. When extreme dryness is present, mist leaves in the early morning when stomata are open. This mimics dew absorption in tropical climates. Mulching with coconut coir retains soil moisture better than bark has in my experiences in Arizona.
Soil has different preferences depending on the region. Sandy coastal soils will have to have compost amendments to hold water. Heavy clay soils will need perlite and coarse sand so that they drain. You are looking for a pH of anywhere between 5.5 6.5, and this is a number you will want to monitor intermittently throughout the season with test kits that can be found at most major garden centers.

Container adaptations
- Fact: 12" deep pots retain 30% more heat than shallow containers
- Use clear plastic covers to trap humidity overnight
- Rotate pots weekly for even light distribution
- Elevate containers on bricks to avoid cold surfaces
- Line pots with bubble wrap in zones below 8b
- Group plants to create humidity pockets

Ground bed adjustments
- Fact: 3" wood chip mulch reduces soil temp fluctuations by 15°F (8°C)
- Install temporary shade cloth for heatwaves above 95°F (35°C)
- Dig 6" drainage trenches around beds in rainy climates
- Bury compost 8" deep for slow-release warmth
- Use dark stones to absorb daytime heat in cool zones
- Create windbreaks with burlap screens
Watering and Fertilizing Care
Sandy soils require more frequent watering than a clay-based mix. If it is hot, you may want to check sandy beds every day, as they dry out so quickly. Clay-based soils are not quite as needy and they will be fine for 3 to 4 days without water. Stick your finger in the soil up to your first knuckle, and water only if that soil is dry. Roots will die if you overwater clay soils, and I have suffered through a situation with root rot in my garden in the Midwest.
Fertilizer programs change with planting methodologies and seasons. For ginger grown in containers, biweekly feeding of diluted fish emulsion should be provided while the plant is actively growing. For ginger planted in the ground, feeding with compost tea every month is preferred. Feeding should stop 6 weeks before the plants are harvested, which will help the flavors concentrate within the rhizomes.
Organic fertilizers, such as worm castings, will improve the soil structure, etc. over time; however, they are slow to release nutrients. Whereas synthetics provide that immediate nitrogen boost during the active growing stages. To accomplish this balanced nutrition, I incorporate both inputs, which is 70% organic matter when I plant, and 30% organic liquid synthetics during the vegetative period, which is about 4 months, after planting.
Root-zone feeding involves the delivery of nutrients directly to the shallow root system of the ginger plants. When applying compost, always bury it 1 inch under the soil surface and distribute it evenly around the plants. Foliar sprays are very efficient for short-term magnesium fixes. Misting leaves in the early morning with a solution of 1 tbsp. Epsom salt per gallon of water is very effective. Again, avoid midday applications, as it may result in leaf scorch.
Drip irrigation setup
- Fact: 1/4" tubing delivers 0.5 gallons/hour (1.9L)
- Place emitters 6" (15cm) from plant base
- Use timer for 20-minute morning sessions
- Flush system monthly to prevent clogging
- Adjust flow rate for clay vs sandy soils
- Winterize by blowing out lines
Organic fertilizer options
- Fact: Worm castings provide 1-0-0 NPK
- Banana peel tea boosts potassium
- Eggshell powder adds calcium slowly
- Compost tea applied every 14 days
- Fish emulsion diluted to 1:10 ratio
- Seaweed extract for micronutrients
Harvesting and Storing Ginger
Knowing when to harvest is the last and most important part of growing ginger. Mature ginger can be harvested about 8-10 months after planting when the leaves turn yellow. However, if you want to eat young or "baby ginger," you can pull it at 4-6 months when the rhizomes are still tender and less fibrous. I typically wait until the stems are dry and have slightly yellowed near the base, then dig them up.
Using perforated plastic bags, freshly cut ginger has a refrigerator shelf life of approximately 3 weeks. If you want to have ginger available for use year-round, you can cure mature ginger by air-drying it in a shaded area with proper ventilation for 48 hours. I typically store one cured ginger bulb in a 55°F root cellar with good ventilation and have found it to remain viable for about 9 months.
To prevent ginger from sprouting during storage, you can blanch your slices before freezing. I can tell you from experience that vacuum-sealed portions retain the flavor for 18 months in a freezer set at 0°F. If you want to store the ginger in your pantry, layer the rhizomes in food-grade silica gel. From my trials, I found that silica gel absorbs moisture much better than rice or newspaper.
While freezing maintains the raw heat of ginger, it does tenderize the texture. On the other hand, pickling in rice vinegar mellows the flavor and leaves the ginger with more shelf stability. I typically freeze about 80% of my ginger for cooking and I pickle the remainder. Tangy pickled ginger slices do make any salad taste better than pretty much any fresh ginger you might chop up!
Harvesting tools
- Fact: Garden forks reduce rhizome damage by 40%
- Use curved hori-hori knife for precision cuts
- Disinfect tools with 10% bleach solution
- Harvest basket allows soil to sift out
- Root brush removes dirt without washing
- Prune foliage 2 days before digging
Freezing techniques
- Fact: Grated frozen ginger lasts 6 months
- Peel with spoon before freezing
- Portion into 1 tsp (5g) cubes
- Vacuum-seal to prevent freezer burn
- Label with harvest date
- Thaw only needed portions
5 Common Myths
When grown outdoors, ginger can grow well in tropical climates.
When protected from frost, ginger can be grown in containers in temperate climates. Once you grow ginger once, you can begin to understand how frost protection and post-harvest mulching can allow ginger to be grown in USDA zones 5-12. Soil temperature preference (70F/21C and above) is often more important than local climate.
Ginger obtained from the grocery store is typically not sprout-able or replantable.
Organically grown grocery store ginger frequently sprouts if it has been soaked overnight and pre-sprouted on damp paper towels. The growth inhibitors used in commercially grown ginger are water soluble in vinegar-water mixtures, and can produce viable ginger.
Ginger plants require full sun for maximum rhizome growth.
Ginger plants naturally grow in the shade of a forest canopy. Four hours of sun in the morning and afternoon shade for ginger grower should help to minimize leaf scorch. In hot climates, 30% shade cloth can be used in full sun to mimic optimum dappled light conditions.
Harvesting ginger kills the plant forever.
After partial harvests of ginger, the plant resprouts from remaining sections of rhizomes. One must leave at least 25% of roots of healthy rhizomes with active buds in soil and new shoots will emerge in 4-6 weeks, given warm, moist conditions.
Ginger does not survive winter and will need to be replanted every year.
Mature ginger will go dormant in cool seasons and will come back in the spring. Mulch outdoor plants with straw that is 6 inches thick or bring the containers in doors as long as they are above 50°F (10C). The rhizomes are good for three to five growing cycles.
Conclusion
Ginger (Zingiber officianale) is a plant that can meet you where you are, whether it is a tropical backyard or an urban balcony. It loves humid weather, but even if you have to shield plants with mulch from frost or shade cloth from the desert heat, ginger seems to grow without protest. My first successful ginger harvest came from an old laundry basket growing on the fire escape of a brownstone in Brooklyn.
From choosing fat rhizomes to curing roots of the mature plants, every stage in the growth cycle merits your efforts for a delicious result. Thoroughly preparing the soil, carefully maintaining moisture, and harvesting at the correct time create the cycle to reward your endurance. Clients in Colorado, by rotating growing indoors- and outdoors, experience annual returns exceeding those from typical Hawaiian growers.
Ginger demonstrates sustainability through its regenerative ability. By leaving 25% of ginger rhizomes in the ground after harvest you can create a "forever" crop - I have not replanted my ginger in three years and the original rhizomes are still producing. Optimizing this crop over something you would buy from the store recognizes the environmental cost of packaging and chemical treatments that you may be exposing yourself to.
Experiment without hesitation to use containers. Try planting ginger in fabric grow bags, repurposed buckets or other containers, or ceramic pots. Alter your soil mixes to include recycled compost available to you locally. Each time things don't go right (like my patio pots getting too much shade) teaches you more than any flawless harvest ever could.
External Sources
Frequently Asked Questions
How long does it take to grow ginger?
Ginger requires 8-10 months to reach maturity. Harvest when leaves turn yellow, though you can collect young rhizomes earlier for milder flavor. In colder climates, start indoors 4-6 weeks before the last frost to extend the growing season.
Can I grow ginger from a piece of ginger?
Yes, fresh ginger rhizomes with visible growth buds (eyes) can be planted. Opt for organic varieties, as conventional store-bought ginger is often treated with growth inhibitors that reduce sprouting success.
What should not be planted near ginger?
Avoid planting these near ginger:
- Root vegetables (compete for underground space)
- Large shrubs (block essential shade)
- Water-intensive plants (risk overwatering rhizomes)
- Mint (invasive roots disrupt ginger's growth)
Should I soak ginger before planting?
Soak store-bought ginger overnight in lukewarm water to dissolve growth inhibitors. For organic rhizomes, a 2-3 hour soak suffices. Adding 1 tsp vinegar per cup of water improves sprouting rates for non-organic ginger.
Does ginger regrow after harvesting?
Ginger is a perennial in tropical climates but behaves as an annual elsewhere. Leave part of the rhizome unharvested, and it may regrow if kept in warm, moist soil during dormancy.
What is the best month to plant ginger?
Plant ginger indoors in late winter (February-March) or directly outdoors after the last frost. In USDA zones 9-12, plant year-round. Soil temperatures must stay above 55°F (13°C) for successful growth.
How often should I water ginger plants?
Water ginger every 2-3 days in warm weather, ensuring soil stays damp but not soggy. Reduce frequency in cooler months. Container plants dry faster, check moisture 1 inch below the surface before watering.
Can you eat ginger leaves?
Ginger leaves are edible but fibrous. Use young leaves in teas or as a garnish. Mature leaves add flavor to broths but should be removed before eating due to tough texture.
Why are my ginger plant leaves turning yellow?
Yellow leaves signal:
- Overwatering (improve drainage)
- Natural maturation (8+ months old)
- Nutrient deficiency (apply balanced fertilizer)
- Pests/disease (inspect for aphids or fungal spots)
Is store-bought ginger safe to plant?
Organic store-bought ginger works best. Conventional ginger often has anti-sprouting treatments, but soaking in vinegar-water overnight can neutralize these chemicals. Look for plump, unwrinkled pieces with visible buds.