
Learning how to grow dill would unlock this powerhouse herb for your kitchen and garden! This feathery plant is a charming addition to any decorative arrangement. Still, it also possesses herbal properties, found in remedies focusing on digestion, filtration, and detoxification. I still keep a jar of dried dill, specifically for home-made teas, in my pantry at all times.
Dill is beginner-friendly due to its low maintenance requirements. It attracts pollinators, including swallowtail butterflies, to your garden. Bolting (early flowering) can occur with heat, but planting near cucumbers also has beneficial pest control-related advantages.
Dill is dense in vitamin A and C, adding another layer of nutrition to your meals: calcium and iron support bone and blood health. I add fresh sprigs to salads for both flavor and nutrition. Avoid heat stress to keep the leaves tender and edible.
Culinary Applications
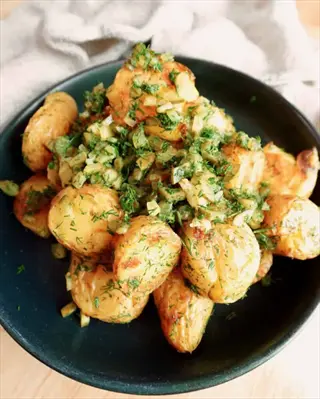
Dill adds a refreshing lemony tang to dishes that brightens instead of overpowering. Currently, fresh sprigs are elevating everything from potato salads to yogurt dips. The flavor is not as strong as the dried dill, which intensifies the herbal notes. For fish, I prefer the fresh; for soups, dried.
Preservation methods significantly impact flavor equivalence. Freezing usually maintains 90% of the essential oils compared to drying, which results in a loss of 70%. As for recipes, use one tablespoon of fresh dill for one teaspoon of dried. You can add frozen dill to sauces without thawing it. This seems to work well.
Cooking can either enhance or detract from the taste and nutritional value of food. Steaming retains vitamin C better than boiling. Add dill at the end of cooking to preserve its fragrant, delicate aroma and to maximize its nutritional value. One cup of chopped fresh dill contains 135% vitamin A and 40% daily needs for vitamin C.
Measure properly. For potato salads, use 2 tablespoons of fresh dill per pound of potatoes. For brine pickling, add 3 sprigs of dill per quart jar. I prefer not to cook the dill too long so that the color and nutritional benefits are retained.
Potato Salad
- Flavor Enhancement: Fresh chopped dill adds bright herbal notes that cut through mayonnaise richness in potato salads.
- Preparation: Mix 2 tablespoons (30ml) chopped dill per 4 cups (950ml) potatoes just before serving for maximum freshness.
- Nutrition: Provides 15% daily Vitamin A per serving while adding minimal calories to the dish.
- Texture Consideration: Finely chop dill to distribute evenly without overpowering potato texture.
- Alternative Uses: Substitute dill for parsley in German-style potato salads with vinegar dressings.
- Storage Tip: Add dill immediately before serving as prolonged refrigeration dulls its aromatic qualities.
Fish Marinades
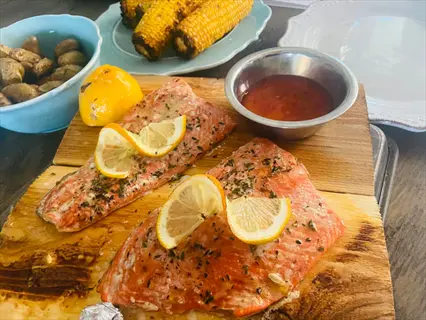
- Tenderizing Effect: Dill's enzymes help break down proteins in fish like salmon and trout during marination.
- Recipe Ratio: Combine 3 tablespoons (45ml) chopped dill with lemon juice and olive oil for 1 pound (450g) fish fillets.
- Marinating Time: Optimal flavor penetration occurs after 30-60 minutes refrigeration before cooking.
- Cooking Method: Best with baking or pan-searing where gentle heat preserves dill's volatile compounds.
- Regional Variation: Essential in Scandinavian gravlax recipes where dill-cured salmon is traditional.
- Complementary Herbs: Pair with tarragon or chives for complex herb profiles in white fish dishes.
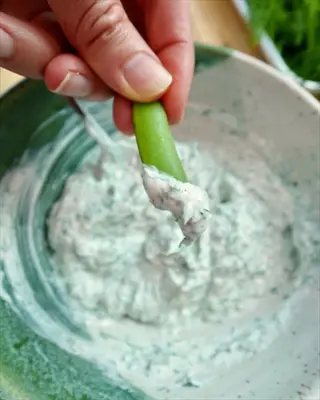
Yogurt Dips
- Cooling Contrast: Dill balances garlic heat in Mediterranean tzatziki sauce made with Greek yogurt.
- Consistency Tip: Strain yogurt overnight for thicker dip texture before adding chopped herbs.
- Serving Suggestion: Pair with vegetable crudités or as sauce for grilled meats at summer barbecues.
- Cultural Origin: Key ingredient in Greek and Turkish cuisines where yogurt-based sauces are staples.
- Flavor Development: Allow dips to rest 2 hours before serving for optimal flavor integration.
- Dietary Adaptation: Use coconut yogurt alternatives with dill for vegan-friendly versions.
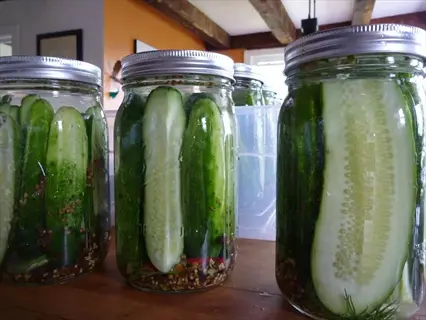
Pickling Solutions
- Preservation Power: Dill seeds and flowers create signature flavor in fermented cucumber pickles.
- Brine Formula: Use 1 cup (240ml) dill heads per gallon (3.8L) brine solution for balanced herbal notes.
- Fermentation Timeline: Full flavor development occurs after 3-4 weeks in cool dark storage.
- Historical Context: Dill pickling dates back to 17th-century Eastern European food preservation methods.
- Vegetable Pairings: Works equally well with green beans, carrots, and cauliflower for mixed pickles.
- Safety Check: Always ensure brine fully covers vegetables to prevent mold formation during fermentation.

Egg Preparations
- Morning Boost: Fresh dill adds fresh flavor to omelets and scrambled egg dishes.
- Cooking Technique: Sprinkle chopped dill during last minute of cooking to preserve volatile oils.
- Pairing Suggestion: Combine with goat cheese or smoked salmon for elegant brunch presentations.
- Cultural Fusion: Inspired by Persian kuku sabzi herb frittatas using abundant fresh herbs.
- Nutritional Bonus: Eggs' protein combines with dill's micronutrients for balanced breakfast nutrition.
- Visual Appeal: Use dill sprigs as edible garnish to enhance plate presentation simply.
Pest Control Methods
Handle pests on dill differently than if it were an ornamental plant, since you're going to eat the foliage. Organic approaches will keep your harvest safe for eating. Chemical pesticides will leave residues on edible herbs. I stick with all-natural sprays, such as neem oil, for my dill patch.
Prompt identification of pests leads to effective pest control. Aphids appear as small green spots on the underside of leaves. Caterpillars eat irregular holes in leaves. Spider mites leave behind fine webbing on stems. Scrutinize the plants every morning, as they are at their peak pest time.
Companion planting creates natural defenses. Growing garlic or chives nearby can help repel aphids. Nasturtiums can divert whiteflies away from your dill. I also grow yarrow to attract ladybugs, which feast on mites. This way, I keep pest problems to a minimum without spraying chemicals.
Use organic treatments wisely. Spray insecticidal soap directly on aphid colonies every three days. Handpick caterpillars in the cool of the morning. Dramatically increase humidity, which deters spider mites. Always test clear sprays on a few leaves to prevent plant damage.
Indoor Cultivation
Container gardening allows for dill to be grown in any home. Pots allow for window sill or counter space. Indoor plants tend to remain compact, whereas outdoor plants typically produce numerous leaves. I have used 8-inch deep pots for my kitchen dill. This pot fits beside my coffee maker.
Growing lights need to change with the seasons. In winter, they require 14 hours of exposure to grow lights. In summer, simply 6 hours. Position grow lights about 6 inches above plants. Dill growing outdoors receives ample sunlight; indoors, grow lights should be managed carefully.
A few simple solutions can help alleviate indoor humidity issues. When the air is dry, the edges of leaves dry out and turn crispy! You can put pots on a pebble tray filled with water. This adds moisture to the air. Placing a small fan nearby can help prevent mold from forming on the soil surface. As a routine, I mist the leaves every morning during the winter heating season.
Water the indoor plants when the topsoil feels dry to the touch. Water with room-temperature filtered water to avoid shocking the roots. Self-watering containers provide a good moisture source. After watering, check the saucers. Empty the excessive water to prevent root problems.
Container Specifications
- Material Choice: Unglazed terra-cotta pots provide optimal air circulation and moisture control for dill roots
- Depth Requirement: Minimum 12-inch (30cm) depth accommodates dill's extensive taproot system
- Drainage Solution: Layer 2 inches (5cm) of gravel beneath potting mix to prevent waterlogging
- Size Consideration: 8-10 inch (20-25cm) diameter containers allow adequate space for mature plants
Light Management
- Daily Duration: Provide 12 hours daily using full-spectrum LED grow lights positioned 6 inches (15cm) above plants
- Seasonal Adjustment: Increase to 14 hours during winter months to compensate for reduced natural light
- Natural Light Tip: South-facing windowsills work best but require daily pot rotation for even exposure
- Light Measurement: Maintain 15,000-20,000 lux intensity using a light meter app for accuracy
Climate Control
- Temperature Range: Maintain 60-80°F (16-27°C) - avoid placement near heating vents or drafty windows
- Humidity Solution: Use pebble trays filled with water beneath pots to create 40-60% humidity microclimate
- Air Circulation: Run oscillating fan 4 hours daily to strengthen stems and prevent fungal diseases
- Seasonal Monitoring: Track conditions with digital hygrometer/thermometer placed at canopy level
Watering System
- Moisture Testing: Water when top inch (2.5cm) of soil feels dry - use finger test or moisture meter
- Water Quality: Use room-temperature filtered water to prevent chlorine damage to sensitive roots
- Self-Watering Option: Consider sub-irrigation planters with wicks for consistent moisture during vacations
- Drainage Check: Empty saucers 30 minutes after watering to prevent root rot from standing water
Nutrition Plan
- Fertilizer Type: Apply half-strength balanced liquid fertilizer (5-5-5 NPK) every 4-6 weeks
- Organic Alternative: Incorporate worm castings into potting mix during planting for slow-release nutrition
- Deficiency Signs: Yellowing lower leaves indicate nitrogen shortage; pale veins suggest iron deficiency
- Application Method: Water soil before fertilizing to prevent root burn in container environments
Essential Growing Steps
Begin your garden journey with soil preparation. Check pH levels and aim for a pH level between 5.5 and 6.7. Add compost to the topsoil before planting. In heavy soils, incorporate coarse sand with the soil for better drainage. Raised beds are terrific for drainage in wet climates. I always prepare beds 2 weeks before sowing seeds.
Direct sowing preserves dill's *taproot development*. Transplanting disrupts delicate roots, resulting in stunted growth. Plant seeds ¼ inch deep in prepped soil. Space plants 12 inches apart to allow for adequate airflow. Keep the soil moist until germination, which typically occurs within 7-14 days. This method will produce stronger, healthier plants.
Watering needs depend on climate zones. In arid zones, the lawn should be watered deeply twice per week. In humid zones, the lawn should only be watered when the topsoil is dry to the touch, using one inch of water per watering session. Use a rain gauge to monitor the amount of water applied as you water. You can also adjust the watering frequency during heat waves above 85°F.
Adjust duration and sunlight exposure throughout the season. Spring plants need full 8 hours of sun. Summer will need afternoon shade to prevent bolting. Shade cloth over plants when it gets really hot must be around 30%. With containers, you can rotate them to achieve even lighting. If I have moved pots every day, I am in the sun equally.
Soil Preparation
- pH Testing: Use test strips or lab services to achieve optimal 5.5-6.7 acidity range
- Drainage Enhancement: Incorporate 2-3 inches (5-7.5cm) coarse sand in clay soils
- Nutrient Boost: Mix 4 inches (10cm) compost into topsoil before planting
- Bed Preparation: Create raised beds 6-8 inches (15-20cm) high for improved drainage
Seed Sowing
- Planting Depth: Sow seeds at ¼ inch (0.6cm) depth in prepared soil
- Spacing Configuration: Space rows 18-24 inches (45-60cm) apart with 12-inch (30cm) plant spacing
- Germination Care: Maintain 60-70°F (16-21°C) soil temperature for 7-14 day sprouting
- Succession Planting: Sow new seeds every 3 weeks for continuous harvest
Watering Management
- Moisture Monitoring: Water when top 1 inch (2.5cm) soil dries out
- Deep Watering: Apply 1 inch (2.5cm) water weekly - equivalent to 0.6 gallons (2.3L) per sq ft
- Drought Response: Increase to twice weekly during 85°F+ (29°C+) heat waves
- Container Care: Use self-watering pots with 1 quart (0.9L) reservoir for consistency
Sunlight Optimization
- Daily Minimum: Ensure 6-hour direct sunlight - 8 hours ideal for maximum growth
- Heat Adaptation: Use 30% shade cloth when temperatures exceed 85°F (29°C)
- Indoor Lighting: Position LED grow lights 6 inches (15cm) above seedlings
- Seasonal Adjustment: Rotate containers daily for even light distribution
Growth Maintenance
- Thinning Protocol: Reduce seedlings to 12-inch (30cm) spacing at 2-inch (5cm) height
- Mulching Technique: Apply 3-inch (7.5cm) straw layer to conserve moisture
- Weed Control: Hand-pull weeds weekly without disturbing shallow roots
- Wind Protection: Install 24-inch (60cm) mesh barriers for tall varieties
Harvesting Techniques
For optimal harvesting, dill leaves and dill seeds should be harvested differently. Dill leaves can be accumulated when the plant reaches 8 inches tall with 4-5 sets of leaves, and cut stems just above the soil level using sterilized shears. Dill seeds can be collected when they turn light brown and papery, and then shake the flower heads into paper bags.
Timing dictates flavor potency. Before noon is when the essential oils are at their strongest. Picking leaves in the morning can help prevent wilting in seeds once the entire flower head is dry. I test the seeds by gently rubbing the flower heads. If the seeds come off easily, then they are ready to go.
Keep plant parts neat. I freeze chopped leaves in ice cubes for easy use throughout the year. I dry seed parts in dark, ventilated places. I store them in air-tight jars. Flowers infuse nicely in vinegar for dressings. I got into the habit of writing the harvest date on my containers to track freshness.
Lean towards sustainable harvesting for sustained productivity. Don't harvest more than one-third of the plant. Rotate the harvesting cycle of your plants every week. It is essential to leave some flowers for pollinators and to allow for self-seeding to occur. Harvesting using this method yields a continuous harvest throughout the entire season.
Leaf Harvesting
- Optimal Timing: Harvest when plants reach 8 inches (20cm) height with 4-5 leaf sets before flowering
- Cutting Technique: Use sterilized shears to snip stems just above soil level, taking no more than ⅓ of plant
- Morning Advantage: Collect leaves before midday heat when essential oil concentration peaks
- Continuous Harvest: Rotate between plants weekly to allow regrowth between harvests
Seed Collection
- Ripeness Signs: Harvest when seeds transition from green to light brown with papery texture
- Stalk Processing: Cut entire flower heads, place upside-down in paper bags in dark, dry location
- Extraction Method: Shake bags weekly until all seeds detach (typically 2-3 weeks)
- Storage Prep: Sieve seeds through mesh screen to remove chaff before airtight storage
Flower Harvest
- Culinary Use Timing: Pick flower umbels when half-open for intense flavor in pickling solutions
- Preservation: Submerge fresh flowers in vinegar for infused dressings or freeze in ice cubes
- Pollinator Consideration: Leave 20% of flowers for beneficial insects and seed production
- Cut Position: Trim stem 6 inches (15cm) below flower head using sharp floral snips
Post-Harvest Handling
- Leaf Storage: Wrap in damp paper towels, refrigerate in airtight containers for 1-week freshness
- Seed Preservation: Store dried seeds in glass jars away from light for 3-year viability
- Freezing Method: Chop leaves finely, pack into ice cube trays with water or oil
- Drying Process: Hang bundles in dark, well-ventilated area at 95°F (35°C) for 5-7 days
Regeneration Techniques
- Bolting Management: Pinch off flower buds to extend leaf production season by 4-6 weeks
- End-of-Season Care: Leave mature seed heads for self-sowing next season's crop
- Winter Preparation: Mulch perennial varieties with 6 inches (15cm) straw in zones 8-11
- Succession Timing: Plant new seeds every 3 weeks to replace harvested plants
5 Common Myths
Dill plants do equally well in full shade as full sun.
Though dill can withstand conditions of partial shade in cases of extreme heat, it makes the most growth when receiving direct sun within a range of six hours to eight hours daily. Without adequate light, stems will become leggy and produce less essential oils. They will also be much more susceptible to diseases. For shaded gardens, consider using grow lights to supplement the lack of light or select shadier spots on hot summer afternoons only when the temperature exceeds 85F, or 29C.
If you want stronger plants, use seedlings; they are more robust than directly sowing seeds.
Dill produces a weak taproot system that is easily damaged when transplanted. After being transplanted, dill will take longer to develop and grow, which can be aggravated by seeding at the wrong time, leading to bolting. Directly seeding will work out better in the long run because the root structure will develop without any undermining interference. The real key to consider when growing plants from seedlings is to use the seeds in the location you plan to eventually harvest the plants to reduce transplant shock, which will weaken any plant no matter what.
Frequent fertilization with nitrogen-rich formulas enhances dill's flavor and growth rate while improving harvest quality.
Excess nitrogen triggers rapid bolting while diminishing the distinctive flavor compounds in dill leaves. Balanced nutrition from compost provides adequate nutrients without forcing premature flowering. Apply a balanced 5-5-5 fertilizer at half-strength every 6 weeks during active growth. Over-fertilization increases pest attraction and reduces drought tolerance, making plants more vulnerable to environmental stresses.
Dried dill has the same culinary value as fresh dill in recipes and cooking.
A drying procedure eliminates 70-80% of the volatile oils of dill that contribute to dill's aroma and flavor. Frozen dill retains 90% of its flavor compounds when frozen immediately after harvest. If you want to use dill for authentic flavor, always choose fresh dill or frozen dill when making dressings and sauces or when cooking fish dishes with dill as the aromatic. Frozen dill can be stored in airtight containers for up to 6 months.
Chemical pesticides are necessary to effectively control pests on dill plants and ensure healthy growth.
Beneficial insects like ladybugs and lacewings naturally control 85% of common pests when provided habitat through companion planting. Organic solutions such as neem oil and insecticidal soap effectively manage infestations without contaminating edible leaves. Chemical residues accumulate in dill's feathery foliage, posing health risks in culinary use. Always prioritize biological controls for edible herbs.
Conclusion
Dill provides a multitude of benefits in both the kitchen and around my garden. Its feathery flowers entice swallowtail butterflies and bees. I get super fresh dill seasoning while also attracting some local pollinators. I always plant a few extra plants for these insects to enjoy, because they help keep my whole garden healthy.
Keep in mind the important growth factor for your climate. Hot areas, such as the southern U.S., need afternoon shade for bolting. Climates that are cooler need full sun. Areas with high humidity require deep watering, followed by infrequent watering, to prevent excessive moisture. Dry climates require watering twice weekly. When the seasons change, care needs to adapt for optimal results.
Seed saving encourages sustainable gardening practices. I collect mature brown seeds to use next year. This saves money and helps protect plant varieties. I get little jars, label the seeds, and store them in a cool, dark location, such as my basement. Suppose I have any extra seeds the following year. In that case, I share them with my neighbors because I love spreading the gardening spirit.
Launch your dill adventure today by following quite a few easy steps. This week, prepare your soil for spring planting. Order your seeds for early sowing. Plant dill close to tomatoes for natural pest control. You'll be enjoying fresh dill in your meals in just weeks!
External Sources
Frequently Asked Questions
How do you harvest dill to encourage continuous growth?
Use sterilized scissors to cut stems just above soil level, removing no more than one-third of the plant. Always harvest before midday when essential oil concentration peaks. Rotate harvesting between plants weekly to allow regrowth. Morning harvesting prevents wilting and stimulates new leaf production from lower nodes.
Does dill grow better in containers or garden beds?
Dill thrives in both environments when given proper conditions. Ground planting suits warmer climates with deep soil for taproots. Containers work well for cooler regions and space-limited gardens. Key differences include:
- Ground advantages: Natural temperature regulation and unlimited root space
- Container advantages: Better pest control and mobility for sun tracking
- Critical requirement: Minimum 12-inch depth for root development in both
Is dill an annual or perennial plant?
Dill is primarily grown as an annual herb completing its lifecycle in one season. In warm climates (zones 9-11), it may self-seed annually if seed heads remain. Perennial varieties exist but are less common. Most gardeners replant every 3-4 weeks for continuous harvests from spring through fall.
What sunlight requirements does dill have?
Dill requires substantial daily sunlight exposure for optimal growth. While tolerating partial shade during extreme heat, it performs best with:
- Minimum: 6 hours direct sunlight daily
- Ideal: 8 hours of unfiltered sunlight
- Critical: Afternoon shade only when temperatures exceed 85°F (29°C)
- Consequence: Leggy growth and flavor loss in inadequate light
What are common problems when growing dill?
Solutions involve organic pest control, well-draining soil, and succession planting. Maintaining consistent moisture without waterlogging and providing adequate spacing prevents most issues.
- Bolting triggered by heat or root disturbance
- Aphid infestations on new growth
- Powdery mildew in humid conditions
- Yellowing leaves from overwatering
- Stunted growth in compacted soil
Does dill naturally repel garden pests?
Dill attracts beneficial insects while deterring certain harmful pests through its strong aroma. It repels spider mites and aphids when planted near vegetables. However, it attracts tomato hornworms and should be positioned away from nightshades. The flowers specifically lure predatory wasps and ladybugs that control common garden pests.
How often should dill be watered?
Water when the top inch of soil becomes dry, typically requiring deep watering once weekly. During heat waves above 85°F (29°C), increase frequency to twice weekly. Container plants need more frequent checks as pots dry faster. Always allow proper drainage to prevent root rot while maintaining consistent soil moisture.
Are all parts of the dill plant edible?
Only mature woody stems become tough and are typically discarded. Roots should not be consumed.
- Leaves (dill weed): For salads, fish, dressings
- Seeds: For pickling and breads
- Flowers: For vinegar infusions and garnishes
- Stems: For flavoring stocks and soups
What temperature range is ideal for dill?
Dill thrives in moderate temperatures between 60-75°F (16-24°C). Growth stalls below 50°F (10°C) while temperatures above 85°F (29°C) trigger premature bolting. Protect plants with shade cloth during heat waves and avoid planting before last frost. Soil thermometers help monitor ideal germination conditions.
Can you use dill after it starts flowering?
Pinching buds delays flowering for continued leaf harvest.
- Flowers for pickling brines and herb vinegars
- Seeds for spice blends and breads
- Mature leaves in cooked dishes only
- Avoid raw applications due to bitterness