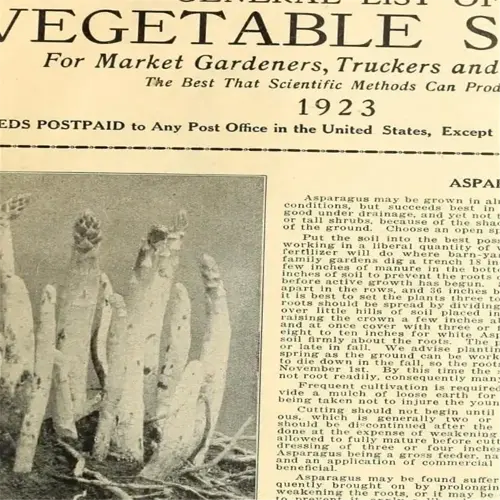

Learning how to grow corn successfully begins with understanding its requirements for sunlight and room to grow. Sweet corn grown at home contains double the amount of vitamin C that sweet corn from the grocery store has. The kernels snap with flavor that you'll never find in a grocery store.
Gardening enthusiasts abound and one of the biggest frustrations is when ears of corn do not fill out. This is usually caused by poor pollination. Corn relies on wind to pollinate between the stalks. Planting in blocks rather than single rows will help nature do its job.
Raccoons and birds sometimes cause problems to crops when they are nearly ripe. An electric fence is a simple way to deter them at night without harming the wildlife. Plants can be staggered every two weeks during the season to ensure fresh corn from early summer to fall frosts.
Spacing and timing will ultimately prove to be a keyword that changes sporadic results into bountiful yields. The labor grants you the sweetness that will last only hours with commercial varieties but for days from your backyard.
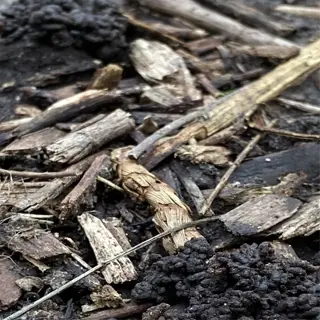
Soil Preparation & Variety Selection
Loamy soil provides adequate aeration for corn roots while still maintaining moisture. Clay soils require amendments such as compost to help keep them from being too wet. The USDA soil texture triangle can be used to determine your soil type based on sand, silt, and clay percentages. It is a good idea to test your soil three months in advance of your planting date, as limed soil may require time to shift from an acid state.
To avoid starchy kernels, supersweet corn varieties must be isolated from any other type of corn by 500 feet. To help you conceptualize this distance, consider it to be the length of two football fields. Dwarf varieties such as White Midget grow naturally in 12-inch pots on balconies. This variety typically grows only 5 feet tall and, therefore, will fit very well in a tight space without compromising the size of the ears of corn.
I learned about pH the hard way. My first crop turned yellow signaling the acidic soil. I now test pH yearly in March. Sweet corn prefers 6.0-6.8 pH. It takes eight weeks for pelletized lime to activate. Crushed oyster shells can be used instead if things happen fast.
Growers in a city setting should be seeking container-friendly options. 'Golden Midget' has buttery ears that mature in 70 days. Consider planting with beans grown on a trellis to use the vertical space. Avoid tall varieties in the beds nearest a window. There may be shifts in wind patterns near the building. Staggering your planting in several pots will allow you to have a longer harvest window.
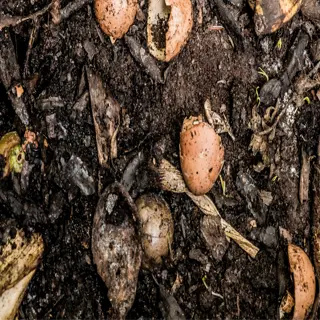
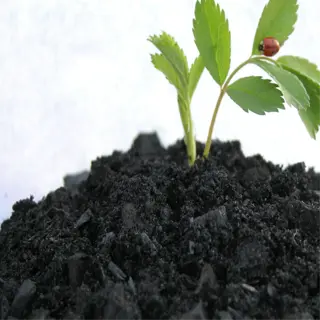
Compost
- Application: 3-inch (7.6 cm) layer tilled 8 inches (20 cm) deep improves water retention
- Timing: Apply 4 weeks before planting to allow microbial activation
- Quantity: 1 cubic yard (0.76 m³) covers 100 sq ft (9.3 m²) to 3-inch depth
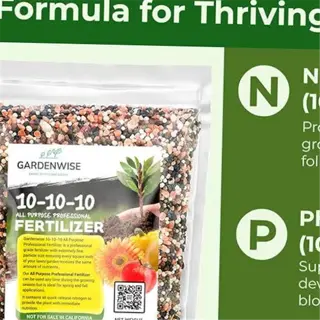
Balanced Fertilizer
- Ratio: 1 lb (0.45 kg) per 25 sq ft (2.3 m²) provides NPK baseline nutrition
- Method: Band application 3 inches (7.6 cm) beside seed rows prevents burn
- Alternative: 5-3-3 organic blend for container gardening setups
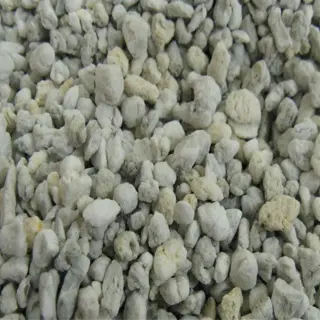
Perlite
- Function: Improves drainage in heavy clay soils by 40% porosity
- Mix Ratio: 1 part perlite to 3 parts soil (25% volume)
- Application: Incorporate 6 inches (15 cm) deep for root development
Worm Castings
- Nutrients: Provides 5-3-2 NPK ratio with beneficial microbes
- Application Rate: 10 lbs per 100 sq ft (4.5 kg/9.3 m²)
- Timing: Mix into top 4 inches (10 cm) at planting time
Biochar
- Benefits: Increases cation exchange capacity by 20-30%
- Preparation: Charge with compost tea before application
- Quantity: 5 lbs per 50 sq ft (2.3 kg/4.6 m²)
Planting Techniques
How to grow corn is dependent on the timing of planting in your region. In the South, gardeners can plant early varieties like ‘Golden Bantam' in March. In the Northern regions, growers should wait to plant these mid-season types until May. A soil thermometer is a good way to measure soil temperature. Ideally, soil temperature is at least 60°F (16°C) to a depth of 4 inches before planting.
I once neglected to check the temperature and lost a whole crop. Now, I slide the probe into shaded soil each morning. Corn germinates poorly when the soil temperature is below 55°F (13°C). For Fahrenheit to Celsius conversions, simply subtract 30 from Fahrenheit and halve it for an approximate Celsius temperature.
Space seeds 8 inches apart in grid patterns for high-density planting plots. This establishes a living windbreak to assist with pollination. Conventional row-style spacing is wasteful. Conventional 36 inches between stalks, especially transplanted stalks, makes space for weeds to grow. Dwarf varieties like the ‘Golden Midget' can adapt to a 15-gallon pot as long as they are watered twice a day.
Tall varieties have difficulty growing in containers. With stalks rising ten feet high, they can easily fall over during a summer wind. When planning patio gardens, stick to tabletop varieties. Turn pots on their sides and bury seeds slightly deeper (1.5 inches) than usual for stability. Mix perlite with soil to reproduce field drainage.
Soil Temperature Verification
- Tool: Analog soil thermometer inserted 4 inches (10 cm) deep
- Timing: Measure for 3 consecutive mornings before planting
- Thresholds: 55°F (13°C) minimum for standard corn
Site Preparation
- Tilling: Break up soil to 8-inch (20 cm) depth
- Moisture: Soil should crumble when squeezed (not muddy)
- Slope: Create 2% grade for drainage in heavy rains
Seed Placement
- Depth: 1.5 inches (3.8 cm) in clay, 2.5 inches (6.4 cm) in sand
- Orientation: Flat side down for even germination
- Cover: Firm soil contact without compaction
Spacing Configuration
- Traditional: 12-inch (30 cm) spacing in 36-inch (91 cm) rows
- High-Density: 8-inch (20 cm) staggered grid pattern
- Containers: 3 plants per 5-gallon (19 L) bucket
Post-Planting Care
- Watering: 0.5 inches (1.3 cm) immediately after planting
- Frost Protection: Use row covers below 40°F (4°C)
- Mulching: Apply straw after germination
Fertilization & Watering
Organic fertilizers, such as composted manure, will release nitrogen into the soil at a slower pace over 6 - 8 weeks. Synthetic blends of 10 - 10 - 10 will provide nutrients right away; however, it is easy to burn the roots of plants with higher applications. For example, corn planted in sandy soils can lose 40 percent more nitrogen to leaching than soil with more content density. To remedy this, I side-dress with fish emulsion every three weeks to get more consistent nitrogen for the plants.
Drip irrigation aims for direct root targeting. It conserves 30% of water compared to overhead sprinklers. The cost is its initial setup. Overhead watering systems create an environment for fungal disease in humid climates. One season, I lost half my crop to rust before I switched to drip lines.
Sandy soil requires attention. Nitrogen can leach below root zones after heavy rains. Use drip systems with polymer-coated urea for a delayed and consistent release methodology. If you are container-growing corn, for example, daily watering will be needed. Also, for my ‘Golden Midget container corn (that I have on my balcony), I would mix water-retaining crystals into my potting soil.
Container plants should be fed weekly with half-strength 5-3-3 liquid. Ground corn is fine with only monthly feeding. Watch for yellowing leaves at the bottom of the plant--that's a sign of nitrogen deficiency. During ear formation, bury banana peels near the stalks for additional beneficial potassium.
Drip Irrigation
- Flow Rate: 0.5 gph per emitter (1.9 L/h)
- Spacing: 12" (30 cm) between emitters
- Timing: 45 minutes daily at dawn
Soaker Hoses
- Pressure: 10-25 psi (69-172 kPa)
- Layout: Parallel rows 18" (46 cm) apart
- Duration: 1 hour every 3 days
Hand Watering
- Volume: 1 gal per plant (3.8 L)
- Frequency: Every 2 days in 85°F+ (29°C+) weather
- Technique: Water stem base slowly
Sprinkler System
- Drop Size: 0.08-0.12" (2-3 mm) diameter
- Runoff Control: Cycle 15 min on/15 min off
- Efficiency: 65-75% in morning hours
Self-Watering Containers
- Reservoir: 2 gal capacity (7.6 L)
- Wick Depth: 6" (15 cm) soil column
- Refill: When gauge shows 25% remaining
Pollination & Pest Control
Hand-pollination increases kernel development by 90% due to pollination by wind only. I take a soft brush and move pollen from tassels to silks every morning. Wind-pollinated plots have a lot of gaps in ears, but planting in tight blocks helps mitigate this. When hand-pollinating you have to judge success by timing the silks to have started when pollen shed is at its peak.
Neem oil sprays repel 70% of beetles with weekly application. Diatomaceous earth establishes a razor barrier against cutworms. For squash bugs, I plant radishes as sacrificial crops. Ladybugs released at dusk will reduce aphid colonies within one night without chemicals.
To help deter or repel corn earworms, interplant marigolds at 10 feet apart. Marigolds secrete a compound called alpha-terthienyl from their roots, which is toxic to nematodes. Nearby nasturtiums will prevent leaf beetles from eating your crop. Do not plant the beans too close, as they will compete for nitrogen, and also attract similar pests like leafhoppers.
Spinosad, which the EPA has approved for use, may be applied as a last resort to control a heavy infestation. Make the application at dusk to avoid drifting to bees. I save permethrin for armyworms only. Wear gloves every time. Rotate your chemicals every year to keep them from becoming ineffective through resistance. Store unused sprays in a sealed container away from children.
Hand Pollination
- Timing: Collect pollen 9-11 AM when tassels dry
- Technique: Shake tassels over wax paper
- Application: Dust silks within 30 minutes
Wind Pattern Optimization
- Row Direction: Plant N/S to catch prevailing winds
- Density: Minimum 4 rows for pollen turbulence
- Barriers: Remove tall plants upwind
Pollinator Attraction
- Plants: Sow zinnias every 15 ft (4.6 m)
- Water: Install birdbath with landing stones
- Timing: Morning bloomers for early activity
Cross-Pollination Prevention
- Isolation: 500 ft (152 m) between varieties
- Timing: Stagger planting dates by 3 weeks
- Barriers: Use cheesecloth bags on ears
Pollination Monitoring
- Tool: 10x hand lens for silk examination
- Sign: Silks turn brown & dry when pollinated
- Salvage: Re-pollinate within 48 hours if failed
Harvesting & Storage
Sweet corn will stay fresh for approximately 7-10 days at 32°F (0°C) under 95% humid conditions if it is refrigerated. Root cellars can keep temperatures at 40°F (4°C) with 85% humidity for at least 3 weeks. I once lost some corn to mold because I stored ‘Silver Queen' in a root cellar that was over 50°F.
To safely store corn, it must be dried to a moisture content of 15 percent. To test moisture on a handful, squeeze it into a ball and release it. If the kernels do not stick together and spring back apart, it is ready to be stored. I learned this after my first harvest was ruined by humid days in July. After drying, I place my corn in a dehydrator set at 130 °F (54 °C) for 8 hours to prevent spoilage.
To stop the enzyme activity that makes food less flavor you'll want to blanch ears in boiling water for 7 minutes and then freeze them. One time, I skipped this step and after thawing it was mushy kernels. It is also a good idea to shock the corn in ice water immediately after blanching. Don't forget to pat it dry before freezing so that you don't end up with ice crystals.
Varieties sensitive to ethylene, such as ‘Honey Select' and ‘Ambrosia', tend to brown rapidly when exposed to fruits, such as apples or tomatoes. The best option is to store them in perforated plastic bags away from other fruits. I separate my kernels in one of the drawers of my refrigerator. Another option is to place them in glass jars to keep them away from the gas circulation.
Ripeness Check
- Test: Pierce kernel - milky fluid indicates readiness
- Sign: Brown/dry silks at ear base
- Timing: 18-24 days post-silk emergence
Harvest Window
- Optimal: Early morning when sugars peak
- Weather: Avoid harvesting in rain
- Tool: Twist ears downward sharply
Post-Harvest Handling
- Cooling: Reduce to 32°F (0°C) within 1 hour
- Cleaning: Brush debris without washing
- Sorting: Discard ears with insect damage
Pre-Storage Prep
- Blanching: 7 minutes in boiling water
- Shocking: Ice bath for equal time
- Drying: Pat kernels with paper towels
Long-Term Monitoring
- Check: Weekly for condensation in bags
- Rotation: Use oldest stock first
- Discard: At first mold signs
5 Common Myths
Increased levels of fertilizer always results in larger corn ears
Excess nitrogen is going to make the stalk weak so it will lodge and the kernels will be shallow! We get optimal yields at 1.2 lbs N/100sq ft (0.54 kg/9.3 .m). If we apply excess fertilizer we will have more leaf growth but with reduced ear growth.
Corn requires watering every day to remain sweet
A reasonable 1 inch (2.5 cm) per week of irrigation will keep your corn sweet. Too much water will leach nutrients and cause root-rotting. The critical period for watering is 2 weeks before/following silking - at other times moderate drought can be tolerated.
Corn varieties needs to be isolated by miles
Only supersweet (sh2) types need 500 ft (152 m) isolation. Standard sugary (su) types need only 25 ft (7.6 m) isolation. Time isolation (3-week planting stagger) allows for better corn varieties isolation than distance use in small gardens.
Homegrown corn can't beat store bought sweetness
Properly picked se/sh2 varities reach 28% sugar content versus store varieties 18%. The key is refrigeration within 1 hour - corn loses half of its sugar not refrigerated for 24 hours.
Corn extracts nutrients from the soil and cannot be replanted
Crop rotation with beans contributes 50% nitrogen needs. Annual replanting is feasible when making 2" (5 cm) compost addition and rotating sections. Soil tests indicate corn needs low phosphorus and requires less phosphorus than tomatoes and peppers.
Conclusion
Learning how to grow corn involves a cycle of four stages: soil preparation, smart planting, pollination care, and appropriate harvest. In my experience on a small scale garden, gardens can flourish when each step is all taken seriously. Start with good soil. Space seeds sufficiently. Nurture the developing ears. Harvest in a timely manner.
When you stagger your plantings 14 days apart, you can have a never-ending supply of deliciousness throughout the summer! My harvests from July to October provide sustainable food for family BBQs without any gaps.Early varieties such as ‘Quickie' will be ready to harvest in 65 days, and then you can plant mid-season varieties.Finally, you can plant late varieties that can tolerate some light frosts so you can harvest until late autumn!
I use the free soil test kits available at my local extension office every year. The test showed my soil pH was too low for growing crops well. Because of their reports, I made amendments to the soil twice, and my yields doubled. You can search for the closest agency in your area using the USDA's online office directory.
Corn from home gardens bursts with sweetness compared to ears from the grocery store. Freshly harvested kernels maintain 30% more sweetness than their store-bought counterparts because store-bought varieties will lose roughly half their sugar content after 24 hours. My kids will no longer eat corn from the store since tasting ‘Honey ‘n Pearl' corn from our backyard corn patch.
External Sources
Frequently Asked Questions
What are the basic requirements for growing corn successfully?
Corn thrives in full sun with well-drained soil rich in nitrogen. Plant seeds after frost danger passes, spacing them 12 inches apart in blocks for pollination. Consistent watering and balanced fertilization are critical for robust growth.
Is corn a perennial plant or does it require yearly planting?
Corn is an annual crop that must be replanted each season. It completes its lifecycle in one growing year and doesn't regrow after harvest, requiring fresh seeds every spring for continuous production.
How can I tell when sweet corn is ready to harvest?
Check for brown, dry silks and plump kernels that release milky liquid when punctured. Ears should feel firm to the touch, typically 18-24 days after silks first appear, depending on the variety.
What common mistakes should I avoid when cultivating corn?
Avoid these errors:
- Planting in single rows instead of blocks, reducing pollination
- Overcrowding seeds, which stunts growth and ear development
- Neglecting soil nitrogen levels, leading to poor kernel formation
- Harvesting too late, resulting in starchy instead of sweet kernels
Why might my corn plants develop tassels but fail to produce ears?
This often results from poor pollination due to inadequate plant spacing or lack of wind. Extreme heat during silking or imbalanced soil nutrients (particularly zinc deficiency) can also disrupt ear formation.
What companion plants benefit corn growth and which should be avoided?
Ideal companions include:
- Beans (fix nitrogen in soil)
- Squash (shades soil to retain moisture)
- Avoid tomatoes, which compete for nutrients
- Steer clear of cabbage family plants that attract shared pests
How does planting corn in blocks improve crop success?
Block planting enhances wind pollination by creating dense clusters where pollen can easily transfer between stalks. This method increases kernel development and yields up to 30% more ears compared to single-row planting.
What are effective organic methods to protect corn from pests?
Organic pest solutions include:
- Applying diatomaceous earth around stalks to deter cutworms
- Installing pheromone traps for earworm control
- Spraying neem oil to combat aphids and beetles
- Introducing ladybugs to manage soft-bodied insects
Can corn be grown in containers or small garden spaces?
Yes, compact varieties like ‘Golden Midget' thrive in 18-inch deep containers. Ensure proper drainage and use high-phosphorus fertilizer to compensate for limited root space. Container corn requires more frequent watering than ground-planted crops.
How should soil be prepared before planting corn seeds?
Preparation steps:
- Test soil pH (ideal 6.0-6.8)
- Mix in 3 inches of compost or aged manure
- Till soil to 8-inch depth for root penetration
- Apply balanced fertilizer 1 week before sowing seeds