
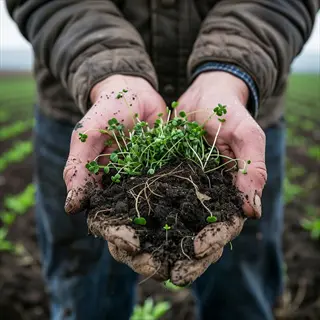
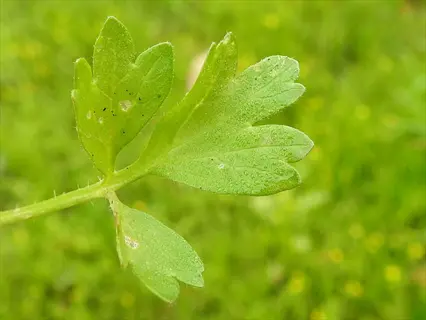
To learn how to grow cilantro correctly, you must know about its nature. Cilantro is the fresh green leaf, while coriander refers to the dried seeds of the Coriandrum sativum plant. This plant is a dual-purpose herb (leafy greens and fragrant seeds) that can be grown in your garden! I tell beginners that it is essential to understand the part of the plant from which you will harvest. Store-bought cilantro and coriander often fail to match the bold taste of homegrown cilantro.
Your kitchen becomes highly flexible when you grow cilantro on your own. Fresh cilantro leaves brighten salsas, curries, and salads with a bright citrusy flavor. Additionally, the small, delicate white flowers attract important pollinators, including bees, to your yard. This herb is especially forgiving for beginner gardeners. Cilantro requires only a small footprint and little maintenance to flourish.
We will investigate practical planting methods that eliminate common mistakes. Learn care fundamentals, such as avoiding premature bolting, which can destroy leaf production. Learn harvesting strategies for mature cilantro seeds or fresh greens, and counter some common misconceptions about growing cilantro successfully. This guide provides everything you need for a flourishing herb garden.
Planting Cilantro Successfully
Successfully planting cilantro starts with timing that is correct for your climate. In cooler areas, plant seeds in early spring, right after frost has passed. Warmer areas: plant in the fall or early spring to avoid the summer heat. I learned this the hard way when my first crop bolted right away. Direct sowing of seeds is preferable to transplanting seedlings, as it avoids damaging the sensitive taproot of the seedling. Scatter seeds where you want cilantro to grow for long-term growth.
The difference in growing cilantro is largely due to soil preparation. First, check the soil's pH, aiming for the ideal range of 6.2 to 6.8. Add approximately 3-4 inches of compost to your soil to enhance its nutrient profile. Good drainage is essential since roots rotting away in excess water can kill cilantro plants almost instantly. Raised beds also help to create better drainage in heavy clay areas. For containers, ensure they have holes for drainage and use a high-quality potting mix. These necessary steps will set you up for success in growing cilantro.
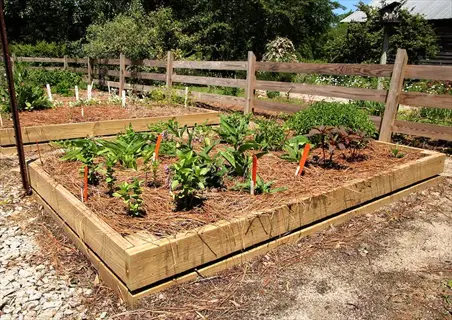
Depending on your area, choose ground planting or growing in containers. For ground planting, plants should be spaced 6-8 inches apart; containers should be a minimum size of 8 inches deep. Both ground planting and container growing require 4-6 hours of morning sun. Afternoon shade helps with bolting. I prefer containers for my patio garden, as I can move them to follow the sun. Ground planting is the best option for larger harvests.
Sow your seeds shallowly (¼ inch depth). Lightly cover them with soil. Keep the soil consistently moist until seedlings appear, which should be within 7-10 days. Thin seedlings early, so they don't get too crowded, and give each plant enough space to mature. Succession seeds are planted every two weeks, ensuring a continuous harvest. This also ensures fresh cilantro, and you'll have it on your table the entire season.
Soil Testing
- Procedure: Conduct pH test using kit or digital meter to determine precise soil acidity or alkalinity levels
- Target range: Maintain 6.2-6.8 pH range for optimal nutrient absorption and root development efficiency
- Amendment: Add agricultural lime if acidic or elemental sulfur if alkaline to balance soil chemistry
Organic Enrichment
- Materials: Incorporate 3-4 inches (7.6-10.2 cm) of compost or well-rotted manure to boost soil fertility
- Mixing: Work amendment thoroughly into top 12 inches (30.5 cm) using garden fork or tiller equipment
- Container alternative: Use organic potting mix blended with perlite for improved drainage in confined spaces
Drainage Improvement
- Problem solving: Add coarse sand to heavy clay soils or peat moss to sandy soils to achieve balanced texture
- Raised beds: Create 8-12 inch (20-30 cm) elevated beds in poorly-draining areas using untreated lumber
- Container tip: Ensure adequate drainage holes with gravel layer at pot bottom to prevent water accumulation
Soil Aeration
- Method: Loosen compacted soil thoroughly with broadfork or garden fork before planting to improve structure
- Frequency: Perform annual aeration during early spring preparation before planting season commences
- Benefit: Creates pathways for improved root penetration and enhances water infiltration into deeper layers
Mulching Technique
- Application: Apply 2-3 inch (5-7.6 cm) layer of organic mulch around plants after soil preparation
- Materials: Utilize readily available straw, shredded leaves or untreated grass clippings as mulch
- Purpose: Effectively conserves soil moisture while suppressing competitive weed growth around cilantro
Direct Sowing
- Depth: Plant seeds approximately one-quarter to one-half inch (6-12 mm) deep in prepared garden soil after final frost
- Spacing: Initially place seeds two inches (5 cm) apart then thin seedlings to six-eight inches (15-20 cm) for proper growth
- Germination: Expect sprouting within seven to ten days when maintaining consistently moist soil conditions without saturation
- Advantage: Prevents root disturbance which significantly benefits slow-bolt cilantro varieties sensitive to transplantation
- Timing: Achieve optimal results when soil temperatures reach 55-68°F (13-20°C) during ideal early spring planting windows
- Coverage: Lightly cover seeds with fine soil mixture then gently water using mist setting to prevent seed displacement
Container Planting
- Pot size: Select containers with minimum eight-inch (20 cm) diameter featuring multiple drainage holes for excess water
- Soil: Fill completely with premium organic potting mixture then water thoroughly when top inch (2.5 cm) becomes dry
- Placement: Position in south-facing location receiving four to six hours sunlight daily for vigorous leafy growth
- Mobility: Rotate containers weekly ensuring all plant sides receive equal sunlight exposure for balanced development
- Depth: Sow seeds at consistent quarter-inch (6 mm) depth throughout container surface for uniform germination success
- Maintenance: Check soil moisture twice daily during warm periods since containers dry faster than ground soil
Seedling Transplant
- Handling: Use biodegradable peat pots minimizing root disruption during transplantation into permanent garden beds
- Timing: Transplant after seedlings develop three to four true leaves typically three weeks after initial sowing
- Acclimation: Harden off seedlings gradually over seven days exposing them incrementally to outdoor conditions
- Limitation: Higher bolting risk makes this method less suitable for warmer climate gardening situations generally
- Spacing: Position transplants six to eight inches (15-20 cm) apart in rows spaced twelve inches (30 cm) for air circulation
- Watering: Provide immediate thorough watering after transplanting then maintain consistent soil moisture levels
Raised Bed Planting
- Construction: Build beds eight to twelve inches (20-30 cm) high using rot-resistant untreated wood or composite materials
- Soil: Fill completely with mixture containing equal parts compost, topsoil and coarse sand for ideal drainage properties
- Spacing: Sow seeds in grid pattern allowing six inches (15 cm) between plants in all directions for full growth potential
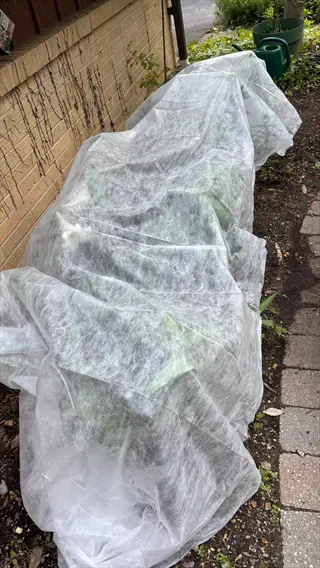
- Protection: Install protective row covers during unexpected cold snaps to shield young seedlings from frost damage
- Accessibility: Elevated beds reduce bending making them ideal for gardeners with physical mobility considerations
- Drainage: Superior drainage prevents waterlogging commonly experienced in heavy clay soil garden environments

Hydroponic Growing
- System: Utilize deep water culture or nutrient film technique systems with carefully pH-balanced hydroponic solution
- Lighting: Provide fourteen to sixteen hours daily illumination under full-spectrum LED grow lights for best results
- Nutrients: Maintain electrical conductivity between 1.2-1.8 mS/cm using balanced vegetative growth formula nutrients
- Temperature: Keep water temperature consistently between 65-70°F (18-21°C) for optimal cilantro root health development
- Harvest: Begin harvesting outer leaves when plants reach six inches (15 cm) height using sanitized precision scissors
- Advantage: Delivers three to four times faster growth rates than traditional soil-based cultivation methods

Succession Sowing
- Interval: Plant new cilantro seeds every fourteen to twenty-one days throughout entire growing season systematically
- Location: Stagger planting locations strategically to avoid depleting soil nutrients in single garden section
- Rotation: Follow cilantro crops with nitrogen-fixing plants like beans to replenish soil fertility naturally
- Timing: Begin first planting after last frost date then continue until six weeks before first fall frost occurs
- Record: Maintain detailed garden journal documenting planting dates and harvest yields for future reference planning
- Benefit: Ensures continuous fresh cilantro supply by offsetting individual plant bolting times effectively
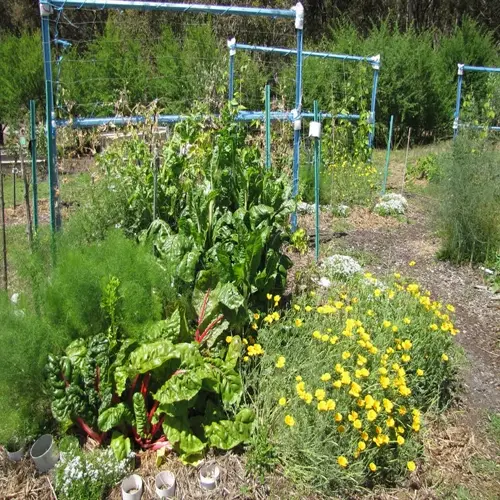
Companion Planting
- Partners: Plant alongside tomatoes providing afternoon shade or with basil deterring common insect pests naturally
- Spacing: Position cilantro twelve inches (30 cm) from larger plants allowing sufficient sunlight penetration requirements
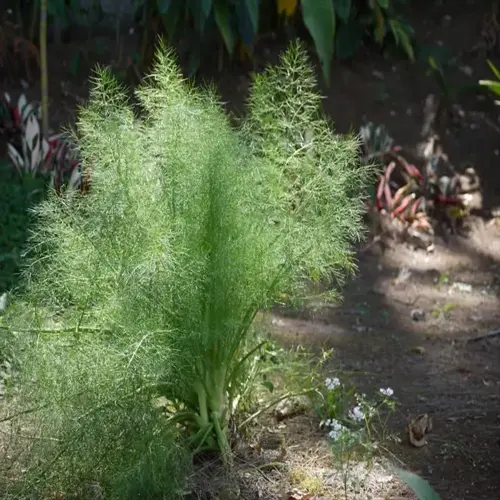
- Avoid: Separate completely from fennel which secretes root inhibitors harming cilantro growth and development
- Beneficials: Attracts hoverflies and parasitic wasps controlling aphid populations throughout vegetable gardens
- Rotation: Follow heavy-feeding crops like corn with cilantro to utilize residual soil nutrients efficiently
- Design: Create polyculture beds mixing cilantro with onions and lettuce for efficient space utilization techniques
Winter Sowing
- Timing: Sow seeds eight weeks before last frost date using protective cold frames or glass cloches strategically
- Varieties: Select cold-tolerant cultivars specifically bred for overwintering in moderate climate zone conditions
- Protection: Cover plants with frost cloth when temperatures drop below 28°F (-2°C) during overnight periods
- Location: Choose south-facing sheltered areas near buildings benefiting from radiant heat retention properties
- Mulch: Apply thick straw layer around plants after ground freezes for consistent temperature regulation benefits
- Harvest: Gather smaller quantities during cold months since growth slows significantly in winter conditions
Intercropping Method
- Strategy: Plant cilantro between slow-growing crops like broccoli utilizing unused space efficiently during early stages
- Timing: Sow seeds when establishing main crops ensuring cilantro matures before canopy closure occurs overhead
- Density: Maintain twelve-inch (30 cm) spacing between cilantro plants even when interplanting with other vegetables
- Benefit: Provides living mulch reducing weed competition while maximizing overall garden space productivity
- Harvest: Remove cilantro plants completely when they begin shading primary crops in developing garden beds
- Rotation: Follow with shallow-rooted plants like lettuce after cilantro removal to utilize available nutrients
Shade Gardening
- Location: Utilize areas receiving dappled sunlight beneath trees or on east-facing building sides strategically
- Varieties: Select slow-bolt types like Long Standing cilantro performing better under reduced light conditions
- Spacing: Increase plant spacing to ten inches (25 cm) improving essential air circulation in humid environments
- Soil: Enhance with extra compost compensating for nutrient competition from nearby established tree roots
- Watering: Monitor moisture closely since shaded areas typically retain water longer than full sun locations
- Harvest: Expect slightly elongated stems but equally flavorful leaves compared to traditional sun-grown plants
Essential Care and Maintenance
Cilantro stays abundant with proper water. Utilize deep watering methods to thoroughly soak the soil once or twice per week. This helps grow the roots deeper and makes the plant stronger. Always check soil moisture two inches down before watering. Sandy soil needs attention more often than clay. Maintain consistent humidity to prevent stress and early bolting in the plants.
Preventing bolting is key to enjoying the leaf harvest. The cilantro bolts when temperatures are above 75°F, plant in shady areas during the afternoon, especially in warmer regions of the United States. Select slow-bolting varieties like Calypso that are more heat resistant. Mulch around the roots of your plant to help keep the roots cool. I use shade cloth over the summer plantings and get a few more weeks of harvest.
Organic cilantro should be fertilized every four weeks. Balanced 5-5-5 formulations should be used at this time, rather than high-nitrogen formulations, which can lead to weak plants. Fish emulsion applied as a soil drench is a good option. Compost tea can be used as a nutrient source; it is quite mild. Yellowing of the plant indicates a nitrogen deficiency that must be corrected. Healthy plants produce plenty of flavorful leaves.
Be vigilant for common pests and diseases. Aphids like to cluster on the undersides of leaves. They will cause leaf curling. You can spray them off with a hose or with insecticidal soap. Fungal leaf spots can happen in humid conditions. Enhance air circulation by maintaining the correct spacing. Companion planting basil can help reduce insect problems, as it naturally repels many pests. Healthy plants tend to resist problems more effectively.
Temperature Management
- Monitoring: Track daily highs exceeding 75°F (24°C) triggering bolting response
- Shading: Install 30% shade cloth when temperatures consistently exceed threshold
- Microclimate: Plant near walls or fences providing afternoon heat protection
Harvest Strategy
- Frequency: Cut outer leaves every 3-4 days to maintain vegetative growth
- Method: Use sanitized scissors removing no more than one-third of foliage
- Timing: Harvest during cooler morning hours for minimal plant stress
Variety Selection
- Types: Choose slow-bolt cultivars like Calypso or Long Standing
- Performance: Lasts 3-4 weeks longer than standard varieties in heat
- Adaptation: Select regional varieties acclimated to local climate patterns
Water Regulation
- Consistency: Maintain even soil moisture avoiding drought stress cycles
- Method: Use drip irrigation delivering 1 inch (2.5 cm) weekly directly
- Mulching: Apply 2-inch (5 cm) straw layer stabilizing root temperatures
Nutrient Balance
- Fertilization: Apply balanced 5-5-5 NPK monthly avoiding high nitrogen
- Organic options: Use fish emulsion or compost tea every 4 weeks
- Deficiency signs: Yellow leaves indicate nitrogen shortage needing correction
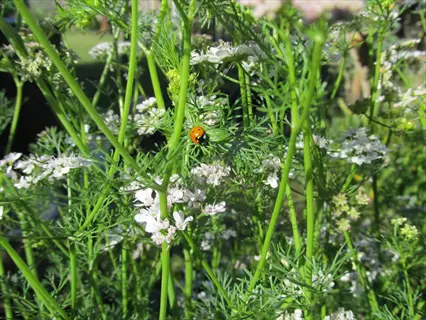
Aphid Control
- Identification: Detect small green clusters under leaves causing curling and distortion of new growth on cilantro plants
- Treatment: Spray insecticidal soap solution every 3 days for 2 weeks to disrupt aphid life cycles effectively
- Prevention: Introduce ladybugs consuming up to 50 aphids daily as natural biological control agents
- Application: Cover both leaf surfaces thoroughly during early morning hours for maximum absorption
- Formula: Mix 1 tablespoon (15 ml) gentle liquid soap per quart (1 liter) of water carefully
- Effectiveness: Eliminates approximately ninety percent of populations within initial treatment week
Whitefly Management
- Detection: Notice tiny white insects flying when plants disturbed and sticky honeydew residue
- Trapping: Install yellow sticky traps every 10 feet (3 meters) around garden perimeter systematically
- Spray: Apply neem oil solution at 7-day intervals preventing reproduction cycles consistently
- Concentration: Use 2 teaspoons (10 ml) pure neem oil per gallon (3.8 liters) of water
- Timing: Treat plants thoroughly at dusk avoiding beneficial insect activity periods carefully
- Companion: Plant aromatic basil varieties repelling whiteflies through natural chemical defenses effectively
Leaf Spot Remediation
- Symptoms: Identify circular brown lesions with distinctive yellow halos developing on foliage
- Cultural control: Space plants 10 inches (25 cm) apart ensuring adequate air circulation
- Pruning: Remove affected leaves immediately disposing in sealed bags to prevent spreading
- Fungicide: Apply copper spray at first sign following manufacturer's recommended label rates
- Watering: Avoid overhead irrigation methods reducing leaf wetness duration significantly
- Recovery: New growth typically remains unaffected when treatment begins promptly after detection
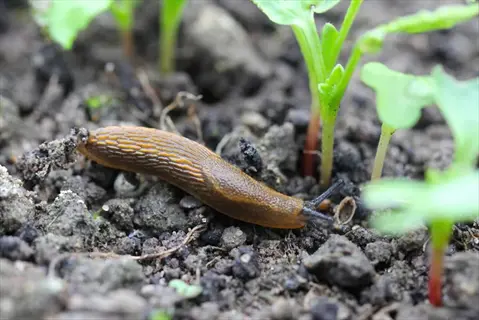
Slug Prevention
- Evidence: Observe irregular holes and silvery mucus trails on leaves after rainfall
- Barriers: Create copper tape rings around containers deterring approach through electrical charge
- Traps: Sink shallow beer containers attracting and drowning slugs overnight effectively
- Natural predators: Encourage ground beetles consuming slug eggs in garden soil naturally
- Organic bait: Scatter iron phosphate pellets safe for pets and wildlife around plants
- Habitat: Remove daytime hiding spots including boards and dense mulch layers regularly
Bolting Recovery
- Recognition: Notice central stalk elongation with feathery leaves and flower buds forming
- Action: Cut stalk immediately below flowering section using sterilized pruning shears
- Regrowth: Plants may produce lateral side shoots extending harvest period slightly
- Acceptance: Allow late-season plants to flower attracting beneficial pollinators intentionally
- Succession: Plant new seeds every 2 weeks compensating for inevitable bolting losses
- Benefit: Flowers provide nectar supporting entire garden ecosystem biodiversity significantly
Harvesting Leaves and Seeds
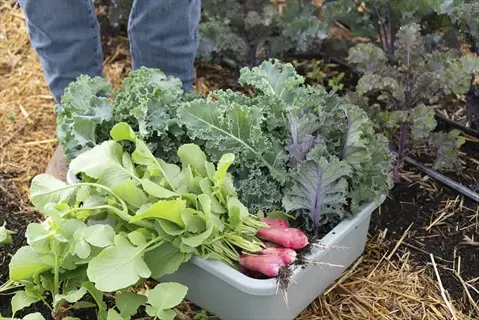
Cilantro leaves can be harvested when plants are 6 inches tall. Use scissors to snip the outer stems an inch above soil level. This cut-and-come-again method enables the inner leaves to continue growing. Harvest in the morning when the essential oils are at the highest concentration to improve flavor. Avoid harvesting more than 1/3 of the plant at a time. Harvesting frequently, every 3-4 days, encourages ongoing harvests every time.
Harvest seeds when they have changed from green to brown, and a rattling sound is heard within the dried hull. Cut complete heads off with 6 inches of stem. Be careful, as seeds will drop out. I hang upside down in a paper bag to collect seeds that fall from the plants. It is an easy way to preserve your fresh cilantro seed.
To process seeds, rub the heads over a dry, clean surface. To remove chaff, winnow gently in the wind or use a fan. Dry seeds should be stored in airtight containers and away from light. For the best flavor, use fresh leaves right away in salads or salsas. Extras can be preserved as needed using drying or freezing for later use.
Weighing preservation methods for the best outcome. Frozen retains its vivid flavor if the leaves are blanched first, then frozen in oil. Drying is effective for leaves and seeds, but it removes the leaf's flavor profiles. Salt curing is ideal for raw seasoning products that you intend to use for months. Select techniques that align with how you want to cook with these.
Timing Indicators
- Color change: Seeds transition gradually from vibrant green to light tan then deep brown indicating full maturity
- Texture: Husks become completely dry and brittle when crushed between fingers showing readiness for collection
- Scent: Strong distinctive coriander aroma released when plants brushed signals optimal harvesting conditions
Harvesting Technique
- Cutting: Carefully snip entire seed head with approximately 6 inches (15 cm) of stem attached using sharp scissors
- Bagging: Immediately place seed heads upside-down in breathable paper bags preventing seed loss during transport
- Handling: Avoid shaking or bumping bags to prevent premature seed dispersal before drying process completion
Drying Process
- Location: Hang bundles in dark well-ventilated area maintaining consistent 70°F (21°C) temperature for proper curing
- Duration: Allow 10-14 days drying period until seed husks naturally split open revealing mature seeds inside
- Testing: Verify dryness by shaking stems; distinct rattling sound confirms moisture content below 10%
Seed Extraction
- Threshing: Rub dried seed heads vigorously between hands over clean surface to separate seeds from husks
- Winnowing: Use gentle fan breeze or outdoor wind to blow away lightweight chaff leaving pure seeds behind
- Yield: Expect 1-2 tablespoons (15-30 ml) of viable seeds per mature cilantro plant under ideal conditions
Storage Methods
- Container: Store in airtight glass jars with silica gel packets maintaining below 10% humidity level
- Location: Keep in cool pantry conditions not exceeding 75°F (24°C) away from direct sunlight exposure
- Longevity: Seeds remain viable for planting 2-3 years while retaining culinary quality for 1 year maximum
Fresh Leaf Storage
- Refrigeration: Place stems upright in water-filled jar covered loosely with plastic bag maintaining high humidity
- Duration: Preserve freshness 7-10 days at optimal refrigerator temperature of 40°F (4°C)
- Alternative: Wrap completely dry leaves in barely damp paper towels inside sealed containers
Freezing Techniques
- Whole leaves: Blanch 15 seconds in boiling water then plunge into ice bath before patting dry and freezing flat
- Puree: Blend fresh leaves with olive oil in food processor then freeze in measured ice cube tray portions
- Labeling: Clearly mark dates and quantities ensuring frozen cilantro used within recommended 6-month period
Drying Methods
- Dehydrator: Process at 95°F (35°C) for 2-4 hours until leaves crumble easily between fingers when tested
- Air-drying: Hang small bunches upside-down in dark well-ventilated room for 1-2 weeks until brittle
- Storage: Crush completely dried leaves into powder storing in opaque airtight jars away from light sources
Seed Preservation
- Whole seeds: Store in glass jars with oxygen absorbers maintaining freshness for culinary applications
- Ground coriander: Grind small batches as needed using mortar or spice grinder for maximum flavor retention
- Planting seeds: Keep in paper envelopes within sealed containers stored in cool dark 50°F (10°C) location
Flavor Preservation
- Herb butter: Mix 1 cup (227g) softened butter with ¼ cup (15g) finely chopped fresh cilantro leaves
- Cilantro oil: Steep clean dry leaves in quality olive oil 48 hours then strain through cheesecloth
- Salt preservation: Layer fresh leaves alternating with coarse sea salt in sterilized glass preserving jars
Using and Preserving Cilantro
Cilantro elevates cuisines from across the globe, with its bright flavor. Mexican foods, such as tacos and guacamole, utilize fresh ingredients to achieve authentic flavor. Asian recipes utilize the stems in curries and soups. Mediterranean recipes often incorporate it into yogurt sauces and salads. Cultures impart unique applications from this wondrous plant. I keep additional plants as a fend-off of international baking and cooking.
For optimal effect, use raw cilantro whenever possible. Add it at the end of cooking or as a garnish since heat will ruin any delicate flavor. Cooking works well for stems used in broths and stews. Finely chop the leaves and freeze them for use out of season. Dried cilantro loses most of its aroma, so it's best to avoid using it in fresh dishes.
Utilize safe preservation methods for your harvest. Freezing is best for flavor: blanch the leaves and freeze in olive oil ice cubes. Then allow the seeds to dry completely for spice preservation. Salt curing produces flavored flakes that last for months. Infusing oils creates flavorful dressings. Select the preservation method that best suits your cooking!
Measure accurately for predictable results. Use ¼ cup of chopped fresh leaves for every 1 cup of salsa. For freezing, blend 2 cups of leaves with ½ cup of olive oil. Salt preservation is 1 cup of salt for every 2 cups of leaves packed tightly. These ratios eliminate the guesswork from preservation each time.
Preparation
- Cleaning: Swirl in cold water bath, spin dry in salad spinner to remove grit and pesticides effectively
- Stem usage: Chop tender stems finely for soups and stir-fries where they impart flavor during cooking
- Storage: Refrigerate upright in jar with 1 inch (2.5 cm) water maintaining freshness for 7-10 days
Flavor Pairings
- Proteins: Enhance chicken, fish, and beans with lime juice creating balanced citrus-herb profiles
- Vegetables: Brighten corn, avocados, tomatoes, and potatoes adding fresh herbal notes to dishes
- Spices: Combine with cumin, garlic, and chili powder creating complex layered flavor foundations
Cooking Methods
- Raw: Add to finished dishes like soups or stews off-heat preserving delicate volatile oils
- Infusions: Steep clean leaves in quality oils or vinegars 48 hours then strain through cheesecloth
- Heating limit: Brief exposure under 2 minutes preserves flavor compounds avoiding bitterness development
Recipe Formulas
- Salsa: Combine 2 cups (300g) diced tomatoes + ½ cup (75g) onions + ¼ cup (15g) chopped cilantro
- Dressing: Whisk ⅓ cup (80ml) oil + 2 tbsp (30ml) lime juice + 3 tbsp (9g) finely chopped cilantro
- Marinade: Blend ¼ cup (60ml) oil + 2 minced garlic cloves + 2 tbsp (6g) cilantro for meat coating
Presentation
- Garnish: Place whole leaves atop finished dishes just before serving for maximum visual impact
- Oils: Drizzle cilantro-infused oil over grilled meats or vegetables as finishing flavor accent
- Edible flowers: Use delicate white cilantro blooms for upscale plating on gourmet presentations
Freezing
- Whole leaves: Blanch 15 seconds in boiling water then plunge into ice bath before patting completely dry
- Puree cubes: Blend 2 cups (60g) leaves with ¼ cup (60ml) olive oil then freeze in standard ice trays
- Storage: Maintain quality 6 months at 0°F (-18°C) using airtight freezer-safe containers or bags
Drying
- Dehydrator: Process at 95°F (35°C) for 2-3 hours until leaves crumble easily between fingertips
- Air-drying: Hang small bunches upside-down in dark ventilated area for 1-2 weeks checking regularly
- Usage: Crush completely dried leaves into powder for rubs and soups where flavor diminishes less
Oil Infusion
- Method: Pack clean dry leaves tightly in sterilized jar then cover completely with quality olive oil
- Duration: Refrigerate 2-3 weeks maximum to prevent potential botulism contamination risks
- Usage: Ideal for salad dressings marinades or bread dipping applications requiring herbal notes
Salt Preservation
- Layering: Alternate 1 cup (300g) coarse sea salt with 2 cups (60g) packed clean cilantro leaves
- Storage: Keep at room temperature in sterilized jars preserving flavor effectively 6+ months
- Usage: Season meats and vegetables directly rinsing excess salt before cooking as needed
Vinegar Pickling
- Solution: Simmer 1 cup (240ml) vinegar + 1 cup (240ml) water + 1 tbsp (18g) salt until dissolved
- Process: Pack stems and leaves in sterilized jars cover with hot liquid and seal immediately
- Flavor: Creates tangy preserved garnish for tacos and salads lasting approximately 3 months refrigerated
5 Common Myths
Cilantro bolting is caused by environmental conditions (primarily temperature) and can be reduced with extra soil nutrients
B. Bolting occurs as a result of environmental factors (a temperature above 75 °F / 24C, and day length) and not soil nutrition. Healthy soil contributes to plant vigor, but plants can actually suffer stress in over-fertilized soil. Prevent bolting by choosing varieties that are slow to bolt, providing afternoon shade, and watering consistently for moisture. Succession planting on a 2-3 week schedule can ensure harvests year-round even with the natural bolting cycle.
Dried cilantro leaves retain the same flavor level as fresh leaves for all culinary applications
Drying can remove as much as 80% of the volatile oils in cilantro, an effect that considerably diminishes flavor complexity. Fresh cilantro has fatty compounds such as decenal and linalool that diminish in flavor when dried. If you are looking for a real cilantro flavor, use fresh leaves, or freeze cilantro in oil cubes. Dried cilantro can only be used for recipes that are long-simmered, and should not be used for indicated fresh use applications like salsas, or garnishes using cilantro, as the deliciously bright, citrusy notes are usually essential to the dish.
Cilantro and coriander arise from distinct plants and, therefore, need unique growing methods
Cilantro (leaves) and coriander (seeds) are actually parts of the same plant, Coriandrum sativum. This means they do not require different growing methods; they will grow in exactly the same type of ground and environmental conditions. Both cilantro and coriander grow well in well-drained soil, with consistent moisture and cool temperatures. You do not need special growing techniques to grow either. You will want to harvest the leaves first, allowing the plant to then flower, and eventually set seed, taking the same plant used for fresh cilantro; there is no need to grow coriander using a different method.
Full sun all day is required for effectively producing flavorful cilantro leaves
While cilantro can grow well in the morning sun, afternoon shade is critical in warm climates for delaying bolting and preventing leaf scorch. Complete exposure to full sun works best, but ideally, cilantro needs 4-6 hours of direct sunlight with some shelter from direct mid day heat. Dappled shade or places that receive morning sun with afternoon shade are excellent options for extending the harvest season in hot regions. Another option is the use of slow-bolt varieties like Long Standing, which actually produce more flavorful leaves when slightly shaded and protected from heat stress than those grown in full sun.
Transplanting cilantro seedlings is more effective than direct seeding for robust growth
Cilantro's delicate taproot makes transplanting risky, often causing shock that stunts growth or triggers early bolting. Direct sowing is superior as it avoids root disturbance entirely. Sow seeds inch deep in prepared soil, thinning to 6-8 inches apart for optimal root development. For early starts, use biodegradable pots that minimize root disruption when planting out, ensuring stronger plants than transplanted seedlings.
Conclusion
To grow cilantro, I focus on a few simple principles. I select slower-bolting varieties for extended harvesting. I plant in seasons that are cool (or use succession planting). I water to keep moisture in the soil consistently. These fundamental aspects are what build strong plants. I have witnessed them succeed in these aspects alone as beginners.
Cilantro demonstrates that gardening is achievable by all. Minimum space and tools are needed. All you may need is a pot or two on a windowsill that receives sunlight. It rewards you quickly, as seeds germinate relatively quickly. This herb is truly effortless for first-time gardeners.
Growing your own cilantro is a step towards an eco-friendly lifestyle. Fresh herbs turn a plain meal into a colorful experience. Gardening limits food miles and packaging waste. The process of transforming seeds into food requires time and care. All of these benefits extend beyond your kitchen.
Start where you are today, with cilantro seeds. Find a sunny location and prepare the soil. Water it lightly until germination happens. Then you can watch your cilantro seeds grow. Within a few weeks, you will have your first harvest. You will immediately experience the difference that fresh herbs offer.
External Sources
Frequently Asked Questions
Does cilantro grow back after cutting?
Yes, cilantro regenerates when harvested properly. Use the cut-and-come-again method by trimming outer stems 1 inch above soil level, leaving inner growth intact. This stimulates new leaf production from the base for multiple harvests. Ensure plants receive adequate water and sunlight.
How long does cilantro take to grow?
From seed to harvest typically takes 50-55 days. Seeds germinate in 7-10 days under optimal conditions. Leaves reach harvestable size in 3-4 weeks. For seeds, allow an additional 30 days after flowering begins for full maturity.
Should I remove cilantro flowers?
Remove flowers only if prioritizing leaf production. Bolting signals the end of prime leaf growth, but flowers attract beneficial pollinators. For seed harvesting (coriander), allow flowering. Cut flower stalks early to potentially extend leaf harvest slightly.
What are common cilantro storage mistakes?
Critical errors include refrigerating wet leaves (promotes mold), using airtight containers without ventilation, and exposing to sunlight. Store dry cilantro upright in water-filled jars with plastic cover. Avoid storing near ethylene-producing fruits like apples.
Can you grow cilantro indoors?
Yes, successfully grow cilantro indoors with these essentials:
- Use deep containers with drainage holes
- Provide 4-6 hours direct sunlight daily
- Maintain temperatures below 75°F
- Water when top soil inch dries
- Rotate pots weekly for even growth
What plants should not grow near cilantro?
Avoid planting cilantro near fennel, which inhibits growth through root secretions. Other poor companions include drought-tolerant herbs like rosemary and sage, which have conflicting water needs. Instead, pair with tomatoes, basil, or spinach.
Why does cilantro bolt so quickly?
Cilantro bolts rapidly due to warm temperatures above 75°F, long daylight hours, root disturbance, or inconsistent watering. Slow-bolt varieties resist bolting better. Prevent early flowering by planting in cool seasons and providing afternoon shade.
How to preserve cilantro long-term?
Optimal preservation methods:
- Freezing: Blanch leaves, freeze in oil cubes
- Drying: Use dehydrator or air-dry bunches
- Salting: Layer leaves with coarse salt
- Oil infusion: Steep in olive oil
- Pickling: Preserve in vinegar solution
Can you plant grocery store cilantro?
Yes, but success rates are low. Grocery cilantro lacks roots needed for regeneration. Instead, propagate stem cuttings in water until roots develop, then transplant. For reliable results, use quality seeds from garden suppliers.
How often should cilantro be watered?
Watering frequency depends on soil and climate:
- Sandy soil: Every 2 days in heat
- Loamy soil: Every 3-4 days in heat
- Clay soil: Every 5 days in heat
- Cool weather: Reduce frequency by 50%
- Containers: Check moisture daily